goat cheese omelettes, which is effectively an evolution of the ham and cheese omelettes I used to make for Mom; I started making goat cheese omelettes after Mom preferred a goat cheese omelette my brother bought for her at a high-end pastry shop and bakery;
goat cheese muffins, an addition (developed at my mom’s behest, after having one of my goat cheese omelettes) to my growing collection of muffin recipes that I serve to my mom, to cater to her evolving tastes;
chocolate buttercrunch (“English Toffee”); along with among other things generally updating the recipe text, a section was added stressing the importance of and outlining the mise-en-place(here’s my archive) that I find to be crucial to this recipe (as in, “of course mise-en-place is always a good practice and a good idea and really helpful when cooking, however in the case of this recipe, mise-en-place is essential to the success of, and simply, the execution of this recipe“);
plain cake, mostly adding for the addition of the optional use of fruit and stewed fruit, the use of either a loaf pan or a square cake pan, and allowing for the distinction between the use of either the “old fashioned” greasing and flouring of the pan method and the parchment paper method;
chocolate chip cookie dough cheesecake squares, mostly for minor turns of phrase, as well as any updates I may or may not have done (oops bad memory, it’s been a while!) since the previous version;
shortbread cookies, again mostly for minor turns of phrase, as well as dividing some “multi-step” instructions, and fleshing out a number of implied steps (call my recipe style ridiculously verbose and overly detailed … in order to … live up to a lessonlearned at a computer conference I attended in 2011. 🙂 )
20260105 updated: The recipe for roast potatoes was updated yesterday.
Happy cooking!
PS: as a personal reference, I have made seven batches of chocolate buttercrunch — representing 3-1/2 pounds of butter, over 4-1/2 pounds of chocolate, over 3-3/4 pounds of sugar, and over 200mL of maple syrup — over the past roughly two weeks, to plan for Christmas giveaways. That’s about 90 to 91 bags of 60g of crunch each!
I came to enjoy a type of convenience frozen pizza in the early 1990’s while in residence at university; of course I enjoyed them then, and continue to occasionally enjoy them to this day. However, what really fascinated me was how the manufacturer managed to produce what amounted to a bun stuffed with a filling, in this case pizza toppings, without an apparent seam or other apparent entry point for the contents (such as the small hole one would see on the size of a jelly doughnut). While said fascination remained, it was not strong enough for me to actually try to figure it out.
Fast forward to late 2023, and a snacks table offered bierocks (here’s my archive), which immediately caught my attention. Before I even picked one up and looked at it, including inspecting its bottom, I immediately realized how they had been made. I definitely ate some, and asked the person who had made them for the recipe. Due to delays in setting up a cooking lesson with said person, I eventually just followed the recipe instead of waiting to be shown how to make them.
(And, I am assuming, the manufacturer of the commercial pizza treats uses some kind of mechanical method analogous to the relevant section(s) below, or, a precisely timed continuous dual extrusion system that minimizes seams, and in either case a dough recipe tuned to be susceptible to the process; ultimately, whichever process is used appears to assure that the edges stay sealed, and the filled units are moved along an Archemides’ screw or the like to the next step, in such a way that smooths out any seams.)
Note that in the following narrative, while the photos are principally from a single session, a few are from two other sessions in order to complete the narrative.
Making the bierocks:
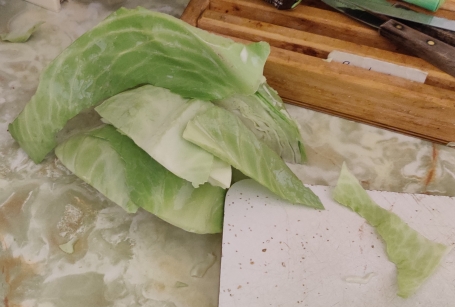
One of the common ingredients in bierocks is chopped cabbage; so cabbage was taken out:
Cabbage taken out
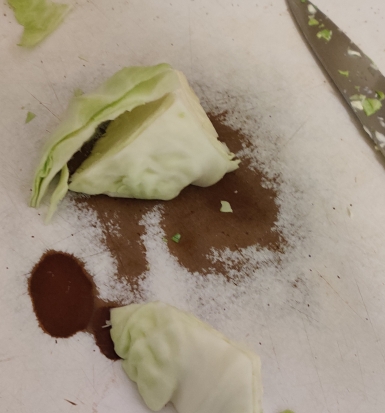
A piece of cabbage was cut off to make chopping easier:
Piece of cabbage placed on a cutting board
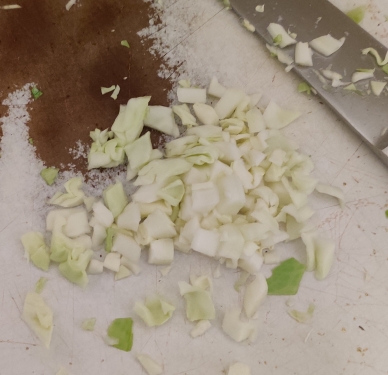
The cabbage was chopped up somewhere between coarsely to finely:
Cabbage chopped
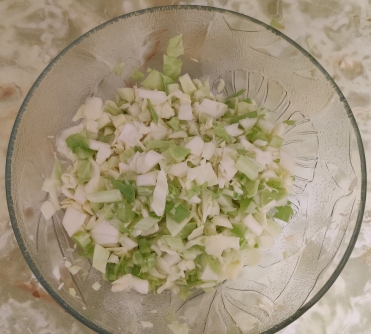
As the cabbage was chopped, it was placed in a bowl:
Chopped cabbage placed in bowl
I continued to chop cabbage, and froze the excess for future use, since a typical cabbage is far larger than the roughly half pound needed for this recipe.
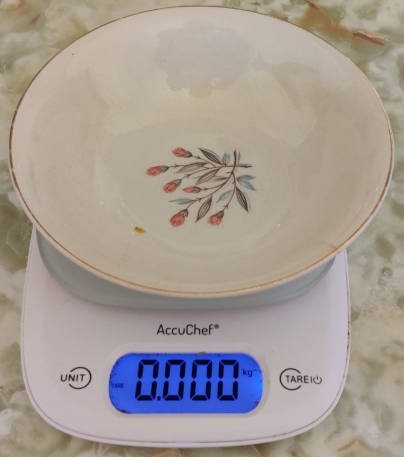
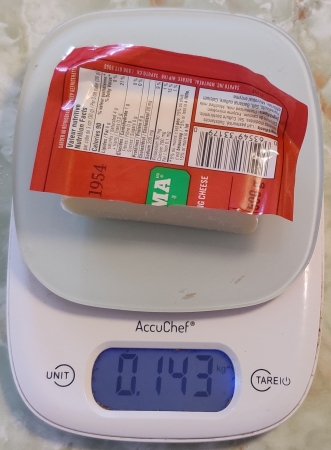
In the case of this session, frozen cabbage from a previous chopping session was used; as such, a plate was placed on a kitchen scale, and the latter set to zero, so as to only be measuring the cabbage:
Bowl placed on kitchen scale, which was set to zero
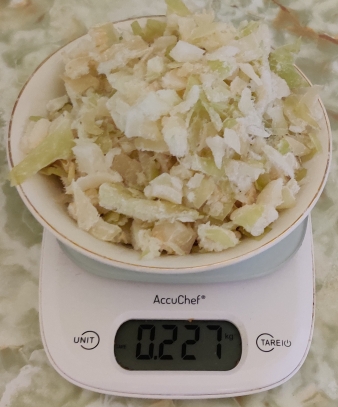
About half a pound (about 227g) of frozen chopped cabbage was placed in the bowl:
Cabbage weighed
The cabbage was put aside in order to allow it to defrost.
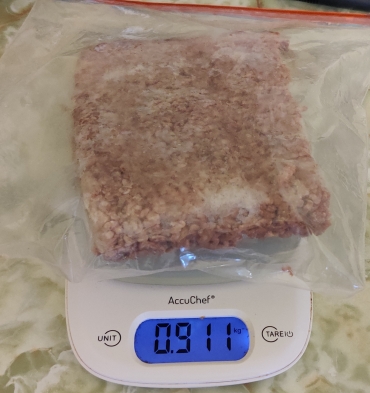
Frozen ground beef was taken out, and weighed to make sure that the appropriate amount of two pounds (911g) would be used:
Ground beef weighed
The ground beef was put aside to allow it to defrost.
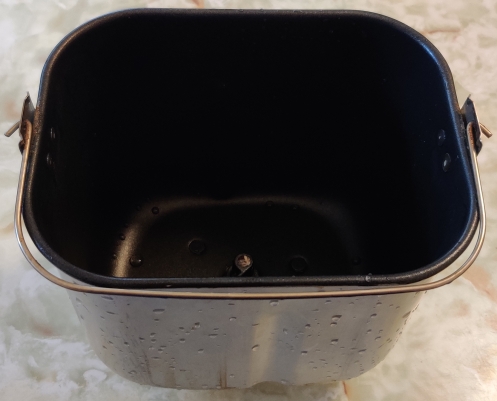
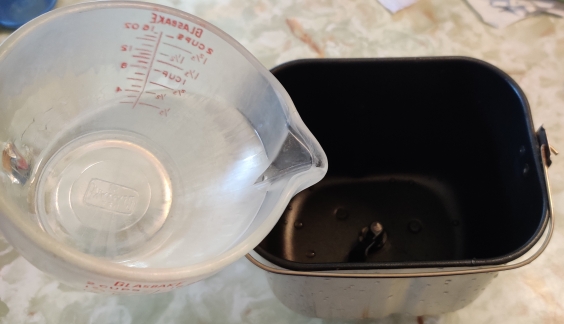
The basket from my bread machine was taken out and cleaned:
Clean bread machine basket taken out
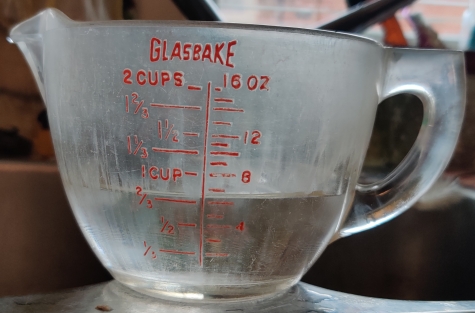
Six ounces of water were measured out:
Water measured out
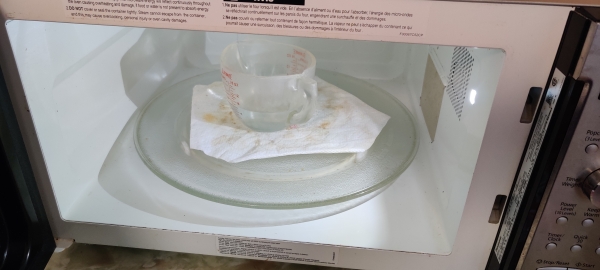
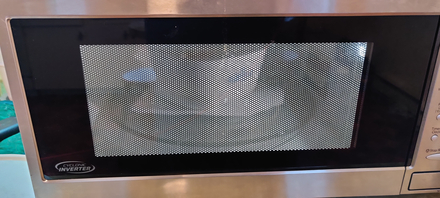
The water was placed in the microwave oven (1100 watts) …
Water placed in microwave oven
… and heated for 45 seconds.
Timer on microwave oven set
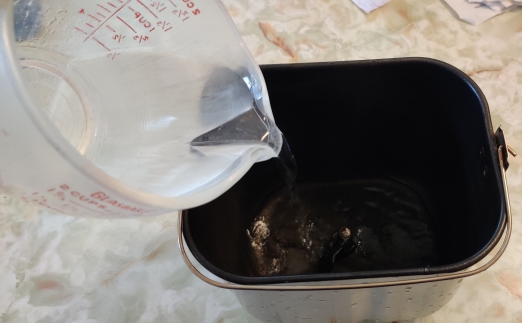
The warmed water was poured into the bread machine basket:
Warmed water poured into bread machine basket
Warmed water poured into bread machine basket
Warmed water poured into bread machine basket
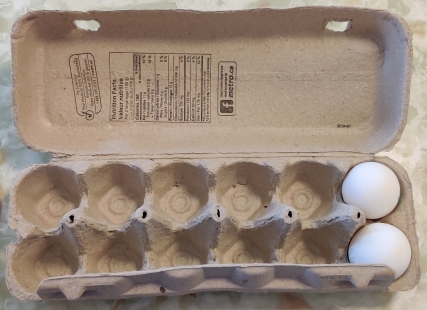
Eggs were taken out:
Eggs taken out
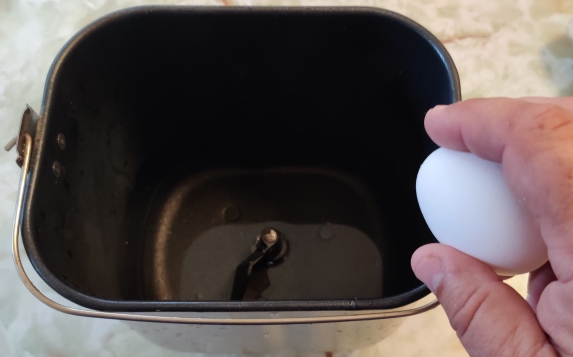
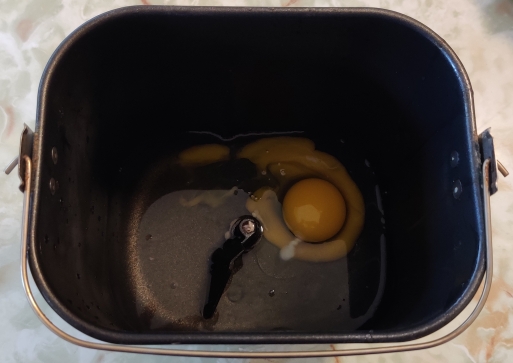
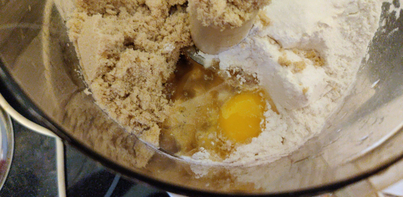
The eggs were cracked into the bread machine basket with the warmed water:
Egg cracked on edge of bread machine basket
Eggs cracked on edge of bread machine basket
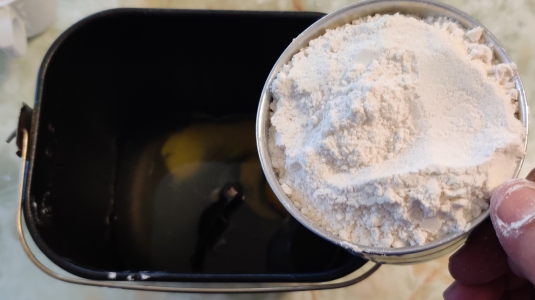
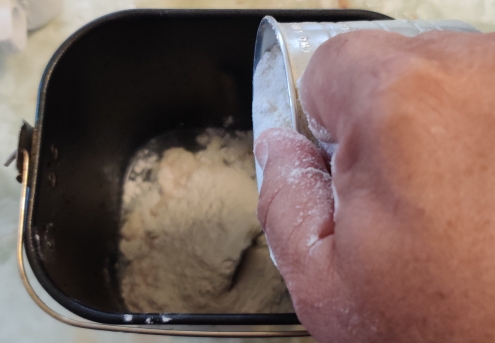
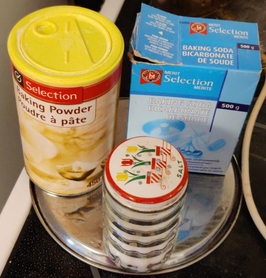
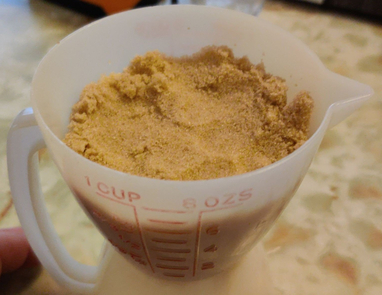
Flour and a measuring cup were taken out:
Flour and measuring cup taken out
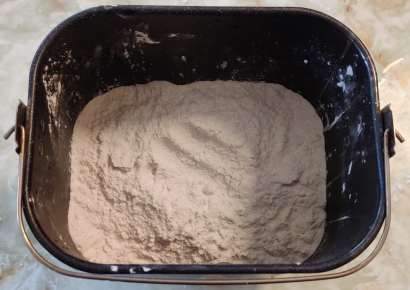
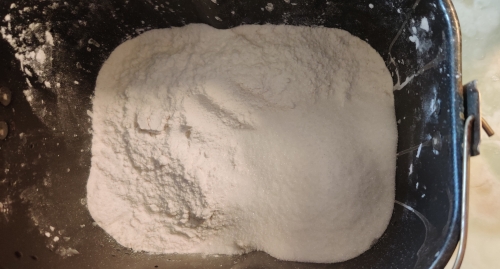
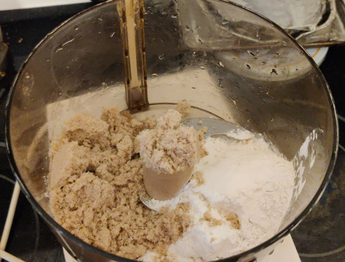
The measured out flour was transferred to the bread machine with the warmed water and the eggs:
Flour transferred to bread machine basket
Flour transferred to bread machine basket
Flour transferred to bread machine basket
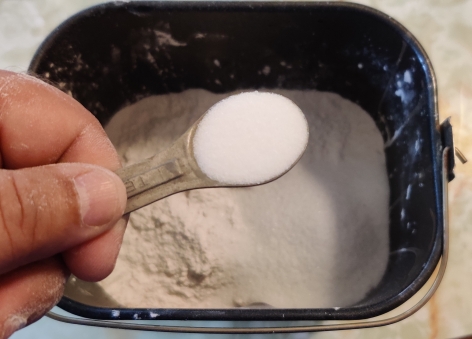
Sugar and measuring spoons were taken out:
Sugar and measuring spoons taken out
Six tablespoons of sugar were measured out …
Sugar measured out
… and transferred to the bread machine basket with the water, eggs, and flour:
Sugar transferred to bread machine basket
Sugar transferred to bread machine basket
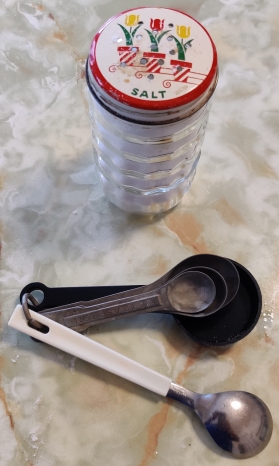
Salt and measuring spoons were taken out:
Salt and measuring spoons taken out
The salt was measured out and transferred to the bread machine basket with the water, eggs, flour, and sugar:
Salt transferred to bread machine basket
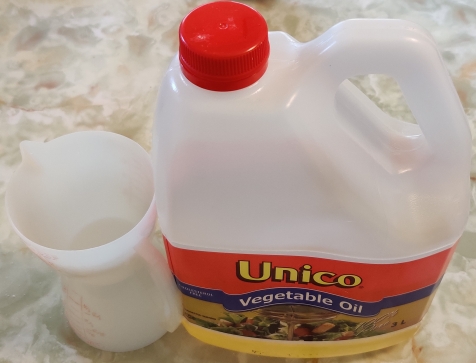
Oil and a measuring cup were taken out:
Oil and measuring cup taken out
The oil was measured out (oops twice as much as I should have used):
Oil measured out
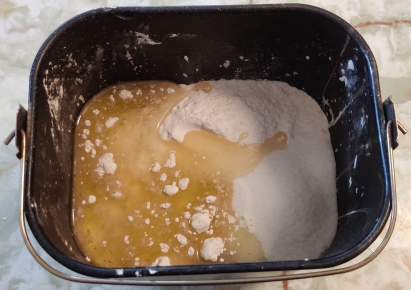
The oil was transferred to the bread machine basket with the water, eggs, flour, sugar, and salt:
Oil transferred to bread machine basket
Oil transferred to bread machine basket
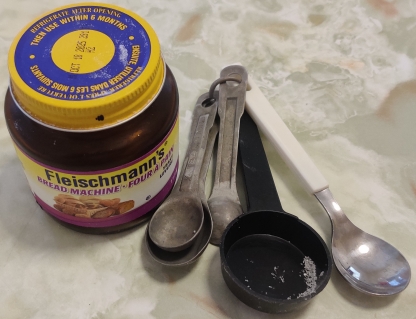
A little note at this point: Since this recipe calls for using a bread machine, I strongly recommend using bread machine yeast; standard bread yeast behaves differently — although not necessarily badly — and in a bread machine, will produce a strong yeasty odour and taste, no doubt due to different timing required for it to act properly. Should you be making bread dough another way, including using standard bread yeast, of course I do not have any advice on that front. 🙂
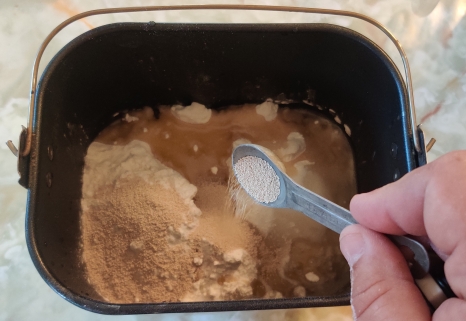
Bread machine yeast and measuring spoons were taken out:
Bread machine yeast and measuring spoons taken out
Two teaspoons of bread machine yeast were measured out:
Bread machine yeast measured out
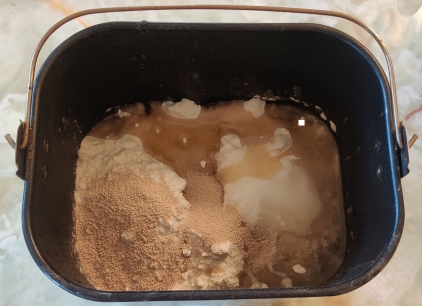
The bread machine yeast was added to the bread machine basket with the water, eggs, flour, sugar, salt, and oil:
Bread machine yeast transferred to bread machine basket
Bread machine yeast transferred to bread machine basket
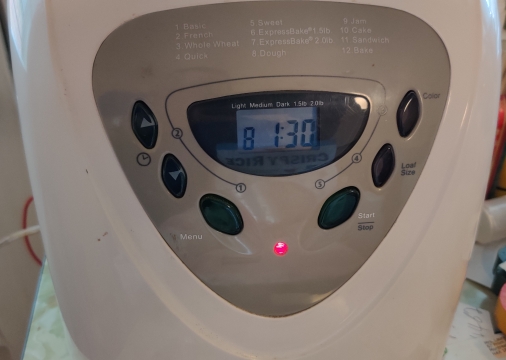
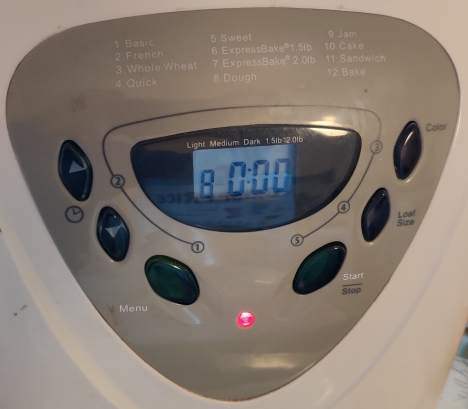
The bread machine basket with all the ingredients was placed in the bread machine, and the unit was set to the dough only cycle, which in the case of my bread machine is setting #8, with a cycle time of 1h30:
Bread machine set to dough cycle
The bread machine was turned on:
Bread machine turned on
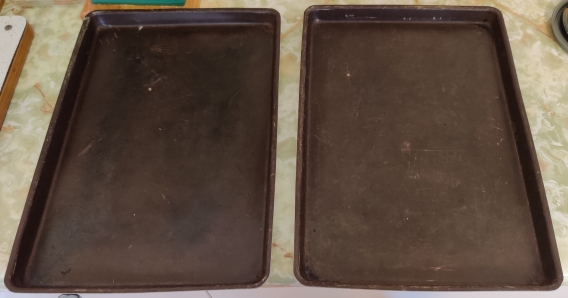
While the bread machine was preparing the dough, baking trays were taken out:
Baking trays taken out
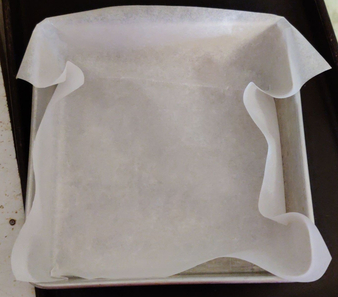
Parchment paper was taken out:
Parchment paper taken out
Sheets of parchment paper were cut off the roll and placed on the baking sheets:
Parchment paper placed on the baking sheets
The baking sheets were put aside for later.
An electric frypan was taken out:
Electric frypan taken out
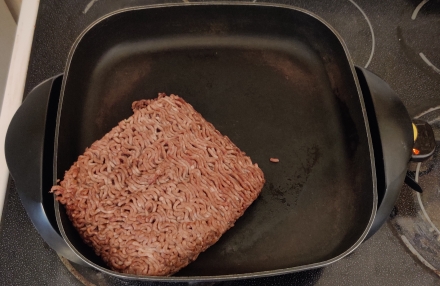
The electric frypan was plugged in, and the ground beef was placed in the electric frypan:
Ground beef placed in electric frypan, and electric frypan plugged in
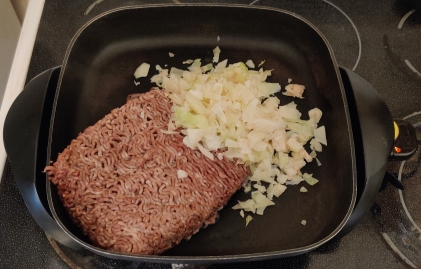
The chopped cabbage was placed in the electric frypan:
Chopped cabbage placed in electric frypan
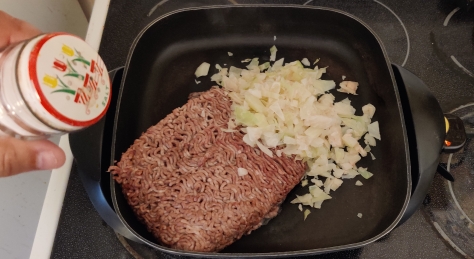
Salt was added to the electric frypan:
Salt added to electric frypan
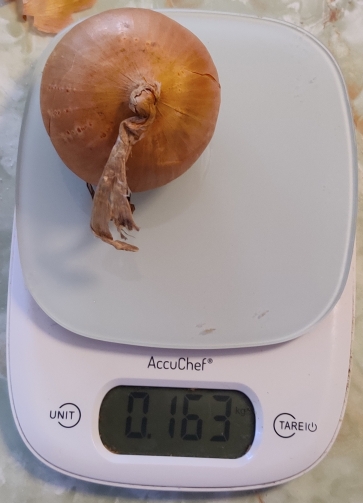
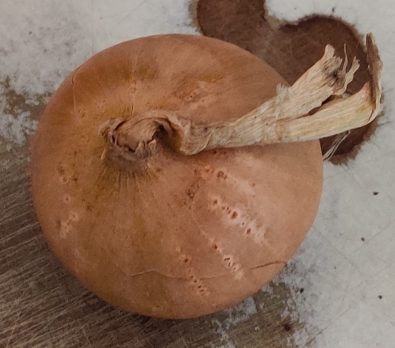
An onion was taken out and weighed to be sure it was enough (“about” a quarter pound of chopped onion in the end):
Onion taken out and weighed
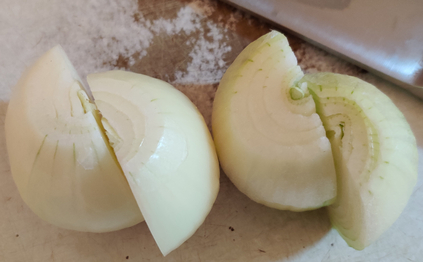
The onion was placed on the cutting board:
Onion placed on cutting board
The onion was trimmed:
Onion trimmed
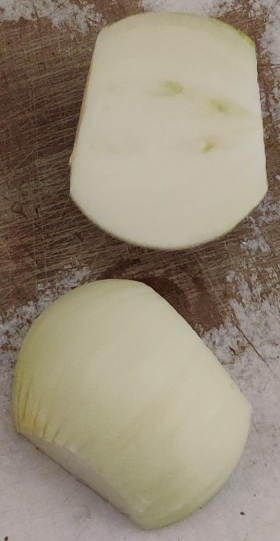
The onion was cut in half:
Onion cut in half
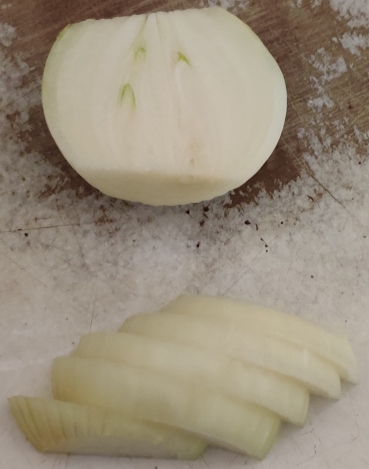
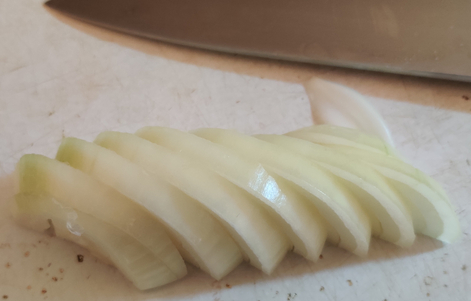
The onion half was sliced into half coins:
Onion sliced
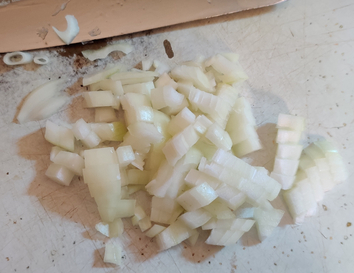
The onion slices were chopped:
Onion chopped
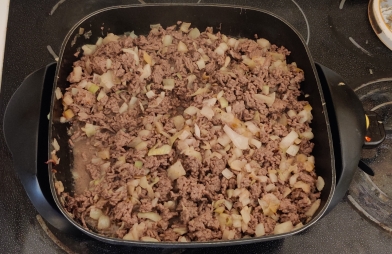
The rest of the onion was chopped, and the chopped onion was transferred to the electric frypan, and the ground beef was cut up with an egg flipper:
Onion added to electric frypan
The ground beef was broken up further, and the ground beef, cabbage, and onions were mixed together:
Ingredients broken up and mixed together
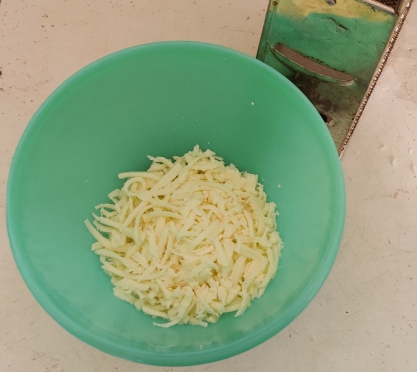
Cheese was weighed out:
Cheese weighed
The cheese was grated:
Cheese grated
The grated cheese was transferred to a bowl, and put aside for later:
Grated cheese transferred to bowl
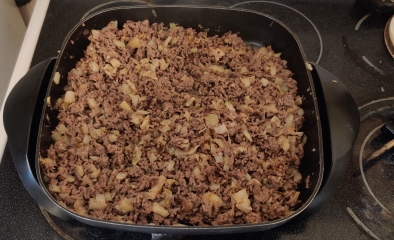
Once the meat mix was cooked, the electric frypan was unplugged:
Fried ingredients cooked
At this point, I took out a large serving plate and a kitchen knife in anticipation of the bread machine dough cycle completing:
Large plate and kitchen knife taken out
The bread machine finished its dough cycle:
Bread machine dough cycle complete
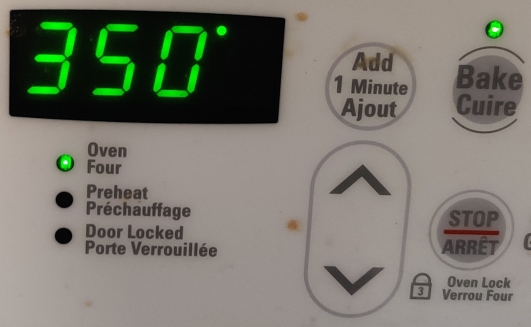
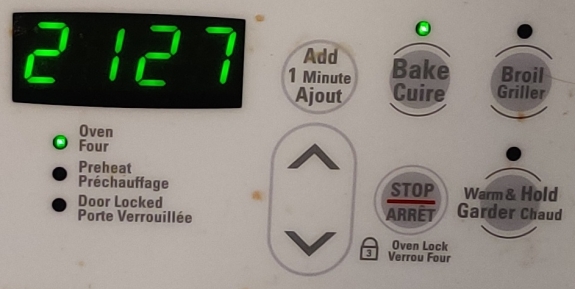
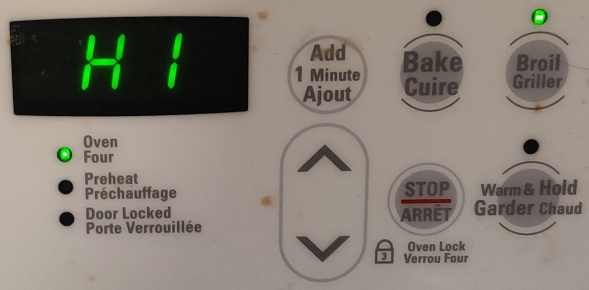
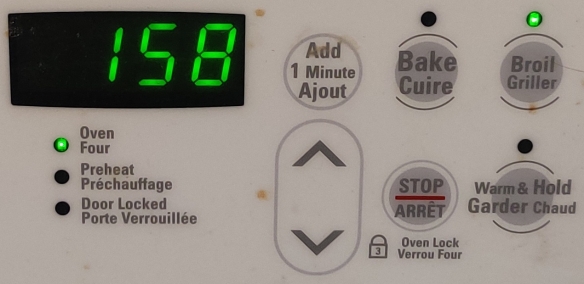
At this point, I started to preheat the oven, set to 350F, and one of the racks was placed in the top position (photo taken after preheating):
Oven preheated to 350F
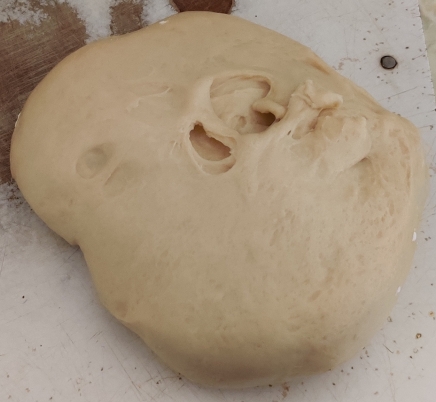
The dough was taken out of the bread machine basket:
Dough taken out of bread machine
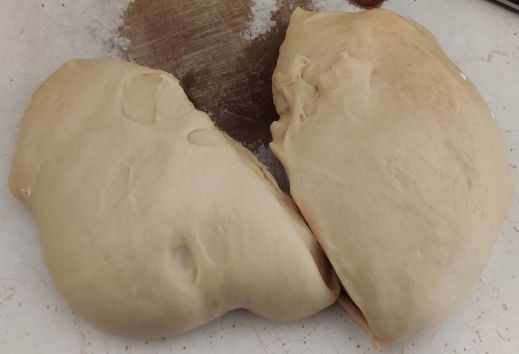
At this point, to get 24 roughly similarly sized balls of dough, I am using what I call the “Jamie Oliver Method” because I saw Jamie Oliver use this method on one of his shows with bread dough:
Cut the dough in half (2 pieces);
Cut each half into three pieces (2 x 3 = 6 pieces);
Cut each “third of a half” into four pieces (6 x 4 = 24).
I concede that Jamie Oliver would have you roll the dough into a long log first to further help with estimating making the sizes relatively even.
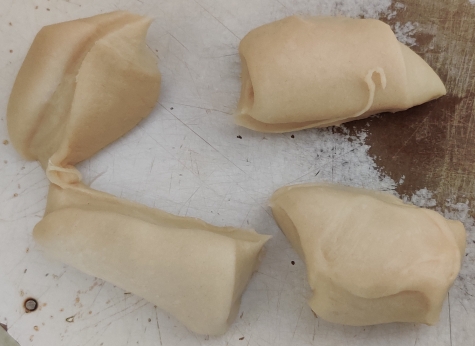
The dough was cut in half:
Dough cut in half
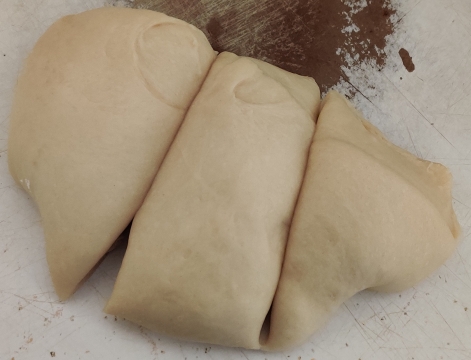
One of the dough halves was cut in three:
Dough half cut into three pieces
One of the pieces was cut in four:
Dough piece cut into four pieces
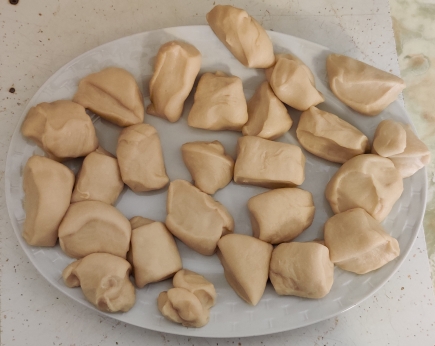
The rest of the bread dough pieces were cut up, resulting in 25 pieces, which eventually were reduced to 24 pieces:
25 bread dough pieces (which will be integrated into 24)
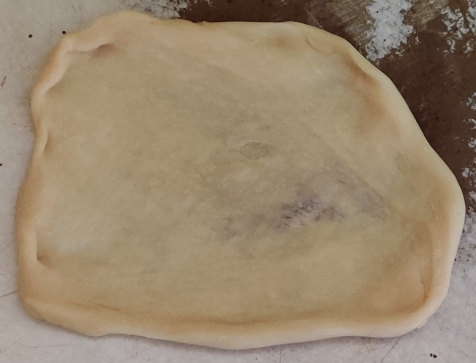
A bread dough pieces was placed on the cutting board, and flattened and stretched out:
Bread dough piece flattened on cutting board
Some shredded cheese was placed in the centre of the piece of flattened bread dough:
Shredded cheese placed on flattened bread dough
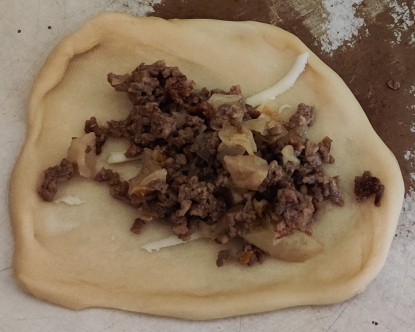
Some cooked meat mix was placed on top of the shredded cheese on the piece of flattened bread dough:
Cooked meat mix placed on flattened bread dough
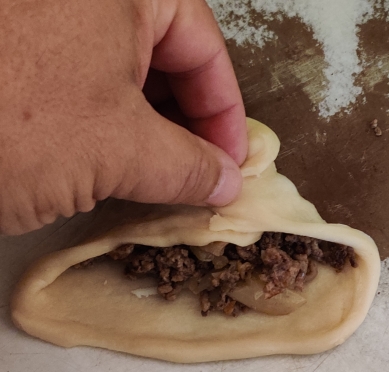
I began to stretch the edges of the flattened bread dough, pulling them together and covering the filling:
Bread dough edges stretched and brought together
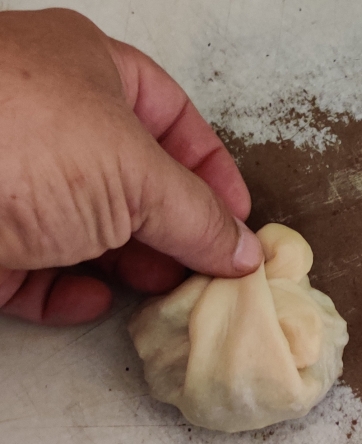
All of the edges were brought together and the edges were pinched together:
Stretched bread dough edges brought together
Stretched bread dough edges brought together
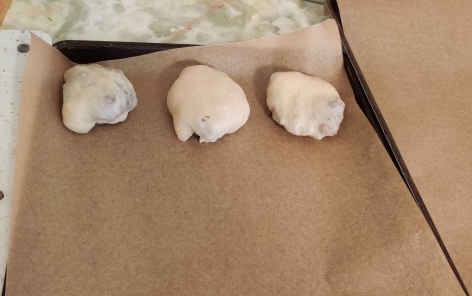
The resulting ball of stuffed bread dough was placed on the parchment paper on one of the trays, pinched edges face down:
Stuffed bread dough ball placed edges down on baking tray
The process was repeated with more pieces of bread dough and more cooked meat mix and shredded cheese:
Stuffed bread dough balls placed edges down on baking tray
Stuffed bread dough balls placed edges down on baking tray
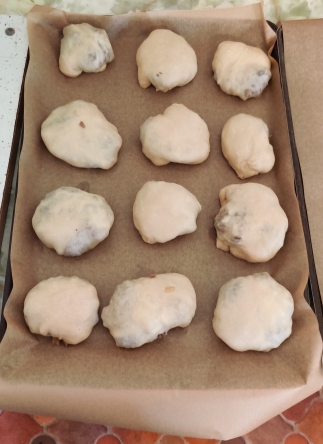
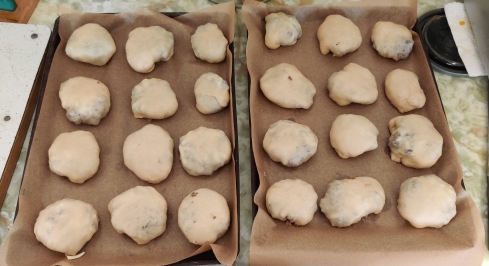
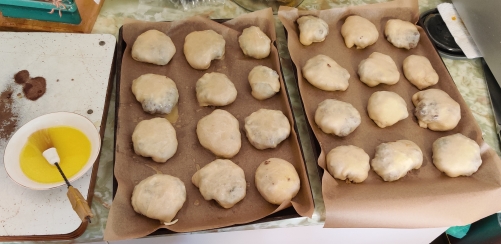
The process was continued until there were 24 units:
24 units on baking trays
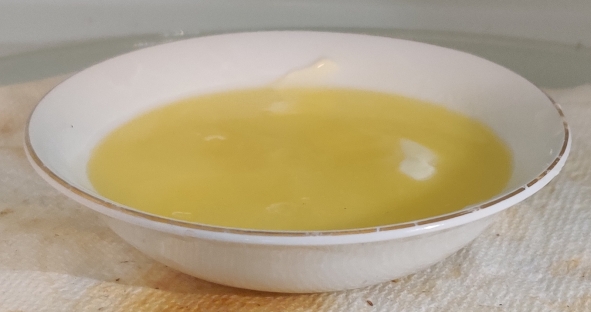
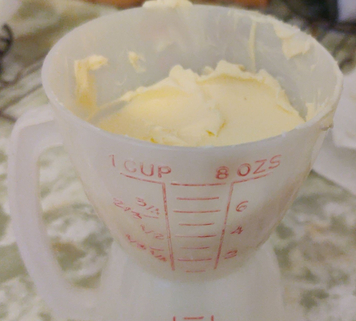
Margarine, a bowl, and a spoon were taken out:
Margarine, bowl, and spoon taken out
The empty bowl was placed on the kitchen scale, which was set to zero:
Kitchen scale set to zero with bowl on it
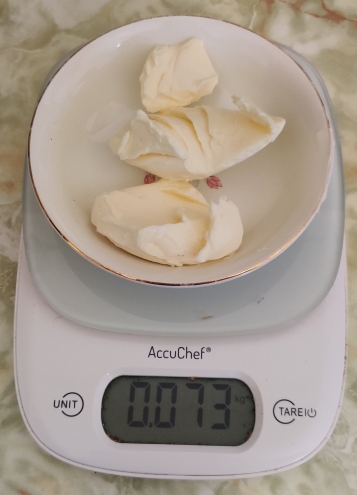
Margarine was weighed out, about five tablespoons’ worth, in the area of about 70g to 73g:
Margarine weighed out
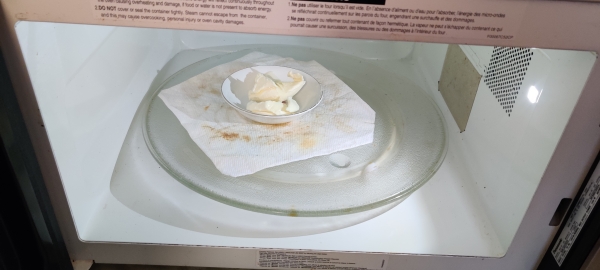
The bowl of margarine was placed in the microwave oven (1100 watts):
Margarine placed in microwave oven
The microwave oven was set to 15 seconds:
Microwave set to 15 seconds
The margarine was partly melted:
Margarine partly melted
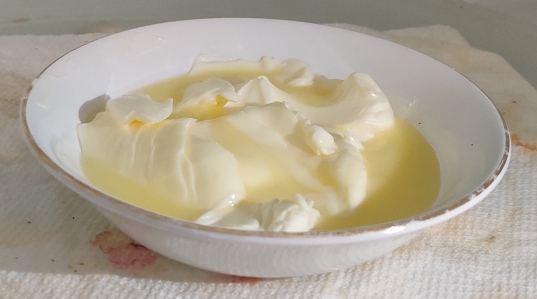
The microwave oven was set again for 15 seconds, and the margarine was mostly melted:
Margarine melted
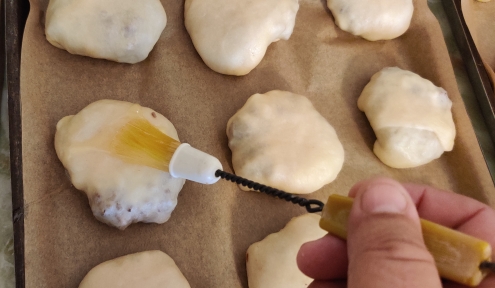
A food brush was used to brush the melted margarine on to the bierocks …
Melted margarine brushed onto bierocks
Melted margarine brushed onto bierocks
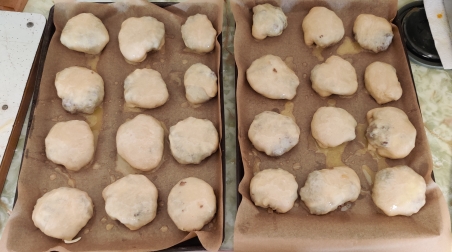
… until all units had been basted and all the melted margarine had been used:
Melted margarine brushed onto bierocks
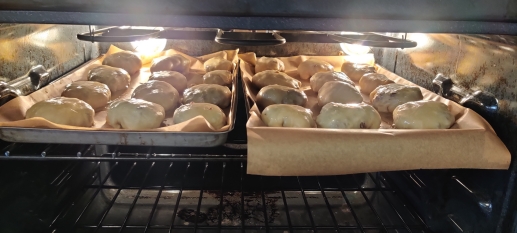
The trays of bierocks were placed in the oven:
Baking trays with bierocks placed in oven
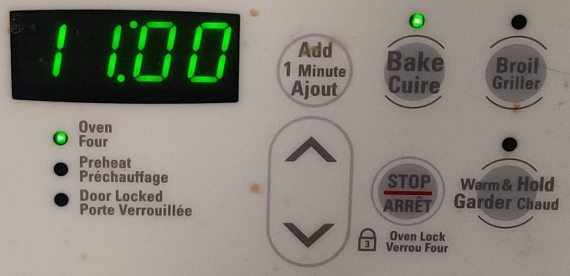
The stove timer was set to 22 minutes:
Timer set to 22 minutes
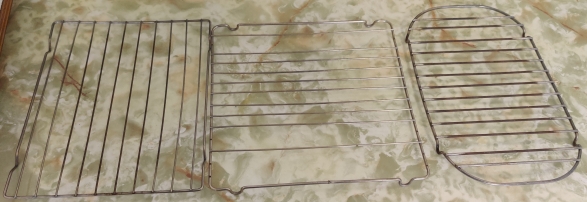
Cooling racks were taken out while the bierocks were baking:
Cooling racks taken out
Pot holders were taken out:
Pot holders taken out
At about halfway through the baking, the trays with the bierocks were rotated back to front within the oven:
Baking trays rotated back to front part way through baking
At the end of the baking period, I turned on the broiler to brown the tops of the bierocks:
Broil cycle turned on at end of baking
… and the oven timer was set to two minutes:
Timer set to 2 minutes of browning
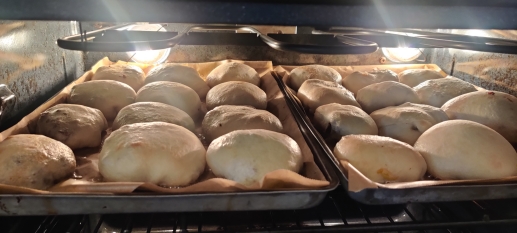
Here’s a photo of the bierocks as they were browning under the broiler:
Bierocks browning under broiler
After the two minutes under the broiler, the bierocks were taken out of the oven:
Baking trays with bierocks taken out of oven
The bierocks were transferred to the cooling racks:
Bierocks placed on cooling racks
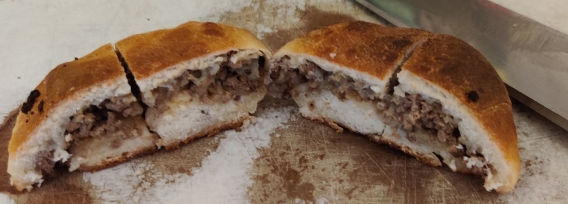
A bierock was picked up to check the bottom where the pinched edges of the dough had been brought together to show how it baked (but … not seamlessly! 🙂 )
Underside of a bierock
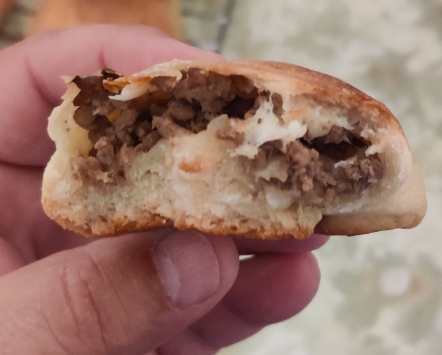
I bit into the fresh bierock … yummy!
Inside of a bierock — Yummy!!!
A bierock was placed on a cutting board with a kitchen knife:
Bierock and knife placed on cutting board
The bierock was cut into four pieces:
Bierock sliced into four pieces for freezing
Several bierocks were cut up into quarters, because bierock pieces have become part of my usual breakfasts:
Bierocks sliced into four pieces for freezing
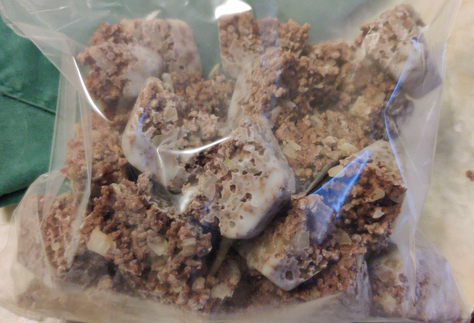
… and the cut up bierocks were placed in a freezer bag for freezing:
Bierock pieces placed in freezer bag
The bag of bierock pieces was placed in a freezer for future eating as part of my daily breakfasts.
In mid-2006, my employer at the time was acquired by another company, and my new employers required me – rightfully so – to take some basic training that I should have taken several years earlier. The training was after work hours, two evenings a week, for a few weeks.
Normally, my eating habits were (and still are) such that a given day’s lunch was composed of leftovers from the previous evening’s supper; in fact, normally supper meal plans at the time and still to this day usually intentionally include cooking for one more serving than the meal would call for, so that I would have a lunch the following day.
The training course, however, had the effect of not only requiring me to improvise for my supper plans, such as eating fast food, but also required me to improvise for the following day’s lunch too. My memory of this period is that there was a snowball effect on much of the week’s meals, although it probably was not quite as dramatic as what my mind has woven into my memory.
One of the solutions I came up with — but never quite fully implemented at the time — was the idea of a cooking weekend, targeted at being done at the cottage. My ambition at that point was to stock the freezer with a variety, as well as a large stock, of dishes and prepared meals, including lunches, so that the above situation wouldn’t be a problem moving forward. I had notions that were fairly ambitious, both in terms of the variety of meals to be made during the weekend, as well as the sheer amount of food that I suppose I expected to make over such a hypothetical weekend.
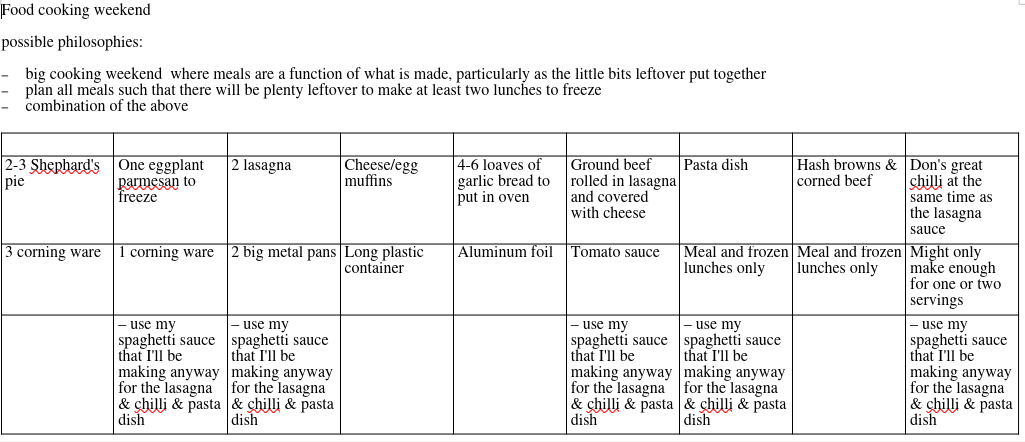
I developed the following planning table:
The table I created with basic plans for such a cooking weekend
As can be seen, one of the goals was to make a number of dishes based on a common ingredient, my spaghetti sauce, which I had begun making in the early 1990’s.
As also can be seen, although there were a few numbers of dishes to produce, overall the list is rather vague in what I would end up with in terms of numbers. Among other things, while I did have rough ideas of how much of most of the items I would make (or at least envisioned making), for instance, I didn’t start planning out the required amounts of each of the ingredients and sub-ingredients needed to make the dishes and components.
Overall, it seemed — and still seems to this day — rather vague and all over the place, and overly ambitious to the point of being daunting. Critically, although I knew that I would be making about seven to eight quarts of my spaghetti sauce, I didn’t plan out its ingredients, determine just how many of each of the other dishes for which it would be used would be produced from the seven to eight quarts, or whether some of the “larger” dishes were to be prepared for their own sake and the freezer, or to be ultimately cooked and divided up into lunch containers. Except as an afterthought, I just about didn’t even insert the making of the spaghetti sauce into the weekend’s already ambitious cooking plans!
Before coming to this last realization, I realized that my plan would only produce two or three servings’ or meals’ worth of each, which might all be eaten in short order.
Unsurprisingly, the planned weekend was never executed, and after a few weeks, my evenings freed up, and my regular lunches returned.
Years later, I realized despite the usefulness of the intentions behind my plans for the cooking weekend, at least for me, it suffered from not only being too ambitious in its own right, but from being even more ambitious than I thought. At the same time, the overall plan suffered from being a bit too wide in its intended scope given what would be a limited amount of base (the spaghetti sauce). As such, the plan was likely to produce — should I accomplish it all in such a weekend — merely an amount of food, especially the lunches, that would be consumed far more quickly than I had hoped.
My spaghetti sauce — and what I do now for tomato sauce based dishes
My spaghetti sauce was a bit of a marathon sauce to make. Based on canned tomatoes, it also included an inordinate variety and amount of chopped vegetables for a spaghetti sauce, and — especially the end product — was not unlike my current vegetable soup recipe, which I have been making since about 2013. I had a prideful joy in making it, partly as a result of it being so chock-full of vegetables, but, to a degree than I didn’t care to admit at the time, also borne of a stubborn pride resulting from it being a showcase of all the vegetables it contained and a desire to show off a certain (naïve) cooking acumen.
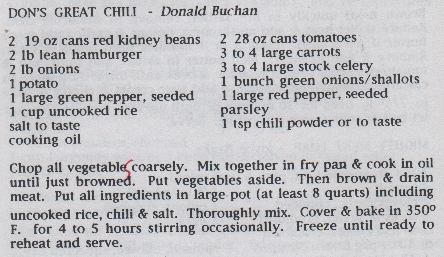
My chili recipe recipe from the early 1990’s, which is essentially my spaghetti sauce with the addition of the red kidney beans and the chili powder (image scanned from my church’s cookbook, published in 1996)
However, one of the things I realized in looking at my big cooking weekend, both early on without realizing it, as well as more formally just recently, was that I just wanted to make, say, lasagna, chilli, beef rolls, pasta dishes, or my eggplant dish (as well as a few lunches not involving my sauce). The “without realizing it” part (early on) was overshadowed by the prideful notion that it made sense at the time to want to use my spaghetti sauce to then make all these other dishes.
Except … I have come to realize that the effort to make the sauce to begin with, as well as my pride in wanting to use it, was perhaps core to the difficulty in implementing the cooking weekend. While the dishes were meant to be a showcase to myself for my spaghetti sauce and as well as my cooking in general, I realized that all these dishes were about showcasing the whole dishes, and not so much meant to showcase my spaghetti sauce.
As such, for a long time now, many of the tomato sauce dishes I make call for commercially prepared tomato / spaghetti sauces, as opposed to, specifically, my home-made sauce.
(As a side thought, were to I make spaghetti sauce again, I have a few vague notions about simplifying it somewhat, as well as chopping the vegetables much more finely, to the point of grinding them, instead of the coarse chopping I favoured for the “sauce” in the 1990’s.)
How things have evolved to today:
Despite the fact that the above weekend plan never materialized, I soon took to often planning cooking weekends when I went to the cottage, especially during the off-season (it’s a family cottage, so there always have been occasional scheduling issues which haven’t always allowed me to do what I would like, when I would like. 🙂 )
However, the first thing that should be mentioned, since this post is at least partly predicated on a period of time in which having ready-made lunches handily available in the freezer was essential, but was not the case, is that … I haven’t since planned out cooking weekends dedicated to cooking ready-made lunches for the freezer, or form a cooking club with a few friends in which we fastidiously make a week’s worth (or more) of lunches and other meals every Saturday, or otherwise come up with a systematic method of stocking the freezer with ready-made lunches.
In the intervening years, the principal approach I have taken to rectify unforeseen needs for prepared lunches is to hoard lunches and leftovers in the freezer; in addition to routinely making extra food for the following day’s lunch, I would occasionally also, at random opportunities, zealously make an extra lunch to place in the freezer. As such, my supply of extra lunches at any given time ebbs and swells according to how many lunches I have managed to hoard at that point in time, versus how many I have needed to eat recently. Fortunately, some of my recipes somewhat ease mounting full lunches in the freezer by being pair-able with odds-and-ends leftovers, such as bacon wrapped chicken, meatballs, and stuffed potato skins.
What I do do is plan “big” cooking weekends many times while I am up at the cottage, including quite often during the off season in winter, incidentally without running water. This is done in conjunction with weekend afternoons in the city with similar objectives (including a cook-through-my-collection-of-recipes project I did mostly in 2021, accessible off my home page at https://www.malak.ca ). Depending on my desires and ambitions, I usually concentrate on single projects, per day anyway; during a week over Christmas to New Year’s, for instance, I usually plan for almost as many large cooking projects as there are days – to cook various large cooking projects to fill the freezer.
I had begun large, more focused, cooking weekends not too long after my above planned weekend should have taken place, continuing a certain tradition I had started years earlier of occasionally making large quantities of my recipes, from a then-limited recipe répertoire, typically focusing on large freezer quantities of one, or perhaps two, recipes from my collection.
Therefore, early on — at this point, exactly “when” being lost to the sands of time and the multiple computer upgrades over the years, during which dates of creation, or at least the last edit, have been lost several times over — I had put the following list together. I tried to write down what my aims and guidelines had become. Note that the text of the list has been slightly edited to fit the current narrative:
A dish needs to be just as easy to make several units of the recipe as one unit – if not easier, and as such not more difficult to make because it’s in quantity (barring the extra time and labour merely due to extra quantity – taking advantage of economies of scale);
A dish needs to be easy to make in large quantities, using a repetitive production line process;
A dish must be appropriate for freezing – for instance, my zucchini dish is not appropriate for freezing, although its sauce is appropriate for freezing!
A dish should be something that just needs to be defrosted and reheated / cooked in toaster oven or regular oven;
A dish should be “convenience food” — the operative notion being “convenient because it’s made in advance and ready to eat” (or brown and serve), not as in “junk food” or like industrially produced, store bought frozen lunches;
A dish should not be something at its core easy enough to make any day of the week fresh (looking back, I suppose that this is barring a notion to make multiple units of otherwise easy to make lunches to stock the freezer, were that have been a priority at the time);
A cooking project should not just be components for other dishes – ie. projects should be to make full meals, not just cooked hamburgers or burger meat, nor just cooked chicken pieces, etc.
Given that over the years, my objectives have evolved, changed, and widened, I have long since abandoned at least a part of the guideline regarding making meal components or single items, because I now regularly cook large quantities of breakfast sausages for freezing, have in the past cooked whole packages or more of bacon for my mom, and I regularly make bacon wrapped chicken, meatloaf, meatballs, stuffed potato skins, as well as cooked ground beef frozen in ice cube trays to keep in the freezer for other times calling for small amounts of cooked ground beef.
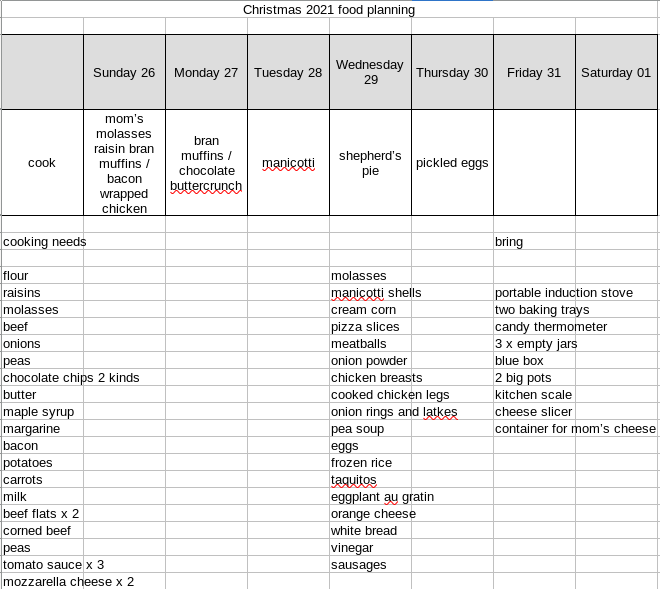
Of course, it would only be appropriate to show a recent planning table for a week’s stay at the cottage over Christmas , 2021 (regular meal planning blocked out):
Yes, there are still a lot of details missing here from this list, such as specific numbers, arguably allowing for somebody besides myself to look at both lists and wonder, beyond the more relaxed pace and the specific list of foods and ingredients to bring, what the difference between this 2021 table and the 2006 table are. However, each entry is based on, normally, the standard amounts in my various recipes, plus often slight excesses. And, according to my notes, I also made stuffed potato skins, bran muffins for my mom twice instead of once, and the chocolate buttercrunch twice, as well as, as intimated in the “bring” list, a container of cheese sliced off of the block for my mom to consume the following week.
These days, my freezers are usually full of many tasty dishes from my collection of recipes, individual servings of many foods both from and beyond my collection of recipes, and various lunches made up of leftovers, some consisting of components from multiple meals and cooking sessions. This is actually served by a certain hoarding instinct; I often fill containers with bits of leftovers from a given meal to freeze, and as possible I add to them with other little bits already in the freezer as they are produced.
And … do I run out of lunches? Usually not! However … managing the freezer is a work in progress and a continuous project, sometimes a daily project beyond simply preparing tomorrows lunch; I sometimes grab opportunities to make a second lunch or portion thereof!
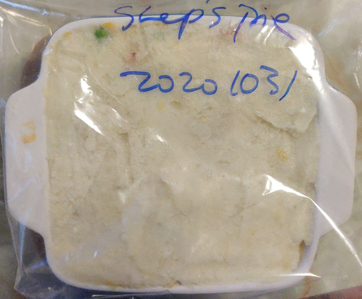
The various steps were performed over several sessions during the week (mostly cubing and drying bread), however, for the sake of narrative, the photos are listed, largely, as though it could have been done in two sessions. And, despite stating in the recipe that its cooking in a turkey is beyond the scope of the recipe, I do indeed show at the end of this post the cooking of the stuffing with the Christmas turkey, in response to a conversation with, and comment from, my brother: “If you get a trailer, you want to see it hooked up to a truck.“
Making the turkey stuffing:
Although the following picture was taken this past week as part of preparing for making the stuffing, normally, throughout the year I collect bread bits and bread crusts …
Collected bread crusts
… and as I collect them I cube them and dry them, to add to a container of dried bread cubes:
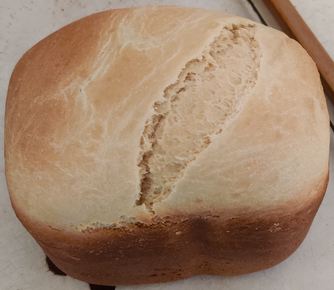
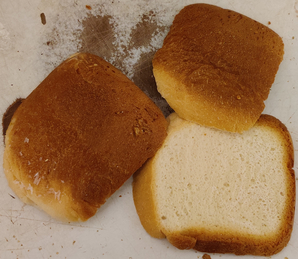
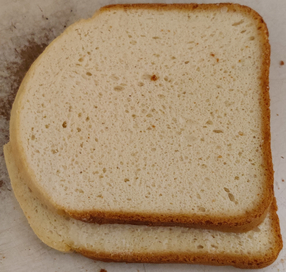
The loaf of bread was sliced for freezing, and some slices were put aside:
Bread slices taken out
Bread slices taken out
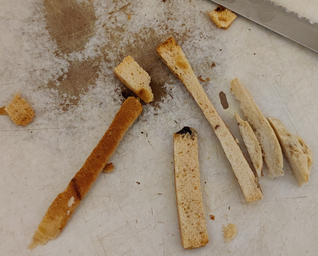
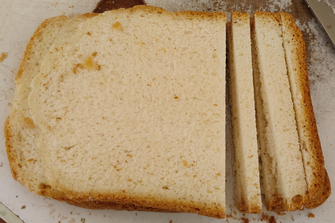
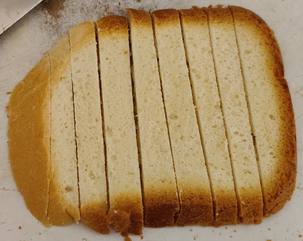
Bread slices were sliced into spears:
Bread sliced into spears
Bread sliced into spears
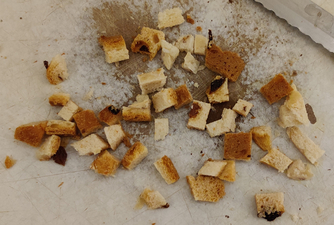
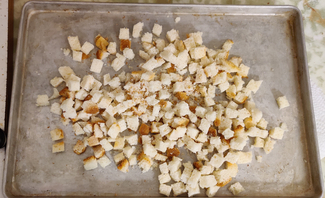
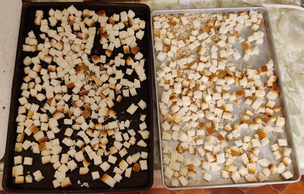
The bread spears were cut into cubes and placed on a tray to dry:
Bread cubes placed on a tray to dry
Bread cubes placed on trays to dry
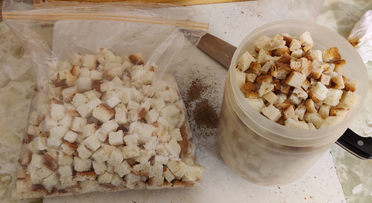
Once dried, the bread cubes were placed in a container I fill over time with dried bread cubes:
Container with dried bread cubes
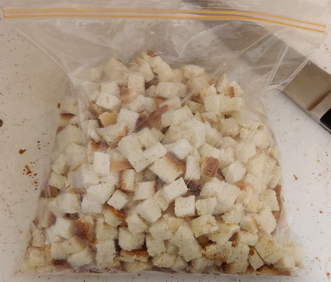
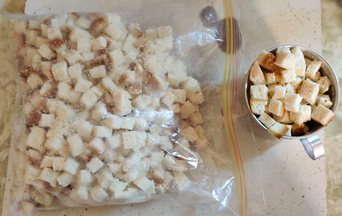
Fresh bread cubes were also put aside in a freezer bag and frozen, to be used later in the week when I made the turkey stuffing:
Fresh bread cubes in a freezer bag put aside for later in the week when I made the stuffing
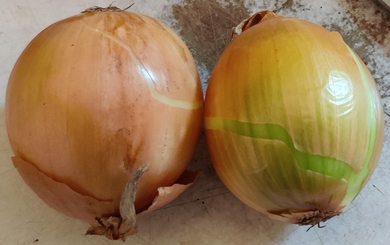
On the day I made the turkey stuffing, onions were taken out:
Onions taken out
The onions were cleaned and trimmed:
Onions cleaned and trimmed
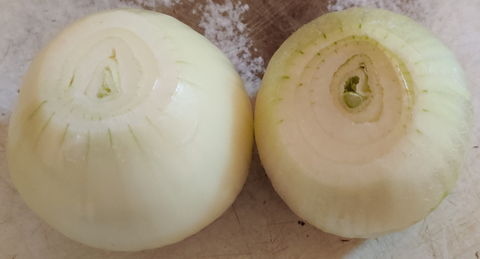
The onions were cut in half:
Onions cut in half
The onion halves were sliced into half coins:
Onions sliced into half coins
The onions were somewhat finely chopped:
Onions somewhat finely chopped
The chopped onions were transferred to a microwave oven safe cooking vessel, and put aside for a few moments:
Chopped onions transferred to microwave oven safe cooking vessel
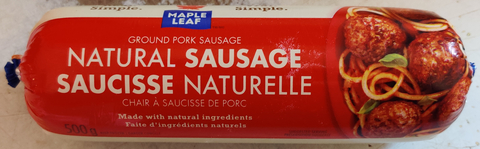
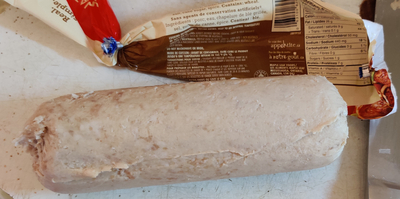
Bulk sausage meat was taken out:
Bulk sausage meat taken out
… and removed from its packaging:
Bulk sausage meat removed from its packaging
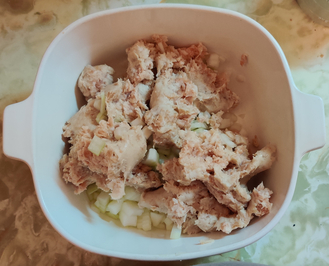
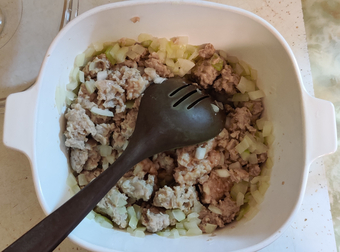
The sausage meat was broken up by hand and placed in the microwave oven safe cooking vessel along with the chopped onions:
Bulk sausage meat broken up by hand and placed in microwave oven safe cooking vessel along with chopped onions
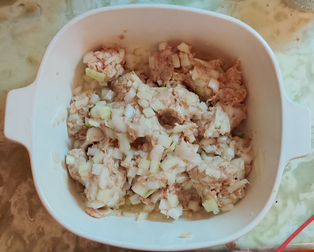
The sausage meat and onions were mixed together by hand:
Sausage meat and chopped onions mixed together
Time was set on my microwave oven:
Time set on microwave oven
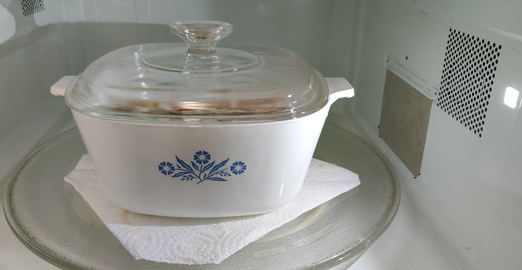
The microwave oven safe cooking vessel was placed in the microwave oven:
Microwave oven safe cooking vessel placed in microwave oven
Microwave oven safe cooking vessel in microwave oven
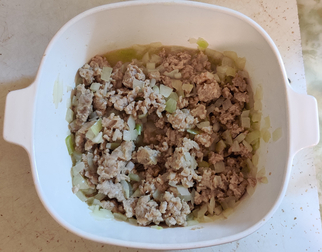
Part way through cooking the sausage meat and onions, they were taken out and large pieces were broken up with a large spoon:
Sausage meat and onions broken up with large spoon
Mostly cooked sausage and onions:
Mostly cooked sausage meat and onions
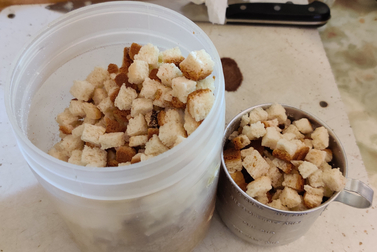
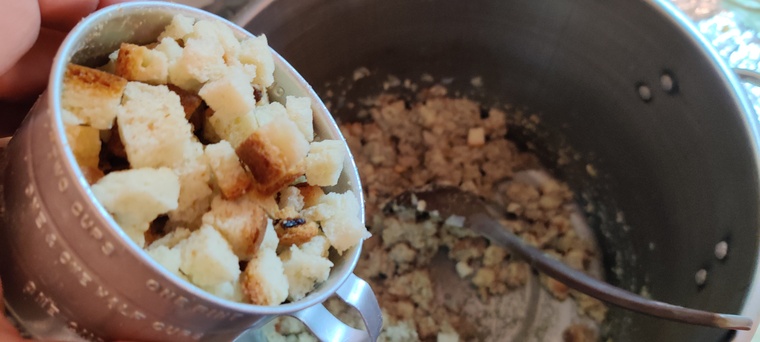
The fresh and dried bread cubes were taken out:
Fresh and dried bread cubes taken out
Fresh bread cubes were measured out:
Fresh bread cubes measured out
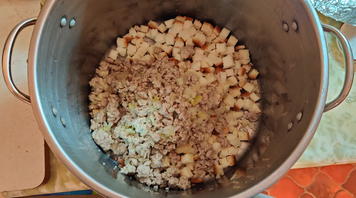
Fresh bread cubes were transferred to a large mixing vessel, in this case, my 16 litre soup pot:
Fresh bread cubes transferred to large mixing vessel
Fresh bread cubes in large mixing vessel
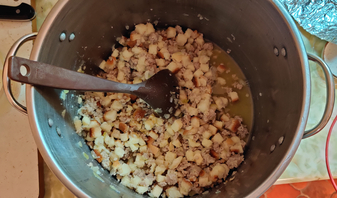
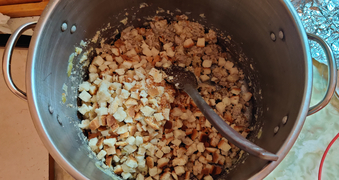
The cooked sausage meat and onions were added to the bread cubes
Cooked sausage meat and onions added to bread cubes
The bread cubes and the cooked sausage meat and onions were mixed with a large mixing spoon:
Ingredients mixed with large mixing spoon
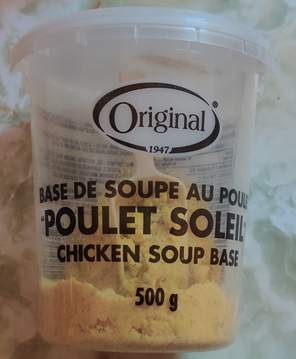
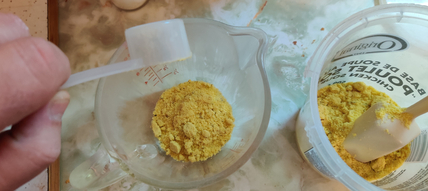
Chicken soup base was taken out:
Chicken soup base taken out
Chicken soup base was measured out:
Chicken soup base measured out
The chicken soup base was added to a measuring cup:
Chicken soup base added to measuring cup
Chicken soup base added to measuring cup
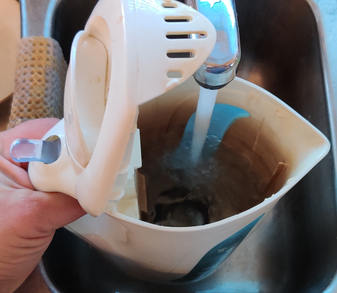
Water was added to an electric kettle:
Water added to electric kettle
The kettle was turned on:
Kettle turned on
Kettle turned on
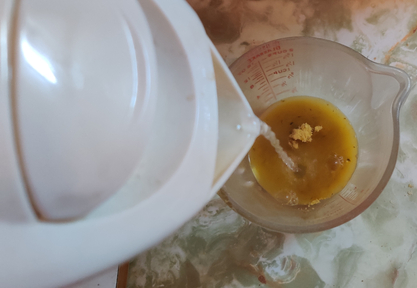
Once boiled, boiling water was added to the measuring cup with the chicken soup base:
Boiling water added to measuring cup with chicken soup base
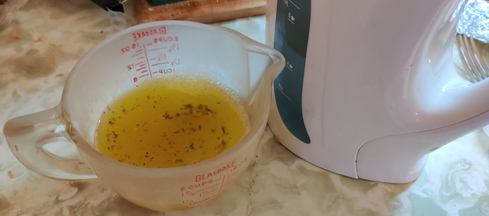
The chicken soup base and the boiling water were mixed together:
Chicken soup base and boiling water mixed together
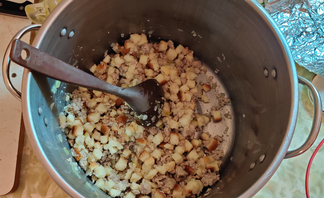
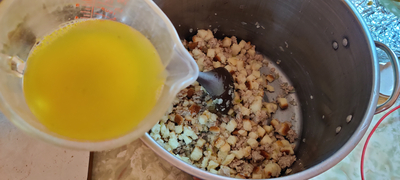
The chicken soup was added to the rest of the ingredients:
Chicken soup added to rest of ingredients
The ingredients were mixed together again with the large spoon:
Ingredients mixed with large spoon
Ingredients mixed with large spoon
Savoury (spice) was taken out:
Savoury taken out
The savoury was sprinkled over the ingredients, and the ingredients were mixed again:
Savoury sprinkled over ingredients
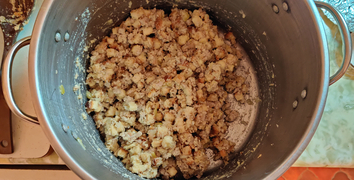
Dry bread cubes were measured out:
Dry bread cubes measured out
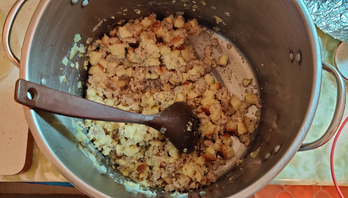
The dry bread cubes were added to the rest of the ingredients:
Dry bread cubes added to rest of ingredients
The ingredients were yet again mixed together with the large spoon:
Ingredients mixed again
Ingredients mixed again
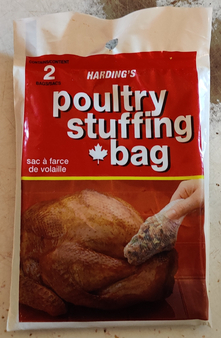
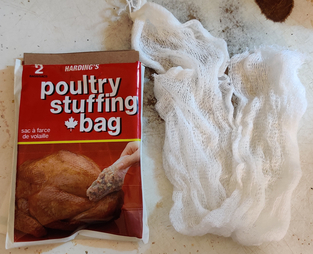
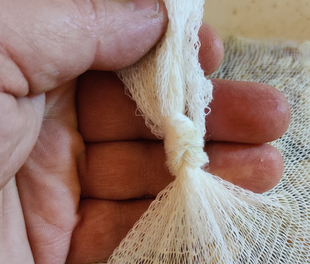
Gauze poultry stuffing bags were taken out:
Gauze poultry stuffing bags taken out
Gauze poultry stuffing bags taken out
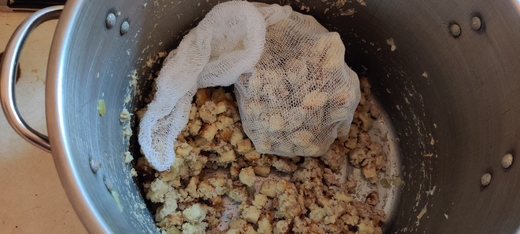
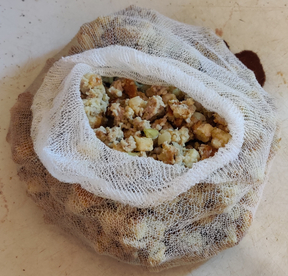
A gauze bag was filled with the stuffing:
Gauze bag filled with stuffing
Gauze bag filled with stuffing
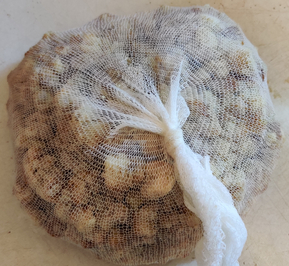
The gauze bag was tied off:
Gauze bag tied off
Gauze bag tied off
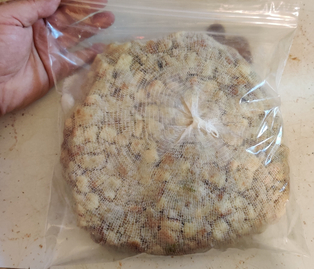
The gauze bag was placed in a sealable freezer bag and placed in a fridge for use later, on Christmas day:
Stuffing placed in a plastic bag for later use
And in the spirit of seeing the “trailer hooked up to a truck”, here are photos from Christmas day, cooking the turkey and stuffing:
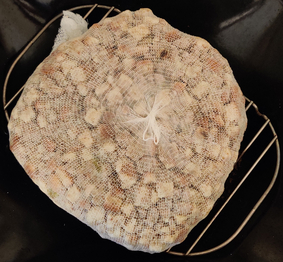
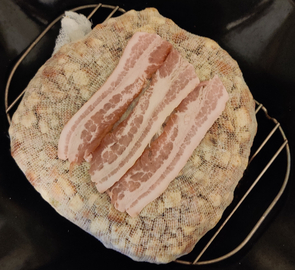
On Christmas day, the gauze bag with the stuffing was taken out of the freezer bag, and placed on a baking rack in a roasting pan:
Stuffing on baking rack in baking tray
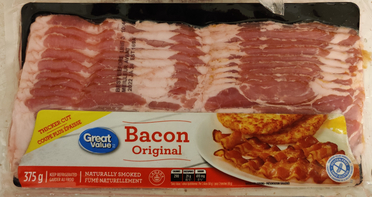
Bacon was taken out:
Bacon taken out
Slices of bacon were placed on top of the stuffing:
Bacon placed on top of stuffing
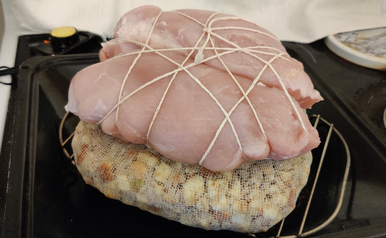
Two turkey breasts, tied together with butcher’s string, were placed on top of the stuffing:
Turkey breast place on top of stuffing
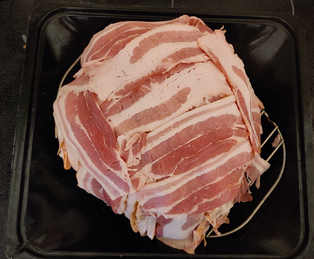
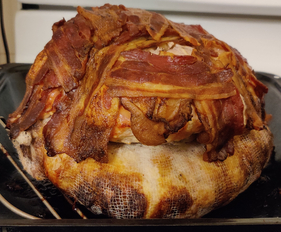
Bacon was liberally wrapped over and around the turkey and stuffing:
Turkey and stuffing wrapped with bacon
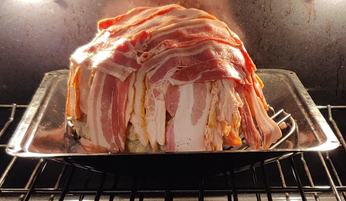
The Christmas turkey was placed in the oven:
Christmas turkey placed in oven
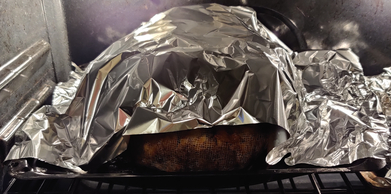
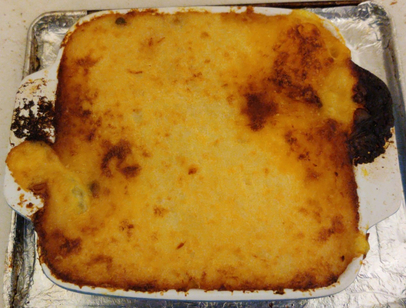
After some cooking, basting, and browning, aluminum foil was placed on top of the turkey partway through cooking the turkey in order to avoid burning on the outside and drying out of the turkey, while the inside of the turkey and stuffing continued to cook (a meat thermometer was critical):
Aluminum foil placed on top of turkey
The fully cooked turkey and stuffing were taken out of the oven:
Fully cooked turkey and stuffing
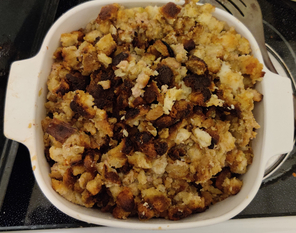
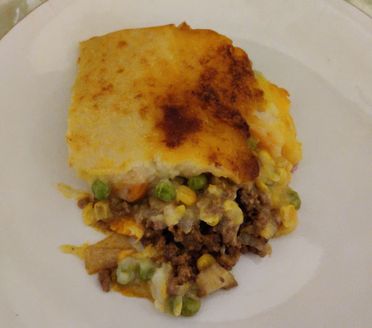
The turkey stuffing was taken out of the gauze bag and transferred to a serving vessel, ready for Christmas dinner:
Stuffing transferred to serving vessel ready for Christmas dinner
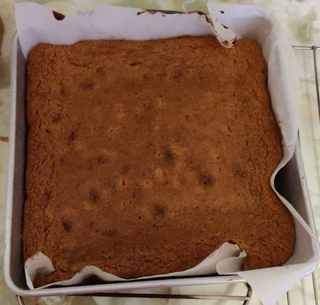
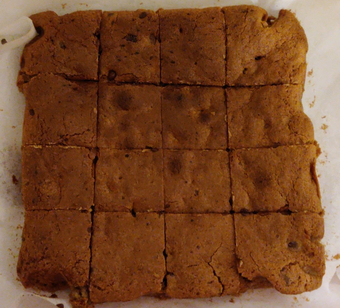
Unfortunately, the two batches I made today did not fully solidify into a fluffy cake consistency during the baking process, and fell a bit, creating a consistency like brownies.
I say “relatively easy” since a good number (though hardly all) of my recipes are geared toward making large batches in advance meant to be frozen, and the making of which I treat as all afternoon affairs, often with a large bottle of very premium beer. The above cooking jobs, however, are individually of the smaller amounts variety, each being able to be made easily and quickly.
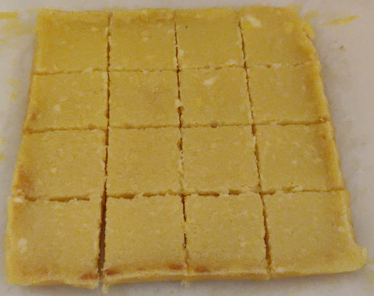
Today, I put my cooking plans into a bit of overdrive, and, by mid afternoon, my main cooking plans for the day were complete, with a few extras beyond the list to boot. The whole list was somewhat more ambitious than the lemon squares which I’d made at the beginning of the week during a spare afternoon I’d had.
An 8″ x 8″ pan’s worth of lemon squares made earlier in the week. They were delicious!
I started all this process somewhere around 09:30 in the morning.
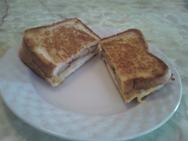
Breakfast was first, consisting of my breakfast sandwiches, which are essentially a grilled cheese sandwich with a fried egg and, in my sandwich, sliced breakfast sausages, while in my mom’s, bacon.
My breakfast sandwhich with sausage (this is an old picture taken several years ago, not this morning). The photos following this one were all taken today, of the foods I made today.
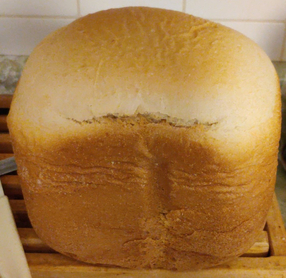
At the same time, I started by setting the bread machine to replenish my supply of bread slices in the freezer for sandwiches and the like. Three hours later, the bread came out of the machine, and was later sliced and frozen.
The bread sliced and on a tray between sheets of food grade plastic, for freezing
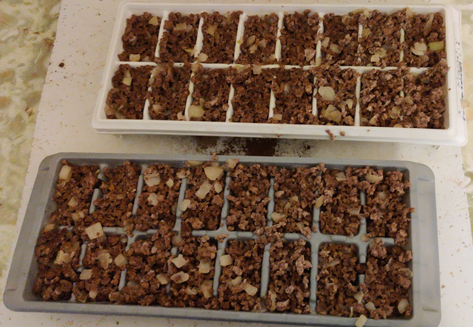
One of the things I now normally keep in the freezer is a cooked mixture of ground beef and chopped onions, cooked in advance and frozen in ice cube trays. The cubes are used for putting into the likes of tomato sauces for spaghetti and other recipes calling for cooked ground beef, or instead of chopped bacon in my pizza recipe. Cooked, two pounds of ground beef with onions will fill two ice cube trays:
Cooked ground beef and chopped onions in a couple of ice cube trays, for freezing
Frozen cubes of cooked ground beef and chopped onions in a freezer bag, ready for use in future meals
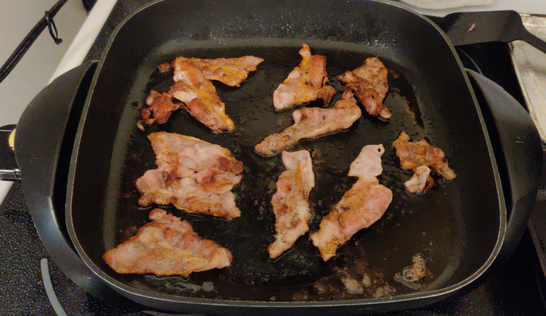
Next, I cooked a single 375g package of bacon (“mild sugar cured bacon”, each slice cut in half lengthwise), for the freezer, for my mom (I prefer cooked breakfast sausages for myself):
Some of the package of bacon cooking
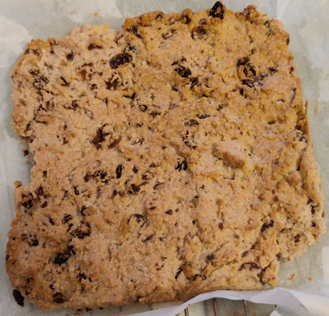
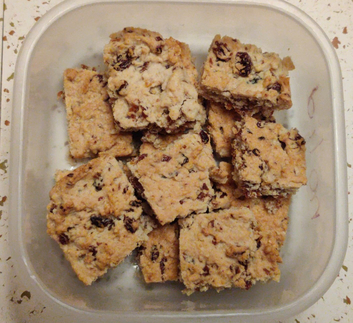
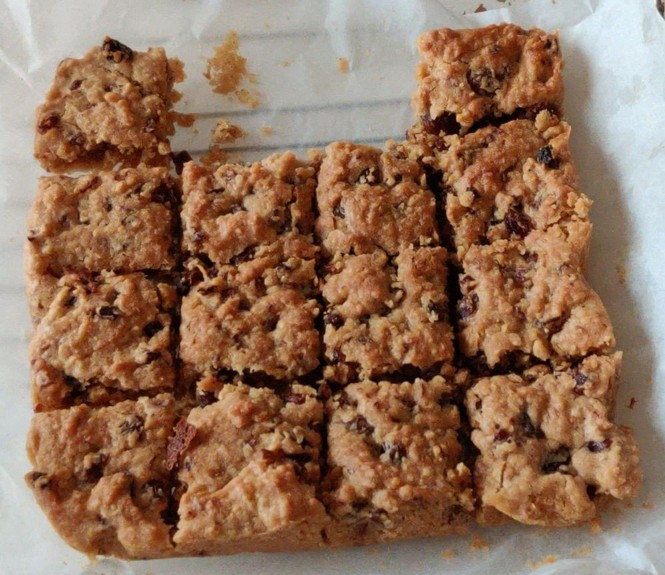
My next cooking job was oatmeal raisin squares, which I learned from one of Jamie Oliver’s TV shows. They’re nice enough, but I make them for my mom.
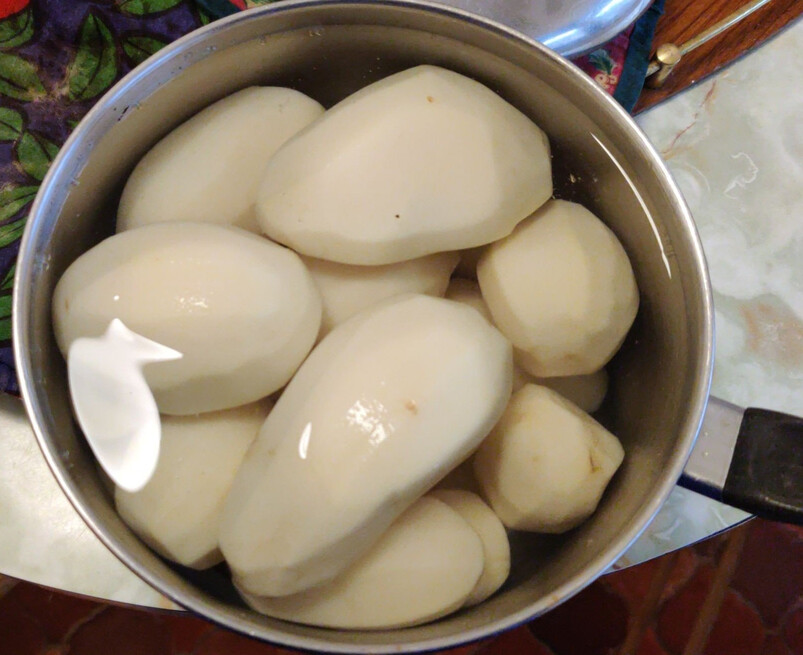
While the oatmeal raisin squares were baking, I peeled a few pounds of potatoes for roast potatoes for tomorrow’s Sunday Lunch.
A few pounds of peeled potatoes for tomorrow’s Sunday Lunch
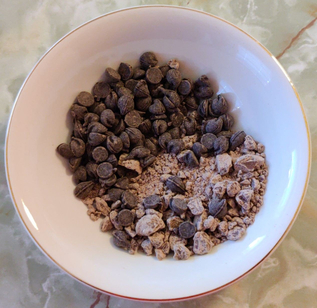
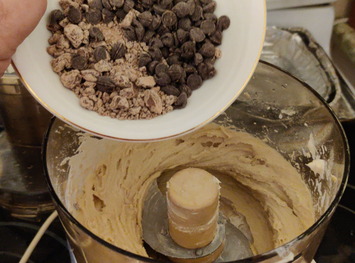
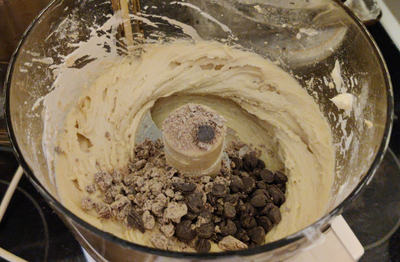
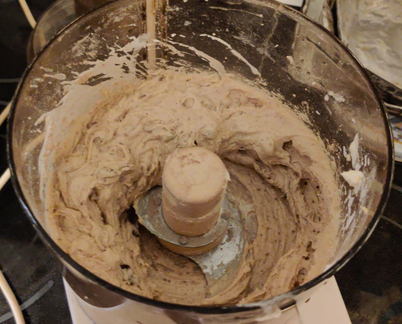
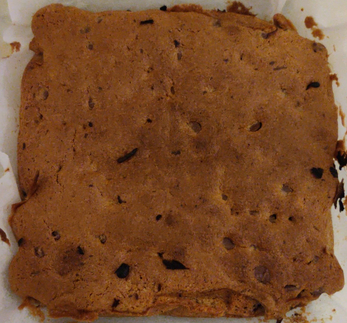
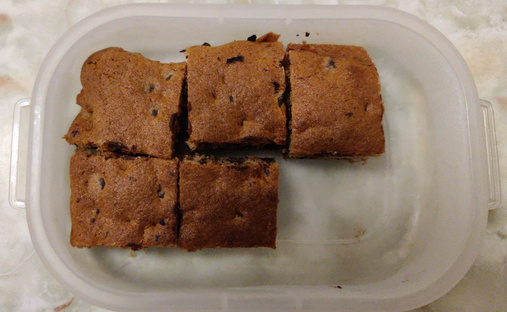
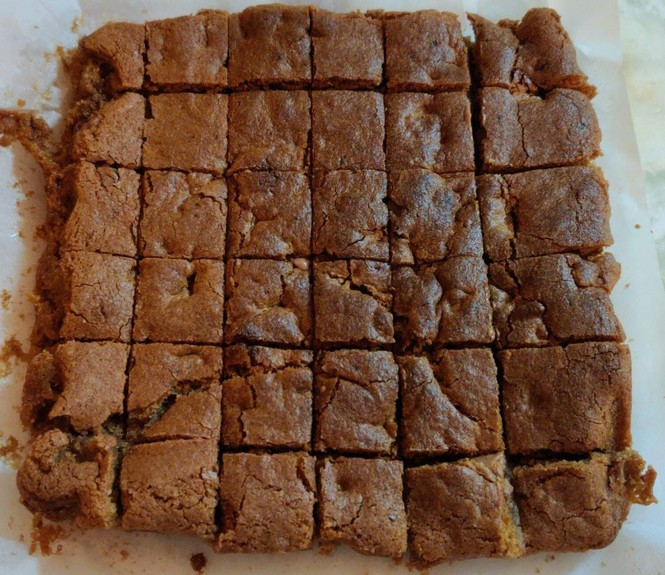
After that, I made blondies for myself. They’re supposed to be similar to brownies, but I add baking powder, giving them more of a cake consistency and height; they are of a tan or caramel colour, and with chocolate chips in it; I cut them into small bite-sized squares.
An 8″ x 8″ pan’s worth of blondies, before being cut into squares
I recently tried a recipe I watched Jamie Oliver make on “Jamie’s Quick and Easy Food”. It presented a minor challenge, because all the measures were in metric units, a different system than that to which I am accustomed to using while cooking.
However, in Canada, we also deal with at least two traditional systems of measurements, in addition to the metric system:
Imperial Measurements (English Units) originating from the British Isles, because of historical ties from colonial times; and,
The United States Customary Units, which are derived from the British Imperial Measurements, and which are really important in Canada because the United States is Canada’s largest trading partner.
This means that in Canada, we regularly albeit informally deal with what could be described as a complex hybrid of (at least) three measurement systems. Although the Imperial System (English Units) has been slowly fading for decades, it has also kept a strong hold on things, such as through old measuring cups and other implements used in home kitchens, often inherited from parents and grandparents. The US Customary Units also have a very strong influence on Canada, especially since the units usually have identical names as their counterparts in Imperial units, as well as very similar though distinct measures.
In my personal experience, listing all ingredients in all home recipes in metric is uncommon in Canada, despite metrication back in the 1970s. In my personal experience, we still list ingredients in quarts, cups, ounces (both liquid and weight), teaspoons, tablespoons, and the like. This of course is complicated by some things like “new” pots being in litres, as well as things like jars, both of the mason and commercial product varieties, which are in millilitres and litres (while my pickled eggs recipe is based on Imperial units, for instance.) In any case, when food weights come into play, I usually I know how to estimate them, such as “about a pound of chicken or ground beef” (follow the weight on the package to help estimating), or a given number of pounds of potatoes, coming out of a bag that is known to contain 10 pounds of potatoes.
As mentioned above, many measuring cups and other kitchen implements are still in Imperial or American measurements, although some newer measuring cups (of which I do not possess save the one mentioned below) and other kitchen implements are also marked in Metric units, in addition to either Imperial or American units.
So, back to baking the squares: This is the second time I have followed one of Jamie’s recipes. The first time, several years ago, I guesstimated conversions. I was fortunate a few weeks later to find a glass measuring cup with multiple scales printed on its sides, each for different ingredients, such as flour, sugar, starch, rice, and the like, and showing graduations in grams for the given ingredient. In retrospect, I perhaps should have been searching for a kitchen scale instead. In any event, I largely forgot about the measuring cup after having used it once or twice.
When I was preparing to make Buddy’s Flapjack Biscuits, I had a minor problem. Since I had forgotten about the measuring cup with scales in grams, and I don’t have a kitchen scale, I couldn’t simply weigh out the ingredients (20230628: I bought a kitchen scale by August of 2020, a few months later, as described in this post). I had to convert the measures of Jamie’s list of five ingredients, composed of 100g of each ingredient. No doubt making each exactly 100g was an intentional novelty added to the original recipe, as well as, of course, being an easy way to remember how much of each ingredient to use.
In the process, I was reminded of a confusing reality of which I’ve been aware all my life: I navigate the above-mentioned three measurement systems, often without thought, almost on a daily basis. To wit, I found a website that converted 100g of flour to close to 2/3 cup in Imperial units, and close to 3/4 cup in American units. I didn’t immediately know which to choose. (20230628: here is a site with the difference between a “Canadian” cup and an “American cup, with my archive.)
I did remember at this point that I had the glass measuring cup with the various scales. I determined that 100g of flour was equal to about 2/3 cup in one of the kitchen measuring cups I have. I guessed that at least with said measuring cup, I would also need to measure to 2/3 cup each for oats and raisins. I was able to determine that golden syrup, through a recipe found on the internet, is almost completely composed of sugar, and in fact has very little water in it. Again using the glass measuring cup with multiple scales, I measured out 100g of plain sugar, and found that it is about 1/4 cup in my regular measuring cup; I chose to use brown sugar in the recipe I developed, and added one and a half tablespoons of water in order to simulate the effect of the liquid nature of golden syrup. An online conversion revealed that 100g of margarine was also about 1/2 cup.
But I am now finding it dissonant that I can’t be certain what the real capacities of each of my multiple measuring cups are, nor for which system (Imperial or American) each were designed. I would only ultimately know by securing a kitchen scale (for dry goods), or securing a graduated cylinder (for liquids), to systematically measure each and every measuring cup I have. Perversely, graduated cylinders to which I would have access are graduated in millilitres, a metric measurement.
And what about the squares? “Buddy’s Flapjack Biscuits” are nice enough, although I think that there are too many oats. On the other hand, my mom likes them a lot. The “Blondies“, as their name may well suggest, are scrumptiously like a chocolate chip cookie version of brownies. Hence both have earned a place in my collection of recipes.
I started making pizza at home in about November, 2019. I figured it was time to learn how to make pizza, being somewhat of a pizza fiend.
I started off with the base biscuit recipe slightly modified from my friend’s cheese biscuit recipe, excluding the sugar and cheese, which I also use for “Barbecups” and “Chickencups“. I eventually, for this recipe, also slightly increased the milk content.
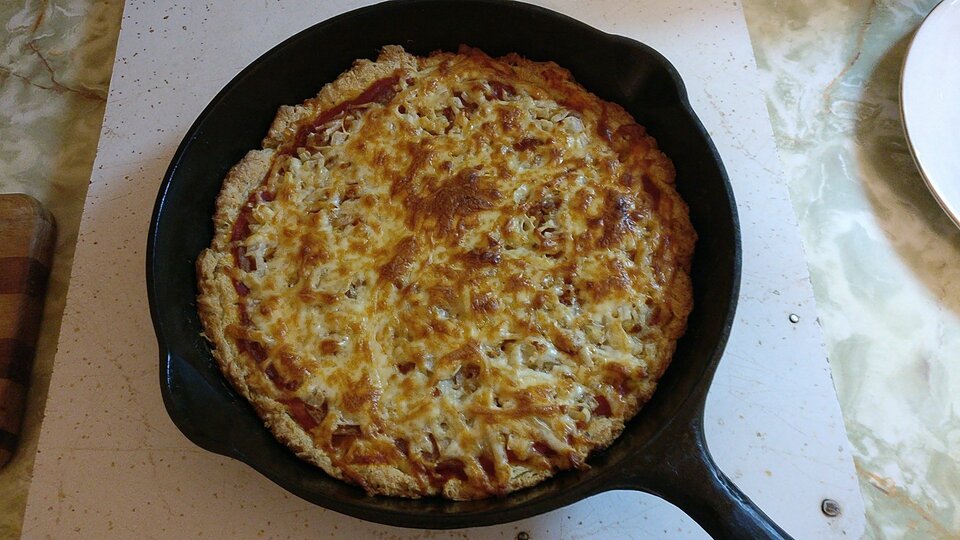
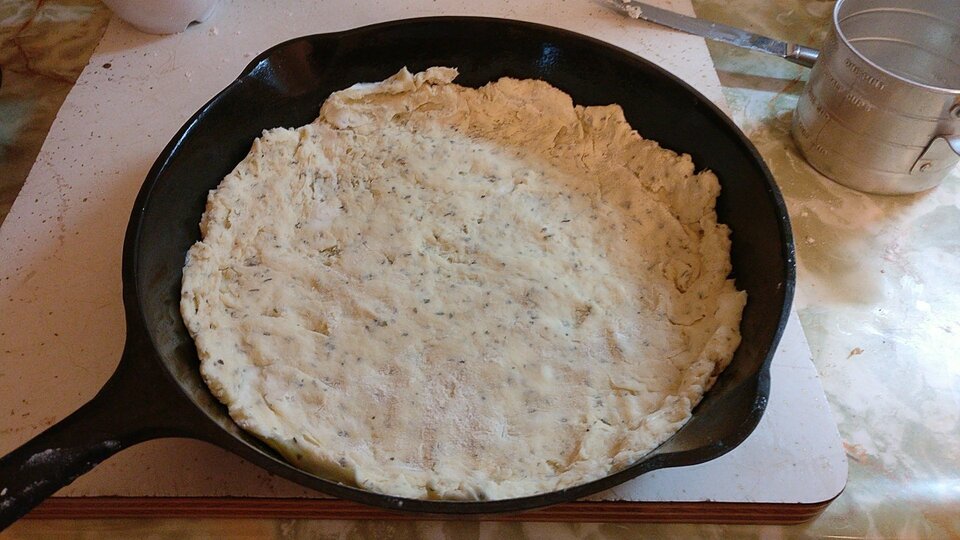
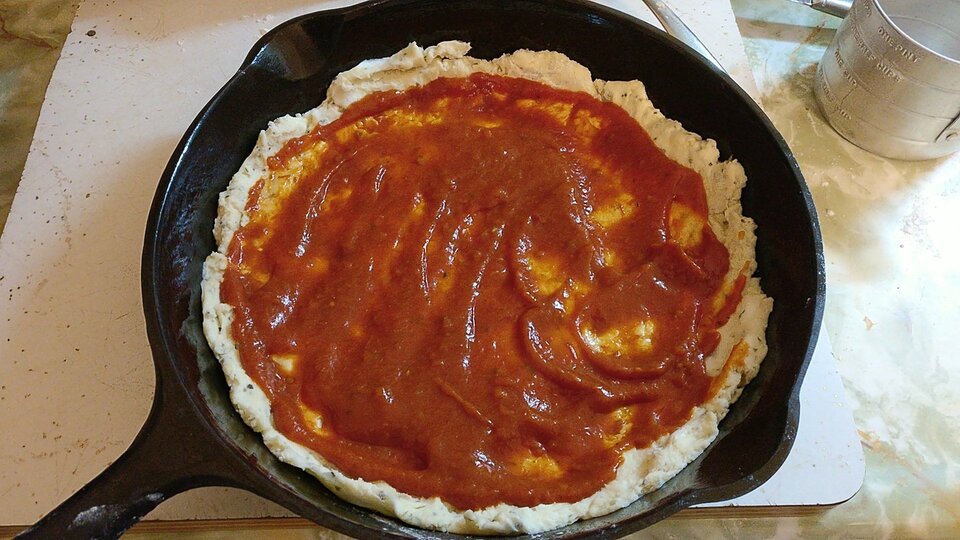
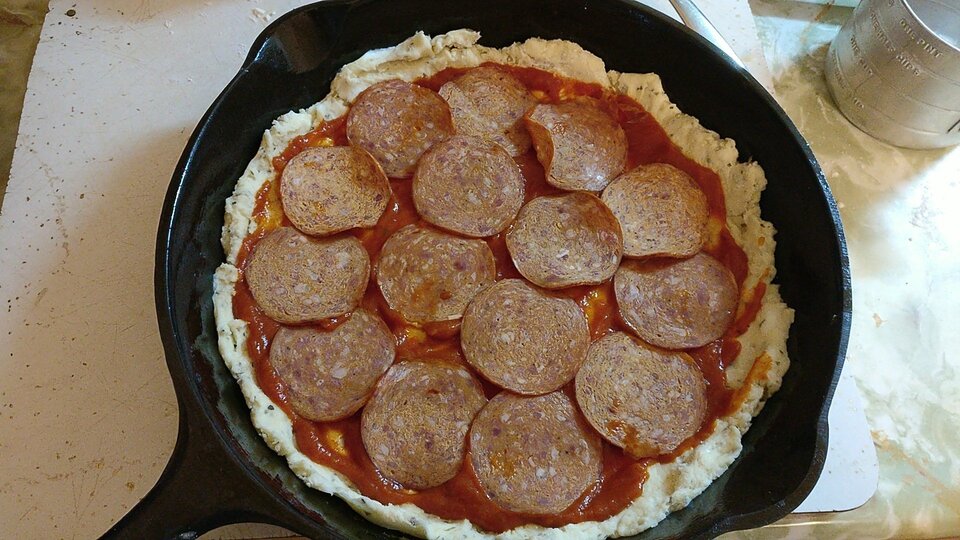
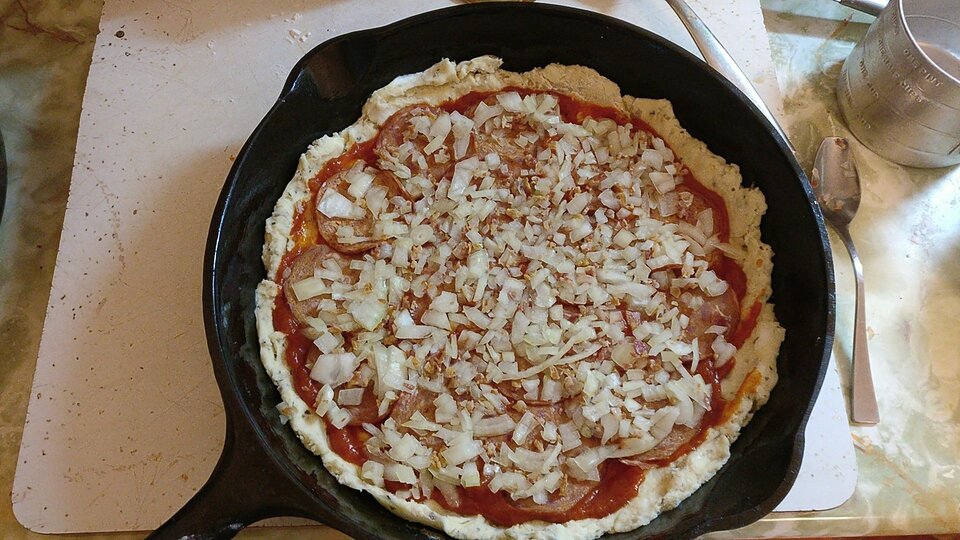
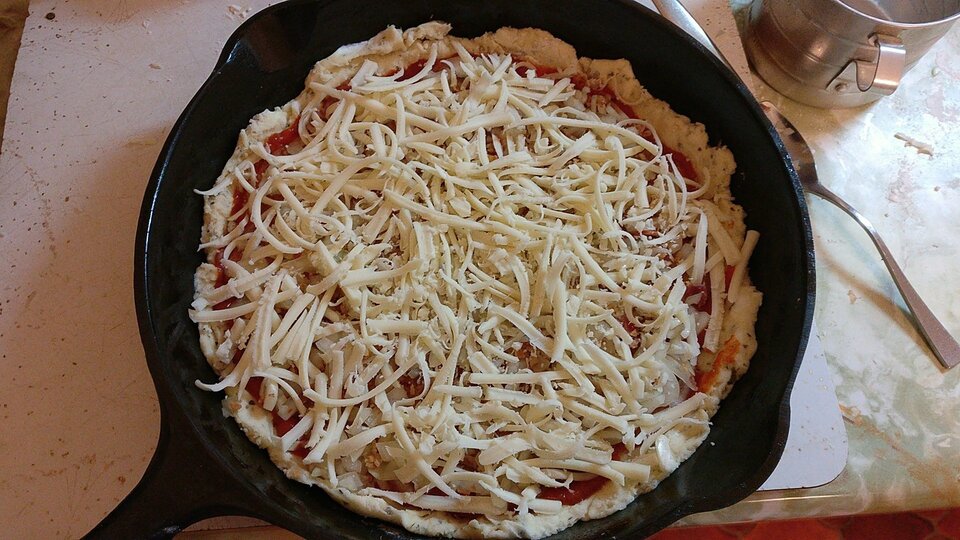
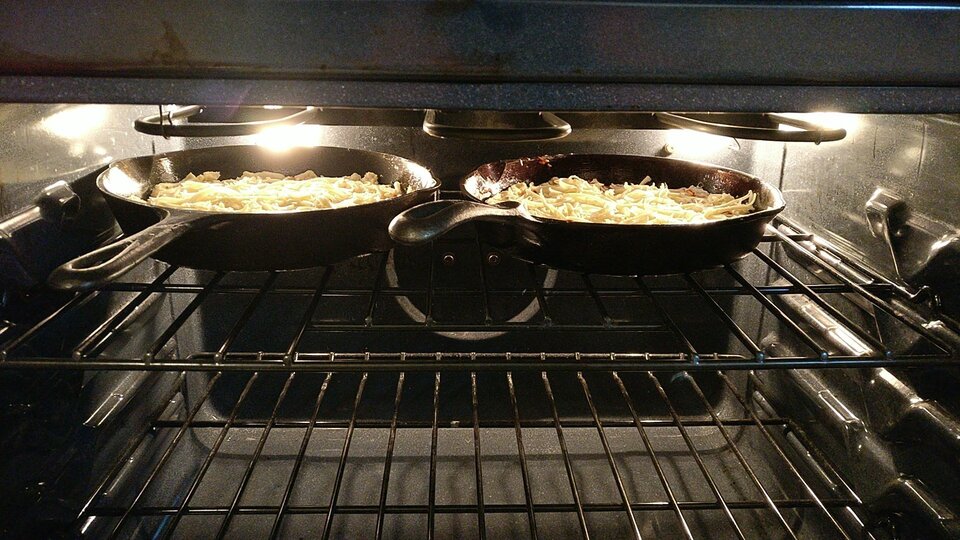
Here are some photos from the process, starting from moulding the pizza dough in two #8 (10-1/2 inch) cast iron skillets.
Pizza dough — my recipe makes two pizzas’ worth (see above)Pizza sauce — about 3-1/2 oz to 4oz per pizzaAbout 15 x 2inch slices of pepperoni per pizzaFinely chopped onion and finely chopped cooked bacon, half of an onion and one slice bacon per pizzaAbout 100g of grated pizza mozzarella cheese per pizzaBake the two pizzas in your oven set to 450F, on the top rackBaked pizza, after about 24 minutes of baking at 450F
The pizza recipe went through a few minor iterations, mostly to adjust for note-taking, experience with pan size, and the usual corrections for typos, completeness, full instructions, etc.
As a side note, when I first made the pizza, I had also recently acquired two cast iron pans to add to my collection, received from a friend who was breaking up her house; they needed to be run through my oven’s self-cleaning cycle in order to make them usable again (yes, they were rather full of baked on crud and rust spots.) The smaller of the two proved too small for the amount of dough in this recipe, but it has been used for other things. 🙂 I now have two #8 pans at home, and two more #8 pans at the cottage, for making pizza.
However, she asked me to slightly modifyher recipe, by making it less sweet and increasing, we decided commensurately, the bran to replace the reduced sugar as well as increase the “branniness” of the muffins.
And … she says that she now prefers the “M” recipe (ie. “M” for molasses, or I think “M” for modified).
(While you’re checking out my collection of recipes, check out my recipe for three ingredient drop biscuits, basically the greek-yoghurt-and-complete-cake-flour recipe for “easy biscuits that you can make quickly any day of the week that is guaranteed to please” that has been going around the internet and various media outlets in North America over the past couple of years, with grated cheese added to it.)
Over the past few weeks, I’ve learned two more recipes — or three, given that one is represented by two recipes of the same thing — to add to my repertoire of cooking skills.
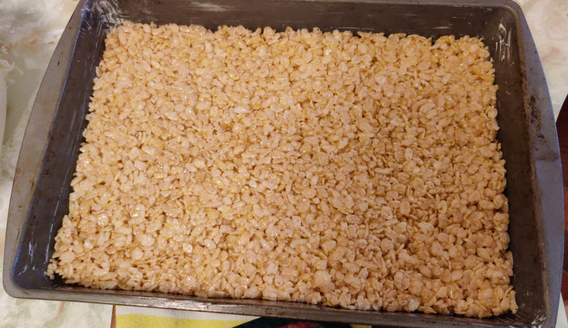
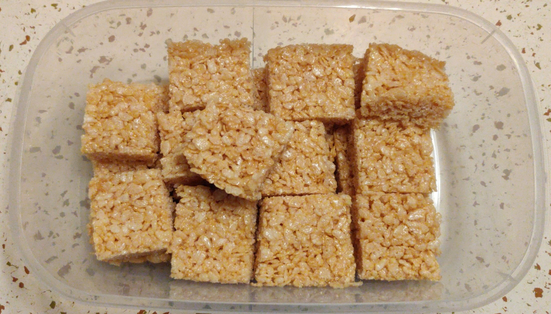
My mom loves bran muffins, and has a bit of a penchant for crisped rice and marshmallow treats. I’ve known these things for years, but over the past few weeks an imp pushed me over the edge to learn how to make them for her.
I like both, but previously never really had a personal grand desire to learn how to make either, even despite my love of a family friend’s ambrosia-worthy banana bran muffins, which I used to occasionally ask her to make for me in my younger years.
The crispy rice treats were almost as trivially easy to make as it was to find a recipe for them. I bought the ingredients, and within a couple of days made two batches, being able to serve one batch to a willing and hungry group. I found that indeed the melting marshmallows can burn easily in the pan if you’re not paying attention.
Mom got her supply a few days later, and happily began munching on them.
I proceeded to make the muffins, and was surprised at how easy it was to make picture perfect muffins. Despite considering myself a competent home cook, I expected it to be a bit more of a challenge. Instead, the recipe was easy to follow; given the attribution, while I am sure that it was “somebody’s recipe”, it came across as having no doubt been fastidiously reviewed, tested, tweaked, and re-written by the website’s editorial staff.
They turned out great, and of course I tasted them in advance. The real test was when I presented them to my mom. She liked them a lot, and ended up eating all of the bran muffins using the internet recipe (here’s my version), two at a time.
She did, however, ask me to make some bran muffins with molasses, and told me where to find her old recipes.
The old molasses I had had begun to solidify with age, but could be liquefied in a microwave oven; however, it re-solidified and created hard little balls once mixed with the cooler oil and sugar. An electric beater could not break them up; I baked the muffins, and they had globs of molasses at their bottoms.
The other night, I again made bran muffins, this time one batch of each recipe. In the picture below, my mom’s recipe is on the left, and the internet recipe is on the right. Yes, by the time I’d taken the picture, I had already eaten one from the batch on the left. It was yummy!
When I used the same container of molasses, I reheated it in a microwave oven several times, including after mixing it with the oil and sugar, but before adding the eggs. It worked, and I managed to keep the molasses sufficiently liquid when I mixed in the eggs, and then the rest of the ingredients.
Mom’s recipe is on the left; the internet recipe is on the right
After the above photo was taken, I did a taste test of the internet bran muffins (here’s my archive) (here’s my version). Comparing the two, each is distinct from the other — molasses comes through very clearly in my mom’s recipe — but beyond that, they are also very similar.
The two recipes are in fact very close: One has molasses, the other doesn’t, one has two eggs instead of one, but a bit less oil. This resulted in samples from each recipe tasting very much like bran muffins and somewhat similarly, although the molasses in my mom’s recipe added a new flavour profile, while the extra egg added a certain firmer cake like texture. The rest of the ingredients and proportions between the two recipes are virtually identical.
Now I’m waiting to bring the two batches to my mom to have another side by side taste test. 🙂
20191030 Update: I brought the two kinds to my mom, and she confirmed what she’d whispered weeks before: The Internet Recipe wins the challenge!


