It’s Christmas time, so I made some shortbread cookies — Photos

My aunt has been making shortbread cookies for a long time, and used to even send batches of her shortbread cookies through the mail across the country to my grandmother. At one point, I asked my aunt to teach me how make her shortbread cookies so that I could make them somewhat more often and then bring them directly and personally to my grandmother. Alas, my grandmother passed away a few years ago, but I have continued making the shortbread cookies because they are tasty, and my mom has said “why should I bother making my shortbread cookies when you make them (an albeit different recipe) so well?” 🙂

I recently made them for the third time in the past month or so, this time to make as a Christmas gift for my brother who also really likes them; I reminded him that our aunt is the mistress, and I merely the student. 🙂

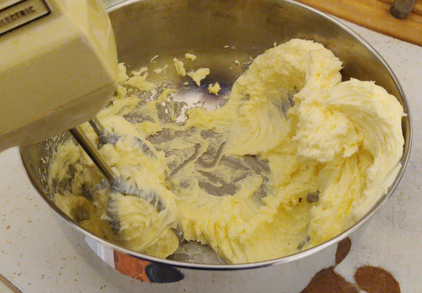
I started off by bringing a pound of butter to room temperature:

A pound of butter brought to room temperature

Then I creamed the butter with an electric beater (dating from the early 1960’s — it’s older than I am!)

Creaming the butter with an electric beater

A cup (packed) of brown sugar was added …

A cup (packed) of brown sugar added.

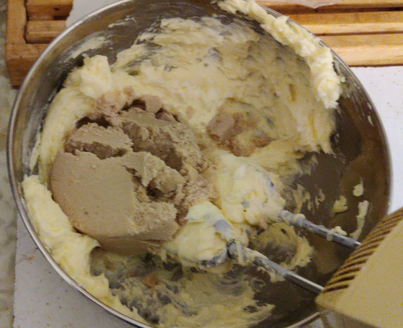
… and then blended with the creamed butter.

1 (packed) cup of brown sugar blended into the creamed butter

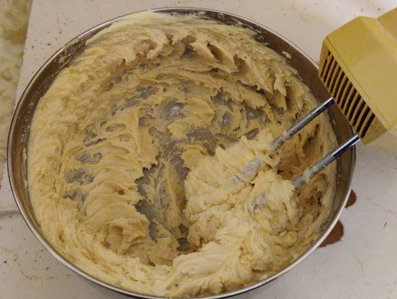
Four cups of regular flour were added, one cup at a time.

The first of four cups of flour added to the butter and brown sugar mix

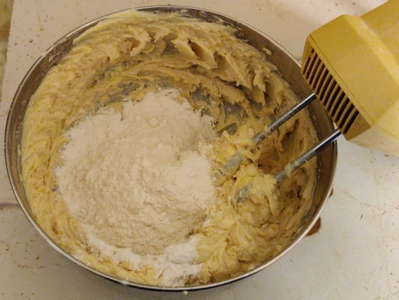
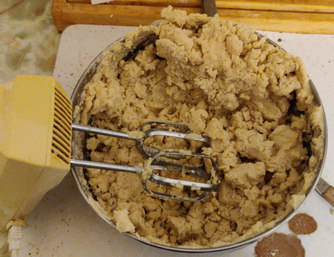
Here is the dough after all four cups of flour have been mixed in:

Dough after all the flour has been added and mixed together

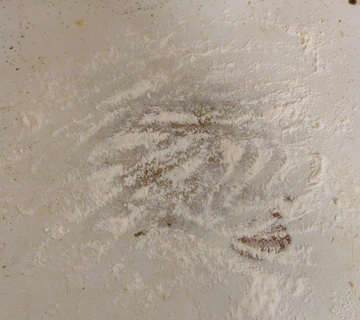
Next, flour was spread on the cutting board to avoid sticking:

Flour on the cutting board

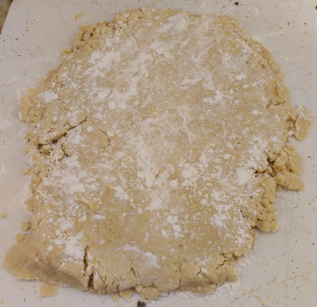
The dough was placed on the cutting board, floured a bit on top to avoid sticking, and flattened with my hands:

Dough on the cutting board, floured and flattened out by hand

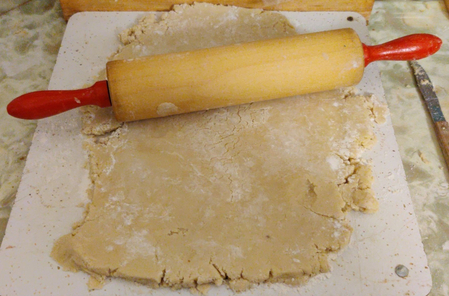
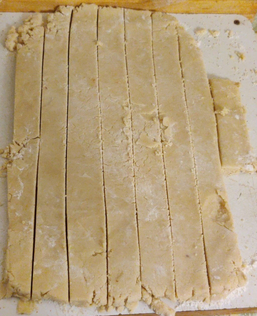
The dough was then further flattened out with a rolling pin.

Using a rolling pin to further flatten out the dough

The dough was then cut into strips about an inch wide, and ends were cut off.

Dough cut into roughly 1″ wide strips

I started to cut the strips into roughly two inch lengths.

2″ lengths of dough were cut

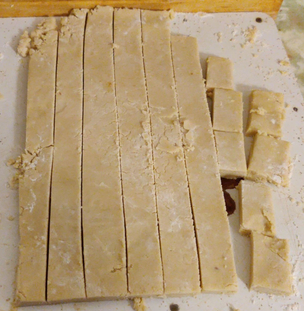
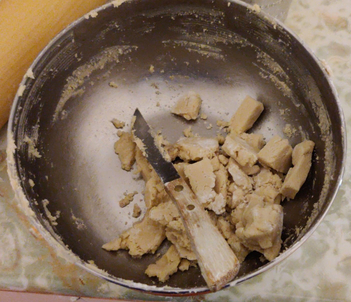
Cuttings from the edges and cookie pieces that broke were put back in the mixing bowl to be formed together again to cut more cookies.

Dough cuttings put back in the mixing bowl

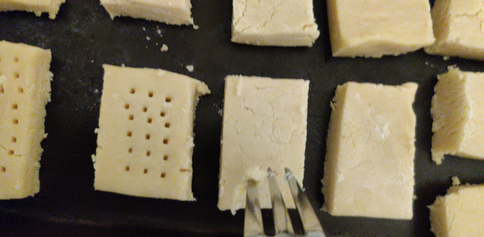
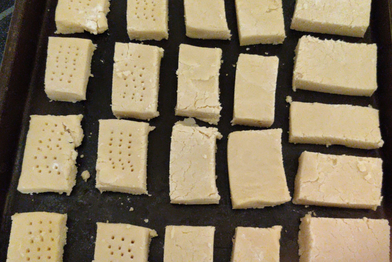
The rectangular cookies were placed on cookie sheets.

Cookie dough rectangles placed on baking sheets

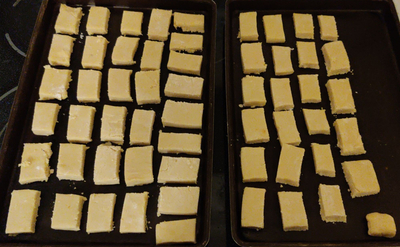
The cookies were then pricked with a fork. According to instruction #4 of the shortbread cookies recipe on the King Arthur Flour website (here’s my archive), it’s to allow steam to escape and avoid bubbling up of the cookies; to me it’s also been a matter of the traditions of the aesthetics of shortbread cookies; oh well, I do it because that’s how I was taught. 🙂

Pricking the cookies with a fork
Some of the cookies have been pricked.

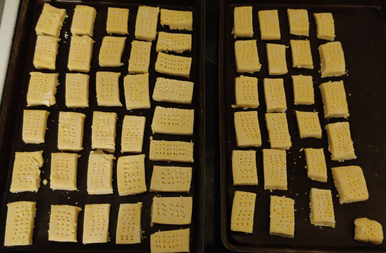
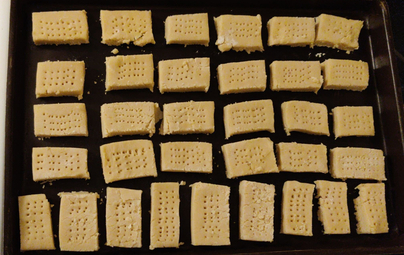
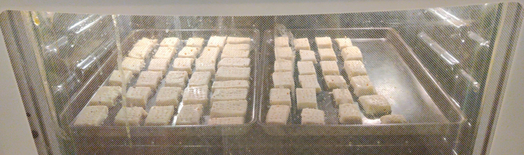
And here are all of my cookies, at the end of the pricking.

All of the cookies, pricked, ready to bake
Yet another closeup of the cookies, ready to bake

The cookies were placed in an oven preheated to 300F and baked for 22 minutes. This could vary somewhat based on your oven and the electrical load in your neighbourhood at the time you bake, but take them out when the bottoms just start to brown.

Shortbread cookies baking at 300F for 22 minutes

And here are the cookies, cooling on baking racks:

Baked cookies on cooling racks

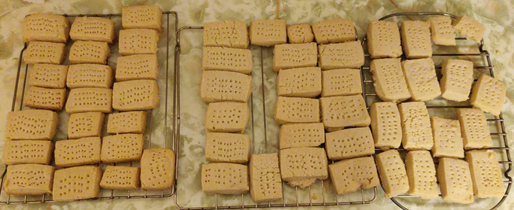
Yes, there is a broken cookie in the upper right hand corner, it broke when I took it off the baking tray. Anyway, I had to do a quality control test, you must understand … it was yummy!

The cookies are now bagged up carefully and the bags placed in a box, which was placed in the freezer until Christmas Day when they will be given to my brother as one of his gifts.

Cooking Beef Manicotti — Photos

A relatively long time ago, a neighbour brought over some stuffed pasta rolls au gratin, and they were rather tasty. I liked them so much that I decided to replicate them, and added the recipe to my repertoire of personal recipes.

I recently made a batch of my manicotti, and I took a lot of pictures.

First, I finely ground some carrots in a food processor:

Finely ground carrots

As a side note, I use carrots because I love carrots, and at the time it seemed perfectly natural to me add ground carrots to the filling mix.

I also add ground onions, which to me are also a natural pairing with the beef. The two ingredients extend the beef used in order to stuff more manicotti shells, or conversely, as tasty fillers, reduce the amount of ground beef required.

Then I ground some onions, effectively rendering them liquid:

Ground onions, at this point in near-liquid form

Ground beef was placed in an electric skillet:

Ground beef placed in an electric skillet

The ground carrots and ground onions were added to the beef in the electric skillet:

The mixture of beef, ground carrots, and ground onion placed in an electric skillet

The ground beef was broken up with a spatula, and mixed together with the ground carrots and ground onions.

Ground beef broken up and mixed together with the ground carrots and ground onions

The mixture was fried, while being constantly mixed:

The mixture of beef, ground carrots, and ground onion frying

At this point, I was getting a little thirsty, so I served myself some homebrew (an Irish Stout):

A serving of some of my homebrew, an Irish Stout

Next, some manicotti shells were taken out of their box:

Manicotti shells in the plastic trays from the box bought at a store.

The manicotti shells were then boiled, six at a time, in salted water with olive oil for five minutes:

Six manicotti shells in boiling water

The manicotti shells were then drained:

Manicotti shells in a strainer

At this point, I stuffed the manicotti shells, six at a time, with the cooked meat, carrot, and onion mixture, holding a cooling manicotti shell in one hand, while transferring the meat mixture using a small dessert spoon.

Unfortunately, I didn’t take a picture of me filling the shells — my hands were dirty and greasy, and I didn’t ask for a photographer’s helper. 🙁

At this point, I may have been getting a bit tipsy from my beer, so I drank some iced tea to help deal with the effects of the beer.

I drink lots and lots and lots of iced tea every day!

I stuffed a total of 22 manicotti shells. The stuffed manicotti shells were then placed in oven-proof and microwave-safe containers:

22 stuffed manicotti shells

Tomato sauce — in this case, a commercial beef and pork tomato sauce — was spread on top of the stuffed manicotti shells.

Tomato sauce spread on top of the manicotti

Mozzarella cheese was sliced off the block and laid on top of the manicotti.

Sliced mozzarella cheese laid on top of the manicotti

Freezer bags were identified with the intended contents and the date.

Freezer bags identified with contents and date

The manicotti containers were then placed in the bags, and then frozen.

Beef manicotti in freezer bags, ready to place in the freezer

When cooking, I defrost the manicotti, sometimes add a bit more cheese on top, start to reheat the manicotti in a microwave oven while preheating a countertop oven to 350F, and bake the manicotti until the cheese on the top is a desired level of browned and the sauce is bubbling up on the sides.

Are they tasty? Of course they are!

Major changes to how PHP requests are handled in Fedora 33

(This post has an update 20210203 at the bottom.)

I run the www.malak.ca website and this blog on an old reclaimed computer using Fedora Linux. I used to use CentOS because of its long term stability, and in fact I still have a computer running CentOS running at full capacity as a computational node for the World Community Grid.

I have used Fedora on my desktops since 2008, and on my website server since at least 2018.

I have found CentOS very stable but, through my brother, somewhat limiting as each given version ages. My brother provides invaluable technical support and often does the heavy lifting on my servers and computers when it comes to, well, technical support and setup, for which I am very grateful. He has humoured me over the years in my use of CentOS, but has been frustrated with CentOS for years given its upstream source’s conservative development cycle and the difficulty in maintaining such systems over time.

In the meantime, over the years while using Fedora, I typically use a version for roughly its full lifecycle of 12 to 13 months, and I normally skip a version in the process. Previous to somewhat recent experiences, I would perform a full new install every year from a downloaded image; I was acting on advice from the Fedora website, increasingly old and out of date each time I performed a reinstall, to not use the dnf upgrade function on the grounds that it wasn’t ready yet. This further gave me reason for the occasional use of CentOS and its long term stability on some computers, which I might want to not want to bother reformatting yearly, let alone reinstall software. However, while I was performing another fresh install from Fedora 27 to Fedora 29 in the fall of 2018, I observed a command line upgrade of a Fedora system, and was intrigued. In the fall of 2019, when upgrading from Fedora 29 to Fedora 31, I used the command line upgrade path instead. (Here’s my archive.) This resolved, at least in my mind, my longtime concerns about the short lifespan of Fedora.

Unfortunately, this proved to be a matter of famous last words, since it was merely a convenience for upgrading, something that could be easily done on a weekday evening, instead of setting aside a Saturday afternoon and a (wholly pleasant) visit with my brother.

My most recent upgrade cycle of my server, from Fedora 31 to Fedora 33, was in and of itself as easy as it was on my laptop, desktop, and another box earlier this year. However, it proved to be effectively fatal for my website, since the web server was showing error 503 for PHP requests on the blog. Apparently, a PHP handling module, mod_php, used on my website, was deprecated in favour of php-fpm (here’s my archive). A mixed technical and somewhat editorialized discussion on this is on my brother’s blog. (Here’s my archive.)

For me, this isn’t so much an opportunity to complain; as I said, my brother did the real work in performing another iteration of setting up my website in April, 2020, only to do it once more in November, 2020, for which I’m grateful, under a fresh, baremetal install (which I performed.) Instead, the second comment to come to mind — initially, privately, and tongue-in-cheek! — after my gratitude that he would do the job yet again, was that my brother at least got to hone his skills on “the new method”.

After that, a few other things came to mind. As such, risking being a back-seat gratuitous commentator on the process:

  • It occurs to me that Fedora, while an excellent desktop operating system, arguably has risks associated with it as a medium-term and long-term server, given its mission to showcase and test new technologies as they are introduced while “old” technologies are deprecated;
    • And, since CentOS (and RHEL) grow old long enough before their 10 year EOL, but Fedora’s approximately 13 month lifespan is too short, how long is ideal?
  • The actual process itself of upgrading Fedora versions remains smooth, polished, and easy;
  • Could the upgrade process itself have included:
    • At least a warning that certain major changes were literally about to occur or were occurring?
    • An opt-out option for some changes?
    • Or involve as possible actually upgrading settings and/or other setups such that a neutral net effect on existing functions is effected, ie. change things properly, not just literally changing things without regard to any possible detriment to functions?
    • Or, make changes, but in separate, neutered files, and a notification that some potential conflicting changes have been made, requiring attention?
  • With regards to general version upgrading of my server, I should do some research into the new technologies to be installed before upgrading, so as to prepare for any major changes, just as any sysadmin should when upgrading versions to another of any long-term distribution such as CentOS, RHEL, Debian, Ubuntu LTS versions, or any other such system.

20210203 Update: It would seem that another victim of the change toward php-fpm was an inability to use the WordPress upgrade tool when it was time to change to v.5.6. It seems that using some file ownership settings on my machine, which facilitated my administration of the website on a larger scale than just WordPress, was at issue, and how php-fpm handles files and the required permissions, vs. the way mpm-itk and php-cgi would handle similar tasks.

And, at the same time, it seems to me that an additional question is raised, following my musing of “And, since CentOS (and RHEL) grow old long enough before their 10 year EOL, but Fedora’s approximately 13 month lifespan is too short, how long is ideal?”: The literal answer may well lie in “well that depends on individual packages and how they evolve over time, especially regarding the “real world” and other pressures which may shape the project’s evolution”, meaning that things may change more swiftly than Fedora’s 13 month lifespan, and others may outlive RHEL / CentOS’ (at least old) lifespan of ten years.

Which leads to my asking: “How to deal with change management?” and “How to choose a distro, and deal with change in a selected platform which has gone in a different direction from decisions leading to its original choice?”