Yet another note to underline that WordPress on www.malak.ca has been updated, this time to version 6.9.4. And, when I was checking, I deleted 3,344 pending comments — I have long since stopped inspecting them 100 at a time for the possibility of a legitimate post; though I did notice that this time around, about 1,400 (presumably) spammy comments were lined up for my post on making Sour Cream Muffins! 🙂
New recipes:
Savoury Pork Custard: A recipe developed with — actually initially proposed by — ChatGPT to create a pork based dish that is very soft.
A Tiramisu-inspired Layer Cake: A recipe based off a “quick tiramisu” seen on a “30 minute meals” show, and reworked again with the help of ChatGPT. Tasty! (Optionally) Uses the loaf cake version of my Plain Cake. At this moment, the recipe is still an early draught along the lines of a “Release early, release often” model (here’s my archive).
Pulled Beef: Basically, beef cooked in the kitchen braising or stewed beef method. The first time I made it, it was a spot on recreation of what one would expect! (Adapted from my pulled pork recipe for beef, with … the help of ChatGPT.)
Updated recipes:
Pulled Pork: A recent addition, but listed as “updated” because I had already transferred this recipe to malak.ca/food several weeks ago. Pulled pork cooked in the kitchen braising method. This has become a recent favourite! The second time I brought it to a church dinner, it was sufficiently popular for it to be characterized as “Don’s Famous Pulled Pork” — much to my amusement, given that in those circles it is more my vegetable soup that would be characterized as “famous” when associated with me, while another parishioner’s pulled pork would best characterized as the “famous pulled pork” in those circles. 🙂
Vegetable Soup: Updated a couple of months ago; I don’t recall the latest updates.
I picked up making stewed rhubarb because my mom always liked using the rhubarb grown in her garden to make stewed rhubarb and rhubarb chutney. (Ironically, for this post, and often enough, I use rhubarb purchased from the grocery store!)
Note that this recipe effectively needs to be done over two days, or at least with a pause of several hours (roughly equivalent to a minimum of “overnight” ) between preparing the rhubarb, and beginning to stew the rhurbarb.
Note that I also am using the “packing in mason jars and heat-processing” method to preserve the stewed rhubarb, and to allow for the making of larger amounts of stewed rhubarb at once; once the heat-processed jars have cooled, the stewed rhubarb is ready to eat.
Making the Stewed Rhubarb:
Day one:
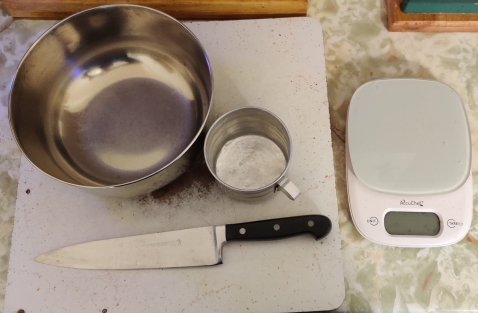
After buying some rhubarb at the grocery store, some mise-en-place was done by taking out a cutting board, a mixing bowl, a measuring cup, a kitchen knife, and a kitchen scale:
Cutting board, mixing bowl, measuring cup, kitchen knife, and kitchen scale taken out
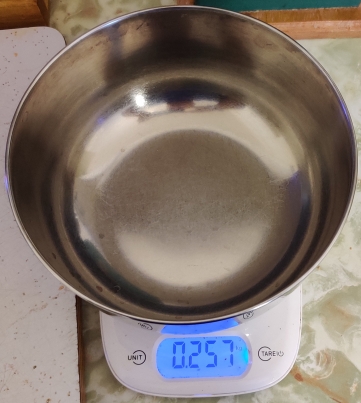
To avoid confusion a bit later on, the tare weight of the mixing bowl was measured and noted (instead of using the tare function on the kitchen scale):
Tare weight of bowl measured
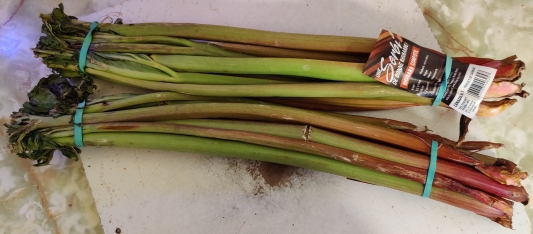
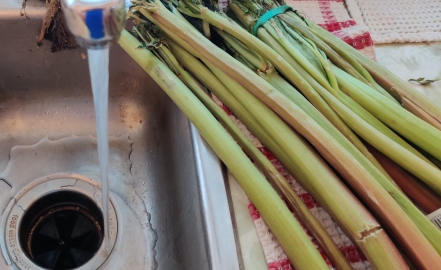
The rhubarb purchased earlier was taken out (yes, it is a bit shabby!)
Rhubarb taken out
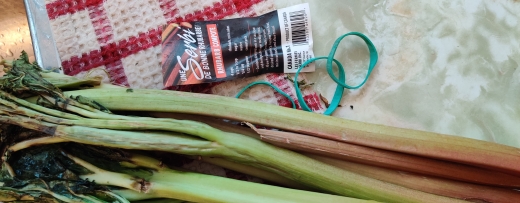
The elastics and labels were removed from the rhubarb bunches:
Elastics and labels removed
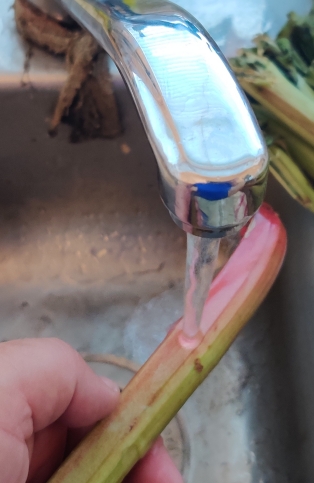
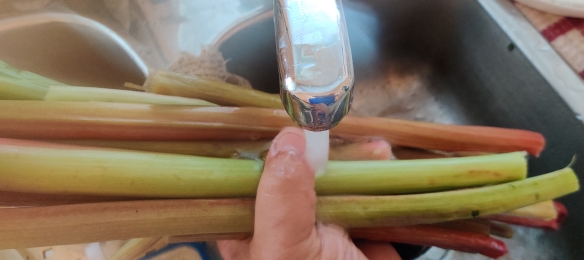
I began to wash and rinse the rhubarb:
Washing and rinsing rhubarb
Washing and rinsing rhubarb
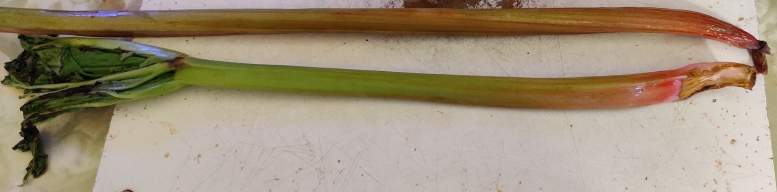
The rinsed rhubarb stalks were brought to the cutting board:
Rhubarb brought to cutting board
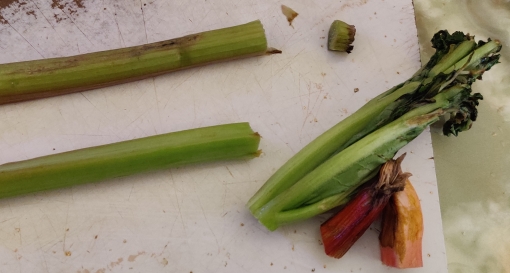
The rhubarb stalks were trimmed:
Trimming rhubarb stalks
Trimming rhubarb stalks
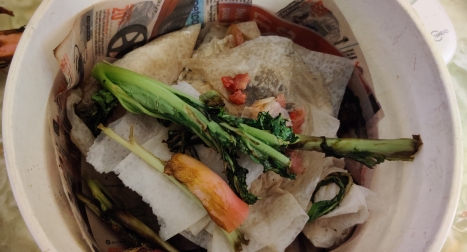
The trimmings were placed in a kitchen waste bucket for later disposal in a municipal composting programme:
Trimmings placed in bucket for composting
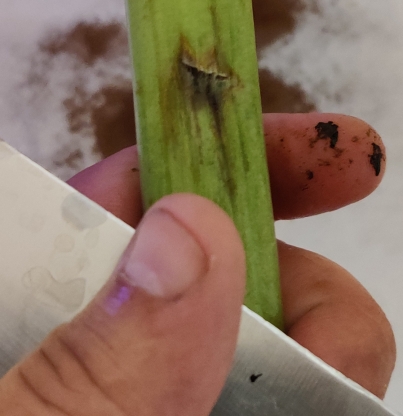
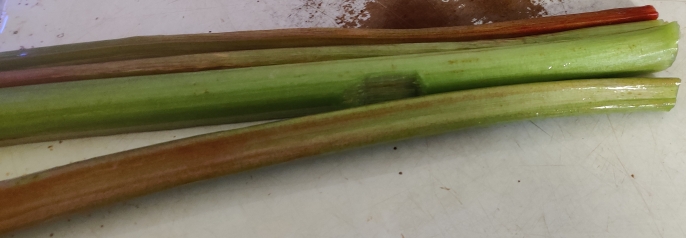
If the rhubarb isn’t completely fresh, or especially typical (in my experience) for commercial rhubarb purchased at the grocery store, sometimes there is some minor damage to the stalks to be removed:
Stalk damage to be removed
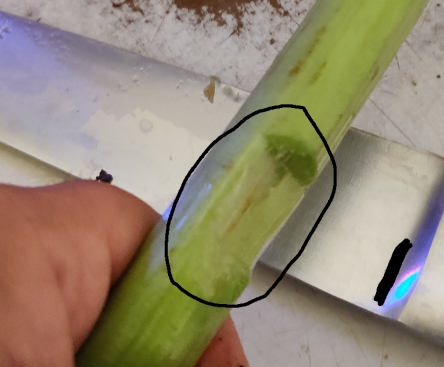
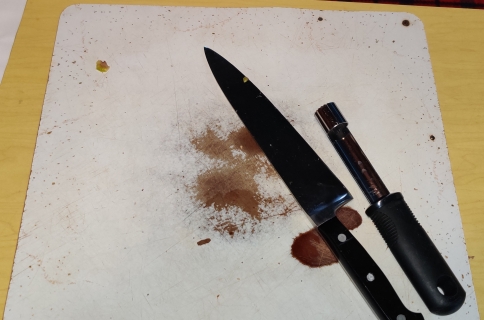
The stalk damage was removed (and while my name can be found on my — this — website in several places, I have blacked it out from my knife, on which I had inscribed my name years ago):
Stalk damage removed
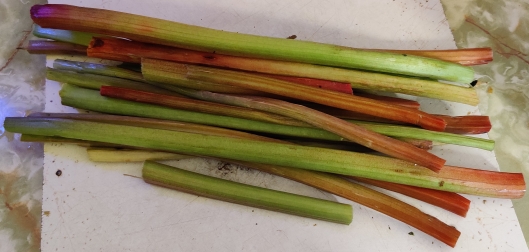
The trimmed rhubarb stalks were piled up …
Trimmed rhubarb
… and the rhubarb stalks were rinsed again to remove the last of the bits:
Rhubarb rinsed again
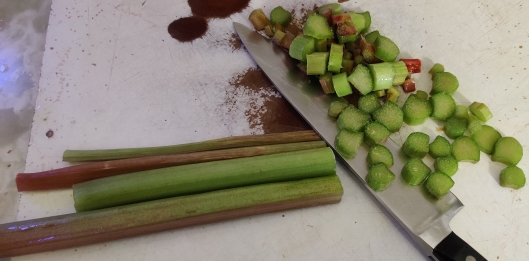
Some stalks were laid on the cutting board for chopping:
Rhubarb laid out for chopping
The rhubarb stalks were chopped using a slicing motion against the grain:
Rhubarb chopped
As chopped rhubarb started piling up on the chopping board, it was transferred to the mixing bowl:
Chopped rhubarb transferred to mixing bowl
The rest of the rhubarb was chopped, and transferred to the mixing bowl as it was produced:
Chopped rhubarb transferred to mixing bowl
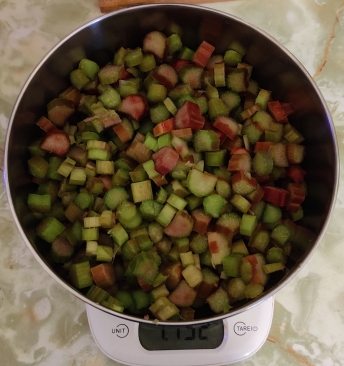
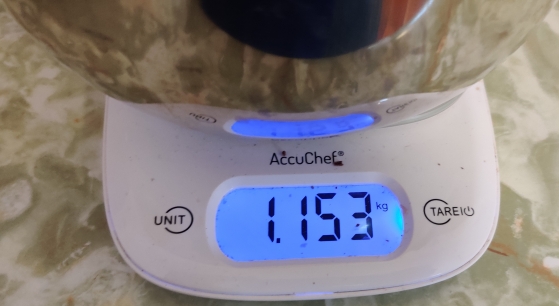
The bowl of chopped rhubarb was placed on the kitchen scale and weighed:
Chopped rhubarb weighed
The weight was noted, to be used in a moment:
Chopped rhubarb weighed
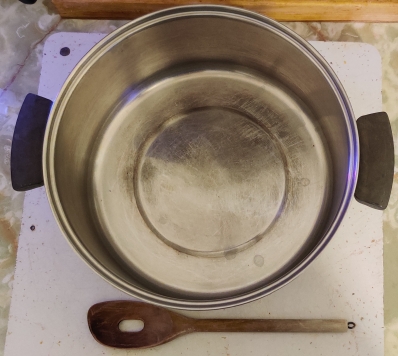
A large pot and wooden mixing spoon were taken out:
Pot and wooden spoon taken out
The chopped rhubarb was transferred to the pot:
Chopped rhubarb transferred to pot
Chopped rhubarb transferred to pot
A calculator app was started, and the net weight of chopped rhubarb was calculated by subtracting the bowl tare weight from the weight of the bowl filled with the chopped rhubarb:
Net weight of chopped rhubarb calculated
Since my recipe is based on the Imperial system, the weight of 0.895kg (above) was converted to pounds, giving a result just barely shy of two pounds of chopped rhubarb:
Rhubarb weight converted to pounds
Next, a multiplication factor for how many “recipe units” was calculated by dividing the weight of the chopped rhubarb by the base amount of three quarters of a pound:
Multiplication factor calculated
The multiplication factor was multiplied by the required amount of sugar and lemon juice for per “recipe unit” of 3/4 lb of chopped rhubarb: Half a cup of sugar, and half an ounce of lemon juice, resulting in 1-1/3 cups of sugar, and 1-1/3 ounces of lemon juice:
Multiplication factor applied to sugar and lemon juice required
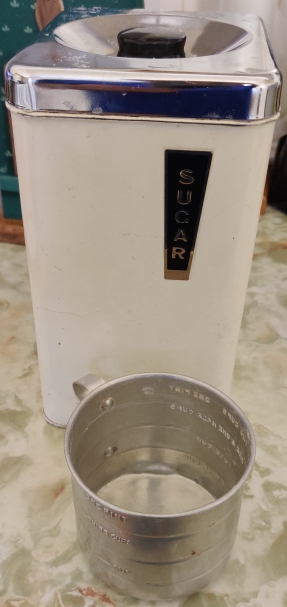
Sugar and a measuring cup were taken out:
Sugar and measuring cup taken out
Measures on measuring cup
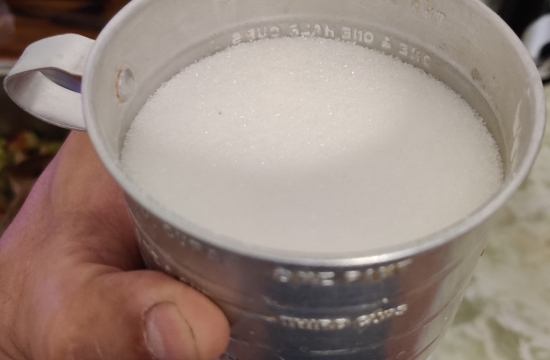
Sugar was measured out:
Sugar measured out
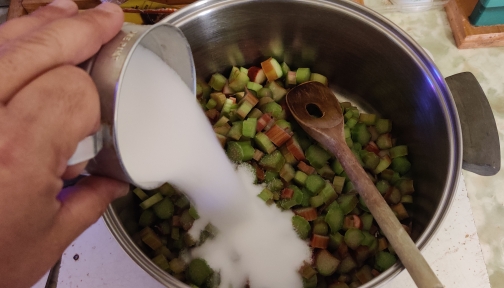
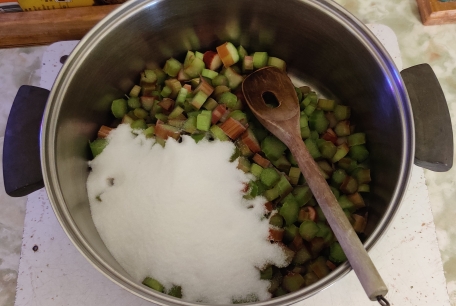
The sugar was poured onto the chopped rhubarb:
Sugar poured into pot of chopped rhubarb
Sugar poured into pot of chopped rhubarb
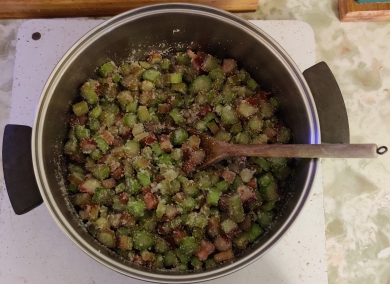
The chopped rhubarb and sugar were mixed with the wooden spoon:
Chopped rhubarb and sugar mixed
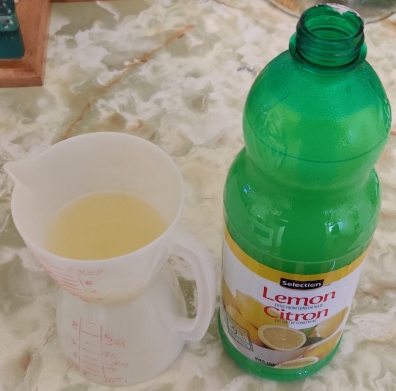
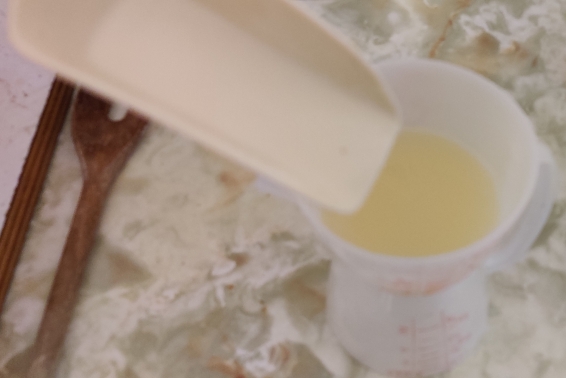
Lemon juice was measured out:
Lemon juice measured out
Extra sugar was added to the lemon juice:
Extra sugar added to lemon juice
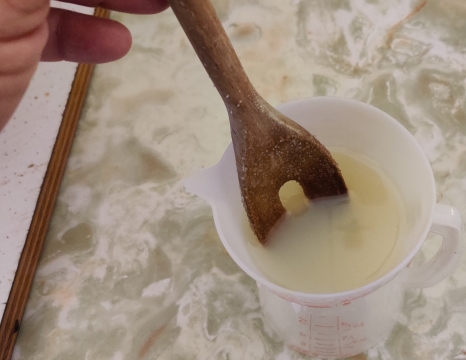
The lemon juice and extra sugar were mixed:
Lemon juice and extra sugar mixed
The lemon juice and sugar mix were added to the chopped rhubarb and sugar:
Lemon juice and sugar added to chopped rhubarb and sugar
The chopped rhubarb, sugar, and lemon juice were mixed some more:
Chopped rhubarb, sugar, and lemon juice mixed
Chopped rhubarb, sugar, and lemon juice mixed
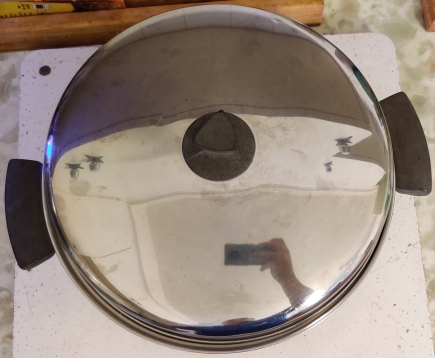
A lid was placed on the pot of rhubarb, sugar, and lemon juice:
Lid placed on pot of chopped rhubarb mix
The pot of chopped rhubarb, sugar, and lemon juice was placed in a fridge overnight:
Pot of chopped rhubarb mix placed in fridge
Day two:
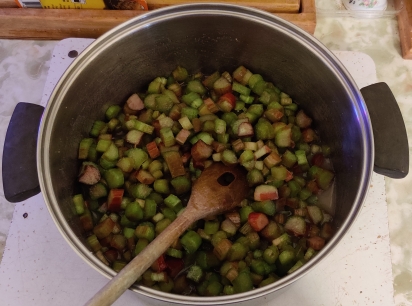
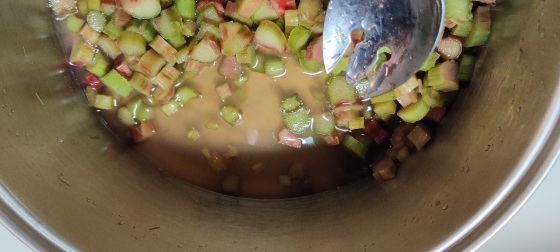
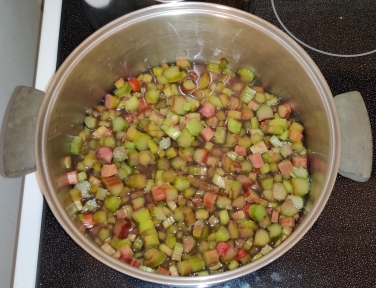
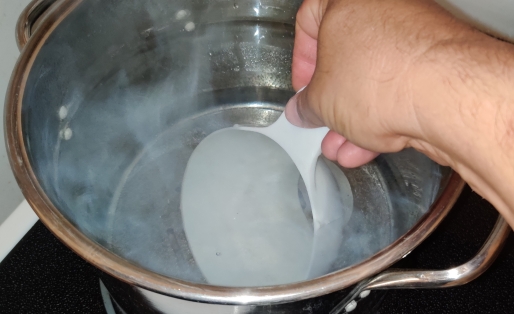
Early the next morning, I checked on the pot of chopped rhubarb:
Pot of chopped rhubarb checked
As can be sort of be seen above and better in the following photo, a good amount of liquid had been drawn by the sugar from the pieces of chopped rhubarb:
Liquid drawn from chopped rhubarb
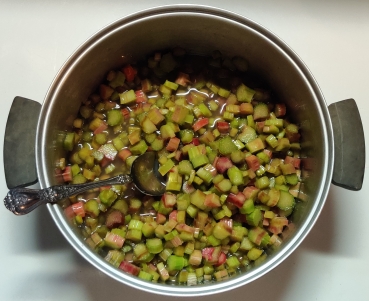
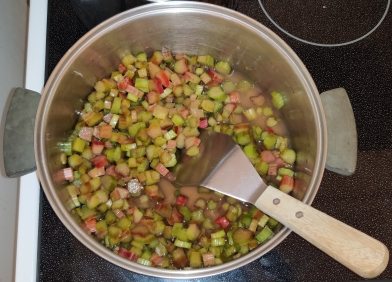
The chopped rhubarb was mixed again with a spoon:
Chopped rhubarb mixed
The pot of chopped rhubarb was returned to the fridge until later that evening (after coming home from work.)
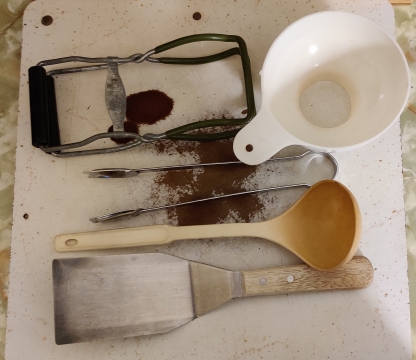
That evening, a jar wrench, a jar funnel, tongs, a ladle, and a stainless steel flipper were taken out:
Jar wrench, jar funnel, tongs, ladle, and stainless steel flipper taken out
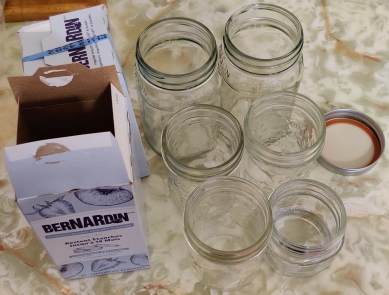
Mason jars, a few more than I expected to need, and new lids and lid rings, were taken out, but kept aside for the moment:
Mason jars and lids taken out
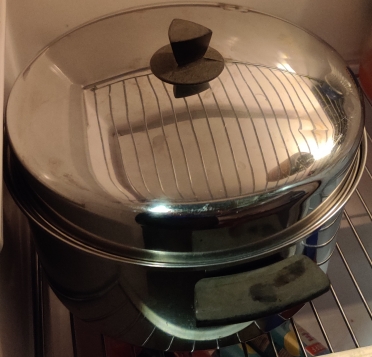
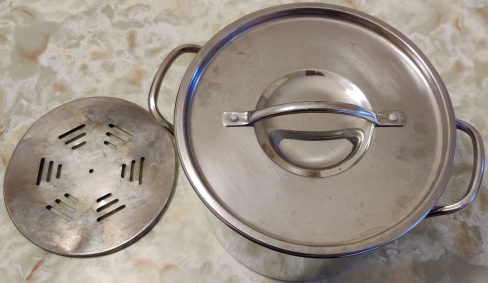
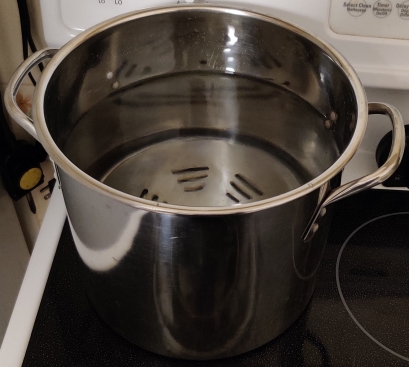
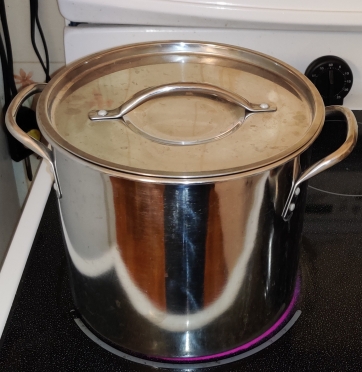
A pot and trivet were taken out, to act as a boiling water bath soon:
Pot and trivet taken out
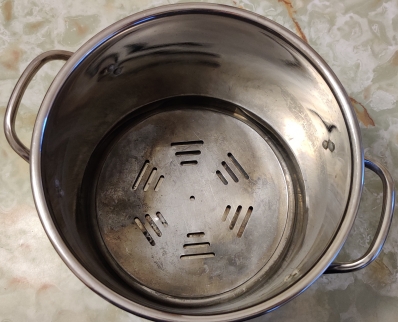
The trivet was placed in the bottom of the pot:
Trivet placed in pot
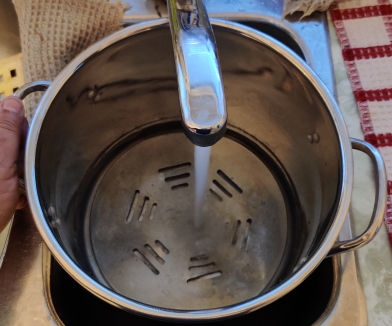
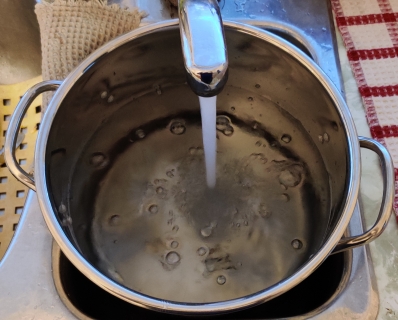
The pot was filled with water:
Pot filled with water
Pot filled with water
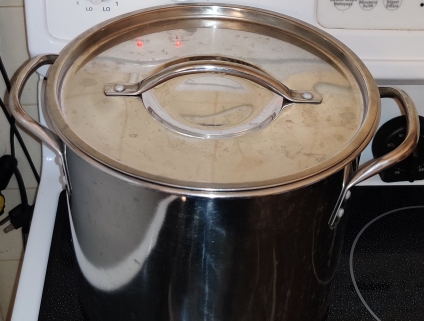
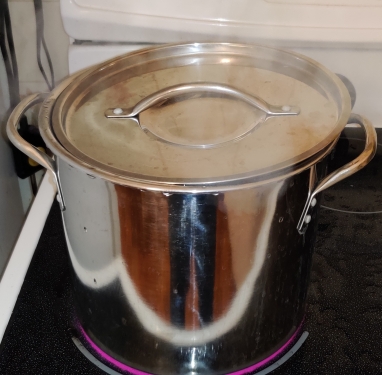
The pot of water was placed on a burner on the stove:
Pot of water placed on stove
The stove was turned on:
… and the lid was placed back on the pot:
Lid placed on pot of water
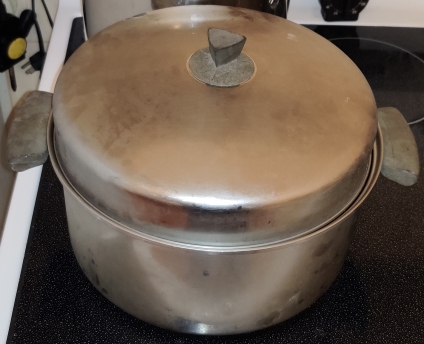
Since I had placed the pot of water on a smaller burner, which proved to be a mistake, I still waited a bit before taking out the pot of chopped rhubarb, sugar, and lemon juice, and placing it on the stove:
Pot of Rhubarb, sugar, and lemon juice placed on stove
After waiting a bit more, having gauged the heating up of the pot of water, the burner under the chopped rhubarb mix was turned on:
Burner under chopped rhubarb mix turned on
The lid on the pot of chopped rhubarb mix was removed:
Lid removed from pot of rhubarb mix
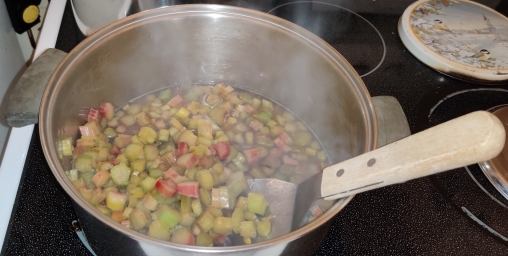
As the rhubarb mix was heating up, I of course mixed it to avoid burning:
Rhubarb mix being mixed while heating
Rhubarb mix being mixed while heating
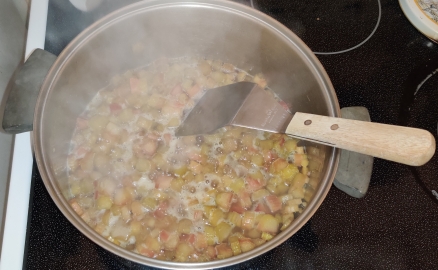
The rhubarb mix began to boil:
Rhubarb mix beginning to boil
At this point, the rhubarb mix was taken off the burner, and since the water bath had not yet reached the boiling point, I brought it forward to the larger burner to bring it to a boil more quickly:
Water bath brought forward to larger burner on stove
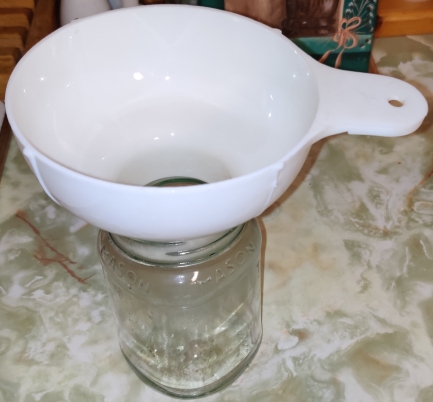
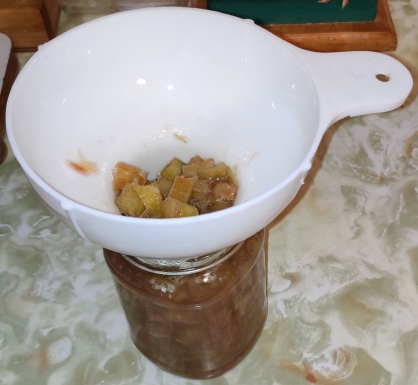
Fortunately, it was obvious that the water bath was “hot enough” to dip the (clean) bottle funnel to sanitize it:
Sanitizing bottle funnel
The bottle funnel was placed in the neck of a jar:
Jar funnel placed in neck of jar
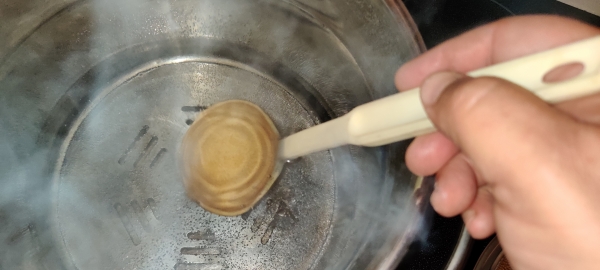
The ladle was dipped in the hot water to sanitize it:
Ladle sanitized
I started ladling the boiled rhubarb mix into the jar until it was filled:
Ladling boiled rhubarb mix into jar
Jar filled
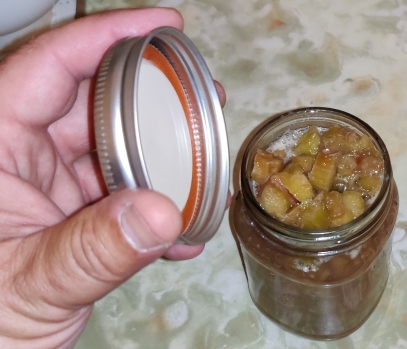
A lid and ring were brought to the jar, and screwed onto the jar (oops, I forgot to take a picture of this second part):
Lid brought to filled jar and screwed on
The rest of the boiled rhubarb mix was transferred into jars, and lids were screwed onto the jars:
Filled jars with lids screwed on
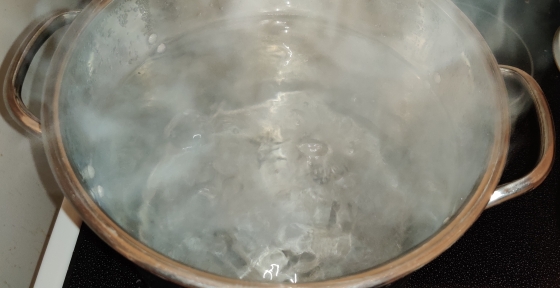
At this point, the water in the water bath was finally starting to boil:
Water bath starting to boil
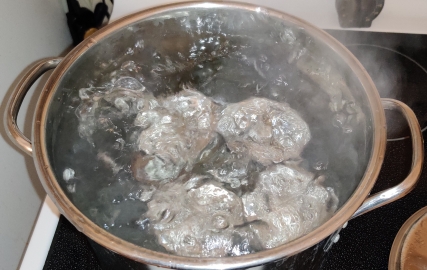
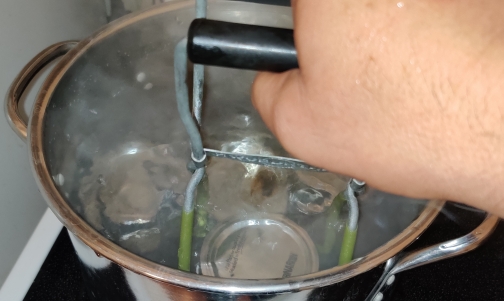
Using the jar wrench, the filled jars were transferred to the water bath:
Filled jars transferred to water bath
Filled jars transferred to water bath
Once the water had come to a rolling boil …
Water bath coming to a rolling boil
… a timer was set to 15 minutes …
Timer set to 15 minutes
… and the lid was placed back on the pot with the water bath and filled jars:
Lid placed on water bath
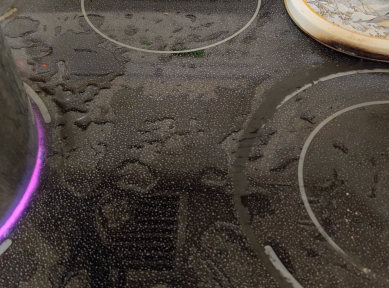
At this point, the water was boiling so vigorously, that water was splashing out of the pot!
Water splashing out of boiling water bath onto stovetop
After 15 minutes had elapsed, the filled jars were removed from the water bath using the jar wrench:
Removing filled jars with jar wrench
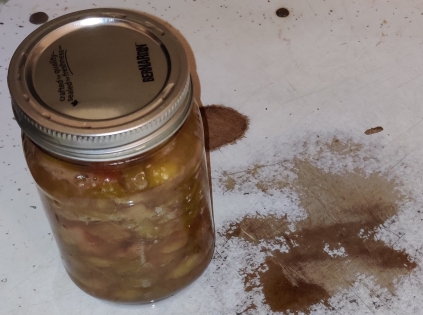
The now heat-processed jars were placed on the the cutting board:
Heat-processed jar placed on cutting board
Heat-processed jars placed on cutting board
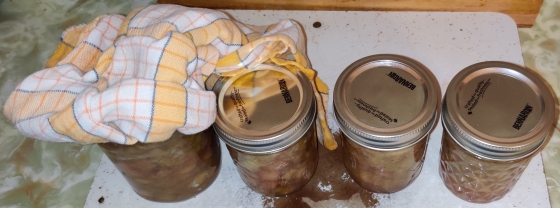
Hot water collecting on the jars was soaked up with a towel:
Water on jars soaked up with towel
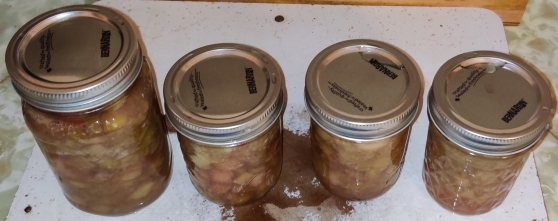
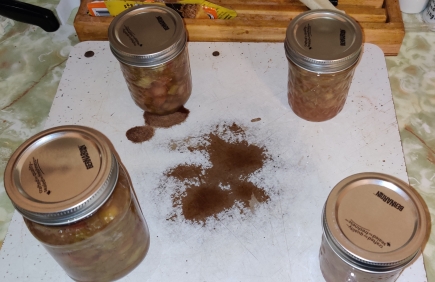
The jars were moved apart from each other to allow for some ambient cooling for a few moments:
Jars separated to facilitate ambient cooling
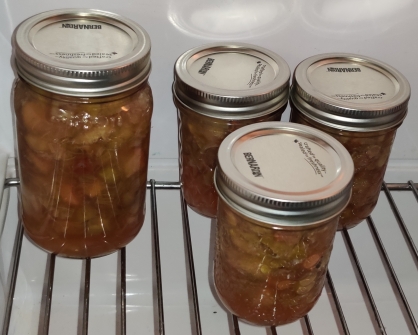
Then, the still-warm jars were moved to a fridge to complete cooling.
Jars moved to fridge
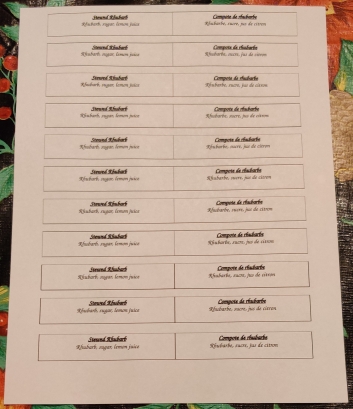
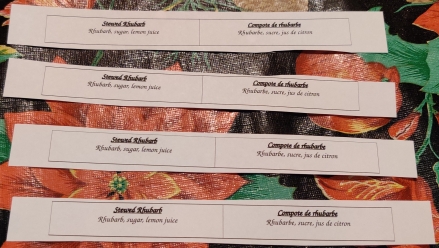
At this point, I changed tack a bit and printed out some labels for the jars, modifying another label template I have for my pickled eggs:
Printed labels for jars of stewed rhubarb
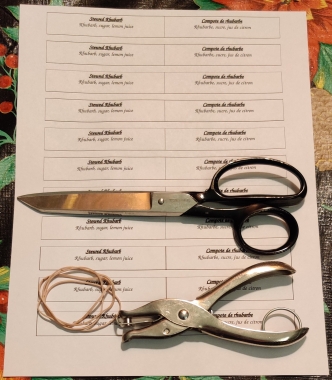
Scissors, a hole punch, and some elastics were taken out:
Scissors, hole punch, and elastics taken out
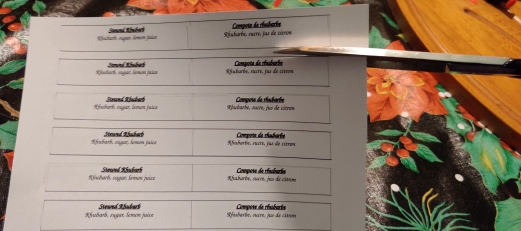
Four labels were cut from the sheet:
Label cut from sheet
Label cut from sheet
Labels cut from sheet
A date code (in this case for 09 August, 2023, the day I filled and processed the jars) was written on the back / inside of each label:
Date code written on backside of label
Date code written on backside of labels
The labels were folded over onto themselves:
Label folded over on itself
Label folded over on themselves
I should note at this point at which the print is more legible, that I live in Montreal, where French predominates, hence the labels are in both English and French. As it happened in the picture above, the folded labels with the English showing were upside down because that’s how I inadvertently happened to flip them over. 🙂
I then picked up the labels, piled them one on another, and crimped the folds:
Labels brought together and folds crimped
A hole was punched through the labels on the end opposite to the fold:
Hole punched through labels
Hole punched through labels
On each individual label, the end near the hole was folded over:
End near hole folded over
Ends near holes folded over
Ah here, the English labels are right side up. 🙂
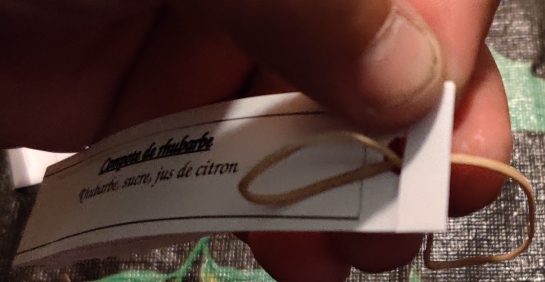
An elastic was threaded through the hole of a label:
Elastic threaded through hole in label
The elastic was looped into itself, and loosely tightened to allow for it to at once hold the label, as well as have a loop to use to go around a jar’s neck:
Elastic looped into itself
… which was repeated for the other three labels:
Elastics looped into themselves
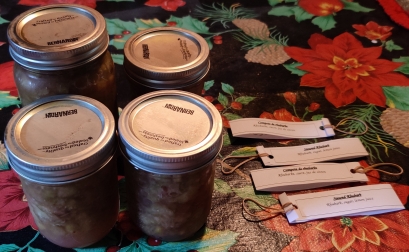
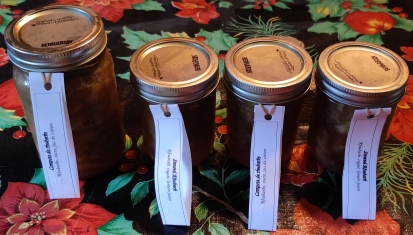
The following morning, the cooled (and fully sealed) jars were removed from the fridge, and brought to the workspace where the labels were:
Cooled bottles brought out
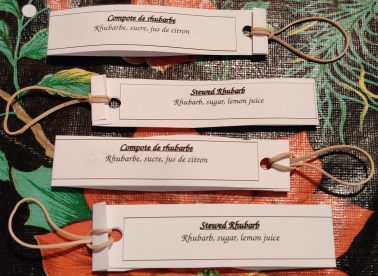
Labels were looped around the jars:
Label looped around jar
Labels looped around jars
These jars will be kept to be donated to my church’s fall fair, along with a few jars of my pickled eggs! (And, Mom will receive any which don’t sell. 🙂 )
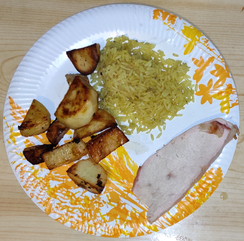
This post is a bit of a gratuitous post to pass the time during my holidays, while showing a bit how I leverage freezers as useful tools for day to day cooking and eating, and highlight how, beyond the strictly obvious (or conversely, as an example of the obvious, whichever you prefer 🙂 ), my cooking efforts actually do fit into and serve everyday life — literally!
Yes, the breakfast shown at the end of this post is a very typical daily breakfast for me these days, barring the days, often on weekends or holidays, when I might choose to make other breakfast foods from my collection of recipes (or of course, something else completely.)
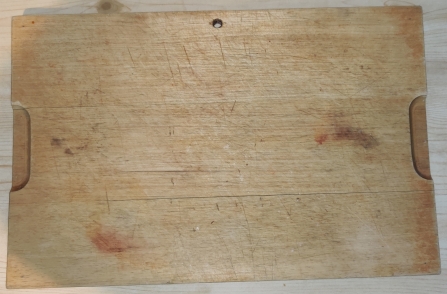
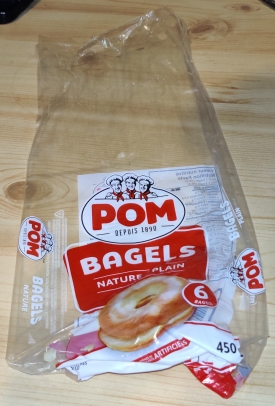
After coming home from the store and having bought bagels and a cream cheese spread flavoured with “herbs” and roasted garlic, I took out a cutting board:
Cutting board taken out
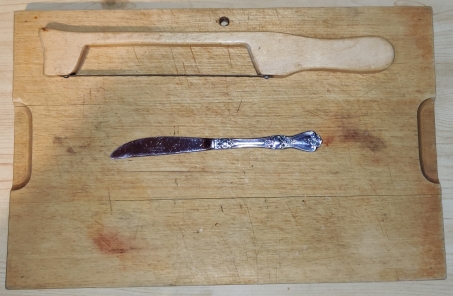
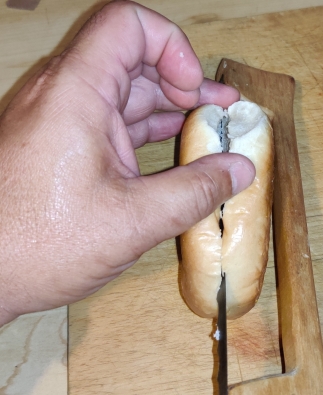
A bagel slicer, basically a serrated edge attached to a wooden guide, and a table knife, were taken out:
Bagel slicer and knife taken out
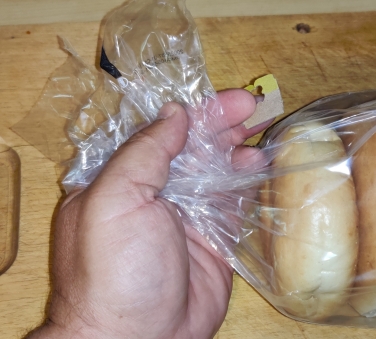
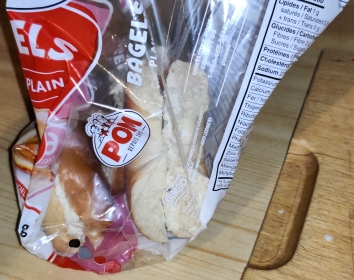
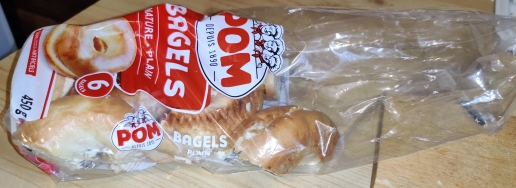
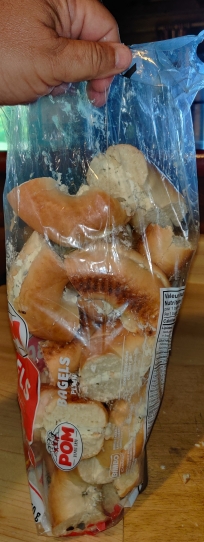
A bag of commercially produced bagels, purchased earlier in the day, was taken out:
Bag of bagels taken out
The bag clip was taken off the bag in order to open the bag of bagels:
Bag clip removed from bag
The bagels were taken out of the bag:
Bagels taken out of bag
The empty bag was kept and put aside:
Bag kept and put aside
A bagel was sliced (be careful, some industrially produced bagels may be partly pre-sliced):
Bagel being sliced
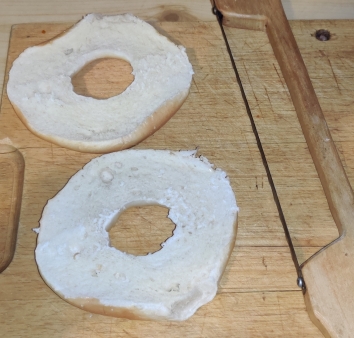
Sliced bagel
… and the rest of the bagels were sliced:
Bagels sliced
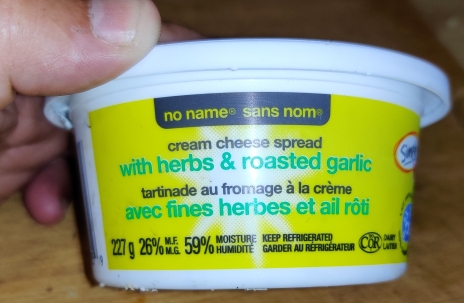
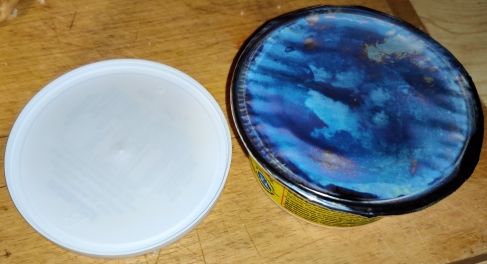
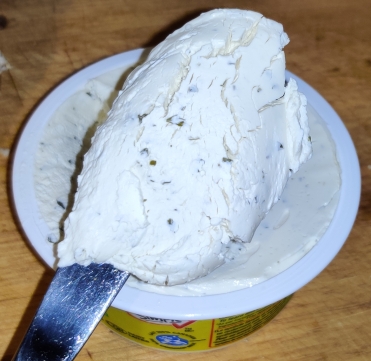
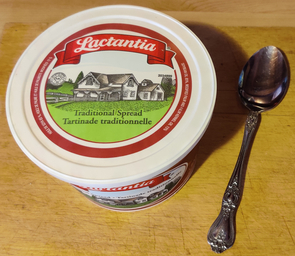
A 227g (8oz) container of a commercially prepared cream cheese spread, in this case flavoured with “herbs” and roasted garlic, purchased earlier in the day, was taken out:
Flavoured cream cheese spread taken out
The lid was removed from the cream cheese container …
Plastic seal to be removed from container
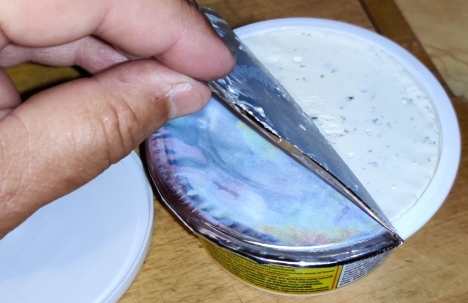
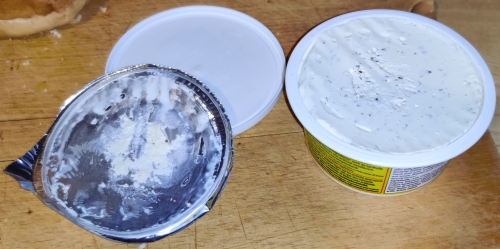
… and the plastic seal was also removed from the container:
Plastic seal removed from container
Plastic seal removed from container
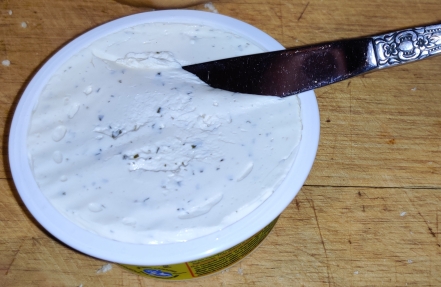
The knife was used to pick up some of the cream cheese:
Picking up cream cheese with knife
Cream cheese picked up with knife
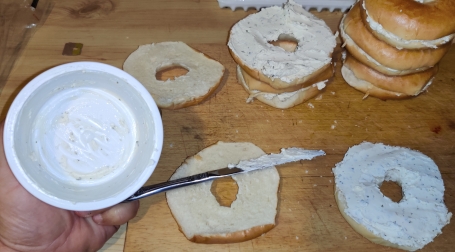
A couple of bagel halves were placed on the cutting board, and the knife holding the cream cheese was brought to them …
Cream cheese brought to bagel halves
… and cream cheese was spread on one of the bagel halves:
Cream cheese spread on bagel half
Cream cheese spread on bagel half
The two bagel halves were put back together:
Bagel halves joined back together
Bagel halves joined back together
Cream cheese was spread on a few more bagels, and after spreading cream cheese on half of the bagels, the container was about half empty:
I continued to spread cream cheese on the rest of the bagels; I scraped the last of the cream cheese out of the container, and I spread the last of the cream cheese onto the last of the six bagels:
Scraping the last of the cream cheese from the bottom of the container and spread onto last bagel
At this point, all six bagels were filled with cream cheese:
Bagels filled with cream cheese
At this point, a clean knife was taken out, and a bagel was cut at a single point:
… and then the bagel was cut in two other places, resulting in three pieces:
The bagel pieces were placed back in the bag:
Piece of bagel placed in bag
Three bagel pieces placed in bag
… and as I continued cutting up the rest of the bagels, I placed the bagel pieces in the bag:
Half the bagel pieces in the bag
… until all the bagel pieces were in the bag:
All bagel pieces in bag
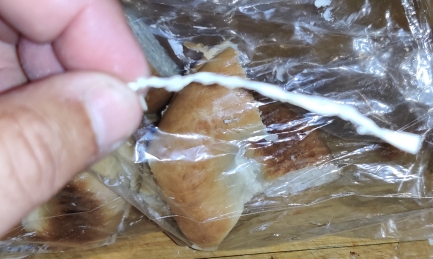
A tie wrap was taken out:
Tie wrap taken out
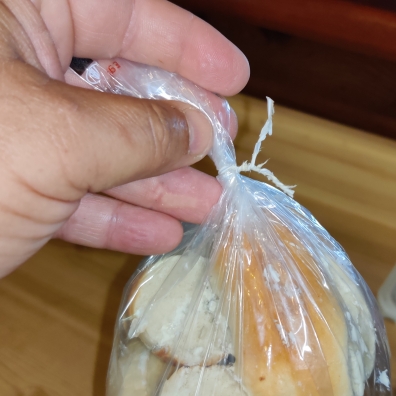
The tie wrap was used to seal up the bag again:
Bag sealed with tie wrap
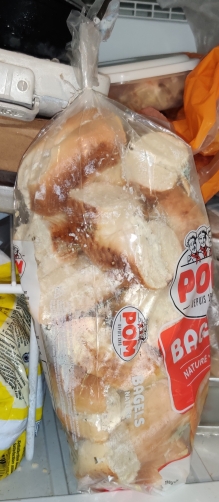
The bag of bagel and cream cheese pieces was placed in the freezer:
Bag of bagel and cream cheese pieces placed in freezer
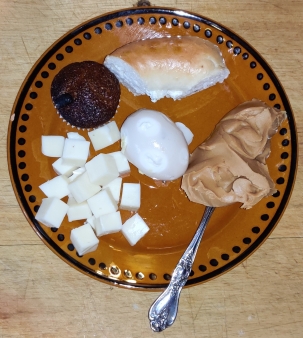
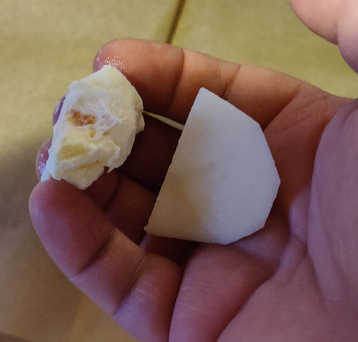
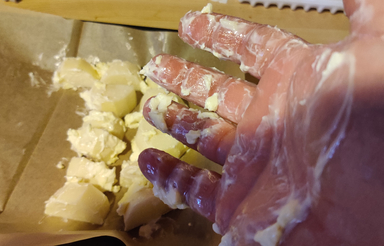
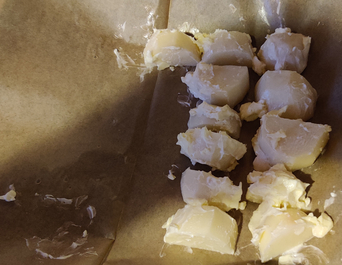
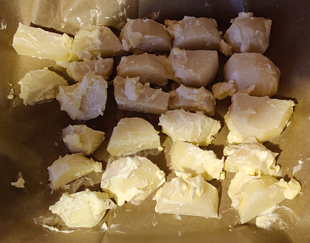
The next morning, I took out a bagel and cream cheese bite, and defrosted it along with a mini raisin bran muffin, made earlier in the week using my mom’s bran muffin recipe, a pickled egg, some cheese, and some peanut butter scooped from the jar:
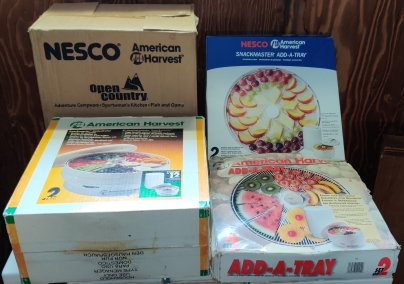
I bought a food dehydrator in early 1997 while I was still involved as an adult member in Scouting, and began by drying (mostly) various fruits for Scout Troop camping trips; Troop members were eager to test out the results of my efforts. While I am no longer involved in Scouting, I have continued drying fruits; I quickly decided that my favourite by far was dried pineapple, which comes out like candy to me.
A short overview of my very early experiences with drying food, from a Scouting perspective, is at what would have been a blog back in the late 1990’s before blogs were a thing at https://www.malak.ca/super.html#dried.
Drying the pineapples:
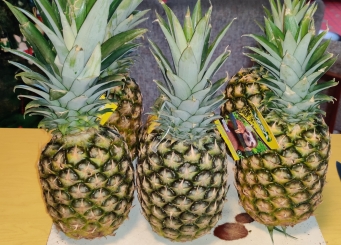
I keep an eye out for sales on pineapples, and brought home six pineapples last week:
Six pineapples (one is on its side)
I brought my cutting board, knife, and corer down to the bar area downstairs, where I normally do my fruit drying:
Cutting board, knife, and corer taken out
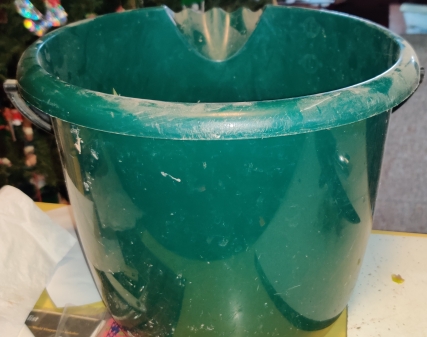
A bucket for the compostable trimmings was also set out:
Bucket for compostable trimmings taken out
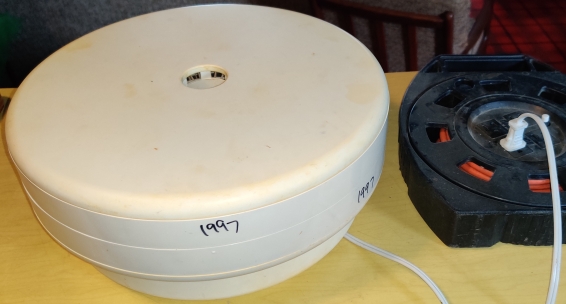
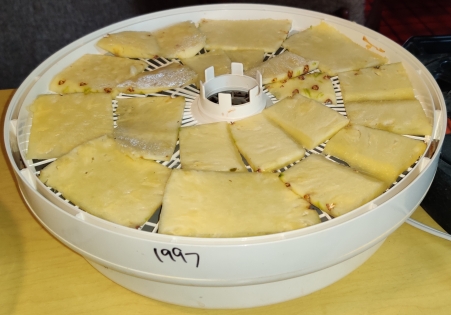
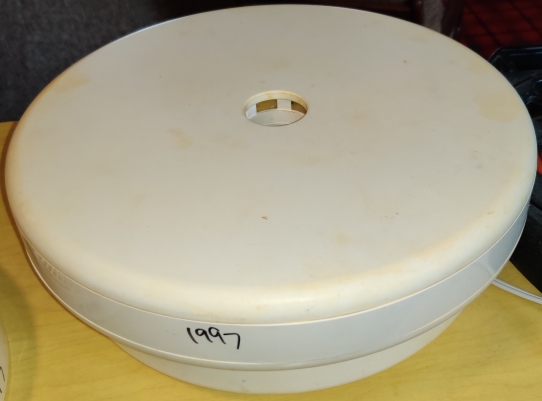
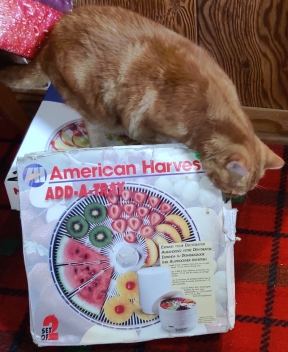
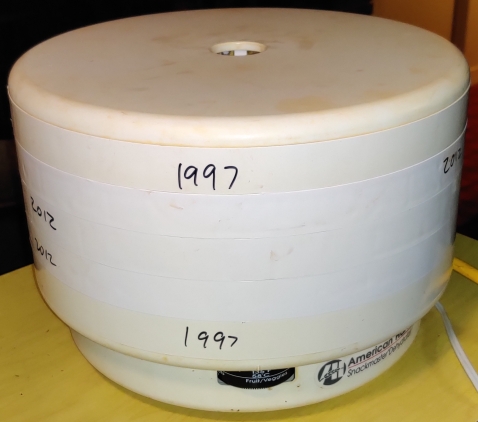
My food dehydrator was of course taken out, with all its extra trays …
Food dehydrator and trays taken out
… and the unit was plugged into an extension cord caddy that was plugged into an outlet in an adjoining room, since the bar has an old outlet that doesn’t accept polarized plugs:
Food dehydrator plugged in
The food dehydrator was set to 135F for drying fruits and vegetables:
Food dehydrator temperature set
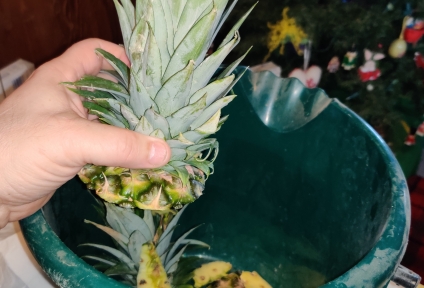
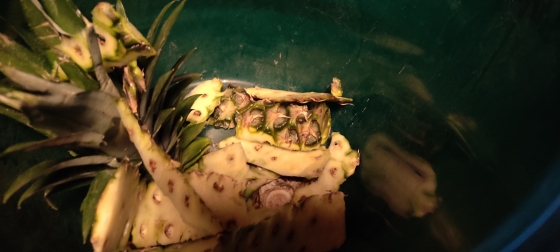
Now to the pineapples: The labels and their plastic tags were removed from the pineapples:
Labels removed from pineapples
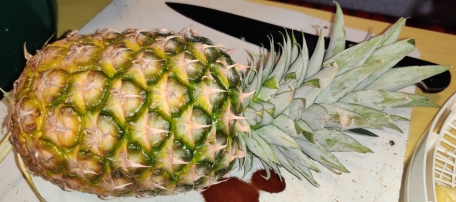
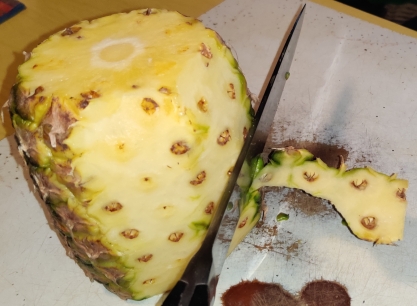
A pineapple was placed on its side in order to trim off the top:
Pineapple placed on its side
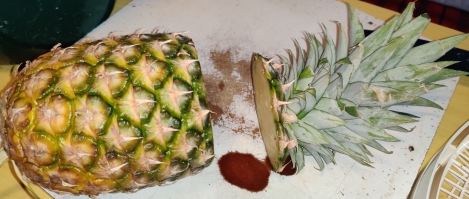
The top of the pineapple was sliced off:
Top of pineapple sliced off
Top of pineapple sliced off
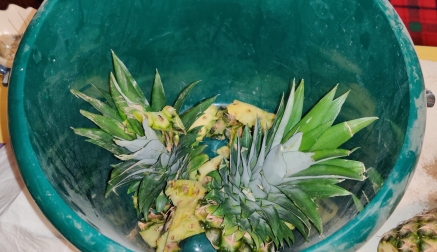
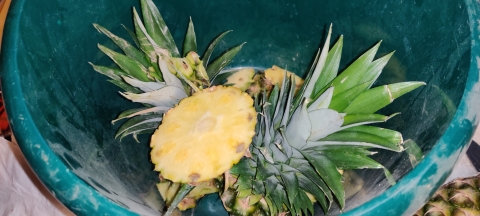
The top of the pineapple was placed in the scraps bucket:
Top of pineapple placed in scraps bucket
Pineapple tops in scraps bucket
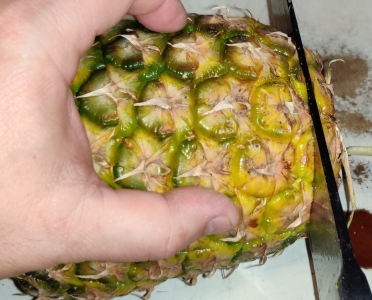
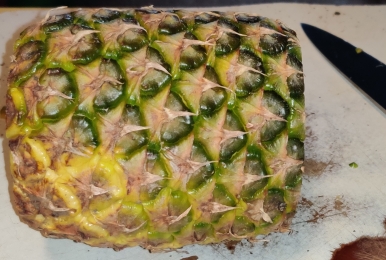
The pineapple was rotated so as to slice off the bottom:
Bottom sliced off pineapple
Bottom sliced off pineapple
The bottom of the pineapple was placed in the scraps bucket:
Pineapple bottom placed in scraps bucket
Pineapple bottom placed in scraps bucket
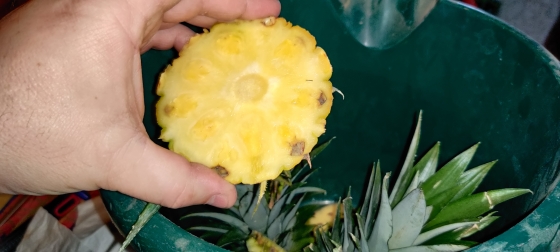
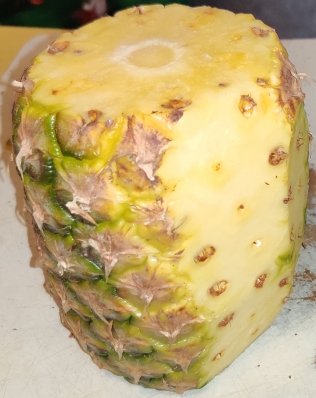
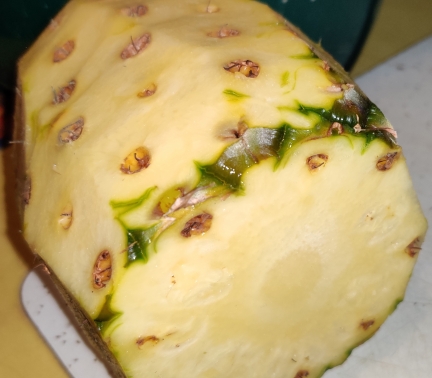
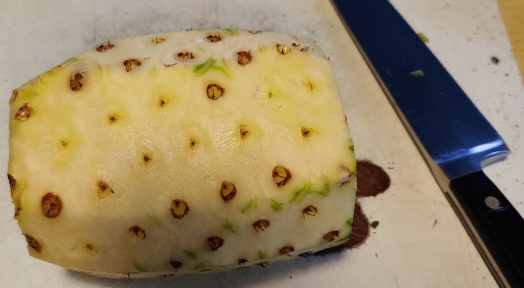
The pineapple is now ready for the rest of the trimming:
Pineapple ready for trimming
I started trimming the skin off the pineapple:
Trimming the skin off the pineapple
Trimming the skin off the pineapple
As part of trimming the skin off the pineapple, sometimes the bottoms have to be trimmed too because of the somewhat rounded shape of pineapples, making it tricky sometimes to trim off the skin in full slices:
Bottoms to be trimmed as well
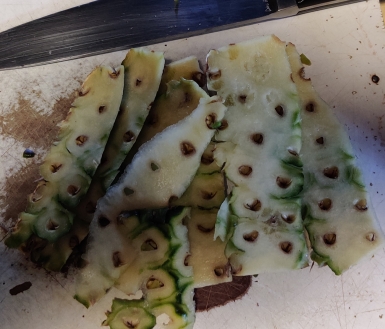
The trimmed pineapple skins …
Trimmed pineapple skins
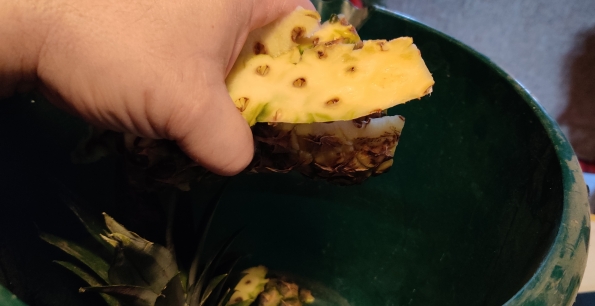
… were placed in the scraps bucket:
Pineapple skins placed in scraps bucket
Pineapple skins placed in scraps bucket
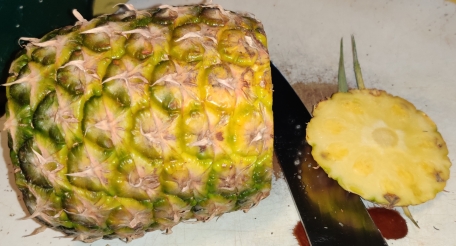
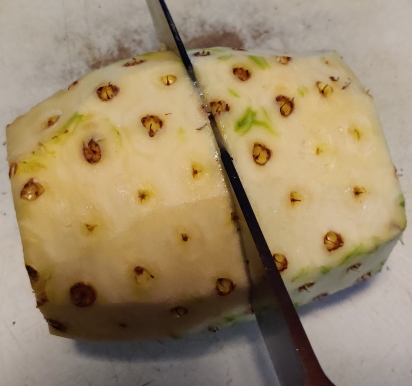
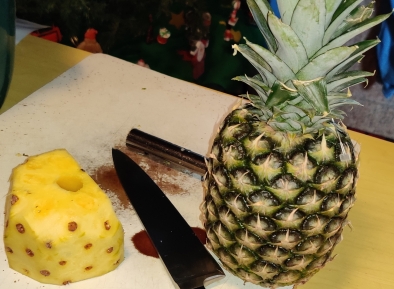
The trimmed pineapple was again placed on its side …
Pineapple placed on its side
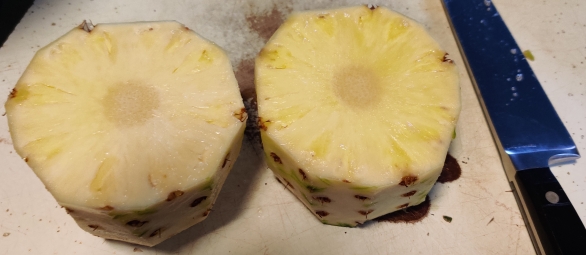
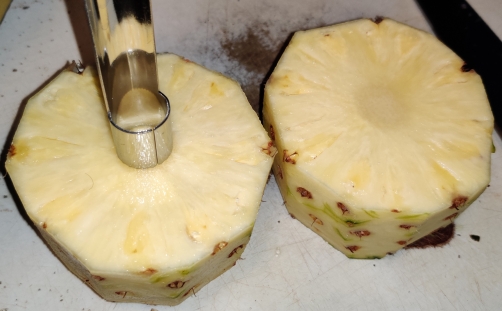
… and sliced into two halves roughly at its centre, essentially to accommodate the length of my corer, although the resulting slices tend to be of a convenient size as well:
Pineapple cut in half
Two pineapple halves
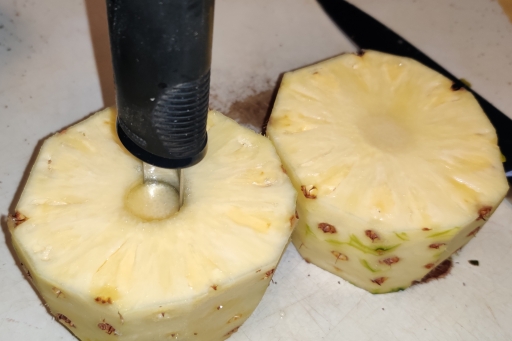
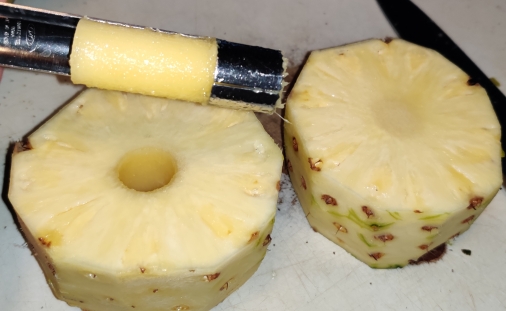
An apple corer was used to remove the pineapple cores:
Coring half of a pineapple
Coring half of a pineapple
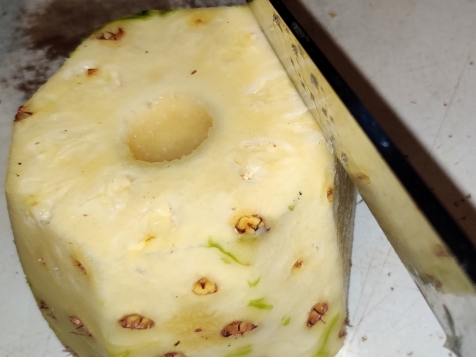
Cored pineapple half
I began slicing pieces off the cored pineapple half, roughly two milimetres thick:
Slicing piece off pineapple
Slicing piece off pineapple
The slices were placed on a drying tray:
Sliced pineapple placed on drying tray
More slices were sliced off the pineapple, to about half of the pineapple half:
Almost half of the half pineapple sliced off
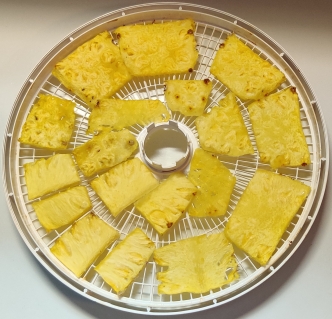
… until the tray was filled:
Tray filled with pineapple slices
The filled tray was placed on the food dehydrator base:
Filled tray placed on dehydrator base
The top of the dehydrator was placed on the tray:
Top placed on the dehydrator
Oh and here’s my cat to help me out:
My cat helping me out
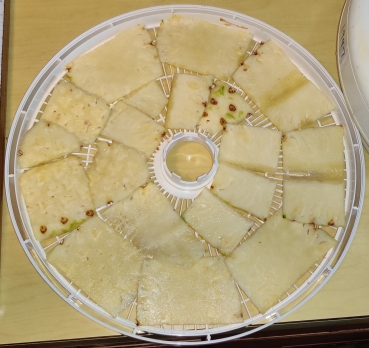
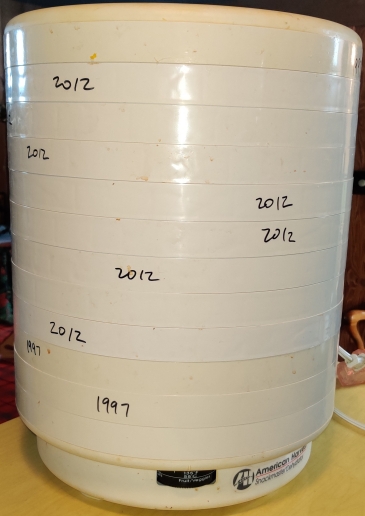
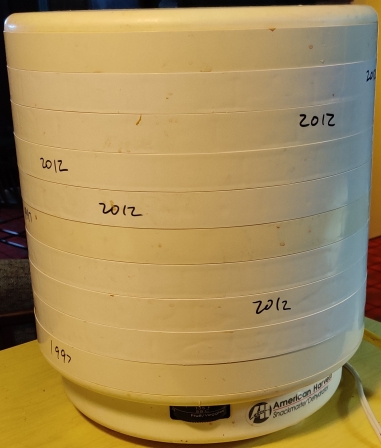
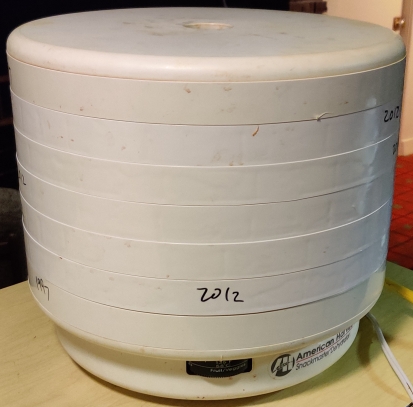
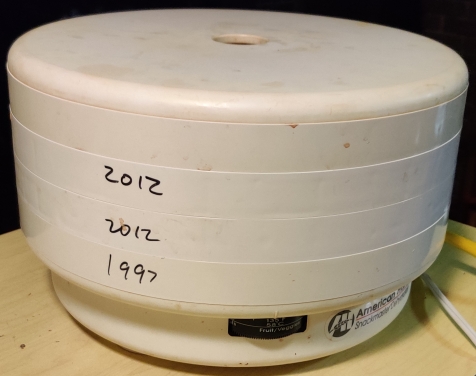
I continued trimming and slicing the pineapples, filling twelve trays; as can be surmised from the following picture, in 2012, I added an additional eight trays to the original four I’d bought in 1997!)
Twelve trays filled with pineapple slices
The twelve trays were filled with a bit more than four and a half of the pineapples I’d purchased, leaving at this point a little less than one and a half pineapples to slice up later as the slices in the dehydrator dried and made space:
One and a half pineapples left after filling twelve trays
At this point, the breaker on the extension cord carrying case decided to trip (in my experience, unusual for a single device with a peak draw of only about 550 watts, although I do suspect that the caddy does have a lower trip level than a normal household circuit breaker):
Tripped breaker
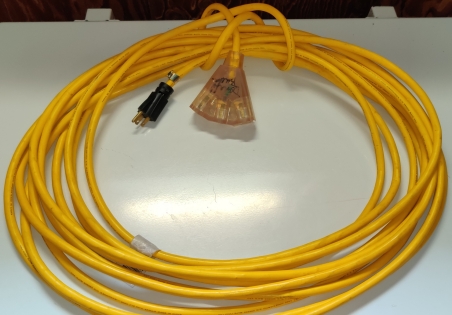
Quickly, a new extension cord was taken out:
New extension cord taken out
… which was plugged into an outlet, and the dehydrator plugged into the new extension cord:
Dehydrator plugged in to new extension cord
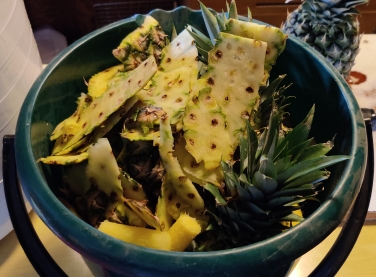
Back to the pineapples, the scraps were placed in the scrap bucket, which was ultimately emptied into my municipal compostable waste bin:
Scrap bucket filled with pineapple trimmings
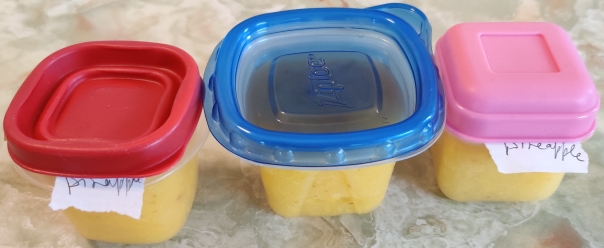
At this point, Mom asked for some mashed pineapple, and got a total of six containers, which were placed in the freezer:
Three of the six containers of mashed pineapple Mom got
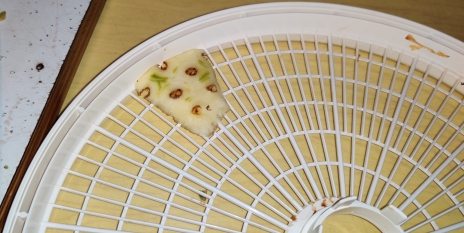
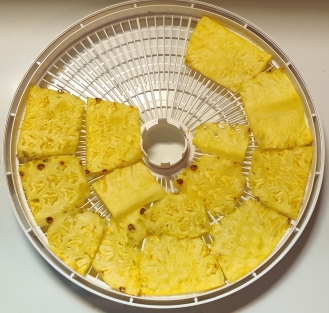
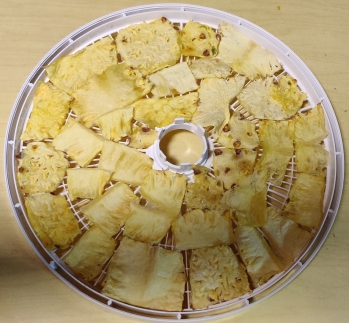
After about six hours, here’s what a tray of partly dried pineapple slices looked like, including the size shrinkage:
Tray of partly dried pineapples
The partly dried pineapple slices were shifted around to make space:
Space made on tray
After space was made on all the trays, four trays were emptied:
Four trays of space freed up
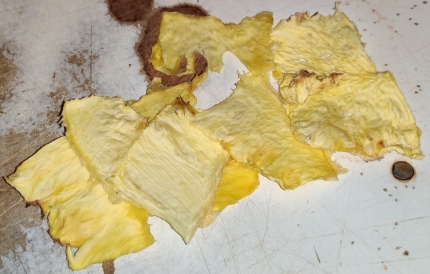
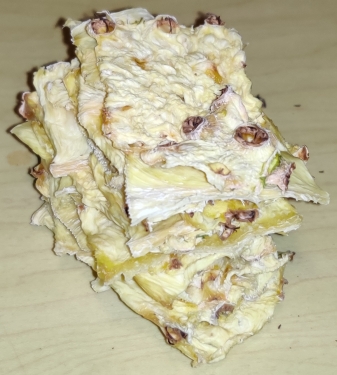
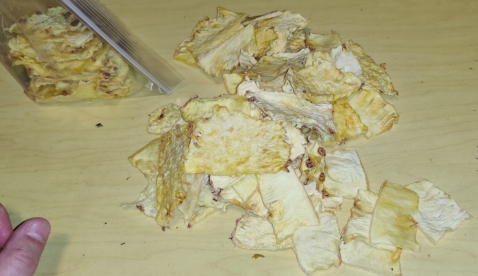
… and the first few pineapple slices dried to my liking were removed from the trays. Allowed to completely dry, pineapple will become crispy like potato chips; I like dried pineapple that is still a bit chewy and flexible, while there is still a very small amount of humidity left in the slices. As such, I remove slices when they have a leathery feel, and after the surface of the slices are no longer sticky.
Almost completely dried slices of pineapple
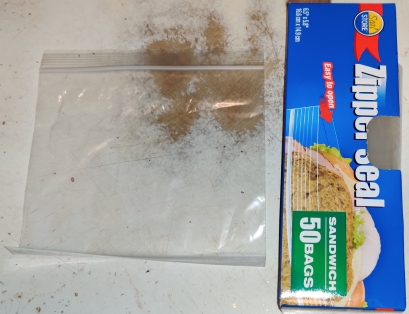
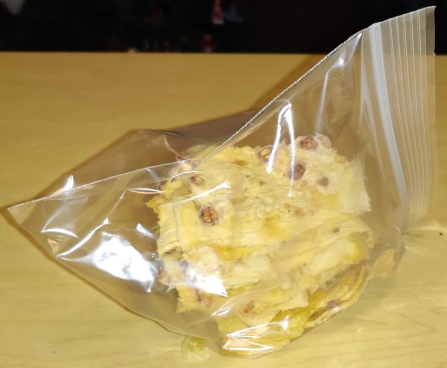
A zipper style sandwich bag was taken out to store the dried pineapple:
Zipper style sandwich bags taken out
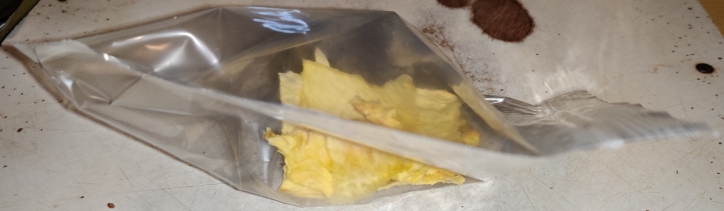
… and the dried pineapple slices were stacked and placed in the bag:
Dried pineapple placed in bag
At this point — seven hours in — I finished slicing the rest of the pineapples, spread them on a couple of the emptied trays, and inserted the filled trays back in the dehydrator stack, for a total of ten trays:
Ten trays after seven hours
After nine hours, here’s what the pineapple looked like:
Tray after nine hours
… and a few more slices of dried pineapple were taken out for bagging:
More dried pineapple after nine hours
Collection of dried pineapple after nine hours
… and my dehydrator was down to seven trays after nine hours:
Seven trays after nine hours
After twelve hours, the dehydrator was checked again:
Tray of dried pineapple after twelve hours
… and more dried pineapple was taken out after twelve hours:
Dried pineapple taken out after twelve hours
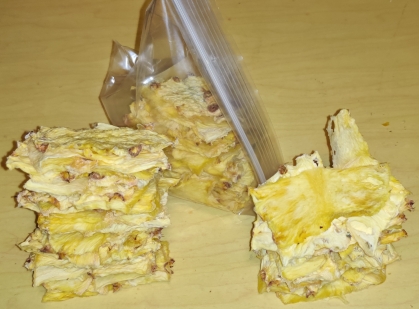
… and stacked for bagging:
Dried pineapple stacked for bagging after twelve hours
… and bagged:
Dried pineapple after twelve hours
… and after all the shifting around and bagging, I was down to five trays in the dehydrator:
Five trays after twelve hours
At this point, I had gone to bed, but I woke up after a couple of hours at midnight, and checked on the dehydrator, shifting pineapple slices around and removing dried sliced pineapple. Here’s the bagged cumulative production after fourteen hours:
Total production after fourteen hours
… and I was down to four trays after fourteen hours:
Four trays after fourteen hours
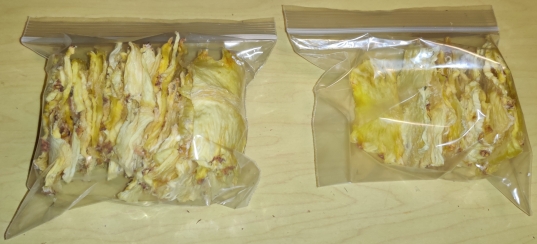
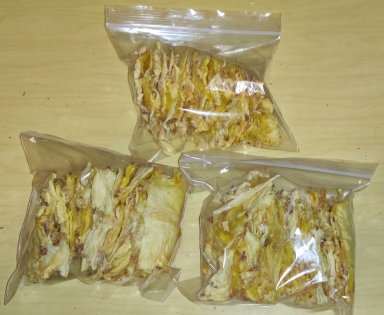
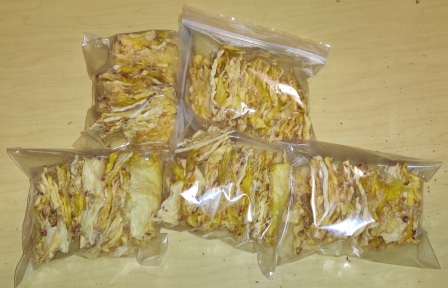
Finally, after seventeen hours — in this case, three in the morning! (yes, I had set my alarm) — I emptied the dehydrator and bagged the last of the dried pineapple slices, for a total of five bags of dried pineapple slices, from a bit over five pineapples:
Five sandwich bags of dried pineapple
After a couple of days, I started eating the dried pineapple — yes, like a kid in a candy shop! 🙂
One of my mom’s perennial holiday dinner treats was her roast potatoes, something I figured it was time to learn how to make. As such, I asked her how to do it — it is fairly easy — and adjusted the basic recipe to two generous servings, which can be multiplied and adjusted according to the number of people to be served.
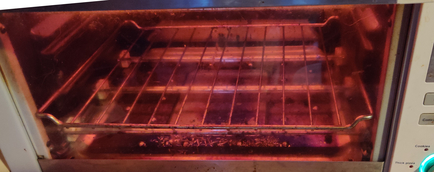
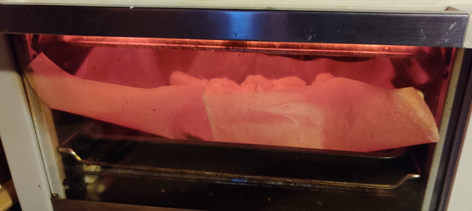
Note that the recipe as presented can be easily made in a countertop convection oven — as was the case in the following series of photos at the cottage — but there may be some minor variations when scaling up to larger amounts cooked in a conventional oven.
Making the roast potatoes:
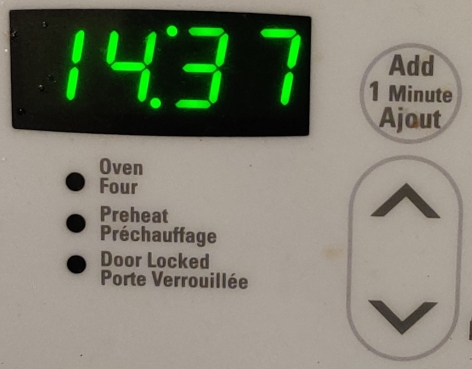
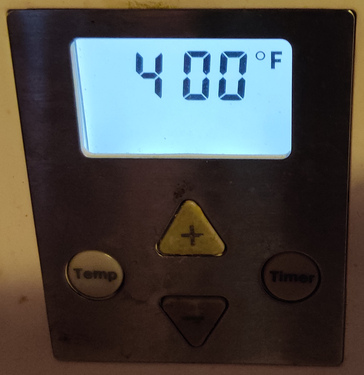
First, the oven was pre-heated to 400F:
Oven preheated to 400F
Oven preheating
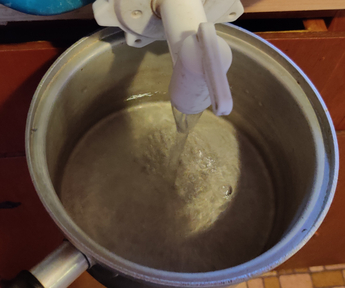
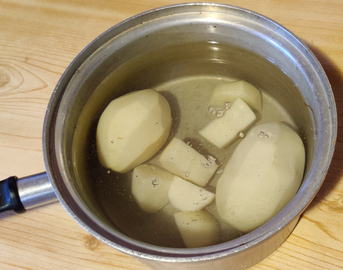
Water was poured into a pot:
Water poured into a pot
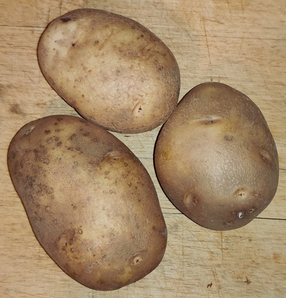
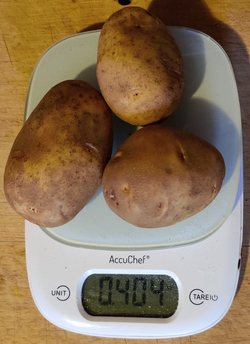
Potatoes were taken out, in this case, about 400g or 3/4lb to 1lb of potatoes:
Potatoes taken out
Potatoes weighed
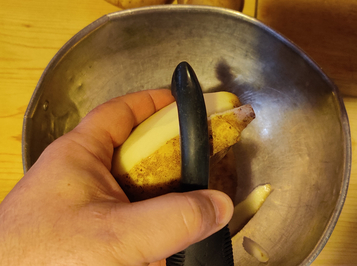
The potatoes were peeled:
Potatoes peeled
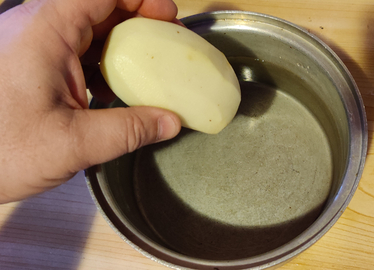
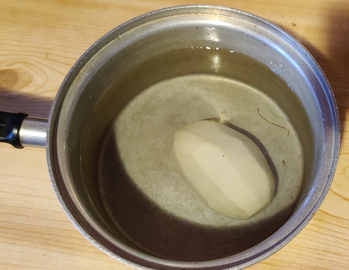
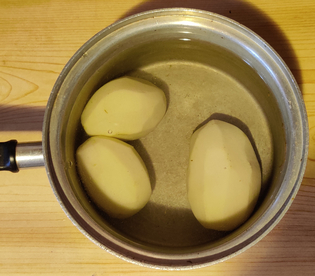
Peeled potatoes were placed in the water:
Peeled potatoes placed in water
Peeled potatoes placed in water
Peeled potatoes placed in water
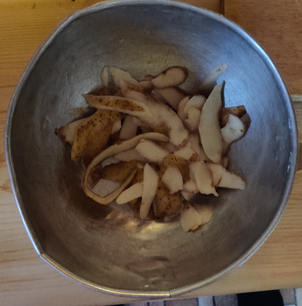
Potato peels were collected, and in this case burned in the fireplace, since it was heating season:
Potato peels collected to place in the fireplace
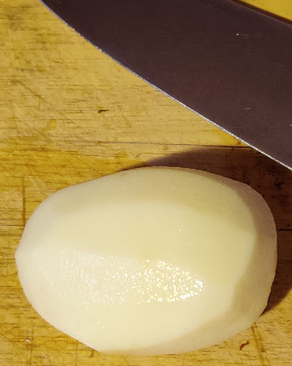
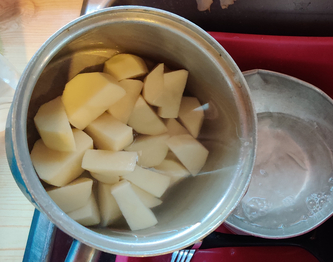
Peeled potatoes were taken out one by one to slice:
Peeled potato to be sliced
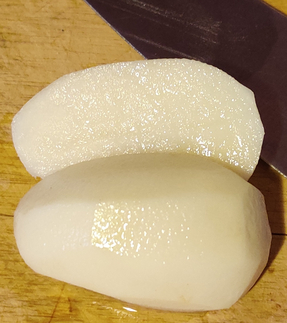
Potatoes were sliced in half lengthwise:
Potato sliced in half lengthwise
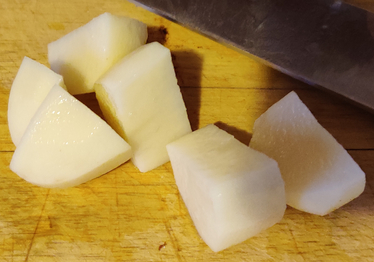
… and then sliced into pieces:
Potato cut into pieces
The potato pieces were placed back into the water:
Potato pieces placed back into water
The rest of the potatoes were similarly cut up:
Potato pieces in water
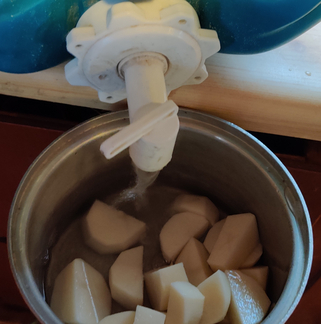
The water was drained from the potatoes:
Water drained from potatoes
… and fresh water was poured in the pot to rinse the potatoes:
Fresh water poured into pot
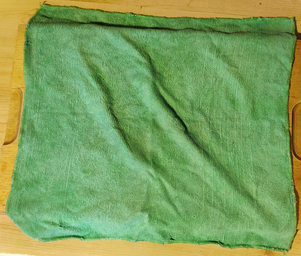
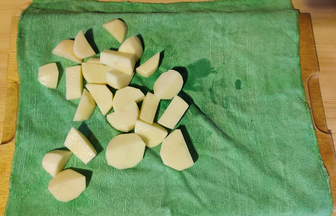
A clean, dry towel was laid out on a cutting board:
Clean dry towel laid out
The drained potatoes were placed on the clean dry towel:
Drained potatoes placed in dry towel
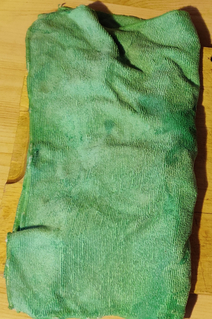
The towel was folded over in order to pat dry the potatoes:
Towel folded over to pat dry the potatoes
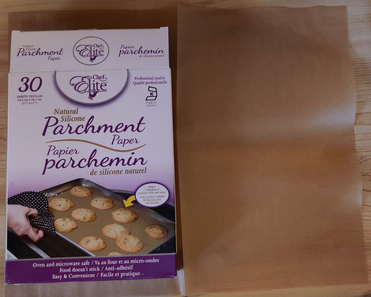
Parchment paper was taken out:
Parchment paper taken out
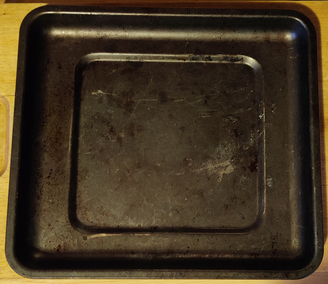
An oven tray was taken out:
Oven tray taken out
The parchment paper was placed on the oven tray:
Parchment paper placed on oven tray
Margarine was taken out:
Margarine taken out
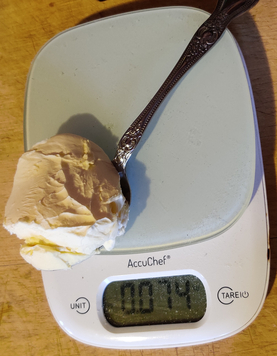
The kitchen scale was set to zero with an empty spoon on it, and then margarine was weighed out:
Margarine weighed out
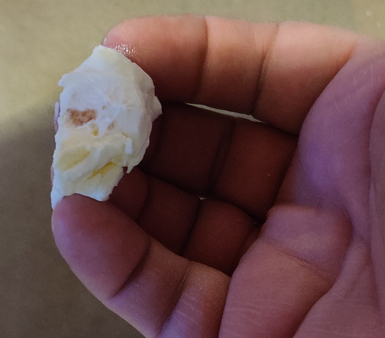
A bit of margarine was picked up with my fingers:
Margarine picked up with fingers
Pat dried potato pieces were picked up one at a time and slathered with margarine and placed on the oven tray:
Potato pieces picked up and slathered with margarine
Potato pieces slathered with margarine and placed on baking tray
Potato pieces slathered with margarine and placed on baking tray
Potato pieces slathered with margarine and placed on baking tray
And as can be seen, the roughly 75g / 3oz of margarine were used up:
Measured out margarine used up
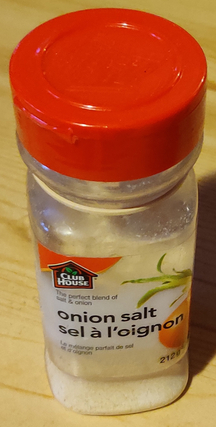
Onion salt was taken out:
Onion salt taken out
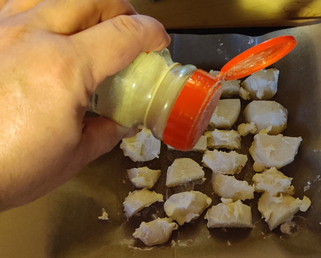
Onion salt was shaken somewhat liberally over the margarine covered potatoes:
Onion salt shaken over the potatoes
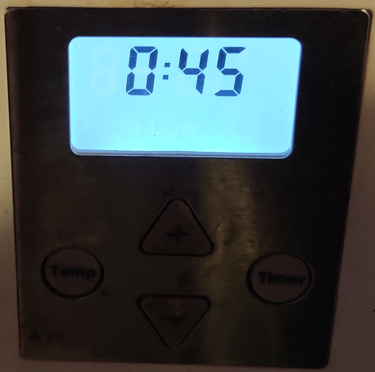
The timer on the oven was set to about 45 minutes:
Oven timer set
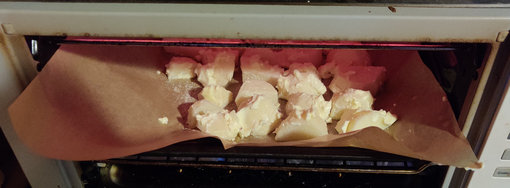
The tray of potatoes was placed in the oven:
Tray of potatoes placed in oven
Tray of potatoes in oven
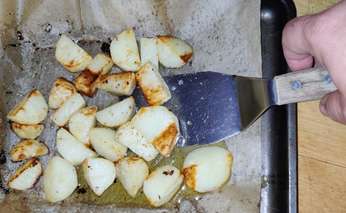
Here is a shot of the roasting potatoes after about 25 minutes:
Partly roasted potatoes
The potatoes were turned over at this point:
Potatoes turned over
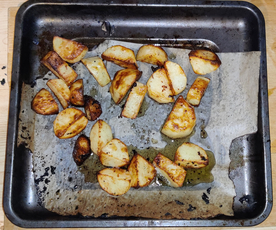
The potatoes were taken out just before 45 minutes, ready to eat:
Roast potatoes ready to eat
(Note that because of the excessive amount of parchment paper used, yes, I did have to deal with some burning parchment paper!)
It has been several months since I’ve done an entry on a recipe from my collection of recipes, mostly just because last winter and spring, I’d run through most of the recipes that I regularly make and which at the time I had considered to be of “sufficient” note to highlight here, save for the recipe which is the subject of this post (but yes, there is a small number more which may eventually be featured!) As such, many of my recipes from my collection of recipes have since been made at least once, and in many cases, several times, over the past few months.
Over the past couple of weeks alone, I did a lot of cooking at the cottage while on holidays, making:
Yes, that’s a lot of potatoes, ground beef, chicken, onions, carrots, eggs, flour, cheese, olive oil, and other secondary ingredients prepared, as well as beer consumed, during the multiple cooking sessions! And, yes, this is how I like to spend winter holidays at the cottage!
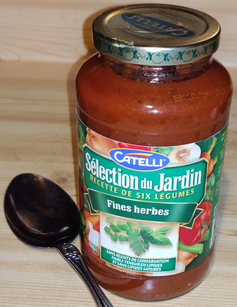
Note that this recipe is vegetarian of the lacto-vegetarian variety (basically, meatless) if the tomato sauce used does not contain meat.
Making the Eggplant au gratin:
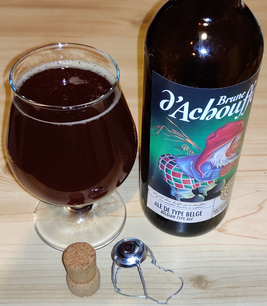
First, a nice beer was taken out — Brune d’Achouffe, a Belgian brown ale 8,5% alc/vol in a 750mL bottle, brewed under licence from the Brasserie d’Achouffe by Brasseurs RJ in Montréal, Québec.
Beef taken out
Next, the beer was poured into a glass:
Beer poured out
… and of course, right away I had to do a bit of quality control on the beer:
Yes, this is a good beer!
Now to the cooking of the eggplant au gratin, really, this time:
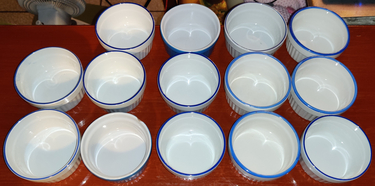
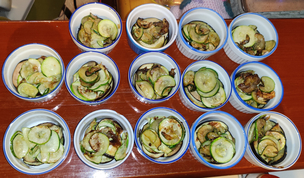
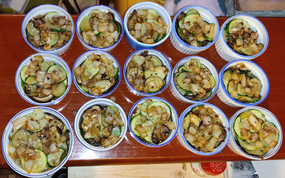
Ramekins were set out — as it turns out, another ramekin was needed to be added later on:
Ramekins set out
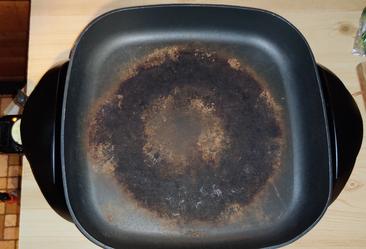
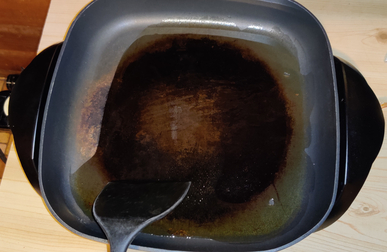
An electric skillet was taken out and plugged in:
Electric skillet taken out
The skillet was turned on
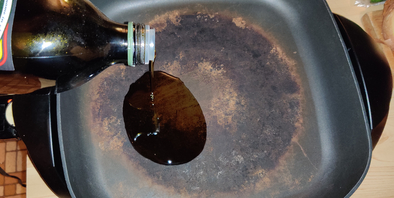
Olive oil was added to the skillet:
Olive oil added to skillet
The olive oil was spread out in the skillet with a plastic spatula / egg flipper:
Olive oil spread out in skillet
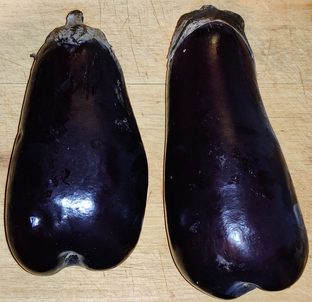
A couple of eggplants were taken out:
Eggplants taken out
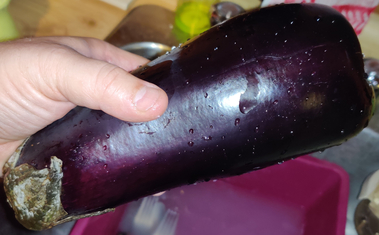
An eggplant was rinsed with water:
Eggplant rinsed with water
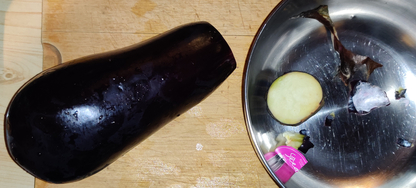
The eggplant was trimmed:
Eggplant trimmed
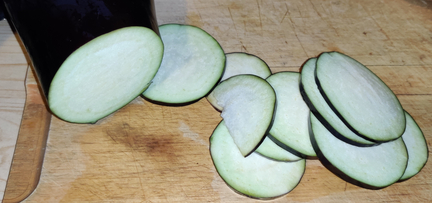
Coins were sliced off the eggplant:
Coins sliced off eggplant
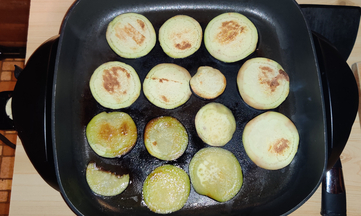
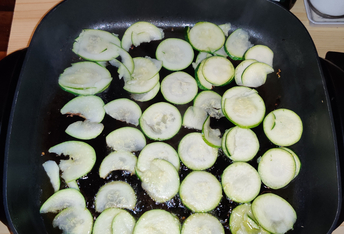
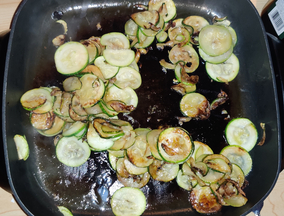
Slices of eggplant were placed in the hot skillet:
Eggplant slices in skillet
After a few minutes of frying, the slices of eggplant were turned over:
Eggplant slices turned over
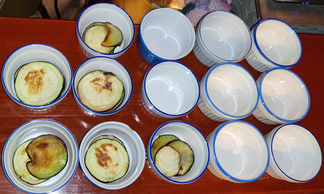
The fried slices of eggplant were placed in ramekins:
Eggplant slices placed in ramekins
The rest of the first eggplant was sliced, the resulting eggplant slices fried, and the fried eggplant slices were placed in the rest of the ramekins, such that the fried eggplant slices were roughly equally distributed amongst the ramekins:
Eggplant equally distributed amongst the ramekins
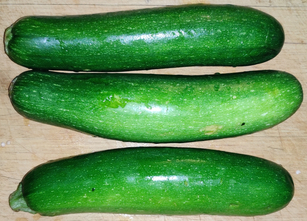
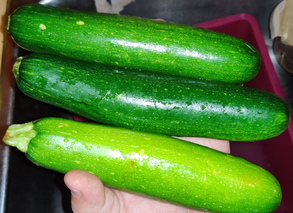
Half of the zucchinis were taken out:
Zucchini taken out
The zucchinis were rinsed with water:
Zucchinis rinsed with water
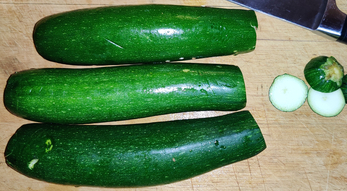
The zucchinis were trimmed:
Zucchinis trimmed
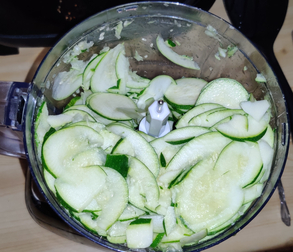
In order to quickly slice the zucchinis, a food processor with the slicing blade attachment was taken out:
Food processor with slicing blade taken out
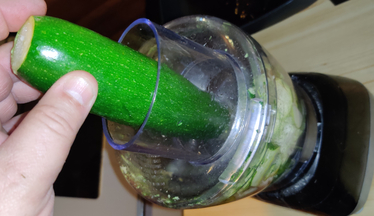
The zucchinis were fed into the running food processor in order to slice them:
Zucchinis fed into food processor
Sliced zucchinis
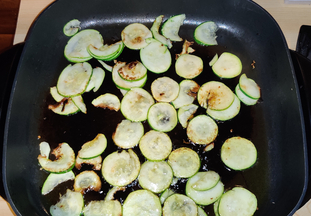
Zucchini slices were placed in the electric skillet with more olive oil:
Zucchini slices frying
The zucchini slices were turned over:
Frying zucchini slices turned over
Fried zucchini slices were placed in ramekins:
Fried zucchinis placed in ramekins
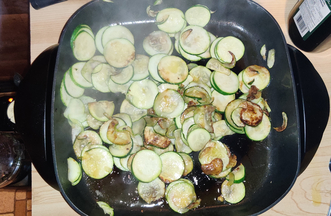
The rest of the first half of the zucchini slices were fried:
More zucchinis frying
More zucchinis frying
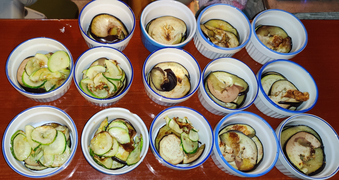
The rest of the fried zucchini slices were placed in the rest of the ramekins, such that the zucchini slices were roughly equally distributed amongst the ramekins:
Fried zucchinis placed in ramekins
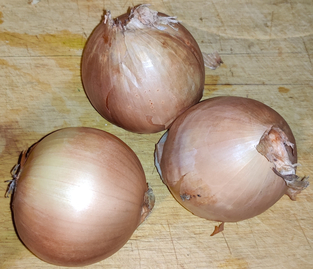
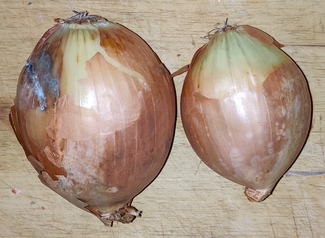
Onions were taken out:
Onions take out
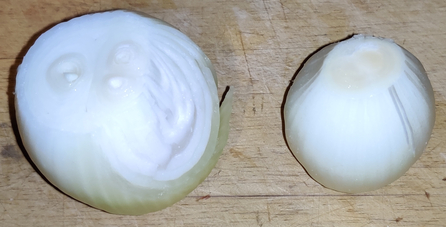
The onions were cleaned and trimmed:
Onions cleaned and trimmed
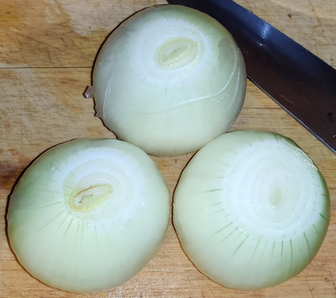
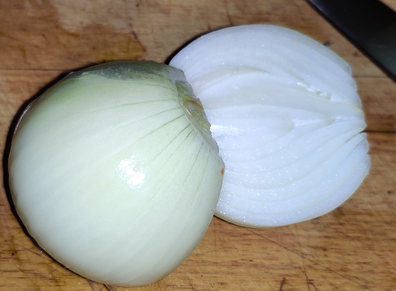
The onions were sliced in half:
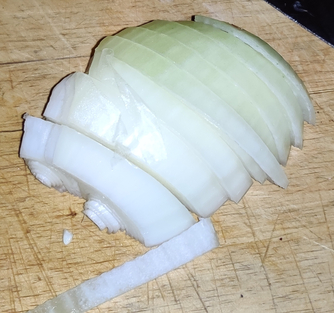
Onions sliced in half
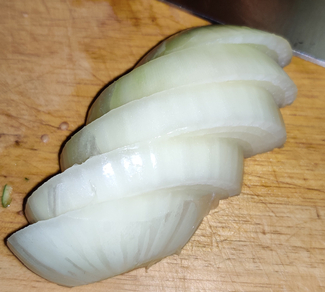
The onions were sliced into thick half coins:
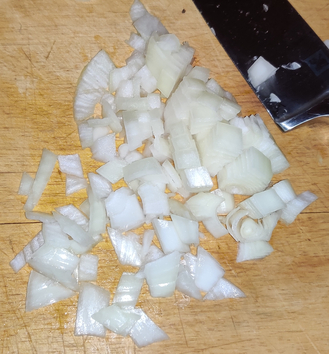
Onion half sliced into thick half coins
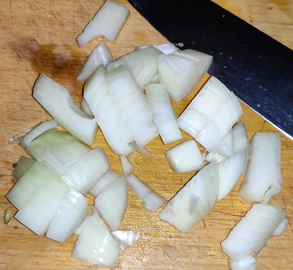
The onions were roughly chopped:
Onions roughly chopped
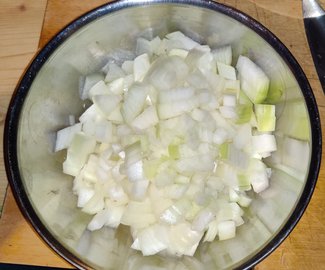
The chopped onions were placed in a bowl:
Chopped onions placed in bowl
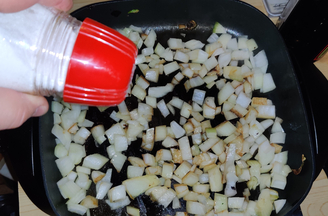
About half the chopped onions were placed in the electric skillet with more olive oil, and salt was added:
Chopped onions in skillet with more olive oil and salt
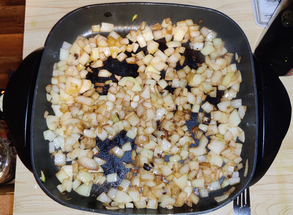
The chopped onions were fried:
Chopped onions fried
The fried chopped onions were roughly equally distributed amongst the ramekins:
Fried chopped onions spread in ramekins
At this point, my beer chalice was empty and needed refiling:
Beer chalice refilled
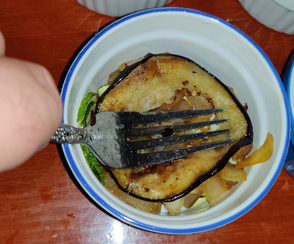
It was time to repeat the process, and the second eggplant was sliced and fried the same way. When the eggplant slices were placed in the ramekins, the contents were patted down with a fork, in order to get rid of deadspace in the ramekin:
Ramekin contents patted down with a fork
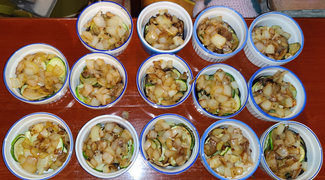
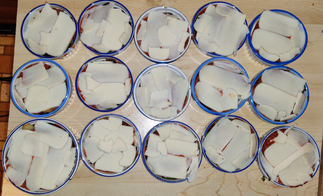
The rest of the steps were repeated with the zucchinis, and the chopped onions, and both were placed in the ramekins in the same order as above, after the second layer of fried eggplant. Note that at this point, another ramekin was added to accommodate what proved to be more ingredients than I originally estimated that I’d had:
Ramekins filled with all fried ingredients
A jar of commercial (meatless) tomato sauce was taken out:
Tomato sauce taken out
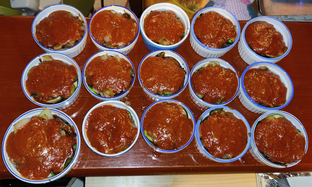
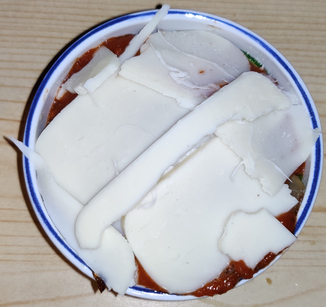
The tomato sauce was spread over the ingredients in the ramekins:
Tomato sauce spread over ingredients in the ramekins
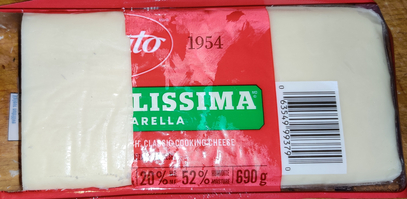
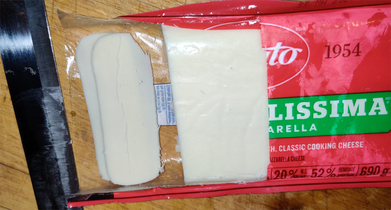
A block of mozzarella cheese was taken out:
Mozzarella cheese taken out
Mozzarella cheese was sliced off the block of cheese:
Mozzarella cheese sliced off the block
Cheese slices were placed on top of the ingredients in the ramekins:
Mozzarella cheese slices placed on top of ingredients in the ramekins
Mozzarella cheese slices placed on top of ingredients in the ramekins
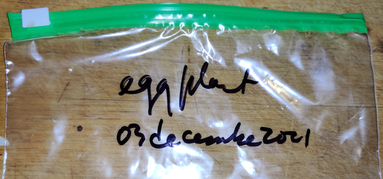
Zipper bags were taken out and identified:
Zipper bags taken out and identified
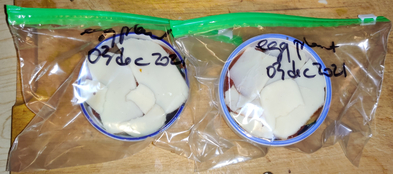
Filled ramekins were individually placed in bags for freezing:
Filled ramekins placed in identified zipper bags
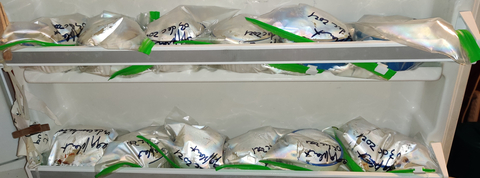
The bags were placed in a freezer (in this case the freezer door) for future eating:
Bagged eggplant au gratin in the freezer
A few days later, an eggplant au gratin was taken out, defrosted, baked, and eaten; of course it was yummy!
Making the vegetable soup instead of another recipe from my recipe collection that I had planned was a bit of a last minute decision, given that the decision to go to the cottage this past weekend was made at the last minute. As such, being at the cottage, I was cooking in a different kitchen using different equipment from usual while making the soup (see pictures).
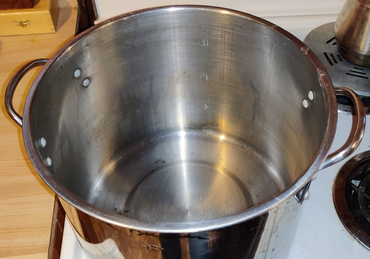
My 16 quart pot was placed on the stove:
Large pot on stove
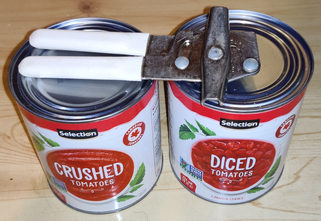
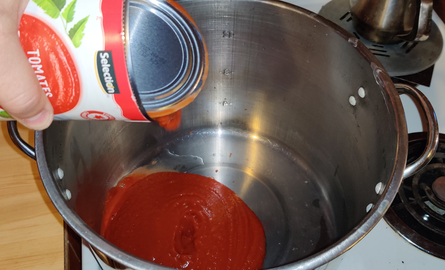
A can each of crushed tomatoes and diced tomatoes were taken out:
28 oz cans of crushed tomatoes and diced tomatoes
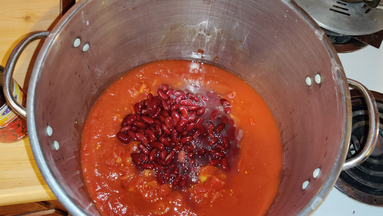
The crushed tomatoes were poured into the pot:
Crushed tomatoes poured into a pot
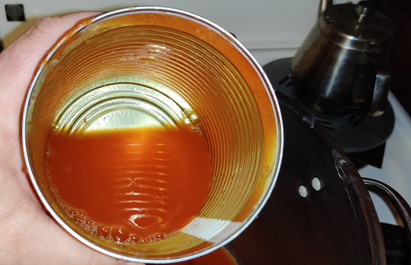
The can with crushed tomatoes was rinsed with water, which was poured into the pot:
Rinsing crushed tomatoes can with water, and poured into the pot
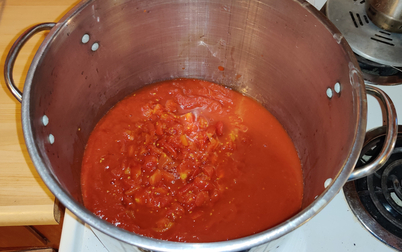
The diced tomatoes were then poured into the pot:
Diced tomatoes poured into pot
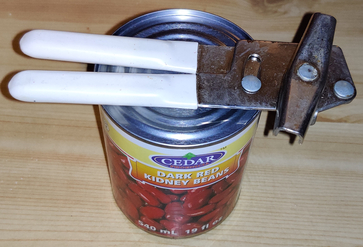
A can of kidney beans was taken out …
19 oz can of kidney beans
… poured into the pot …
Kidney beans poured into the pot
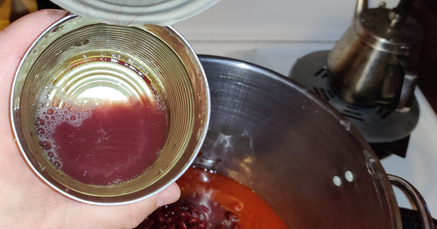
… and the kidney beans can was rinsed with water, which was then poured into the pot as well:
Kidney bean can rinsed with water and poured into the pot
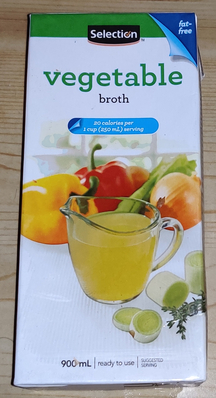
A 32 ounce (900 mL) box of vegetable broth was taken out …
A roughly 32 ounce (900 mL) box of vegetable broth
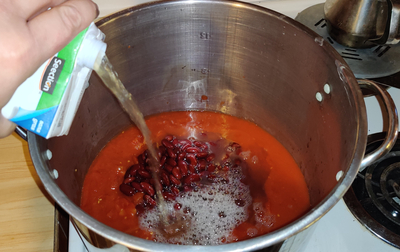
… and was poured into the pot:
Vegetable broth poured into the pot
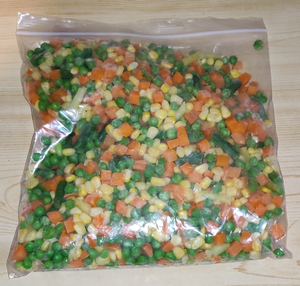
About a kilogram (a bit over two pounds) of mixed frozen vegetables were taken out …
About 1kg of mixed frozen vegetables
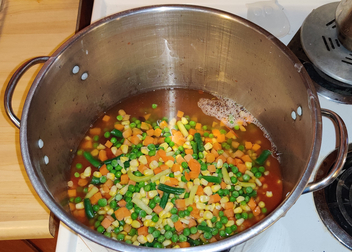
… and poured into the pot:
Mixed vegetables poured into the pot
At this point, I started mixing the ingredients:
Ingredients in pot mixed
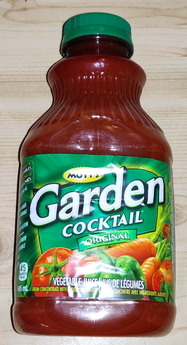
A 32 ounce (945mL) bottle of multi-vegetable cocktail was taken out …
32 oz (945mL) bottle of vegetable cocktail
… and poured into the pot:
32 oz (945mL) bottle of vegetable cocktail poured into the pot
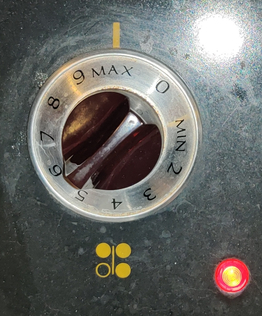
At this point, the burner on the stove was turned on to start heating up the soup:
Stove under pot turned on
Throughout the following steps, I kept on mixing the soup in the pot to keep it from burning on the bottom of the pot.
Next, a couple of onions were taken out …
Two onions
… then the onions were cleaned and trimmed …
Onions cleaned and trimmed
… then the onions were sliced …
Sliced onions
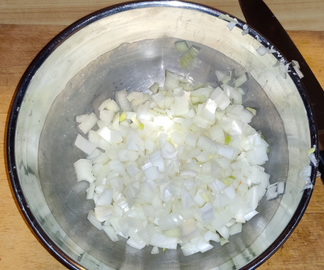
… then the onions were chopped …
Chopped onions
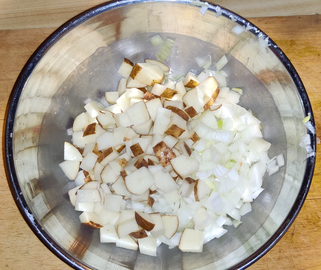
… and the chopped onions were placed in a mixing bowl:
Chopped onions placed in mixing bow
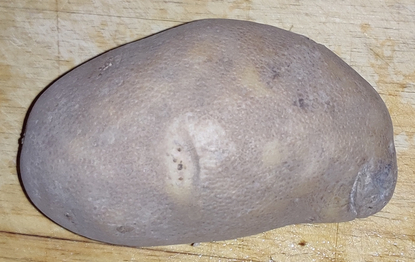
A potato was taken out …
A potato
… and the potato was cleaned and trimmed:
Potato cleaned and trimmed
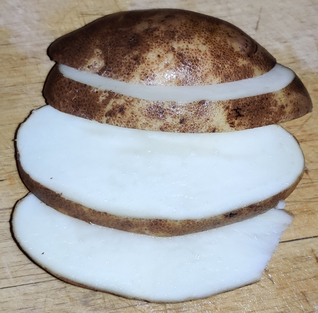
The potato was sliced along its length …
Potato sliced along its length
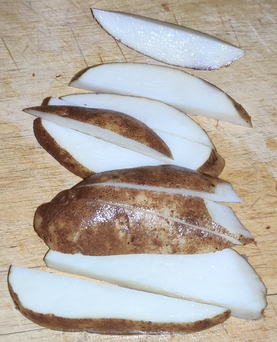
… the potato was then sliced into spears …
Potato sliced into spears
… then the potato was sliced into cubes …
Potatoes sliced into cubes
… and the potato cubes were placed into the mixing bowl with the chopped onions:
Potato cubes placed in mixing bowl with chopped onions
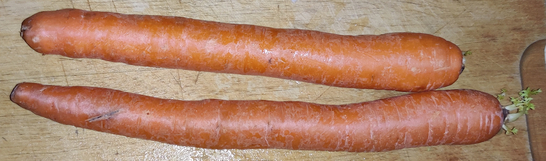
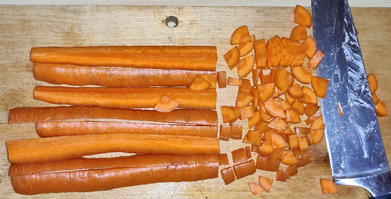
Two carrots were taken out …
Two carrots
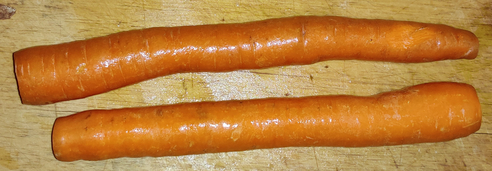
… the carrots were cleaned and trimmed …
Carrots cleaned and trimmed
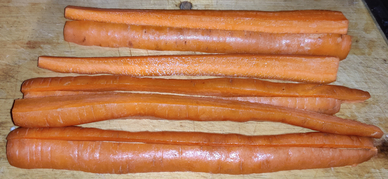
… then the carrots were quartered to make spears …
Carrots sliced into spears
… then the carrots were then chopped coarsely …
Carrots chopped coarsely
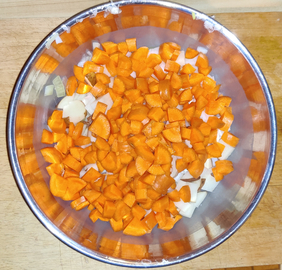
… and the chopped carrots were placed in the bowl with the potato cubes and chopped onions:
Chopped carrots placed in mixing bowl with potatoes and onions
Throughout all the vegetable chopping, I mixed the ingredients already in the pot while it was heating up, in order to avoid burning on the bottom of the pot.
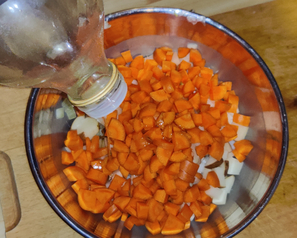
Next, olive oil was added to the bowl of chopped vegetables …
Olive oil added to the chopped vegetables
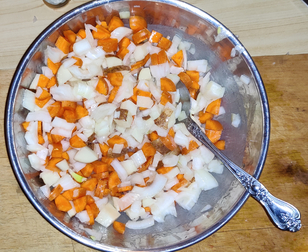
… then the chopped vegetables and olive oil were mixed together to fully coat the chopped vegetables:
Mixed vegetables and olive oil mixed together
A cast iron skillet was preheated on the stove:
Cast iron skillet preheated on the stove
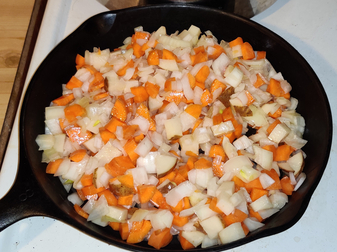
… and the mixed chopped vegetables and olive oil were transferred to the skillet:
Transferring mixed chopped vegetables and olive oil to the cast iron skillet
Mixed chopped vegetables and olive oil in the cast iron skillet
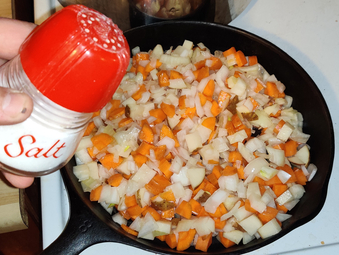
Salt was added to the frying chopped vegetables:
Salt added to the frying chopped vegetables
Once the chopped vegetables started to brown in the skillet, they were transferred to the soup pot that was continuing to be heated up:
Fried vegetables transferred to the soup pot
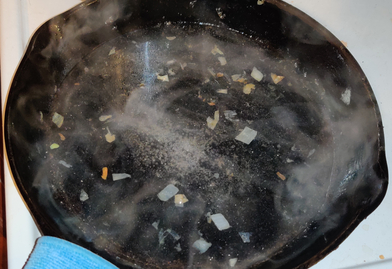
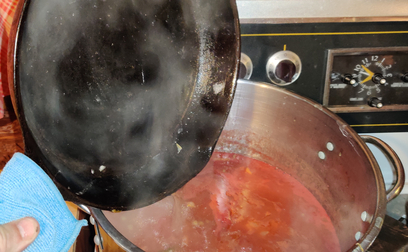
The skillet was deglazed with water …
Deglazing hot skillet
… and the deglazing liquid was added to the soup pot:
Deglazing liquid added to the soup pot
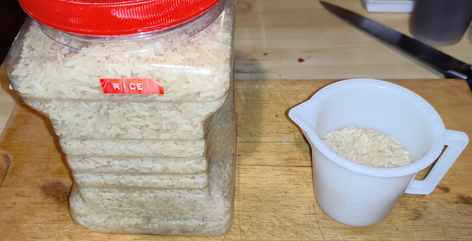
Half a cup of rice was measured out:
Half a cup of rice measured out
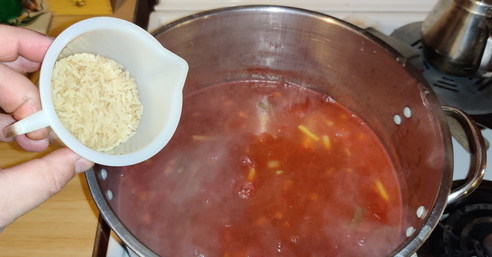
… and the rice was added to the soup.
Rice added to the soup
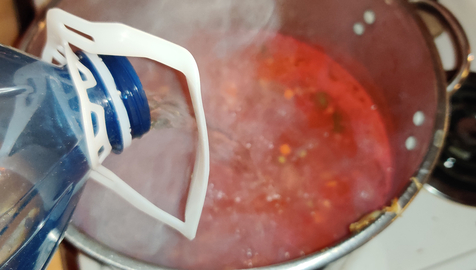
Water was added to the soup pot to bring the liquid level up to the eight quart mark:
Water added to soup pot to bring it to eight quart mark
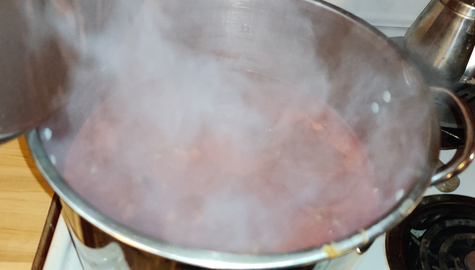
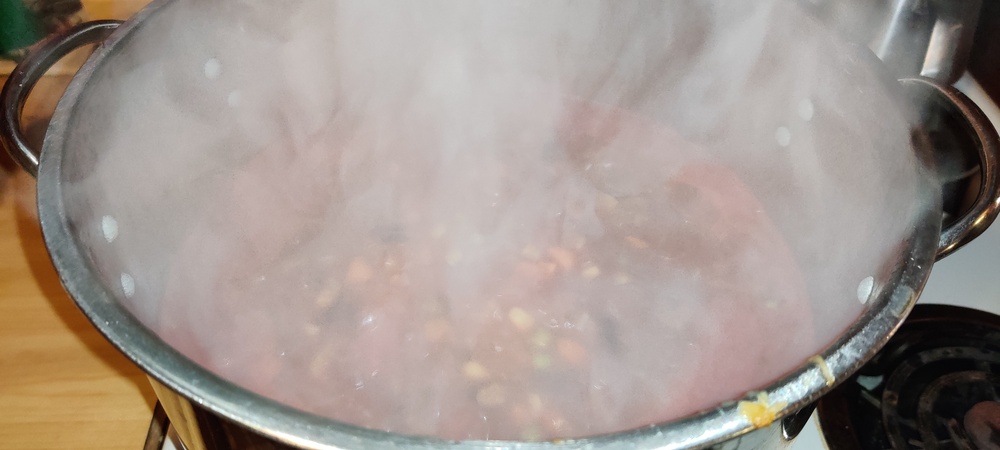
The soup was continued to be heated:
Soup heating up
… and brought to a boil:
Boiling soup
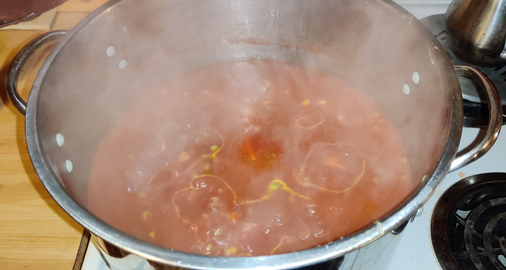
The heat was reduced and the soup was simmered for over half an hour:
Simmering soup
I continued adjusting the salt level in the soup until it was to my taste.
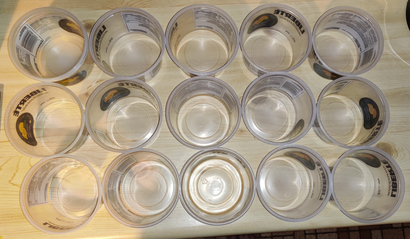
While the soup was simmering, plastic containers (in this case, reused yoghurt containers) were laid out:
Plastic containers laid out
Once the soup had simmered for over half an hour (probably coming on to an hour), the soup was taken off the stove, and transferred to the containers with a ladle (the golden sheen is the olive oil reflecting the camera flash):
Soup transferred to plastic containers
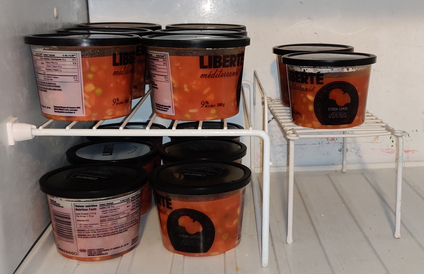
And the containers were covered, and placed in the freezer:
Before beginning to makepickled eggs, I had never cared much for pickles of just about any sort all my life, although over time I have come to realize that I wasn’t as averse to pickled items as much as I thought, demonstrated by having begun making pickled eggs and continuing to love them for many years now.
My mom, on the other hand, has enjoyed several kinds of pickles as long as I remember. While I was growing up, every summer into the fall, she would be part of a group of ladies at our church who would be making various jams, jellies, and pickled vegetables to sell later each autumn at the church’s fund-raising bazaar. This in fact was an indirect inspiration for me, a couple of decades later, to make my pickled eggs to contribute to the same church bazaar table. To this day, every year my mom makes an English-style chutney containing rhubarb (which she grows in her garden), raisins, and onions, using the recipe the church group assigned to her to make in the early 1980’s.
Over the years, one of the things that I have been keeping my eyes out for at roadside farmers’ stands on my way up to the cottage are artisanal jars of pickles from the local farmers to keep my mom supplied with pickles, usually of the bread and butter pickles, and pickled beets, varieties. For several years, one stand in particular sold bread and butter pickles that my mom really liked; however, the stand has since closed. I won’t be trying to find out whether the lady who made them distributes them elsewhere; conversations over the years indicated that she found that making at least her bread and butter pickles was becoming too much trouble for the price she was able to charge.
A growing nagging feeling that I should at least experiment making bread and butter pickles for my mom has been developing over the past couple of years.
This year, after having found a different road side stand distributing various pickled vegetables from a local cabane à sucre (maple sugar shack) (here’s my archive), I bought some jars of the bread and butter pickles for my mom. She tried them, and found them to be representative of the style but not as good as those from the closed farmer’s stand, and further, that the jars appeared not as fully packed as the other jars.
This proved to be one of two imps pushing me over the edge to experiment, the other imp being having found a three litre basket of pickling cucumbers at my local grocery store shortly thereafter, which I decided to purchase.
Already having a supply of onions, sugar, and vinegar, I proceeded to wash then slice the cucumbers in my food processor using the slicing tool. The recipe was based on cups of sliced cucumbers, so given the number of cups of sliced cucumbers I actually produced from what I’d purchased in the three litre basket (14 cups, as compared to the base recipe’s 20 cups), I adjusted the amounts of each of the rest of the ingredients accordingly.
I deviated from the original recipe in the following ways:
– The original recipe called for thinly slicing the onions, while I coarsely chopped the onions;
– In addition to the pickling spice blend in the bag, the original recipe called for mustard seeds, turmeric, and celery seeds, which I did not have, and which I simply omitted;
– The original recipe called for packing sterilized jars with the cucumber slices, onions, and pickling solution immediately once bringing the mix to a rolling boil, and then boiling the sealed mason jars in a water bath for 10 minutes, while I instead boiled the cucumbers and pickling solution for ten minutes, then packed them in sterilized mason jars, and finally proceeded directly to cooling the jars, over concerns that, not having used the water bath method before, I would suffer jar breakage.
Tasting a leftover pickle that didn’t get bottled, I could tell that it tasted roughly like what I knew bread and butter pickles should taste like.
The whole process, including cleaning up, took about two and a half hours, and produced five jars of about 450mL each. I was pleasantly surprised at how relatively easy it was.
My mom was thrilled to learn that I’d conducted my experiment, and anxiously awaited my next visit so that she could try the results.
In the meantime, I had a nagging guilt about not following the instructions and not treating the filled jars in a water bath. The following week, when I happened to be back at the grocery store, I happened upon another display with more pickling cucumbers, and yet another imp convinced me to buy a three-litre basket of cucumbers.
This time, I decided to follow the recipe a bit more closely, given that I already had what I considered to be an otherwise successful batch of pickles in sealed jars already in storage: While I decided to continue omitting the turmeric, mustard seeds, and celery seeds, I sliced the onions thinly and into coins; I brought the cucumber slices, sliced onions, and pickling solution to a boil; then I immediately packed the sterilized mason jars with the mix; and then boiled the sealed jars in a water bath for ten minutes. I did not have any jar breakage. The second basket I’d purchased seemed to have more cucumbers than the first basket (16 cups of sliced cucumbers), and I produced seven 500mL mason jars, as well as one 250mL mason jar.
In the meantime, my mom had made some pickles using some instructions she’d received from a friend, involving the use of pickling solution saved from a number of previously consumed jars of pickles, and some English cucumbers she’d purchased.
The following week, I visited my mom, bearing a jar from each batch, and we set up a taste-test. Fortunately, I am not outright averse to bread and butter pickles; they just aren’t something for which I’ve acquired a taste – yet. 🙂
We had four jars of pickles to compare, which we rated as follows by preference (1 – liked the most, 4 – liked the least):
1: My batch #2 – perfect, and crunchy (refrigerated)
2: My batch #1 – almost as good as “my batch #2”, but not crunchy, at least not enough, and otherwise very good (not refrigerated)
3: Current roadside stand pickles – okay, but not as good (refrigerated)
4: My mom’s recycled pickling solution experiment with English cucumber (refrigerated) – fourth place, and okay but decidedly unremarkable.
We came up with a suspicion afterwards: Since “my batch #1” wasn’t refrigerated while the others were, we wondered if that could have made a difference in the crunchiness.
I received a phone call a couple of days later about “my batch #1”: After refrigeration, they were declared a complete success, since they developed a certain crunch in the fridge.
So my experiments seem to have been successful, at least until and unless I find some spoilage in the jars of “my batch #1” after a few months, if they last that long, and of course which I am not expecting to occur anyway.
For the past several years during my summer holidays, I have been visiting the grounds of a Buddhist monastery near my cottage as an activity. Normally, my visit centres around going about mid-day and bringing a picnic lunch to be enjoyed on the grounds, as well as walking the grounds and admiring the scenery, the various Buddhas throughout, and of course the temple.
At the gate, there is a sign with a crossed-out pictogram expressly, at least on a literal level, forbidding chicken, steak, and eggs to be brought onto the grounds. Obviously, the pictogram more widely means “no meat or animal products”. Underneath, it says “only vegetarian food”. The specific use of the word “vegetarian” confuses the matter.
As per my understanding of vegetarianism, generally eggs, milk, honey (surprise — made by bees, it’s an animal product!) and a few other animal products are acceptable; the interpretation to which I personally subscribe is “no animal flesh”. I assume, given the inclusion of the egg in the pictogram, that the policy is actually veganism, as in no animal products whatsoever. (If I am incorrect on this point, then that is only somewhat beside the point I am trying to raise here. Update 20180805: See notes at the end.)
I typically eat three meals a day of the meat and two vegetables variety, although peanut butter, pickled eggs and cheese are central to typical breakfasts. However, especially since in the past I have flirted with vegetarianism of the meatless-but-eggs-and-cheese-and-other-animal-products-are-fine variety, I don’t have a problem with the sign; I consider myself to eat a wide enough variety of foods that it isn’t an issue. Further, I do not have any food allergies or particular dietary restrictions — for instance, I do not have any dietary requirement to eat, let alone at every meal, certain foods; certainly for the purpose of this post, foods which contain animal products.
And of course, the monastery is clearly and very well within its rights to place such a condition on the guests it invites to visit its grounds: One does not need to visit the grounds if one is opposed to the condition. In any case, when I have visited, I have never had my picnic lunch bag verified at the gate. Once, I noticed a gentleman eating his lunch on the road just outside the gate; I imagine that he didn’t know in advance about the condition, and his lunch presumably contained some offending ingredient. I can only imagine that based on my personal experience, the gentleman saw the sign, and complied of his own accord without any intervention from the monks.
Nonetheless, planning my picnic lunch for these visits has proven to be quite the challenge over the years.
I bring foods which I enjoy and which I assume are vegan. I even now somewhat plan in advance for this lunch, including when I go to the grocery store on my way up to the cottage. I usually check ingredients lists. As revealed below, obviously not well enough.
And, so far, I realize after the fact every year that I have failed to bring only vegan foods.
One year, I made a peanut butter sandwich on Challah bread. That’s the braided bread often found in delicatessens and jewish bakeries. Challah bread nornally contains eggs.
Another year, as I was planning my lunch, I looked at the ingredients list of various products I wanted to bring: One cake contained eggs. Another commercial snack cake also contained eggs. Two favourite varieties of flavoured potato chips and similar snacks contained milk products (sour cream and onion, and cheese flavoured snacks). Pleased with myself, I did not bring either of the cakes nor the chips / snacks. However, I failed on the sandwich I’d brought: I made my peanut butter sandwich on the bread I make at home in a bread machine. I later remembered that the bread recipe I use contains milk.
This year, I thought I was really well prepared: My peanut butter and jam sandwich, on a very plain bread that did not contain milk nor eggs. Dried pineapple, which I had dried myself. Caramel popcorn, whose ingredients list did not contain any animal products. Juice boxes. And a few other items, which I deal with in the following paragraphs.
To my amusement, though not surprise, I learned after the fact that the roasted and salted cashews I brought may contain milk, along with peanuts and other tree nuts. This is in a grey zone, as the warning’s purpose is to inform that the cashews were prepared in a facility which prepares other items which may contain the offending items, and that cross-contamination might have occurred, not to indicate that the cashews actually contain the offending items, at least by design.
The following items were also brought, and which I later realized were not allowed under the above-mentioned presumed vegan food condition:
– a brand of salt and vinegar potato chips, whose “seasonings” contain lactose, and whose label states they contain milk, to my great surprise: I had bought the chips on the presumption that they contain potatoes, vegetable oil, salt, and vinegar;
– a variety of chocolate buttons candy, whose label states it contains milk (this should have been a no brainer, since they are in the milk-chocolate range of chocolates);
– a store brand of a swiss-type chocolate bar, whose label states it contains milk and eggs (again this should have been a no-brainer, at least for the milk);
– a chocolate-coated granola bar, which contains honey and multiple mentions of milk and milk products (once more, this should have been a no-brainer).
As such, I guess I will yet again have to plan better for my visit during my holidays next year: I will have to buy fruit cups and fresh fruits, while excluding the various above-mentioned items. These aren’t a real problem for me, but I do admit that these items are not always the first things that come to mind when I go shopping or make a last-minute grab for food for my lunches, be they regular daily lunches, or my visit to the monastery grounds.
In the past, I have subscribed to the mostly-meatless form of vegetarianism, for environmental reasons, principally in that meat consumes enormous amounts of water to produce. (As a side bar, one complaint I had was that prepared frozen pasta dishes could have been made in one extra variety: In addition to the vegetable lasagnas that are made, why not make traditional meat lasagnas exactly as usual, save that the meat hoppers are not filled during some runs?)
However, I am generally typical of North Americans in that I eat meat very regularly. Lately, for health reasons, I have been somewhat, mostly only very slightly, cutting down on my meat consumption; the environmental reasons of water requirements and carbon footprint in the form of methane production (21 times as efficient as CO2 as a greenhouse gas), have also been present in my mind.
But this little exercise makes me wonder how a vegetarian, let alone a vegan, or for that matter, someone who is lactose-intolerant, suffering from celiac disease, allergic to eggs, nuts and peanuts, or seafood, or who has some other intolerance to some food ingredient, is able to navigate commercially prepared foods, restaurants, and even dinner parties serving only foods “made from scratch” but in kitchens with the following ingredients, given the omnipresence of meats, milk, eggs, honey, other animal products, wheat, nuts, peanuts, seafood and any other I consider to be common and basic foods, and which in and of themselves are mundane, at least to me.
Yes, I am aware of various commercial foods and food management systems, such as nut-free candies and gluten free foods, and restaurants catering to the various issues raised above. I am also aware that making foods “from scratch” present options for my picnic lunches. My point here lies in the insidious degree to which certain common ingredients are used in food products not purchased for the presence of said ingredients.
Update 20180805: I have done some cursory checking into Buddhism and vegetarianism, and according to the wikipedia page on Buddhist Vegetarianism, (here’s my archive), the traditions of the particular monastery I visit likely fall under the “no meat, eggs and dairy” category, although strict veganism does not seem to be the case.