I bought a food dehydrator in early 1997 while I was still involved as an adult member in Scouting, and began by drying (mostly) various fruits for Scout Troop camping trips; Troop members were eager to test out the results of my efforts. While I am no longer involved in Scouting, I have continued drying fruits; I quickly decided that my favourite by far was dried pineapple, which comes out like candy to me.
A short overview of my very early experiences with drying food, from a Scouting perspective, is at what would have been a blog back in the late 1990’s before blogs were a thing at https://www.malak.ca/super.html#dried.
Drying the pineapples:
I keep an eye out for sales on pineapples, and brought home six pineapples last week:
Six pineapples (one is on its side)
I brought my cutting board, knife, and corer down to the bar area downstairs, where I normally do my fruit drying:
Cutting board, knife, and corer taken out
A bucket for the compostable trimmings was also set out:
Bucket for compostable trimmings taken out
My food dehydrator was of course taken out, with all its extra trays …
Food dehydrator and trays taken out
… and the unit was plugged into an extension cord caddy that was plugged into an outlet in an adjoining room, since the bar has an old outlet that doesn’t accept polarized plugs:
Food dehydrator plugged in
The food dehydrator was set to 135F for drying fruits and vegetables:
Food dehydrator temperature set
Now to the pineapples: The labels and their plastic tags were removed from the pineapples:
Labels removed from pineapples
A pineapple was placed on its side in order to trim off the top:
Pineapple placed on its side
The top of the pineapple was sliced off:
Top of pineapple sliced off
Top of pineapple sliced off
The top of the pineapple was placed in the scraps bucket:
Top of pineapple placed in scraps bucket
Pineapple tops in scraps bucket
The pineapple was rotated so as to slice off the bottom:
Bottom sliced off pineapple
Bottom sliced off pineapple
The bottom of the pineapple was placed in the scraps bucket:
Pineapple bottom placed in scraps bucket
Pineapple bottom placed in scraps bucket
The pineapple is now ready for the rest of the trimming:
Pineapple ready for trimming
I started trimming the skin off the pineapple:
Trimming the skin off the pineapple
Trimming the skin off the pineapple
As part of trimming the skin off the pineapple, sometimes the bottoms have to be trimmed too because of the somewhat rounded shape of pineapples, making it tricky sometimes to trim off the skin in full slices:
Bottoms to be trimmed as well
The trimmed pineapple skins …
Trimmed pineapple skins
… were placed in the scraps bucket:
Pineapple skins placed in scraps bucket
Pineapple skins placed in scraps bucket
The trimmed pineapple was again placed on its side …
Pineapple placed on its side
… and sliced into two halves roughly at its centre, essentially to accommodate the length of my corer, although the resulting slices tend to be of a convenient size as well:
Pineapple cut in half
Two pineapple halves
An apple corer was used to remove the pineapple cores:
Coring half of a pineapple
Coring half of a pineapple
Cored pineapple half
I began slicing pieces off the cored pineapple half, roughly two milimetres thick:
Slicing piece off pineapple
Slicing piece off pineapple
The slices were placed on a drying tray:
Sliced pineapple placed on drying tray
More slices were sliced off the pineapple, to about half of the pineapple half:
Almost half of the half pineapple sliced off
… until the tray was filled:
Tray filled with pineapple slices
The filled tray was placed on the food dehydrator base:
Filled tray placed on dehydrator base
The top of the dehydrator was placed on the tray:
Top placed on the dehydrator
Oh and here’s my cat to help me out:
My cat helping me out
I continued trimming and slicing the pineapples, filling twelve trays; as can be surmised from the following picture, in 2012, I added an additional eight trays to the original four I’d bought in 1997!)
Twelve trays filled with pineapple slices
The twelve trays were filled with a bit more than four and a half of the pineapples I’d purchased, leaving at this point a little less than one and a half pineapples to slice up later as the slices in the dehydrator dried and made space:
One and a half pineapples left after filling twelve trays
At this point, the breaker on the extension cord carrying case decided to trip (in my experience, unusual for a single device with a peak draw of only about 550 watts, although I do suspect that the caddy does have a lower trip level than a normal household circuit breaker):
Tripped breaker
Quickly, a new extension cord was taken out:
New extension cord taken out
… which was plugged into an outlet, and the dehydrator plugged into the new extension cord:
Dehydrator plugged in to new extension cord
Back to the pineapples, the scraps were placed in the scrap bucket, which was ultimately emptied into my municipal compostable waste bin:
Scrap bucket filled with pineapple trimmings
At this point, Mom asked for some mashed pineapple, and got a total of six containers, which were placed in the freezer:
Three of the six containers of mashed pineapple Mom got
After about six hours, here’s what a tray of partly dried pineapple slices looked like, including the size shrinkage:
Tray of partly dried pineapples
The partly dried pineapple slices were shifted around to make space:
Space made on tray
After space was made on all the trays, four trays were emptied:
Four trays of space freed up
… and the first few pineapple slices dried to my liking were removed from the trays. Allowed to completely dry, pineapple will become crispy like potato chips; I like dried pineapple that is still a bit chewy and flexible, while there is still a very small amount of humidity left in the slices. As such, I remove slices when they have a leathery feel, and after the surface of the slices are no longer sticky.
Almost completely dried slices of pineapple
A zipper style sandwich bag was taken out to store the dried pineapple:
Zipper style sandwich bags taken out
… and the dried pineapple slices were stacked and placed in the bag:
Dried pineapple placed in bag
At this point — seven hours in — I finished slicing the rest of the pineapples, spread them on a couple of the emptied trays, and inserted the filled trays back in the dehydrator stack, for a total of ten trays:
Ten trays after seven hours
After nine hours, here’s what the pineapple looked like:
Tray after nine hours
… and a few more slices of dried pineapple were taken out for bagging:
More dried pineapple after nine hours
Collection of dried pineapple after nine hours
… and my dehydrator was down to seven trays after nine hours:
Seven trays after nine hours
After twelve hours, the dehydrator was checked again:
Tray of dried pineapple after twelve hours
… and more dried pineapple was taken out after twelve hours:
Dried pineapple taken out after twelve hours
… and stacked for bagging:
Dried pineapple stacked for bagging after twelve hours
… and bagged:
Dried pineapple after twelve hours
… and after all the shifting around and bagging, I was down to five trays in the dehydrator:
Five trays after twelve hours
At this point, I had gone to bed, but I woke up after a couple of hours at midnight, and checked on the dehydrator, shifting pineapple slices around and removing dried sliced pineapple. Here’s the bagged cumulative production after fourteen hours:
Total production after fourteen hours
… and I was down to four trays after fourteen hours:
Four trays after fourteen hours
Finally, after seventeen hours — in this case, three in the morning! (yes, I had set my alarm) — I emptied the dehydrator and bagged the last of the dried pineapple slices, for a total of five bags of dried pineapple slices, from a bit over five pineapples:
Five sandwich bags of dried pineapple
After a couple of days, I started eating the dried pineapple — yes, like a kid in a candy shop! 🙂
For several years, I have used a backwoods washing machine — basically, and literally, a slightly modified 20 litre bucket using a modified toilet plunger as an agitator — up at the cottage to wash clothes, towels, and even bed sheets, for its inherent value of washing clothes of course, but also to reduce the workload upon my return from holidays, as well as to implement a certain DIY ethic, and pass the time (in my eyes, in an amusing way). This is of course in the context of not having an automatic, electric washing machine at the cottage for a variety of reasons, including a lack of space, and the fact that the cottage is not winterized, hence there would issues related to freezing.
Note that while the use of modern conveniences of concentrated laundry detergent, as well as plentiful, clean water (from a pressurized water system) and a garden hose are shown in this post, depending on your circumstances and should you wish to make a backwoods washing machine for yourself, you may wish or need to adjust steps, practices, and so on.
Washing the laundry:
First, since my bed sheets at the cottage needed washing, I stripped my bed and took them outside to the back deck:
Laundry taken out
I also took out some other laundry to add to the wash:
Other laundry added to the lot
Laundry detergent was taken out (on the right), and previously, one of the laundry packs was diluted in water for easier use and dividing up in smaller laundry loads (on the left).
Dissolved laundry pack, and concentrated laundry detergent packs
My backwoods washing machine was taken out — a modified 20 litre plastic bucket and a modified toilet plunger:
Backwoods washing machine taken out
Backwoods washing machine taken out
A garden hose was taken out:
Garden hose taken out
Garden hose taken out
The clothes line was also up and in place for use:
Clothes line set up
Finally, sufficient clothespins were in place:
Clothespins needed for later
The lid to the backwoods washing machine was taken off the bucket:
Backwoods washing machine opened up
Clothes were added to the backwoods washing machine’s bucket:
Clothes added to backwoods washing machine
The diluted laundry detergent was taken out and added to the backwoods washing machine:
Diluted laundry detergent taken out
Laundry detergent added to backwoods washing machine
The plunger-agitator was added on top of the clothes in the backwoods washing machine:
Plunger-agitator placed in backwoods washing machine
More laundry was placed in the backwoods washing machine:
More laundry placed in backwoods washing machine
The backwoods washing machine was moved to a more convenient location on the steps of the deck at the cottage:
Backwoods washing machine moved to a convenient location on steps
The garden hose was used to fill the backwoods washing machine with water:
Garden hose used to fill backwoods washing machine
Garden hose used to fill backwoods washing machine
The lid to was picked up and placed on the backwoods washing machine’s bucket:
Lid picked up to place on backwoods washing machine
Lid placed on backwoods washing machine
The plunger-agitator was moved up and down like a butter churner:
Plunger-agitator was moved up and down
As part of moving the plunger-agitator up and down, the laundry will sometimes get caught a bit:
Laundry caught in plunger-agitator
After about five minutes of manual agitation, the lid was taken off the backwoods washing machine:
Lid removed from backwoods washing machine
Sometimes, the laundry may become caught up in the holes in the plunger-agitator:
Laundry caught in plunger-agitator
Given the rough-edged hole in the lid of the backwoods washing machine, the wooden handle can become worn and the wood fibres dislodged …
Fibres dislodged from wooden handle of plunger-agitator
… and which may transfer to some of the laundry:
Dislodged fibres transfer to laundry (already on clothesline)
After the washing had been completed for the first load, the individual items were taken out of the backwoods washing machine and hand-wrung, and were put aside for a few moments:
Washed clothing taken out of backwoods washing machine and hand-wrung
The rest of the dirty bed sheets were placed in the backwoods washing machine, and the agitation action mentioned above was repeated:
More bed sheets added to backwoods washing machine and the agitation process repeated
As the water on the steps of the deck and the garden tiles at the foot of the steps shows, the process can be a bit wet:
Wet steps and garden tiles at the foot of steps
At the end of the manual agitation, the bed sheets were removed from the backwoods washing machine and hand-wrung, and were put aside for a few moments.
At this point, the backwoods washing machine’s bucket of dirty wash water …
Bucket of dirty wash water
… was brought inside and emptied in the toilet, and the toilet flushed:
Dirty wash water flushed down toilet
Back outside, the backwoods washing machine’s bucket was rinsed with the garden hose:
Bucket rinsed with garden hose
The backwoods washing machine’s lid was rinsed with the garden hose:
Lid rinsed with garden hose
The backwoods washing machine’s plunger-agitator was rinsed with the garden hose:
Plunger-agitator rinsed with garden hose
At this point, the backwoods washing machine components were allowed to dry, and the backwoods washing machine was put away until the next use.
The laundry was hung on the clothesline:
Laundry hung on clothesline
In order to rinse the laundry, the garden hose was used to spray clean water on the laundry hanging on the clothesline:
Laundry being sprayed with clean water from garden hose
Laundry being sprayed with clean water from garden hose
At this point, the laundry on the clothesline is dripping water:
Water dripping from laundry on clothesline
Water dripping from laundry on clothesline
The bottoms of the various pieces of laundry were hand-wrung at their bottoms in order to remove the rinse water:
Laundry on clothesline hand-wrung to remove rinse water
As the laundry dries and become less heavy, they begin to get caught in the breeze:
Drying laundry beginning to catch the breeze
And depending on the amount and strength of the breezes and the winds, the laundry can really get caught in the wind:
Laundry really getting caught in the wind
As the laundry dried, it was taken off the clothesline …
Dried laundry taken off the clothesline
… while the rest of the laundry remained on the clothesline to continue drying out:
Rest of laundry continuing to dry on clothesline
Ah, the wind picked up quite a bit again, making the remaining laundry on the clothesline really get caught up in the wind:
Laundry really caught up in the wind
As the dried laundry was taken off the clothesline, it was folded up, ready for their next use:
Folded laundry
Although the backwoods washing machine has its limits regarding just how much laundry it can wash at once or just how well it deals with ground-in dirt, it is quite effective at washing regular albeit small loads, and is quite useful in situations in which more modern and convenient, automatic washing machines are not conveniently available!
Although over the past few weeks I have continued cooking a number of dishes from my collection of recipes, for this post, I decided to highlight another obsessive hobby of mine: Making firestarters!
I make these firestarters in such large quantities over time that I have few hard numbers quantifying “how much wax” or “how long to allow cooling” or “melt to what temperature”; it is a matter of experience and “feel”, although it is a process which could easily lend itself to measured amounts.
The process allows for me to do many of the steps below separately, as well prepare “for the next batch”.
Although I used to regularly sell these at craft fairs and flea markets, I now just liberally give them out to my neighbours at the cottage, as well as of course using them myself to light fires in the fireplace at the cottage during heating season.
Preparing the egg carton wells:
Flats from eggs sold in bulk were taken out:
Egg carton flats taken out
Egg carton flats taken out
Each flat is brought up to the light and checked for holes:
Flat checked for holes in the light. This flat has three wells with holes in them.
The wells with holes were cut out of the egg carton flat:
Wells with holes cut out
Flats were then trimmed around the edges:
Flat trimmed around the edges
Trimmed flats are stacked together for future cutting:
Trimmed flats stacked
Trimmed flats stacked
Flats were cut into pieces to be further cut:
Flat cut into pieces to be further cut into pieces
The flat pieces were again cut into manageable pieces:
Flat cut again into pieces
The pieces were cut into individual sets of wells of varying formats (2, 3, or 4 wells) for making the firestarters:
Flat cut into formats of 2, 3, and 4 wells
The cut wells are stored in a box:
Cut wells stored in box
Making the firestarters:
Melting the wax:
A portable electric countertop stove was turned on:
Stove turned on
Some old candles were placed in a pot:
Old candles placed in a pot
The pot of old candles was placed on the stove:
Pot of candles placed on the stove
The wax was melted:
Melting wax
When “enough” wax was melted …
Melted wax
… liquid wax was poured off into a coffee can, which is a convenient size for dipping the filled egg carton wells and soaking them in wax:
Liquid wax poured into a coffee can
Liquid wax in coffee can
Large unmelted pieces of wax were put aside for the next batch, and some solids such as a metal wick base and a wick were transferred to another coffee can where solids from the melting of waxes is collected, to be later rendered for its wax value, and the solids burned in the fireplace:
Solids from candle meliting saved in a coffee can
Preparing the egg cartons:
Cut egg carton wells were laid out on a tray:
Cut egg carton wells laid on a tray
Using a sawdust and wax filler:
At this point, a sawdust filler is used, which I normally create after the current step; hence here, I used sawdust filler made during a previous batch. If you have not done so , see the sections (lower down) on making the sawdust and wax filler.
Cubes of sawdust and wax
The wells of the cut egg cartons were filled with the sawdust and wax mixture:
Egg carton wells filled with sawdust and wax mix
Dipping the filled egg carton wells in the melted wax:
A grouping of egg carton wells filled with sawdust and wax mix was picked up with a pair of pliers, and brought over to the coffee can of liquid wax:
Egg carton wells with sawdust and wax picked up with pliers, brought to coffee can of liquid wax
The wells were dipped in the liquid wax:
Wells dipped in liquid wax
The dipped wells were lifted out of the liquid wax:
Dipped wells lifted out of liquid wax
The dipped well was returned to the tray:
Dipped well returned to tray
The rest of the wells were dipped in the liquid wax:
All wells dipped in liquid wax
The tray of firestarters was placed on the lawn outside my shed where there was a light breeze to help cool the firestarters:
Firestarters placed in the breeze to cool
Trimming the firestarters:
The mostly cooled firestarters were picked up, in order to trim the solidified wax from the bottoms:
Mostly cooled firestarters picked up, to trim solidified wax from bottoms
The solidified wax was trimmed off the bottoms of the firestarters:
Wax trimmed off bottoms of firestarters
The wax trimmings were placed back in the pot with the unmelted candles, to be melted during the making of a future batch of firestarters:
Wax trimmings placed in pot
Making the sawdust and wax filling:
Sawdust was taken out:
Sawdust taken out
Sawdust was placed on a tray:
Sawdust placed on tray
The liquid wax, which at this point had started cooling and hardening, was placed back on the stove to remelt the wax:
Melted wax placed back on stove
The remelted wax was slowly poured over the sawdust:
Melted wax poured over sawdust
Melted wax poured over sawdust
Sawdust not having absorbed any liquid wax was shifted on top of the rest with hot wax:
Sawdust covering the rest with hot wax
More sawdust was added to cover the wax soaked sawdust:
More sawdust added to cover the wax soaked sawdust
The sawdust was pressed down with my hands to spread out the hot wax:
Sawdust pressed down with my hands
The wax and sawdust were put aside in order to cool for a few hours:
Wax and sawdust allowed to cool
The rest of making the filler can be found at the end of this page, after the section on bagging the firestarters.
Cutting and trimming fireststarters:
The firestarters, now having cooled, were brought into the house, and placed on a working surface, a piece of plywood board on the floor:
Firestarters placed on a cutting surface
A knife with a serrated blade was taken out to cut the firestarters into individual units:
Knife with serrated blade taken out to cut firestarters into individual units
The firestarters were cut into individual units:
Firestarters cut into individual units
Firestarters cut into individual units
Firestarters cut into individual units
The protruding bits of sawdust and wax were trimmed with a pocket knife:
Protruding bits of sawdust and wax trimmed with pocket knife
Protruding bits of sawdust and wax trimmed with pocket knife
Protruding bits of sawdust and wax trimmed with pocket knife
Sometimes, an individual firestarter does not need to be trimmed:
Firestarter not needing to be trimmed
Here is the pile of trimmed firestarters:
Pile of trimmed firestarters
Trimmings from the firestarters were placed in the can, for use in a future batch of firestarters:
Trimmings placed in can, for use in a future batch of firestarters
Bagging the firestarters:
The trimmed firestarters were grouped in dozens (in this case, three dozen):
Trimmed firestarters grouped in dozens
Seven inch by eight inch sealable bags were taken out:
Sealable bags taken out
Sealable bags taken out
Firestarters were placed in bags, a dozen per bag:
Firestarters were placed in bag
Prior to making this batch of firestarters, printed out labels were copied, four to a page (and for this post, my phone number was blacked out in the pictures):
Printed out labels, four to a page
Labels were cut:
Labels cut
Labels cut
Labels cut
Labels were folded over (note that I live in a predominantly French-speaking area, hence the text is in both English and French):
Label folded over
A folded over label was placed in each bag:
Folded over label placed in bag
And here are the three bags of firestarters made in this batch, ready to give away or sell:
Three bags of firestarters
The bags of firestarters were placed in a plastic crate with other bags of firestarters:
Bags of firestarters placed in a crate with other bags of firestarters
Back to making the sawdust filling:
A while later, when the sawdust and wax mix had completely cooled, excess sawdust on the tray was transferred back into the bucket of sawdust:
Loose sawdust transferred back to bucket
Loose sawdust transferred back to bucket
Excess sawdust was brushed off of the cooled and solidified sawdust and wax mix:
Excess sawdust brushed off cooled and solidified sawdust and wax mix
The cooled and solidified sawdust and wax mix was brought to my work surface:
Cooled and solidified sawdust and wax mix brought to work surface
Some of the pieces of solidified sawdust and wax mixture were placed on the work surface to cut into smaller pieces:
Pieces of solidified sawdust and wax mixture placed on work surface
The pieces of sawdust and wax were cut into fairly small cubes (about half an inch) :
Solidified sawdust and wax mix
Some of the sawdust and wax pieces were sliced into lengths …
Some pieces sliced into lengths
… which were then cut into about half inch cubes:
Slices of sawdust and wax cut into half inch cubes
Finally, the cubes and crumbs were placed into a container, to be used as filler for a future batch of firestarters.
Cubes and crumbs placed in container
If you came from the top section to see how to make the sawdust filler, return to the section on filling the egg carton wells.
I have a thing about glasses, cups, and containers for drinks of the water and non-alcoholic varieties, specifically for drinking iced tea (Nestea for those who are wondering), of which I drink really large amounts daily, and which itself is a personal trademark.
My obsession with drink containers is to the point that it would also be a bit of a personal trademark in and of itself except that, barring given containers that have been and/or are particularly noticeable or distinctive in their colouring scheme or design, most people would not notice my obsession because most of the containers I use — publicly, anyway — are actually rather mundane containers and cups.
That being said, I’ll start with what I use at home to drink my iced tea:
Some of my favourite glasses, which I use at home.
At home, my favourite drinking glasses are old glass candle holders of the variety that some restaurants have been known to have on their tables. I started using the glass candle holders back in the early 1990’s when I found one still with the wax in it; I took it home, reclaimed the wax for a hobby of mine that uses wax, and cleaned up the container. I have since found, cleaned, used, and unfortunately, broken well over a dozen of these containers over the years.
I also have a tall glass container that may have once served as a flower vase, which was found in a garbage bin.
When I go out, whether or not the drink container I use is distinctive enough to be a personal trademark depends on which container I bring with me. Below are three of my more distinctive containers:
A few of the attention-grabbing travel mugs I have.
The large “X-Treme Gulp” mug – the largest of them in the centre – holds about a litre and a half, and garners attention and incredulous comments to the order of it being “one really big coffee mug”. This was a surprise Christmas gift from my aunt in 2005; I had mentioned my interest in (at least somewhat) unusual drinking containers, and I probably joked about wanting a clownishly large container. That Christmas, a package arrived in the mail, with the mug in it. It is indeed clownishly large, and at the point of being unwieldy to use and drink from.
The yellow mug on the right holds about a litre, and garners similar attention. In 1995, I was driving around for work, and a yellow “something” caught my attention in a snow-filled ditch; I stopped and went to find it, and it was the thermal travel mug pictured above (but without a lid). Obviously, I grabbed it and took it home.
The smallest of them holds about a half litre, and its claim to fame is its wide bulbous base. In 1996, I was part of an organizing group for a party weekend with a wide group of friends, and we’d ordered a bunch of those travel mugs with custom artwork put on it memorializing the event — this one being the tenth edition of the event. We ordered enough for everybody to get one, so as to discourage people from leaving empty bottles of beer, liquor, and soft drinks laying around, which not only of course would have been a nuisance to clean up at the end of the weekend, but which also would have become a safety hazard when many of about a hundred, twenty-somethings became somewhat to very inebriated.
Found Containers
A particular characteristic many of the cups, mugs, and bottles which I have collected over the years is that they have been found on the street, or were found in recycling bins or the garbage.
A number of the mugs, bottles, and water containers I have found on the streets and elsewhere over the years
Most of these containers and mugs shown above have at various times been a favourite container of the moment, and have seen a lot of use over the years. In fact, the opaque container with the red top (second row, first on the left), which I found in the bushes while I was geocaching in 2002 or 2003, came with me on a trip to London, while the small greenish Nalgene container with the black lid (first row, second from right), was found in a lost and found pile in 2017, and went with me on a couple of cruises.
Of course, all containers I find on the street or elsewhere are properly washed in a dishwasher before I ever use them; it’s the same logic as “don’t you wash your dirty dishes before using them again?”
Unfortunately, a number of the bottles and cups I find in the street, including the stainless steel units, that were used for coffee, have a lingering coffee odour to them, and even after an initial cleaning, will impart a coffee taste when filled with a new drink. This is a mild issue for me since I do not drink coffee, nor do I particularly care for it. However, the taste disappears after a few uses and cycles in the dishwasher. Soaking in a mild bleach solution can help in extreme cases.
One virtually new travel coffee cup I found on the street in a snowbank in 2018 was branded with the logo of a well known goodwill organization; I imagine that the organization’s local major location being barely a block away made the chances of finding the mug there coincidental approaching zero. A family member guilted me into not using it, and tried to prevail upon me to return it to the organization. I ultimately gave the travel mug to my aunt when she visited, so that she may have a thermal coffee mug for when she were to go about her visits with friends.
Another travel mug I found in 2016 is a favourite given how well its lid seals (photo above, first row, third from the right); however, it has two little holes in its base, which allow water to enter in between the mug’s interior and exterior when I clean it in the dishwasher, upside-down. Mildly annoyingly — and a perverse reason why I like it all the more — it leaks a lot of water after I take it out of the dishwasher. However, its story lies in the corporate logo and company name which were silk-screened on it side; I was not familiar with the company name, and thought nothing of it, much as I would not think anything of most other common corporate logos on a mug. For months after finding the mug, I innocently used it everywhere, such as at work and other areas my life would bring me. One day, a work colleague saw my mug’s logo; he asked me if I knew what it meant, and suggested – in a suspiciously insistent way – that I should look it up. My immediate reaction was one of horror that it might be connected to a website of a particular type of explicit material (which could lead to unwanted consequences with my employer); I checked on my personal phone’s internet connection — of course not my work computer with the work internet — and found out that the logo was indeed generally connected with explicit websites. I quickly scraped the silk-screened logo off of the stainless steel exterior of the mug, and of course I continue to use the mug to this day.
Nalgene Water Bottles
Prior to learning about Nalgene containers for the consumer market in the early 1990s, and that they don’t absorb and retain flavours, then impart them in later contents, I only knew of Nalgene through school lab equipment such as squeeze bottles for lab-grade water and other reagents and solvents such as acetone and hexane.
Generally, I use Nalgene bottles for carrying water around, and I’ll drink my iced tea from another container or mug.
My current collection of Nalgene bottles
My first Nalgene bottle was one I found at a campsite in Vermont in 1994, left behind by previous users of the site. Unfortunately, after several years of service, I inadvertently left it – filled with water – in my car overnight in the middle of a particularly bitterly cold part of winter. The ice expansion caused the plastic in the bottle to split open, and I put it in the recycling bin.
Another early experience with Nalgene bottles was during a sales call with my employer in 1995, who showed a potential client two water samples — one murky, one clear — in clear Nalgene sample bottles in order to demonstrate his filtration device to recondition the process water or glycol in building heating and cooling loops. The sales demonstration was very effective on me, and I asked if I might be able to secure a bottle or two. I used the bottles he gave me for several years; however, the plastic was soft and over time became deformed by the heat in my dishwasher.
Over the years, I have found a Nalgene bottle in a recycling bin (second from the right, 500mL, blue cap), another in a lost and found bin (last on the right, green container, black cap), and others at used goods stores. My most recent acquisitions are two 1.5 litre bottles (first and second on the left), received as a recent Christmas gift (2019).
Stylish Insulated Stainless Steel Bottles
The “stylish” insulated stainless steel bottles I have: three new ones on the left, which I have never used, and three used ones I found on the street on the right
There are the relatively new fangled stylish insulated bottles that seem to have taken the water bottle market by storm. Although stainless steel insulated bottles and thermoses have been around for ages, S’Well and similar bottles seem to have started a style revolution in water containers over the past few years, with a lot of copycat competitors, ranging from low end look-alikes to high-end rivals.
I have three new such bottles which I have never used: One received from my employers in 2017, of course with corporate branding (third from the left), and which was the first time I’d seen the style; another received as a Christmas gift in 2018 (first on the left), which was a copycat; and one received as a promotional item during a themed cruise in 2018 (second from the left).
The only such bottles I actually use are the three I found on the street: A cheap discount store, single layer / uninsulated knockoff bottle in 2019 (third from the right); a salmon pinkish orange bottle of the S’Well brand in 2019 (second from the right), and a third, which I call “Le Chic” (because of the branding on it) in 2020 (last bottle on the right). All three show varying degrees of definite signs of wear and tear, and at least two leak very slightly, one a bit more than the other. The “Le Chic” bottle is a very recent addition, and it has the coffee taste issue mentioned earlier; it will probably enter into my regular usage rotation.
Glass Drinking Jars
I have known about glass drinking jars for a long time, although I only first had one in 2006, when I bought two at the tuck shop at a campsite I was spending a long weekend at; they were relatively expensive, but I purchased them anyway.
Since then, I have found a few at Walmart (the fruit design on the left in the picture above) at a far more reasonable price. Of the other two, one was found on the streets when it caught my eye one morning, while the other was given to me by the recipient of some of my pickled eggs who was returning empty mason jars.
Save for the fact that they are glass and hence susceptible to breakage, these jars are great travel drink containers: In fact, I brought one with me as my main drinking container during a month long business trip out of province in 2009. It served me well, and it amused me when I used it on an airplane. Once I’d finished drinking the water the flight attendant poured into it, I put a lid on the drinking jar. When the airplane landed, I opened it, and was amused by the popping sound caused by the relative vacuum created due to slightly lower cabin pressure.
However, as to the breakage factor, they can be difficult to use on a daily basis in a backpack, since I have accidentally broken a couple of them over the years by simply putting down my backpack on a hard floor in a less than ginger fashion, unfortunately breaking the jar in the bag.
What’s Next on the Horizon?
Of course, I haven’t told the stories to all of the containers I’ve seen come and sometimes go, let alone some that never were. But that is, in a sense, part of the story: There have been so many over the years — including old plastic containers never meant to be used as drinking containers, but rather should have been placed directly in the recycling bin once the original contents were consumed, or finding really good quality travel mugs on the street with excellent seals, that allow me to vigorously shake it to dissolve the iced tea powder I added to the water in it. Oh, and the sort of pear-shaped clear 500mL bottles that a certain type of inexpensive, convenience-store table wine came in … I have fond memories of using those for several years throughout the 1990s.
And while over time I’ve had — and continue to have — favourite containers in the lot, the choice of which container(s) is(are) today’s or this week’s favourite can be ephemeral over time, especially as the overall collection grows with new additions, and contracts due to losses and breakage.
Also, while I actually (somewhat) zealously protect my containers, including very much those found for free, this has also led me have a certain zen when one goes missing, especially if it was one of the “found for free” containers. Just as I found the container because somebody else lost it before me, sometimes I lose containers, leave them behind locked doors to rooms to which I no longer have access, or they get confiscated at a public event such as at a stadium that doesn’t allow participants to bring in items like mugs and bags, both for safety reasons (projectiles), as well as to protect revenue streams from the concession stands.
But this is one of the fun things about what I dare call a hobby: The collection evolves and renews itself, and while I may “mourn” the loss of one of my containers, all I have to do is wait to find another “new to me” container or mug in my various travels, and I’ll end up with a new favourite container.
I purchased a Katadyn Pocket filter in 2012 for a variety of reasons, the principal amongst which was to have drinking water at my cottage during the off season (winter) when the water system is turned off to protect it from freezing. Issues such as not wanting to depend on neighbours and even just whether or not the neighbours were there, the relative convenience of having as much water as I was willing to filter when I wanted regardless of the hour, and not having to transport very large quantities of water from the city, circled through my head.
Like so many other people, I repeated in my blog the 50,000 litre nominal capacity of the filter cartridge as a deciding factor in the purchase of this particular filter. Despite having accepted the value as a ballpark figure to mean “you’ll get lots and lots and lots of water, a few orders of magnitude more than other filters”, I also recognized the ballpark nature of the figure, and that actual capacity would vary (possibly considerably) according to real world conditions such as varying water quality and just how vigorously one might clean the filter cartridge. Unfortunately, I have been disappointed with just how variable this figure has actually proven to be in my case.
In 2016, I began wondering about the real life capacity of the filter cartridge, given a noticeable change in pumping experience filtering water from my artesian well instead of melted snow from my front yard at the cottage. The obvious visual wear of the filter gave me a reference point, and, having kept notes, I revealed that since purchase and up to that point, I’d only filtered roughly 1,500 litres. I had estimated that I might attain a very rough total capacity of 3,000 litres.
In 2017, I had passed a benchmark: The plastic gauge that had come with the unit had passed over the filter, at about 1,650 litres, and by the time I’d written the post, I’d reached 1,750 litres. This represented 3.5% of the nominal 50,000 litre capacity. I mused over the lack of any reported real life capacities that I could find on the internet, going through some hypothetical arithmetic I was able to develop from one source.
I knew that I wouldn’t get anywhere near the oft-touted 50,000 litres. In anticipation of needing a replacement filter cartridge, I went to a store selling them, hesitantly because the replacement part has a fairly expensive price. I purchased a replacement, and was pleasantly surprised to get a 73.2% discount on the price at the counter (for reasons unknown). I surmised that a part of the discount was since the unit was in a box that had obviously been opened and resealed, although why it was so significant still eludes me. The only thing in my favour were the local consumer protection regulations requiring that in the case of a difference between the advertised price and the price at the counter, the consumer gets either up to a $10 discount from the advertised price if lower than the value at the register, or the value of the register price if lower than the correct price.
Since January, 2017, when the gauge passed over the filter unit, I have been bringing somewhat more water up to the cottage, up to five gallons at a time instead of just a single gallon, in order to somewhat extend the life of the filter cartridge. I have been continuing to use the original filter unit, wanting to take full advantage of its lifespan.
During my most recent weekend to the cottage in April, 2019, I began filtering water as usual. The filter had been cleaned and bleached prior to use. However, the filter quickly clogged, and suddenly, the plunger went down quickly; the unit’s internal pressure had been sufficient to collapse that which remained of the filter.
It should be noted that the filter failure was due to the fact that over time and hundreds of filter cleanings, it had been physically worn away, and therefore the failure was due to it being thin (about 1mm to 2mm thick) and not because I’m inventing a frivolous claim of manufacturing defect.
I also have a definitive capacity of the cartridge I received with the original purchase, under the various conditions of water quality I filter and maintenance: approximately 2197.5 litres (let’s round that up to 2,200 litres), or 4.4% of the stated 50,000 litre capacity. It was used up over seven off seasons at the cottage, providing a significant amount of the drinking quality water needed for cooking, cleaning, and drinking.
It seems that I didn’t get anywhere near the nominal capacity. Sigh.
Now it’s time to see how much capacity I get out of the second filter.
I had reached an estimated 1,500 litres of filtered water over four winter seasons of using the filter at the cottage during the off-season when our water system is turned off. I had further guessed — hoped, really — that I might get as much as another 1,500 litres, spread over two to four more seasons, and as such it might take as long as until the year 2020 to know when the filter cartridge would need to be replaced.
I was overly hopeful. In January of 2017, I was up at the cottage for a week, doing a lot of cooking and needing a good amount of filtered water. I tested the filter unit against the gauge supplied with the filter, and since the gauge passed over the filter unit, “it was time” to change it.
The winning total (as of January, 2017): 1650 litres. Or, about 3.3% of the oft-touted capacity of 50,000 litres.
As of September, 2017, I have not replaced the filter yet, and am at approximately 1750 litres, or about 3.5%.
This makes me wonder, yet again, what Katadyn knows about the “in the wild” capacity of its filters. As in, how come I have only gotten 3.5% of the rated capacity of the filter before it has worn out.
And it makes me wonder why, in my perhaps modest efforts to find out how much water people actually filter with their units, just about everyone (including myself, admittedly, shortly after I bought the unit) talks about 50,000 litres, but few talk about “well I only filtered this much before I had to replace it”, or the like.
There are reviews I found on the mec.ca website there from people whose posts are meant to imply that they’ve gotten a lot of use out of their filter. I saw one that said that over 25 years, the person was on their third replacement, and claimed to have filtered over 250,000 litres! (or over 62,500 litres per filter!)
A comment I came across said “I bought mine in 1988 and I have yet to change the filter”. I can imagine that over 29 years one might have used it quite a number of times; but what, every weekend for groups varying from two to five people? Once or twice a year when they take their children hiking one afternoon around the cottage or campsite that they rented for a few days during the summer holidays, and the rest of the time they’re on a water system? Or “I’m an avid hiker who goes out hiking every weekend I can, and I bring my Scout Troop hiking all the time and they are constantly asking me to filter water for them”?
Yes, I have seen some reviews that are “a bit more detailed” than that, such as “well after 15 years I replaced it, having filtered thousands of litres of water” … which still begs the question: Thousands of litres of water … that sounds vaguely less than 50,000; 7,000 litres is “thousands of litres”, as are 4,500 litres, and 25,000 litres. So did you keep a log of roughly how much you filtered? Trip diaries such that you could guestimate or have a basis on which to assume that each trip you used it, you typically filtered a given amount a day and you were gone a given number of days, and at least have a ballpark idea of how much water was filtered?
And here’s one that I found mildly useful: “I used it travelling for 18 months through India, and used it instead of buying bottled water all the time” … but that doesn’t really tell me how much water they filtered. But, it allows for some hypothetical arithmetic. Let’s say there were two people producing let’s say three litres per day per person for 18 months — 548 days, give or take — that’s 3,288 litres, or almost 6.6% of the rated capacity of 50,000 litres. At four litres per person per day, that’s 4,384 litres, or almost 8.8%. At five litres per person per day, that’s 5,480 litres, or almost 11.0%. Now that’s a lot of drinking water, both per person, and just a lot of water to filter in a given day while travelling. After that, I have to ask what they were using the water for! Were they filtering enough water to wash their clothing and showering or bathing? If so, given how much time it takes in reality to filter a few hundred litres a day with the unit, were they spending *all* of their time filtering water and not actually taking advantage of their trip in India?!? And, of course, it should be noted that they *didn’t* mention that they bought the unit expressly for this trip, or never used it again before or after.
I am obviously getting worked up: Were I to have filtered 25,000 litres (50% capacity) or more, over a decade or two, I might not be as upset, and would likely chalk it up to the expected variation in the field due to “real world circumstances”. However, losing more than 96% of the rated capacity is frustrating to the point of unacceptable, to say the least.
The only consolation?
In January, 2017, after having passed the plastic gauge over the filter unit and having learned that it was at the end of its designed lifespan, I went to a Mountain Equipment Coop (MEC) to buy a new filter unit, not really sure whether I wanted to go through with the expensive purchase; the replacement filter units cost $235, compared to $435 for a new complete unit.
The last unit on the rack — which is the unit I therefore bought — looked like a returned unit. (Later when I got home, I was able to open it and learn that everything was there: A new filter unit, a new spigot hose, new o-rings, a new scrubby pad or two, a new bag for the spigot hose, a new tube of lubricant, and whatever else was supposed to be there.)
The list price: $235.00
The price that rang up at the till: $63.00
Discount: 73.2%
I did a double take, and without thinking I said, “That isn’t the correct price.” I of course should have kept my mouth shut, but no matter: Québec’s consumer protection laws were on my side. Were the price at the register to be higher than the advertised price, the customer would pay the advertised price, less a $10 indemnity (with a few exceptions as well as a few other pricing rules applying as per the case); if the price at the register were to be lower than the advertised price, then the customer would pay the lower price, regardless of the difference between the two prices.
Nonetheless, we went through the motions of verifying the price on the MEC website, and indeed confirmed that the list price was $235. However, either the clerks were savvy and well trained, knowing the law in this case, or they were naïvely trusting of the price scanner / computer / register, and insisted that the $63 price that rang up on the machine was the price to be paid.
You can be sure that the next day, I made a point of going back to the same MEC to see if they’d restocked the shelf with that item, in order to hopefully take advantage of another massive discount. Sadly, they had not. And, I expect that the store knew that the item I bought was the last unit in the store, and that (I presume that) it was a returned and restocked item, hence (presumably) the discounted price. Perhaps this doesn’t explain just how deep the discount was, but it nonetheless explains some of it. A few months later, I was at another location of the MEC and I looked at the section with water filters; they had replacement cartridges, in factory sealed boxes of course, and the price at the rack was $235, as expected. I did not dare ask for a price check. 🙂
So the experience was not a complete loss, to the point of it almost having a mildly pleasant dénouement, but the deep discount on the replacement unit still does not make up for the remaining 23.5%-ish of capacity I had expected but did not receive, and continue to not expect to receive, out of the original filter. Which, incidentally, as of September 2017, nine months later, has not yet been replaced; like one of the pub patrons in the following joke, I want to squeeze as much capacity as I can out of the filter before I finally replace it.
The promised joke:
Three people are in a pub, each ordering a drink of their preference. Unfortunately, each drink comes with a fly in the glass.
One returns the drink and requests a replacement, without a fly of course.
Another removes the fly from his drink, and proceeds to drink it.
The third grabs the fly from the drink and calls out “Spit out every last drop, you little scoundrel!”
In 2012, I bought a Katadyn Pocket water filter principally for use at the cottage during the off-season when our water system is turned off, plus a small handful of personal interest reasons like being a trained water techie, having been involved in Scouting, camping and hiking a long time ago (but no longer), having been involved in geocaching which can involve some hiking in the woods, filtering water from snow or ice for my homebrewing (mostly just to be able to have a story to tell about the “specialness” of the water), and generally to use for my amusement while hiking around at the cottage during my holidays and other times.
About two thirds of the way down the above post, I asked “So, does the filter work? And do I get the runs any more?” to which I answered with an obvious tone, “Of course, and of course not.” Those answers are as true today as they were back in 2013.
I use the filter principally up at the cottage during the off-season, about mid-October to mid-May (during the winter, when the water at the cottage is turned off due to freezing weather), for my water needs for drinking, cooking, hand washing, and dish washing (normally, just the rinsing part at the end.) Obviously, as long as the water isn’t grungy, a lot of water doesn’t need to be filtered to begin with, like for soaking dishes before cleaning them, or as long as it’s fairly clear, for washing my hair and taking a sponge bath.
Every year, I keep a register of the amount of water I filter, as a function of the five litre plastic jug to receive the filtered water, which I always fill up to the brim. I’ve checked the 2014-2015 and 2015-2016 registers (I can’t seem to locate the previous two), and I respectively had filled the container 67 and 72 times. That adds up to roughly 695 litres of water. There is going to be some variance in this number, since I when I fill up my container for brewing water, I skip using my 5 litre container and fill the brewing water container directly.
Assuming that during the previous two winters (2012-2013 and 2013-2014), I’d used it similarly, let’s say that I’ve filtered about 1,400 litres. Add to that the very occasional use during the intervening summers, let’s say a good 100 litres, and I’m up to about 1,500 litres.
Here’s the clincher, though: The ceramic filter is visibly wearing down after four seasons of use, and I’m certain I won’t get 50,000 litres out of it.
Normally when I use the filter to filter melted snow or lake water, I have to clean the filter typically after about 12 or 13 litres, because it’s becoming too difficult to filter water at that point due to the ceramic filter clogging up. On general principle, barring the exact number of litres, this is normal and has always been to be expected.
However, recently I noticed something I find curious: During my most recent usage, I was filtering water from the artesian well, which is a good 60 feet deep. I was filtering this water since while the water system had been turned on, I hadn’t yet bleached the well after the winter to clean out the well as well as the house’s pipes. The curious part: I was able to get to 20 litres and beyond without any increase in difficulty in operating the filter, and were I not to have been too curious and opened up the filter for a preventative cleaning, I would have been able to filter an ample amount more.
The well, being a good 60 feet deep, is therefore supplying water that has been very nicely filtered by typically 60 vertical feet of gravel and sand. Further, since I’m assuming that the aquifer is at least somewhat dynamic, I assume that one day the water I’ve drawn from the well could have been rain water or lake water from a few days previous that trickled through the 60 feet of gravel and sand on my property, while another day the water may be runoff having traveled through I don’t know how many hundreds or thousands of lateral feet of sand and gravel from the hills behind my cottage. As such, the water is presumably — and I assure you, actually is — sparkling clear.
This is as compared to when I filter lake water or melted snow, the latter of which, may I remind you, is not quite so pristine as you may think, even when excluding the yellow variety; it is relatively chock full of dust particles that fell with the snow or became nuclei as part of the condensing and / or crystallization process. At this point I assume that at least some of the dust particles may be coming from the various chimneys at the cottages surrounding mine, including the chimney from my own cottage.
Which leads to the notion of this post regarding the filter’s capacity.
The filter is rated as having a capacity of “up to 50,000 litres”. When I bought the unit, I did recognize this to be codespeak for “Depending on the source water quality, the capacity may and will be reduced in real life.” Unfortunately, as it seems in my experience so far, possibly by a very significant margin.
However, I am wondering exactly when I’ll be needing to replace the filter. Yes, I have the little gauge to measure the filter thickness, and I use it occasionally. The question *is*not* “How will I know when to change the filter?” The question is “*When* will the ‘when’ be.” Let me explain.
I’d guess I’ve worn down at least half of the working thickness of the filter in the past four years of use over roughly 1,500 litres, especially if my vague memories of where the gauge the unit comes with was at when the filter was new are correct as compared to where it is now, and just visually guestimating the wear against where it obviously used to be when it was new.
And here’s the conspiracy theory:
I bet that the 50,000 litre estimate that they give is based on using either laboratory grade distilled water, or perhaps treated tap water intended to be potable.
I know that everyone’s source water will be different, and generally using it while traveling to areas where the tap water is clear but not quite potable is as legitimate a use for the water filter as filtering swamp water while out hiking.
(As a side opinion: Regarding dubious water systems while traveling, depending on where you go, unfortunately outside of the westernized world — and even within it in some cases — the tap water may not be quite potable at least from a microbiological point of view as one might expect or hope it to be. The water system can be dubious at best due to antiquated pipes, or the production plant is old and breaking down, or the employees are severely underpaid, or there aren’t enough of them to do the work well. And that’s just the areas which have a distribution system, and that isn’t delivering water that’s smelly or cloudy or outright foul.)
But I’m wondering just how long my filter unit will actually last. For the moment, I’m betting on another two to four cottage seasons, or “up to” another 1500 litres, the way I’m using it. That’s still far beyond other filters where the unit has a nominal capacity of a few hundred litres, and the filter unit itself is disposable and needs to be replaced the way a razor blade in a razor has to be, or ink cartridges in a “wow this printer isn’t expensive at all!”. Ultimately *a* *part* of what makes the other filters, razors with disposable blades, or ink jet printers so deceptively inexpensive is that the manufacturers make their money in selling you spare parts and refills.
I know that the kind of water I filter and of course its quality are far beyond Katadyn’s control. I know that if I’m filtering snow where a good amount of the particles to remove are composed of fine mineral dusts, there will be a sandpaper effect when I’m cleaning the filter, versus filtering stream water where the solids to be removed are more likely to be decaying organic matter in the form of fish poop and dead leaves, which will be easier to clean off the filter when the time comes. I know that the filter is designed such that when it is being cleaned, the process is meant to be ablative. But I’m wondering how much of my perceptions are, well, perceptions and not real life, how much of my use represents an edge case, how much my of cleaning is a bit too vigorous, and so on.
And I wonder just how much Katadyn knows that the 50,000 litre mark is about as close to an imaginary number as it can get. (Or conversely just how delusional I am. 🙂 ) I’d love to see their internal graphs on the real life capacity of their filters. I’d love to see the range that their customers get out of their filters.
So Katadyn: Here’s my estimate, for my filter — about 3,000 litres, given the kinds of water sources I’m using (cottage country snow, some lake water, and a small sundry other sources like streams when I’m hiking, etc..) At the rate I’m going, I expect that it may take as long as until 2020 to find out, though. 🙂
Any and all Katadyn Pocket Filter users are invited to leave your estimate — I hope at least somewhat evidence based — here, or send me an email malak at the site malak dot ca
I used to be rather involved in Scouting and camping, so it was no surprise when my brother recently sent me a link to “41 Camping Hacks That Are Borderline Genius“. (Here is my archive of the page in case it disappears ) The idea was to present a list of camping tips that, while often easy once you’ve looked at them, seem to elude many of us. The tips ranged from the small to large, from the really backwoods to mostly the car camping with a family crowd variety, from the simple to the involved. I read the list and found some tips interesting, some I’d done before, some I’d never thought of, and enough of which I thought were downright gratuitous in their inclusion in the list (in my mind — although this itself isn’t listed — along the lines of “if you’re going for more than an hour you’ll want some food”.)
This post is about one of the tips that I found useful.
The “hillbilly washing machine” was a gem for me: Someone else would no doubt list it as mundane, impractical, or on some level conceptually obvious. According to the proponent, this backwoods washing machine could be made for about $6. (Here is my archive of the page.) This person was a blogging mom telling about her participation in the Second Annual Flats and Handwashing Challenge (again here’s my archive), trying to involve other parents in a challenge to use reusable cotton diapers for a week instead of expensive store-bought disposable diapers. One of the challenge’s rules suggests that buying / making / securing a sufficient quantity of reusable diapers in order to last the week without having to wash them seemed to defeat the purpose of the challenge, and as such the challenge suggests the washing machine as one of the ways to make participation (both short and long term) practical.
The concept is really simple: Take a five gallon bucket with a hole in the lid and use an old fashioned toilet plunger to simulate the function of a washing machine agitator. Add water, soap and clothes to be washed, and voilà , you have a functional washing machine.
I found the idea intriguing: Having a three-season cottage that lacks the space and appropriate place for a washing machine (read it lacks a heated space during the winter to avoid freezing), this seemed to fit the bill, regardless of the time of year. Over the years I’d gotten mildly tired of always making sure that I’d be bringing clothes up from the city for the weekend, let alone enough. As such I had stocked my wardrobe and drawers there with old shirts, pants and the like that were perfectly serviceable but of course not exactly appropriate for showing up to work, let alone the likes of a wedding. I’d even gone so far as to buy a dedicated set of socks and underwear in sufficient quantity for the usual longest stint of two weeks that I would spend up there. I of course had backup plans that I could hand wash some small items in the sink or bathtub, drive to one of the towns about 45 minutes away and use a laundromat, or in an extreme emergency ask one of the neighbours if I may draw on their goodwill and use their washing machine, a plan I hope I never have to use. (This goodwill capital is reserved for “it’s the middle of the winter, I don’t have running water, and I desperately need a shower because such-and-such occurred; a sponge bath just won’t do.”)
So for the next couple of weeks, I kept my eye out for a five gallon bucket on the side of the road on garbage days, having a 16 litre square bucket in reserve just in case I was unsuccessful. Fortunately, my “nice” square bucket did not have to be sacrificed. The “new” bucket was in a previous life apparently used to hold kitty litter, based on the kitty litter dust on the bottom and its proximity to a cat box being thrown out. Its original function was to hold commercial hamburger pickles for a restaurant — and the brine smell permanently permeates the plastic, but, even for one who does not care for pickles, only to a pleasantly low level.
As a side note: I don’t know about how the geometry would have worked out, but based on my experience, the size absolutely does matter — a full 20 to 23 litre bucket is absolutely necessary.
The first part of the job was a general cleaning of the bucket — removing a commercial label, a general washing, and the like.
The next part was to cut out four of the eight sections along the side of the lid that holds the lid to the bucket — I obviously would want the lid to hold to the bucket during usage, but as many people familiar with buckets intended to be water-tight and resealable after opening know, these lids can be a pain to secure properly onto the bucket, and then remove from the bucket. Removing four of the eight sections changed this dynamic from a bucket that was frustrating to open and close to a bucket that is easily opened and closed, while of course maintaining reasonable water tightness during operation.
Then there was the hole to cut in the centre of the lid, large enough to freely allow the plunger to come up and down. It’s about two inches in diameter and was easily cut with a pocket knife.
Then for the most expensive part of the machine: The plunger. Firstly, just finding an old-fashioned plunger that is full sized does not seem to be the easiest thing to do; they seem to be going the way of the dodo bird. Even the now-almost-old-fashioned plunger with a flexible extension that is meant to fit more snugly into the bottom of a toilet and increase performance and effective pressure seems to have competition with new-fangled, ergonomic and style conscious designs. However, I found one of the plungers with the flexible extensions for a whopping $1.97 plus applicable sales taxes. Following some advice I’d seen on some of the pages describing how to make this project, I trimmed off the extension while maintaining the structural integrity of the bottom part where it would have flexed, and I cut out three triangular holes in the cupped part so as to allow for less water resistance when using the plunger.
And voilà ! Backwoods washing machine for a paltry sum of about $2.27 or thereabouts, plus of course a (very) little bit of effort.
At this point, I tested it a couple of times; see below.
Hence, having used it a couple of times, the notion of getting a wringer of some sort seemed useful, and this was my “target item” a couple of weeks later when I went to a flea market. I found a mop bucket with a couple of wooden dowels integrated into it which act as a wringer when you put the mop between them and use foot to create pressure between the dowels, which squeezes out the water. $10 later, and I’d thought I’d really gotten a good deal; I later decided wasn’t worth more than “It was nice to have an objective for the flea market, but in retrospect it wasn’t worth the money at any price.” I tried to use the wringer, but decided that it wasn’t of much use. It not only added extra work to the process, but it wasn’t particularly effective for wringing out clothing, at least given that I was still able to easily wring out more water with hand pressure afterwards. (sigh …)
Now that I’ve used the washing machine a few times, I’ve decided a few things about how to use it and get acceptable results:
1) it’s only good for about one or two days’ worth of clothing for one person, or equivalent; hence you’ll want to divide up equal piles for more days’ worth of clothing, or if you’re washing for more than one person, or also want to wash up all the linen, towels and rags from yesterday evening’s dinner party and associated cleanup. Interestingly, the original blogger suggested that she’d used it for only a day’s worth of diapers at a time.
This was explicit in the original blog entry regarding the cotton baby diapers: In my experiences, it became obvious that the point (and the capacity) of the unit was tailored and ideally (and only) suited to washing one or two days’ worth of diapers at a time to avoid having to store increasingly smelly items for wash day at the end of the week. The point of the challenge was, beyond using cloth diapers (especially for those who can’t afford disposable diapers), to hand wash the diapers while avoiding the use of automatic washing machines (again in a context of affordability.) It also seemed to come across that perhaps it was intended more as a pre-wash system for such items so that you don’t have to wash them at their dirtiest with your delicates and your picky teenager’s latest styles in jeans, although in re-reading the original posts, it became clear that this obviously was a creation of my imagination, however true it might be.
2a) It seems ideally suited to small items such as socks, underwear, small hand towels, and wash cloths. The occasional polo shirt works too but they seem to be nearing the limit of what the unit can handle — hence the mention above about the importance of the sizing of the bucket being in the 20 to 23 litre area.
2b) It really isn’t suited for bulky items. For instance, during my recent two weeks of holidays, I was glad that I’d had enough pants to not “need” to wash them; for fear that jeans were just to heavy and bulky and would require far too much effort, I never even tried to wash a pair, let alone several.
2c) It seems that washing large items and/or large quantities and/or both would require a larger bucket, and would require something more appropriate for agitation that a simple hand plunger. Some other such items seen on the internet suggest reducing the size of a 55 gallon drum and adapting an old bicycle to agitate the load.
3) For the whole operation, I’ve found that for me, what works best is as follows: a) put in clothes as above b) add about a tablespoon or two of wash powder c) fill with water d) use plunger action, using two hands — with one you’ll tire out really quickly — for up to about five minutes e) take out and wring the items individually — as mentioned above, hand wringing seems to be the most effective short of having a proper (old style) wringer or a restaurant-grade vegetable spinner (which I wouldn’t seriously consider buying since I know its cost would defeat the project’s “on a budget” and “let’s keep this simple” themes) f) hang the laundry on a clothesline or other similar support reasonably securely — outside! Otherwise, you’ll have to go through a rinse cycle or two by repeating a) to e) g) thoroughly rinse all the items with a garden hose, and allow to drip dry. Hand wringing of items at their bottoms will of course significantly reduce drying time. Obviously, if you rinse as in f), (say, if you do everything inside) then don’t do this!
Overall, despite its limitations, I like the idea. I’d like to think that it’s one of those “why didn’t I do this years ago” ideas. I might not have “wasted” money buying as many new socks just for the cottage.
The “but” part is that it is a useful item that definitely has its limits. Operating it does require a certain amount of manual labour, and is really only useful for a portion of items that need to be washed. I was a bit disappointed that after my two weeks of vacation and despite having kept up with just about all the shirts, socks and underwear I’d worn as well as a few hand towels and wash cloths I’d used, I still had about three loads of laundry to do once the bedsheets, pants, large towels and a few other items were taken into account.
Yes, it was fun. Yes, I recommend it.
Happy washing!
UPDATE September, 2014:
I have used the washing machine since during this year’s holidays at the cottage and a couple of other times. Having formed some opinions last year about its limits, this year I decided not to depend on it for washing or reducing the washload at the end of my holidays, and, surprise, surprise, I found it to be a wonderful and useful tool.
I used it for the predictable small items such as my socks, some underwear, hand towels and wash cloths, for which it is ideally suited.
But I found something else for which it is suited, to my surprise to boot: Much of the bed sheets for a double bed and the pillow cases. Last year I assumed that such items would be too bulky for the washing machine. This year, mid-vacation they needed to be done. They were easy to wash one sheet at a time plus another time for the pillow cases, and to my surprise they were easy to wash, to the point that I have since washed them again in it, “saving me” from having to bring them home to wash and dry in a standard electric washing machine back home in the city.
So two more points for the washing machine and it having continued to demonstrate its usefulness as well as having redeemed itself a bit: Next time going up to the cottage, I won’t have to remake my bed upon arrival, possibly, for all I know, late in the evening and after the proverbial long tiring day at work.
During the summer of 2012, I bought a Katadyn Pocket water filter. It took a bit of research, but in short order the decision to buy this model over just about any other was clear: Most water filters seemed to have a capacity of a few hundred gallons or maybe up to 1,500 gallons; the Katadyn Pocket filter has a capacity of up to 13,000 gallons, or 50,000 litres. Given the price difference — anywhere from $75 to $250 for most of the rest, and $300 to $350 for the Katadyn Pocket, there was little to decide.
The unit has a 0.2 micron ceramic filter with silver impregnated in it in order to act as a bacteriostatic agent, although you have to be careful about that (see below).
The only thing that bugs me a very little bit about it is that it’s a filter only (albeit very good), not a purifier. Unfortunately, the purifiers don’t have the capacity that this filter has. This works out to the fact that the unit can effectively remove all bacteria and cysts — and of course cloudiness — in water, but theoretically it can’t remove viruses due to their being far smaller than the pore size (unless they electrostatically attach themselves to a particle which can be filtered out by the unit). It also means that it doesn’t remove any other contaminants smaller than 0.2 microns, including the usual nasties one might think of such as dissolved heavy metals, pesticides and other such nasty contaminants, and the more benign but nonetheless undesirable tastes, odours and colours that aren’t due to cloudiness.
There are two ways of dealing with these issues:
1) Choose a clear water source — that you might be tempted to drink without treating it at all (your natural “yuck” factor will help you out with this) — and this will reduce the likelihood that these are problems to begin with. By itself, most people — including myself, a trained water techie — can’t just look at clear water and tell whether it’s contaminated with the poop of 30 deer 100 feet upstream, or the dumpings from some illegal leather tanning shop 200 feet upstream. But, generally, you can tell the difference between clear, running water in the middle of the woods far away from just about anything and that doesn’t have any smells to it, and stagnant, cloudy and smelly water in the ditch surrounding a garage.
2) Bring around a small bottle filled with bleach and an eye dropper (*). I find that depending on the water source and the strength of the bleach (typically 4% to 6% sodium hypochlorite), 1 to 3 drops per imperial gallon (4.5 litres) has worked well on the filtered water. Melted snow from my cottage could do with 1/2 drop per imperial gallon, given that the bleach taste still often comes through quite distinctly on such (presumably) relatively pure water. As a reference, the USEPA (here’s my archive) recommends to use two drops per quart when using bleach to disinfect untreated water, or about 8 drops per US gallon (3.78 litres), or about 9 drops per imperial gallon (4.5 litres).
(*) This won’t deal with a bunch of dissolved metals, and can’t completely deal with tough contaminants, so choose your water source carefully!
Now, putting aside that I’m a water techie, why would I, who stopped being involved in Scouting and most forms of camping and hiking in 1999, need such a device?
The family cottage doesn’t have running water in the winter, and I usually spend a week over Christmas and typically a weekend a month at the cottage over winter, when the water is off. I’ve been starting to get tired of carrying up big jugs filled with water. I’ve been getting tired of running out of water or at least having to be careful about how I use water. And, particularly, I’ve been getting tired of depending on a few neighbours for their goodwill. The operative notion here is “depending”; a lack of goodwill is not the issue, although the variability of whether or not two of the immediate neighbours would be around all the time is a concern alongside the inconvenience of having to go out to get clean drinking water in the middle of washing dishes.
One of the first things I had to figure out the hard way is the importance of keeping the unit clean (go figure, a water techie needing to be reminded of the importance of keeping drinking water treatment equipment clean): Over almost two weeks in the summer, I’d used it three times, and ended up with a good case of diarrhea which took a couple of weeks to clear up. So note to myself, and those considering buying any camping water filter: Keep the unit and the outlet hose in particular clean — it can get contaminated easily — and when you’re going to leave it sitting around for more than a day or two or pack it away for a while, run a bleach solution through it first and dry it out.
So, does the filter work? And do I get the runs any more?
Of course, and of course not.
This year over Christmas, I found it quite useful, although I did bring up a good supply of water anyway to begin with, given that I was coming up for a week and the long-awaited testing grounds had finally arrived. I needed some kind of starting point, in case I found out that “making” water was a lot more work than I’d bargained for, especially given all the freezer cooking (and therefore dish washing) I do over that period.
I also confirmed what I had begun observing for years while melting snow for things that didn’t require drinking-quality water: You’d be surprised how much dirt and debris comes through when melting “pristine” snow in the middle of cottage country, far away from the city. It’s but a little more appetizing for drinking, cooking or rinsing the dishes than dishwater — so of course I don’t bother filtering the melted snow for my “put the dirty dishes in hot soapy dishwater” part, but of course I use filtered water for rinsing the dishes.
Regarding the amount of bleach to use, I have found that the filtered water from melting snow needs about a drop per imperial gallon, while the filtered lake water can handle about two drops per imperial gallon, before a distinct bleach taste comes through. This is a little testing based on working with the filtered water and after having first consulted some tables on how many drops of bleach per litre to use for treating water (here’s my archive) (instead of just calculating it myself). As a reference, the USEPA (here’s my archive) recommends to use two drops per quart when using bleach to disinfect untreated water, or about 8 drops per US gallon (3.78 litres), or about 9 drops per imperial gallon (4.5 litres).
Regarding the “one litre per minute” claim, it mostly works out to that, sort of, I guess — which means, not really. In practice, though, I suspect that that’s based on filling up one litre or one quart water bottles commonly used, especially in camping and hiking circles. For larger amounts of water, it takes longer. The best test I’ve had — since filtering water while being distracted by the TV at the cottage isn’t much of a test — was when I recently filtered about 23 litres of melted snow undistracted for a future batch of beer, and it took me about 40 to 45 minutes. This admittedly but importantly included a stop about halfway through to open up the filter and clean the ceramic filter, which had become sufficiently dirty from the dirt in the “clean” snow that I’d melted, making filtering the water difficult. A comparison between the 100 metre race and the 3,000 metre race in the Olympics would be apt: You sprint in the former race, but you pace yourself at a somewhat slower running speed in the latter in order not to get too tired right away and be able to make it to the end of the race.
Anyway, I like the filter, and it should get several years’ worth of use before I have to start thinking about buying a replacement filter cartridge.


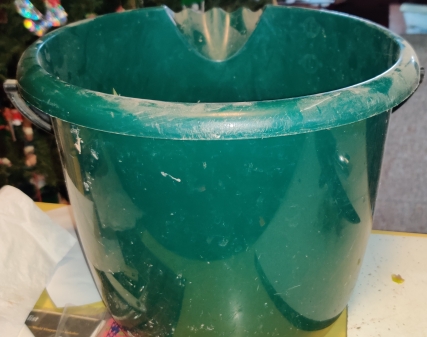
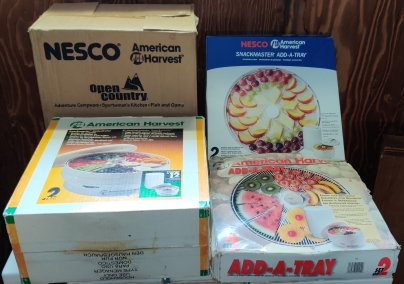
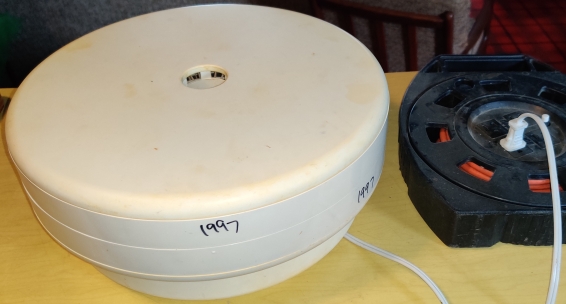


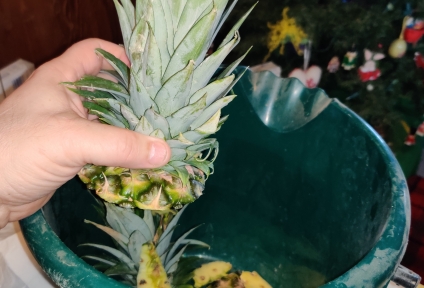
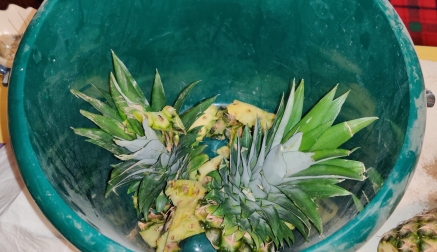
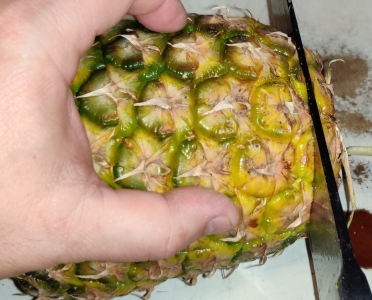
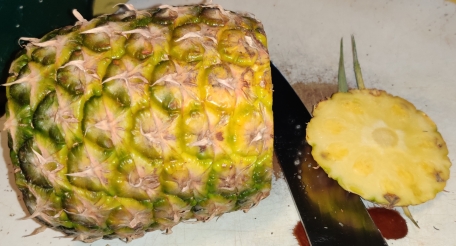
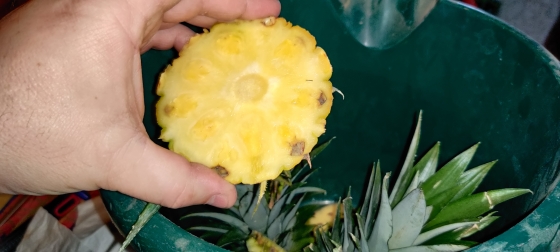
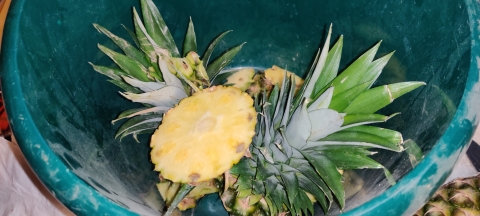


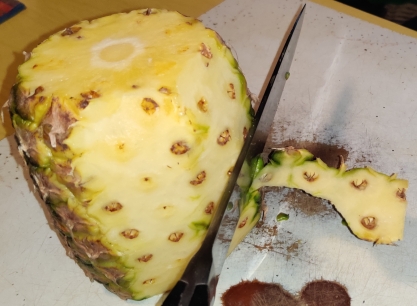
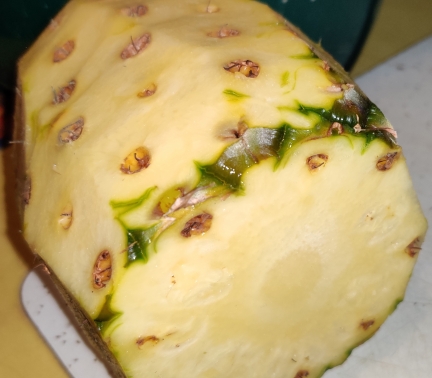
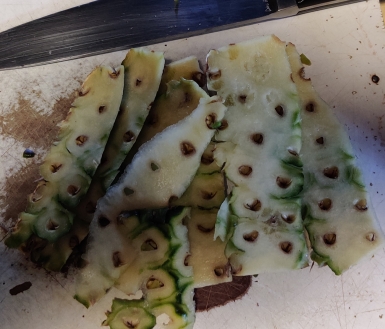
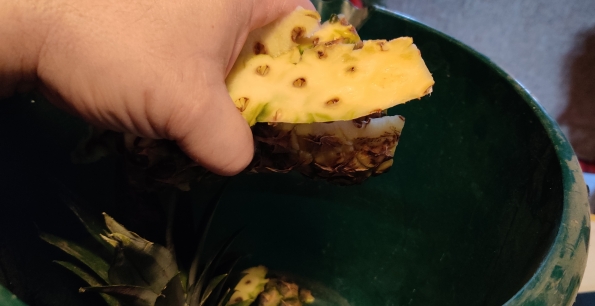
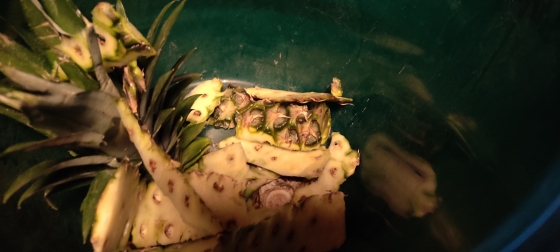

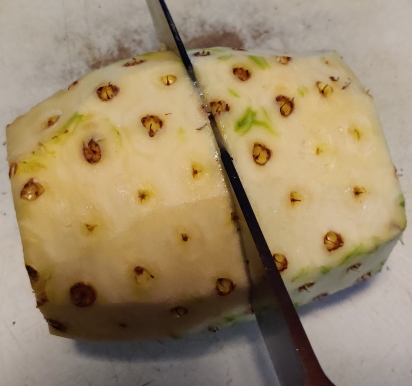
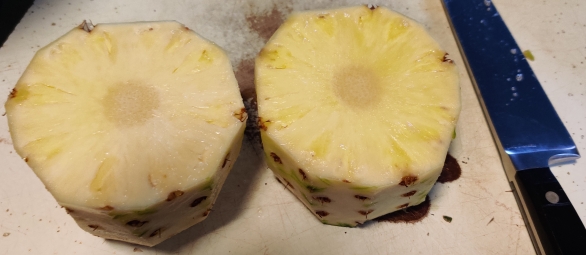
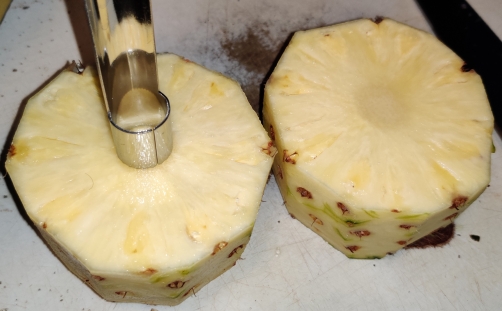
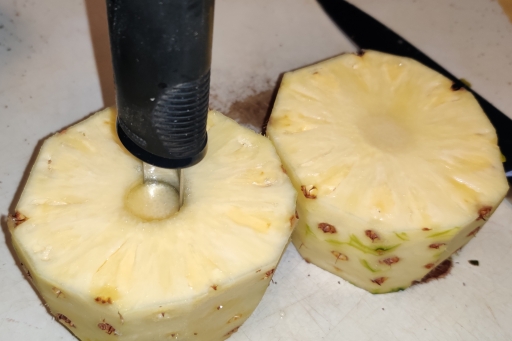
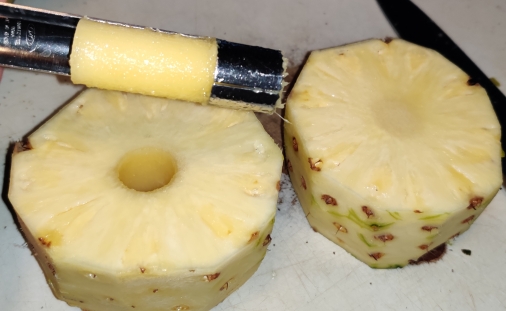
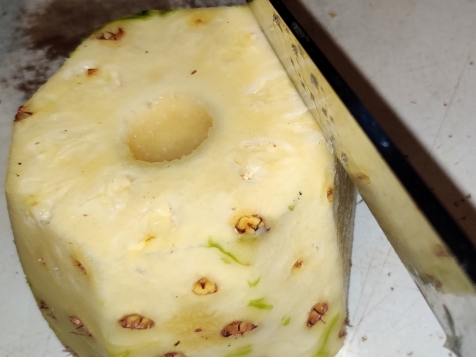

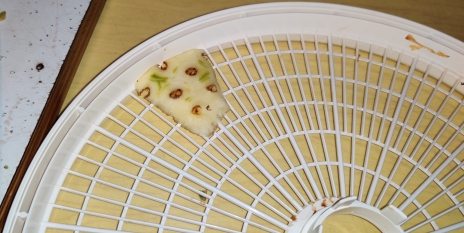


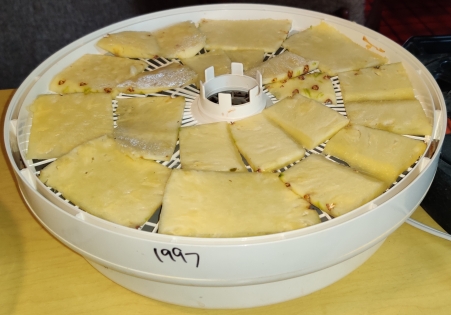
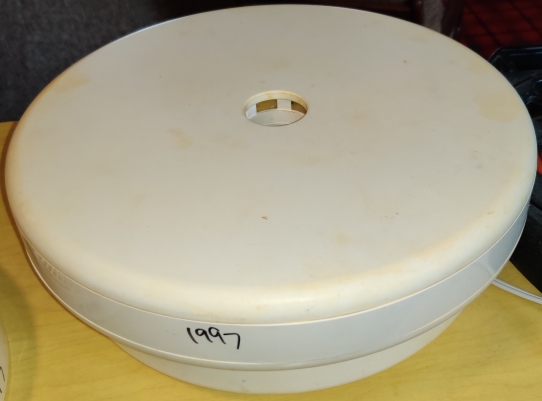
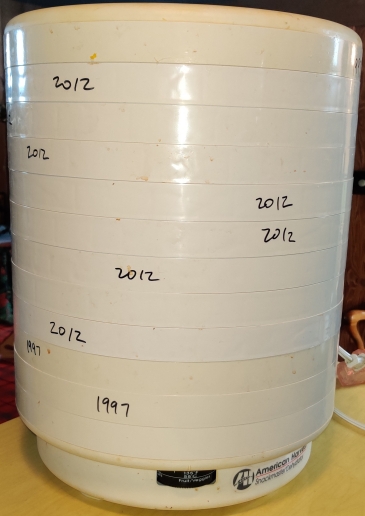

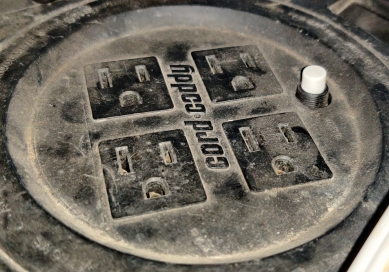
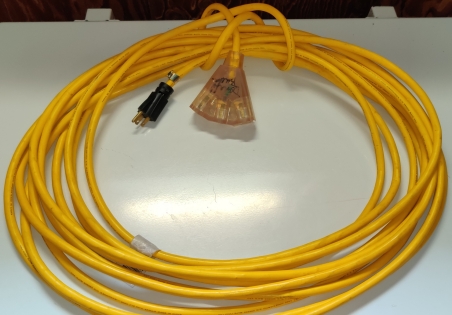


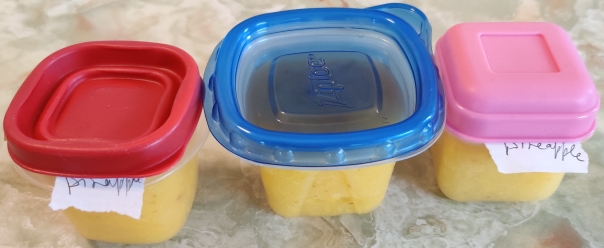
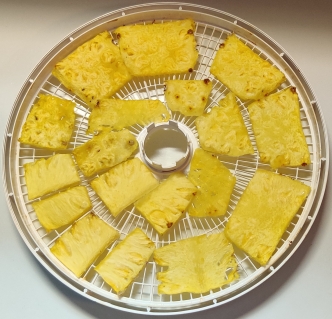
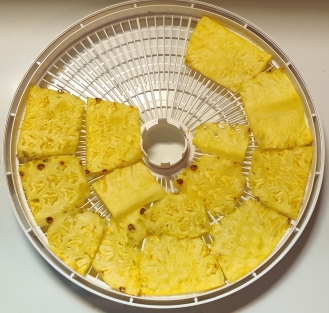
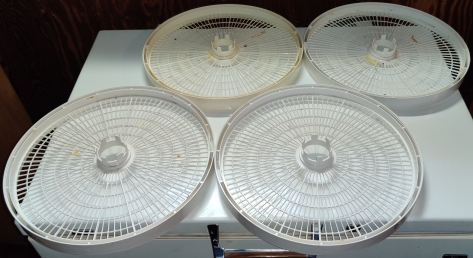
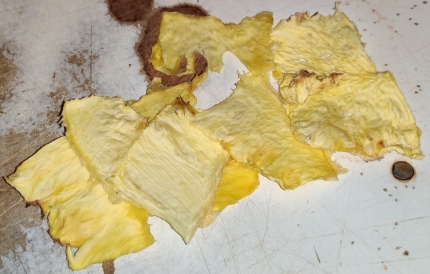
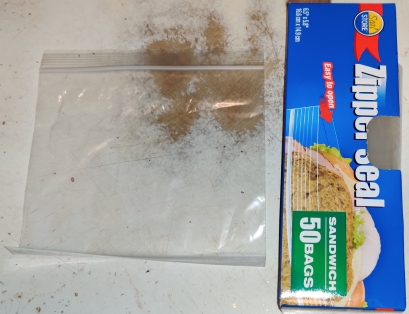
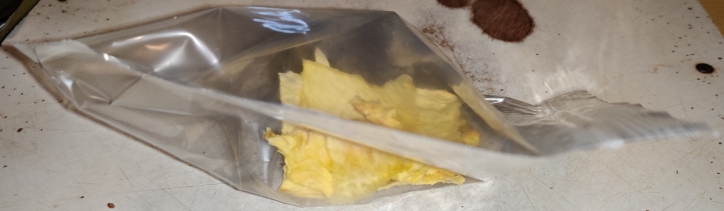
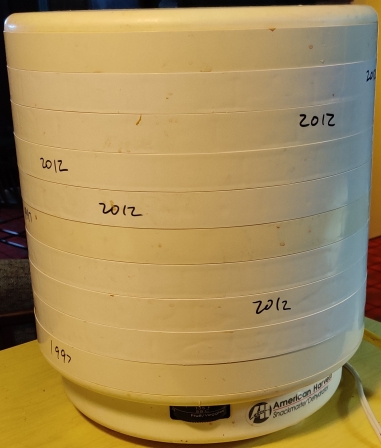


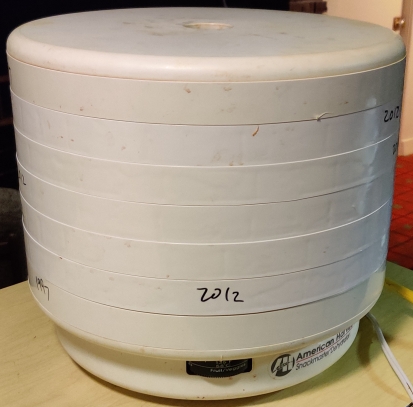

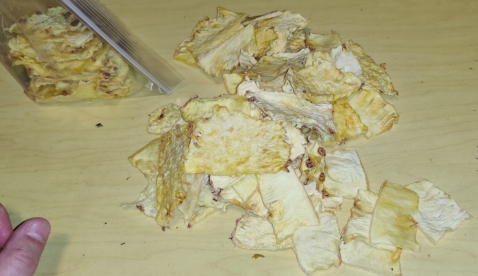
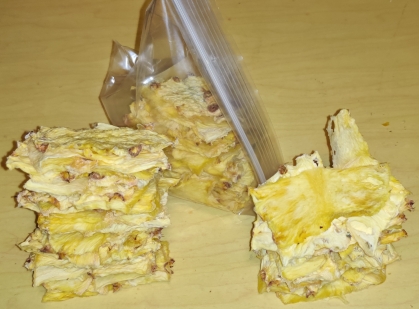
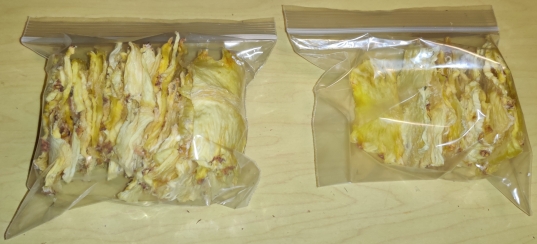
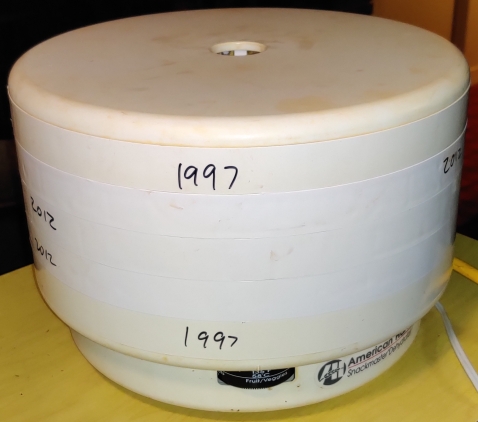
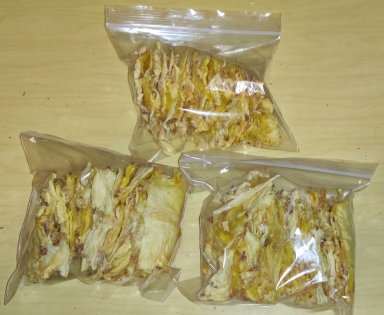
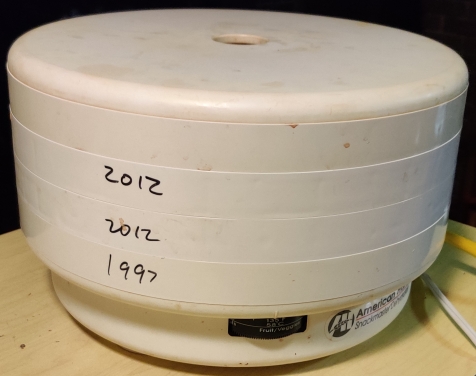
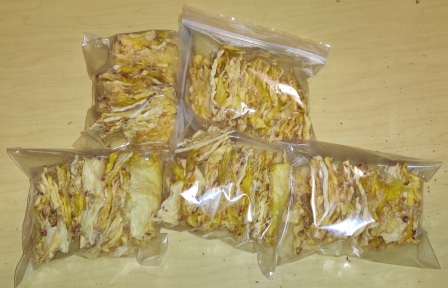
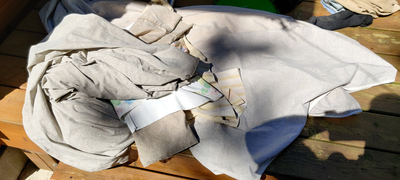
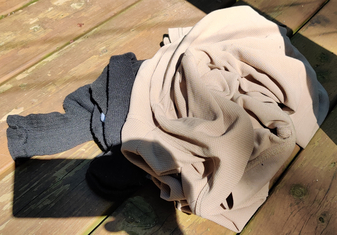
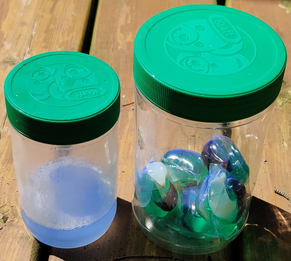
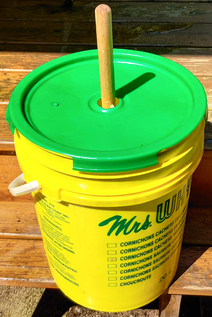
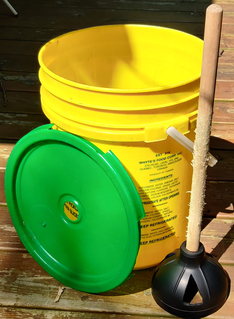
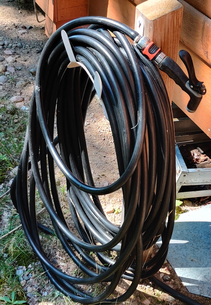


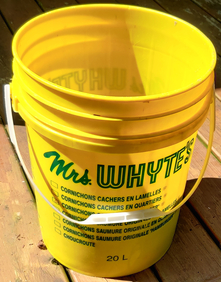
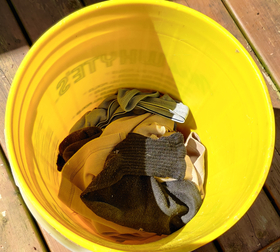
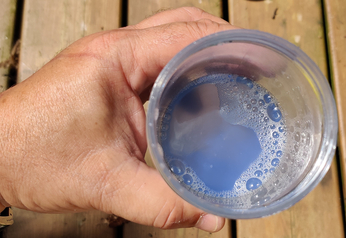
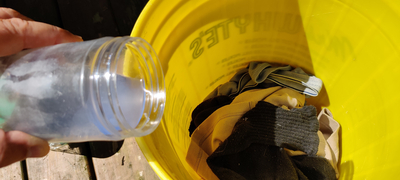
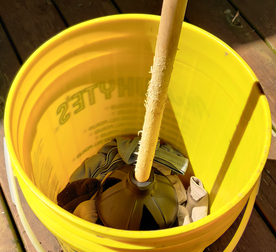
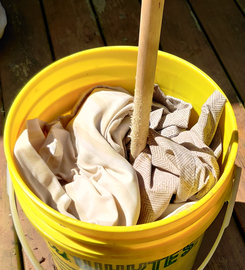
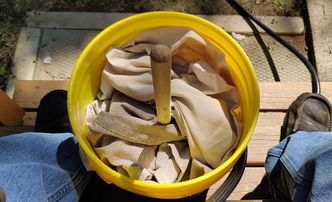
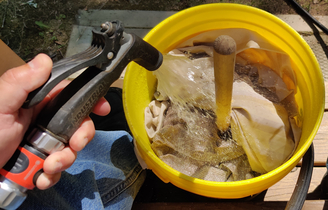
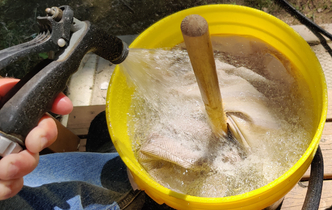
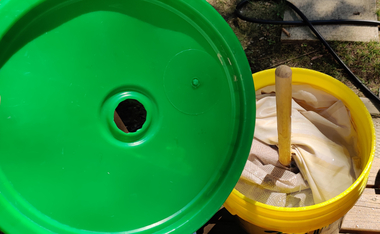
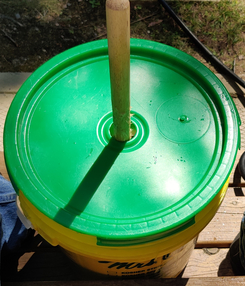
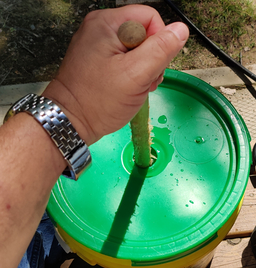
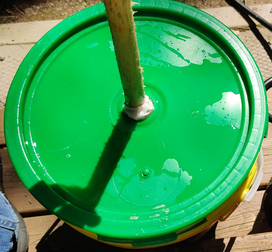
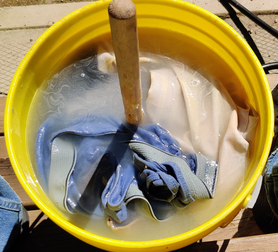
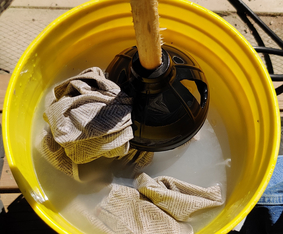

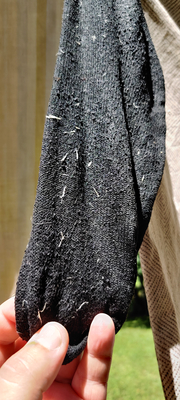
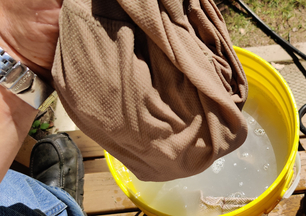
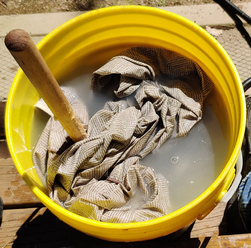
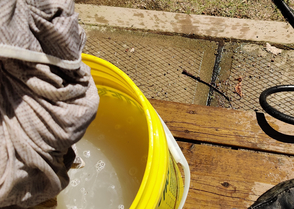
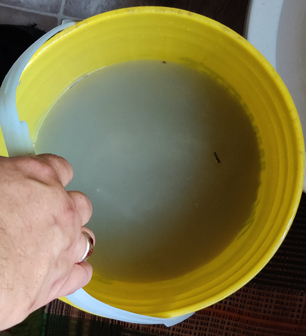
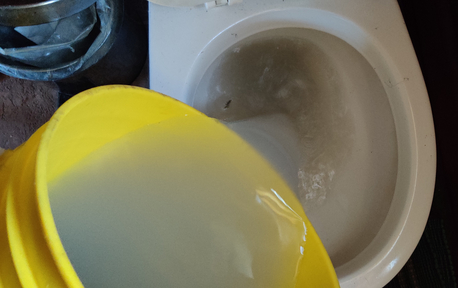
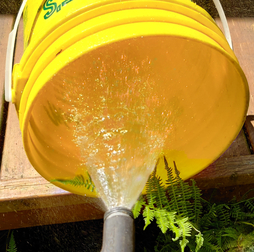
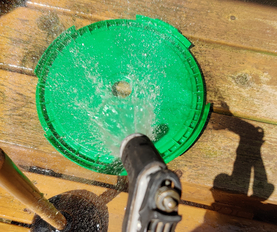
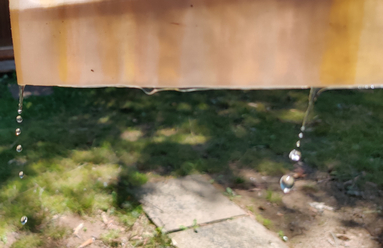
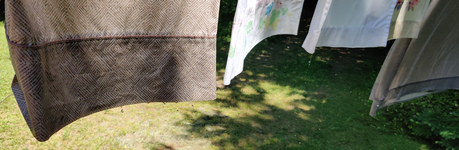
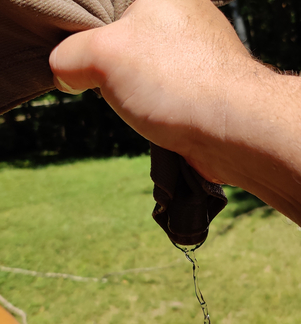
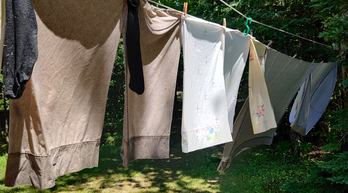

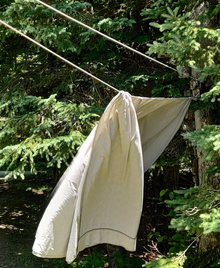
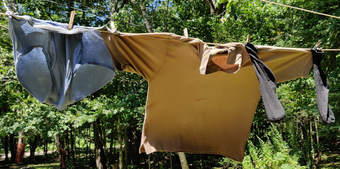
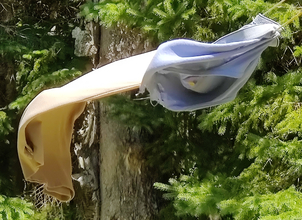
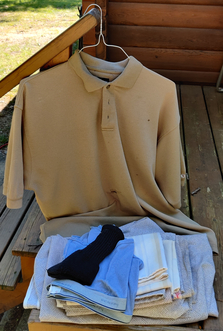
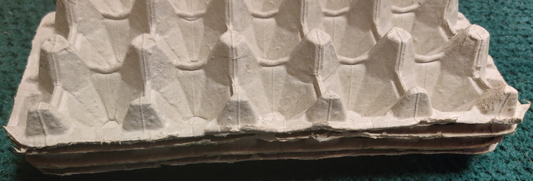
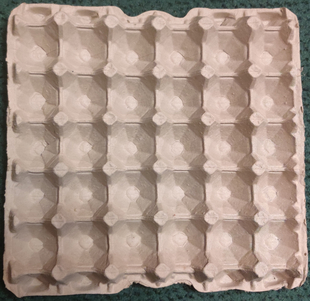
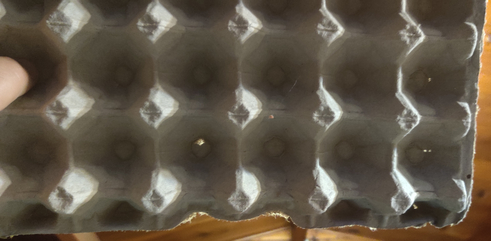
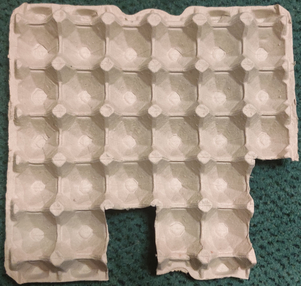
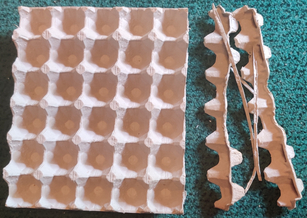
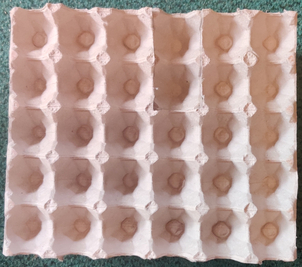
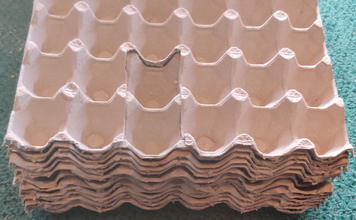
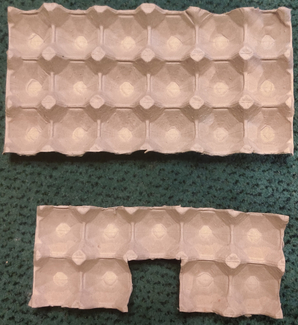

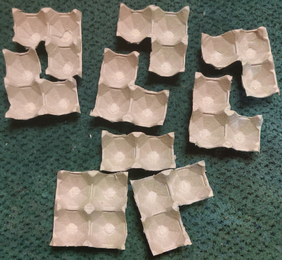
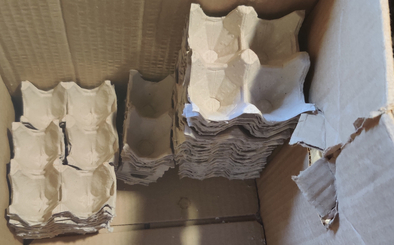

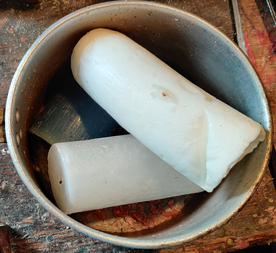
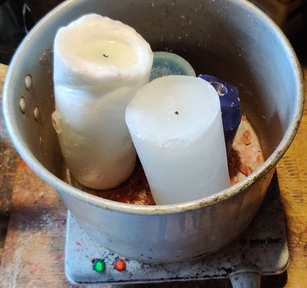
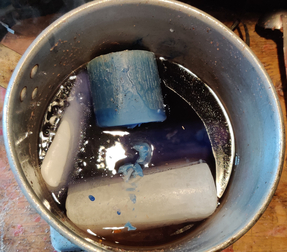
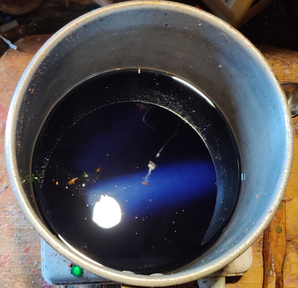
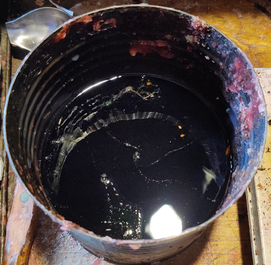

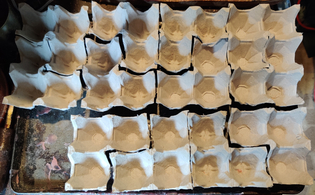
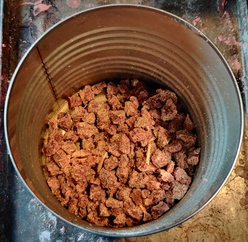

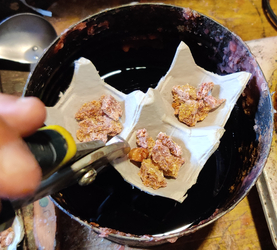

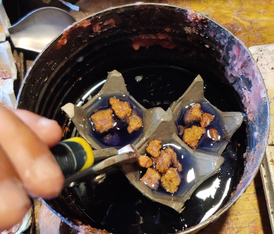

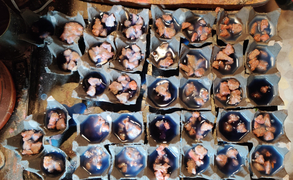
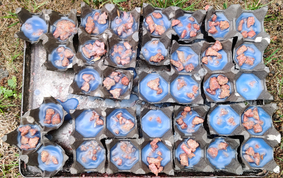
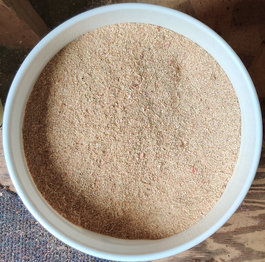
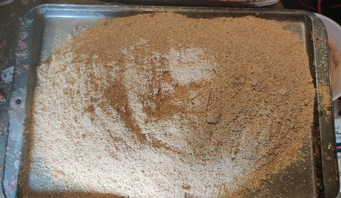
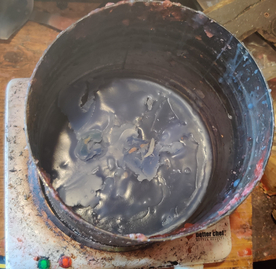
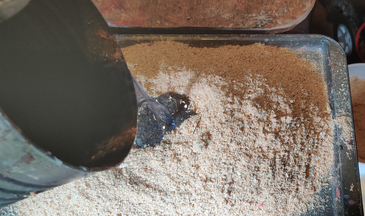
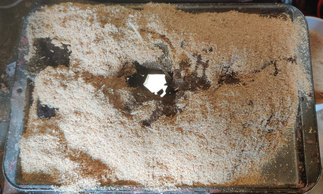
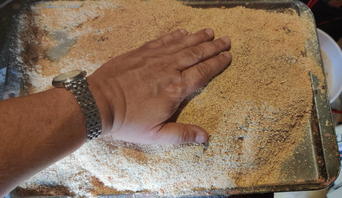
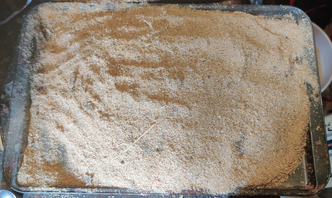
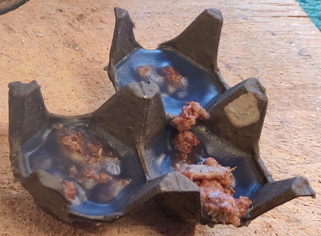
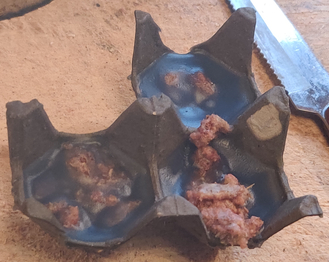
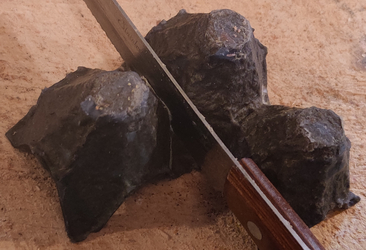
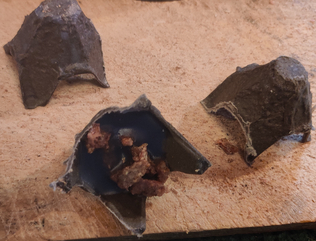
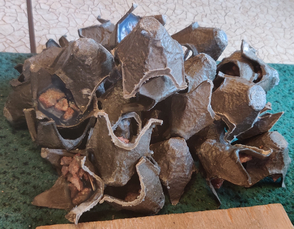
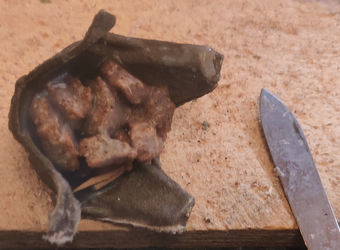
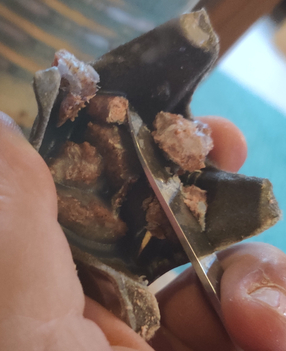

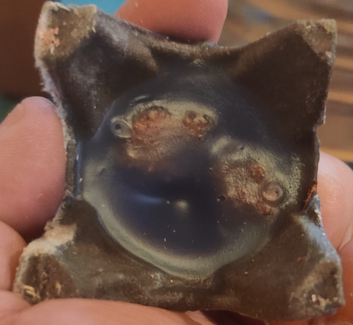
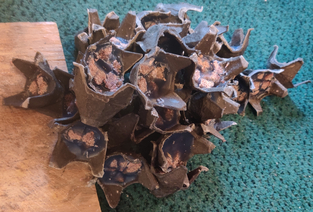
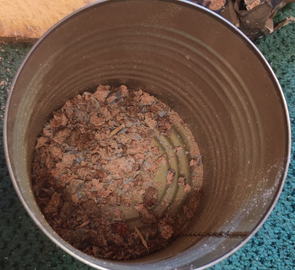


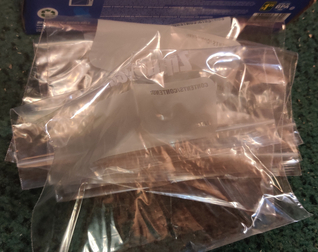
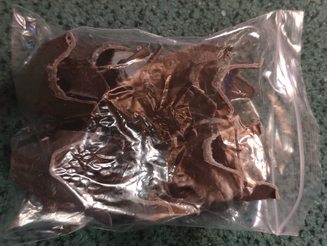


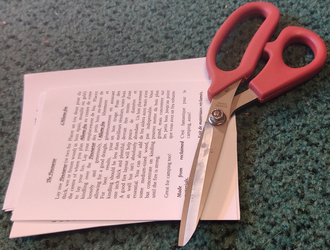

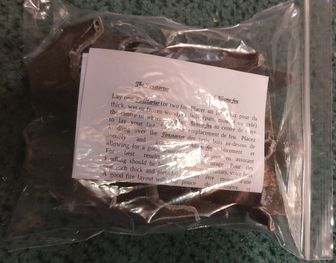
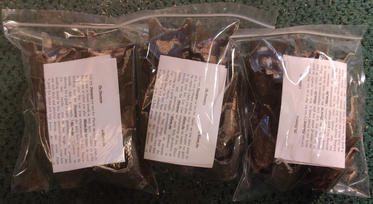
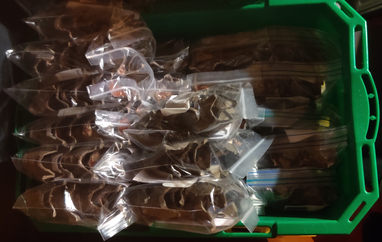
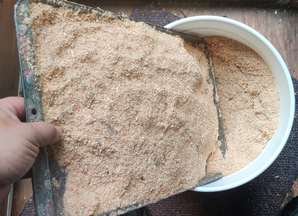
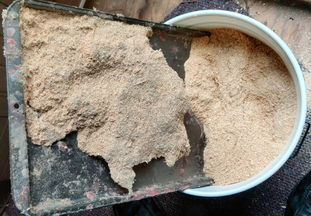
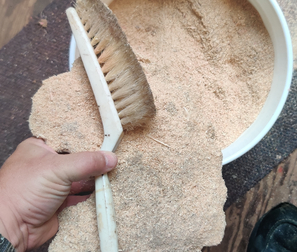
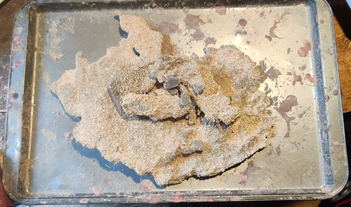
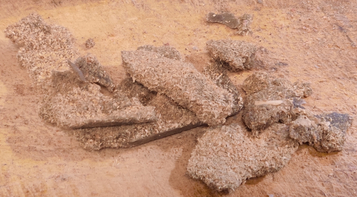
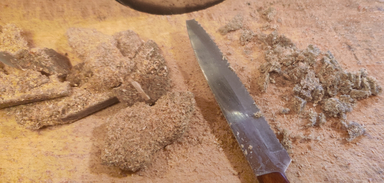
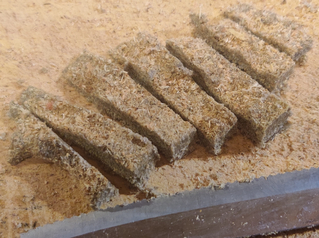

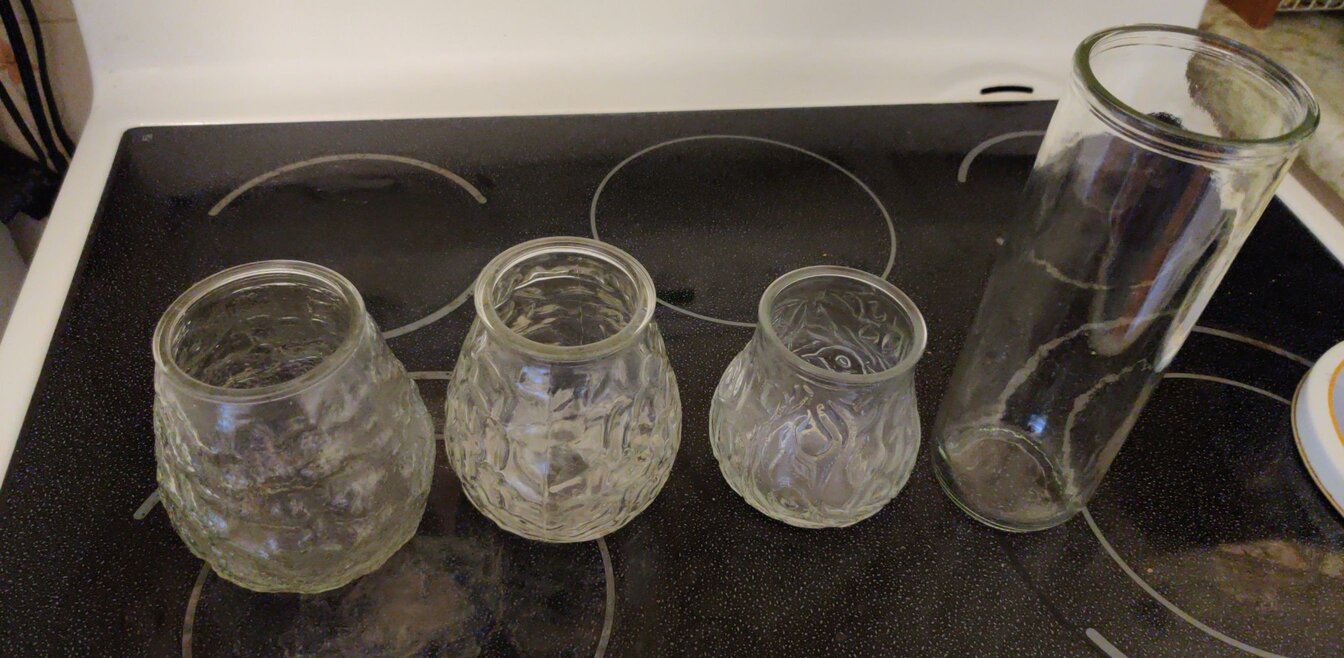
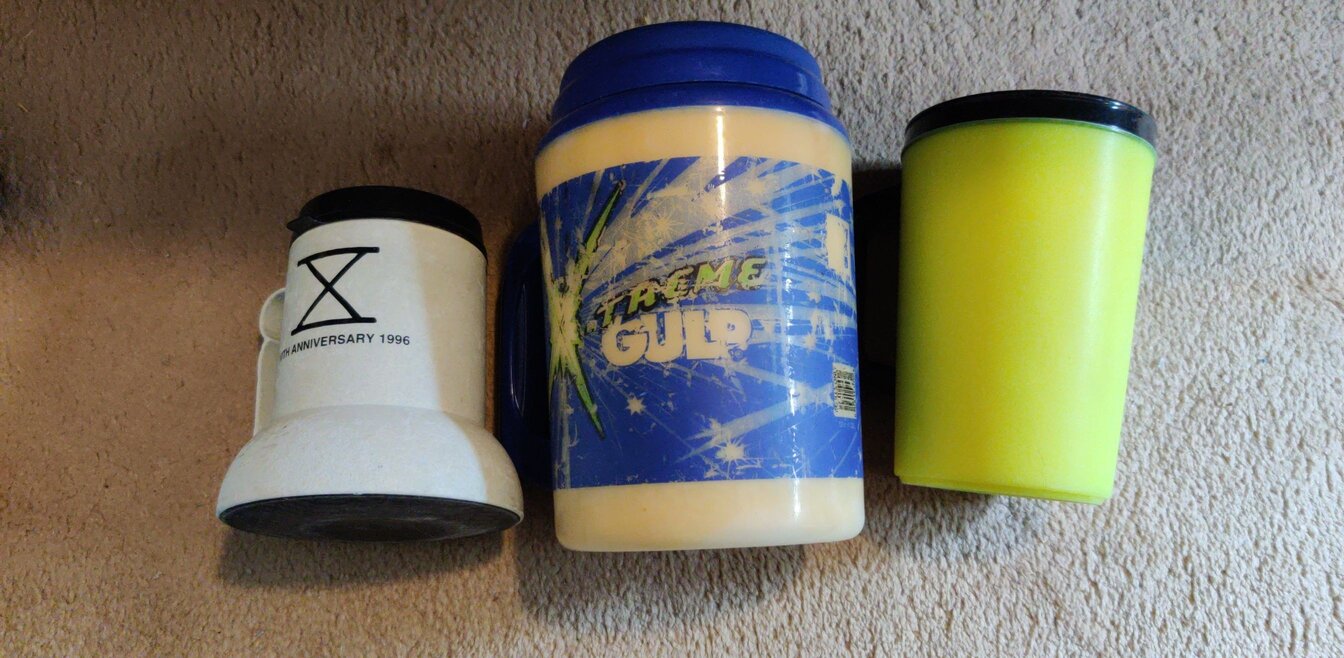
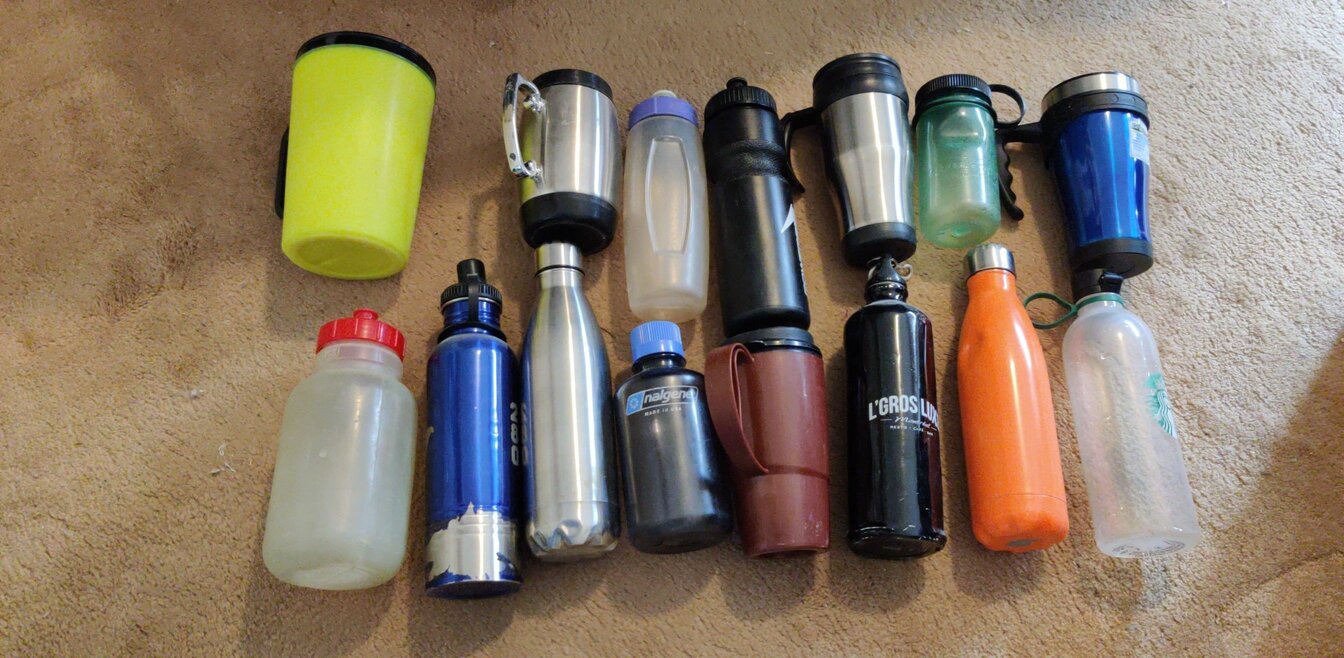
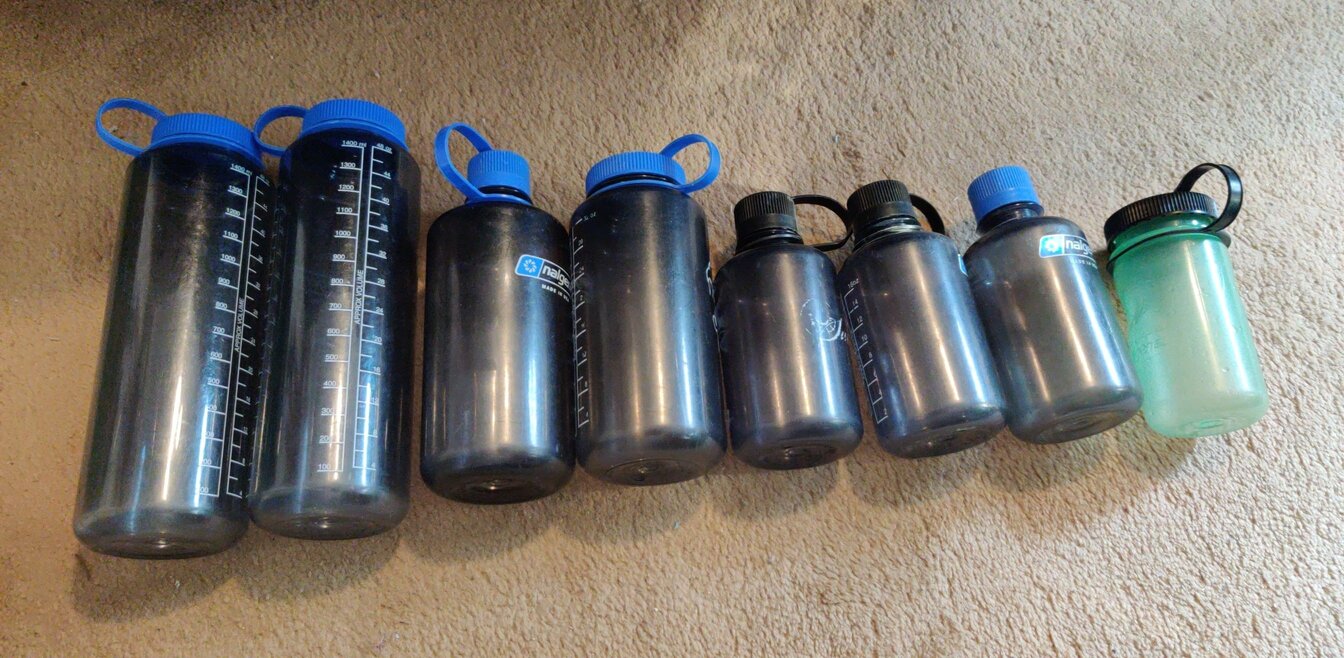
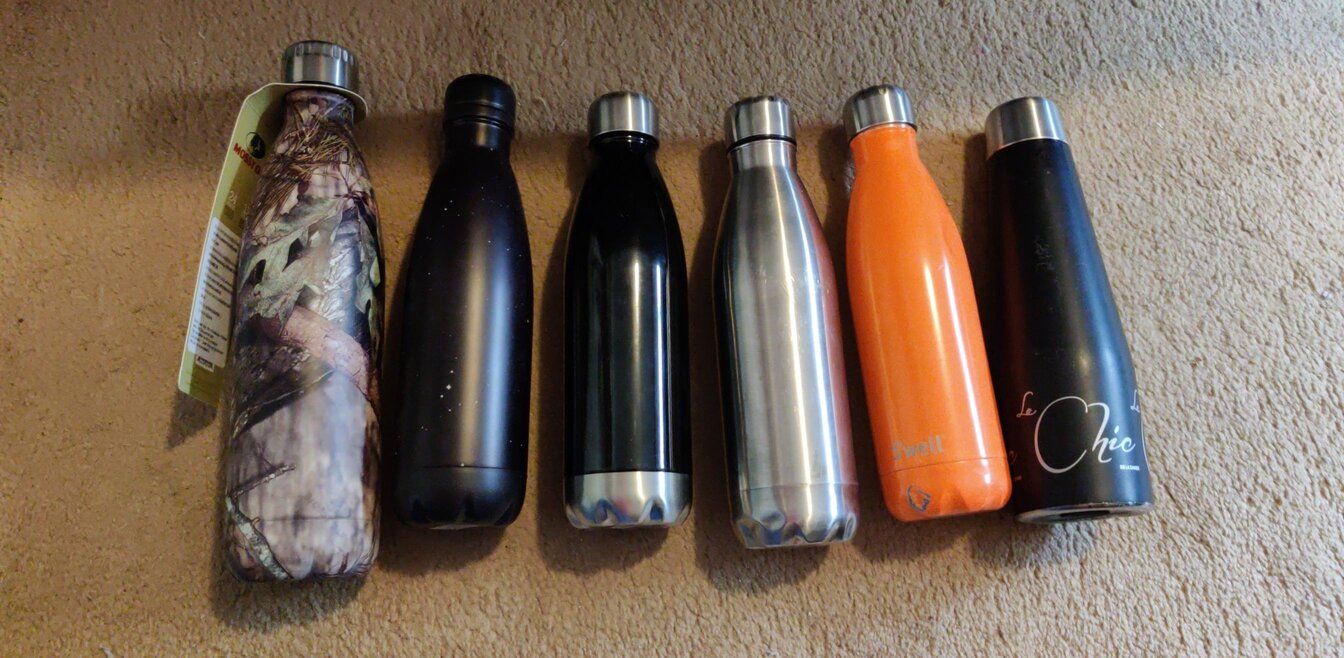
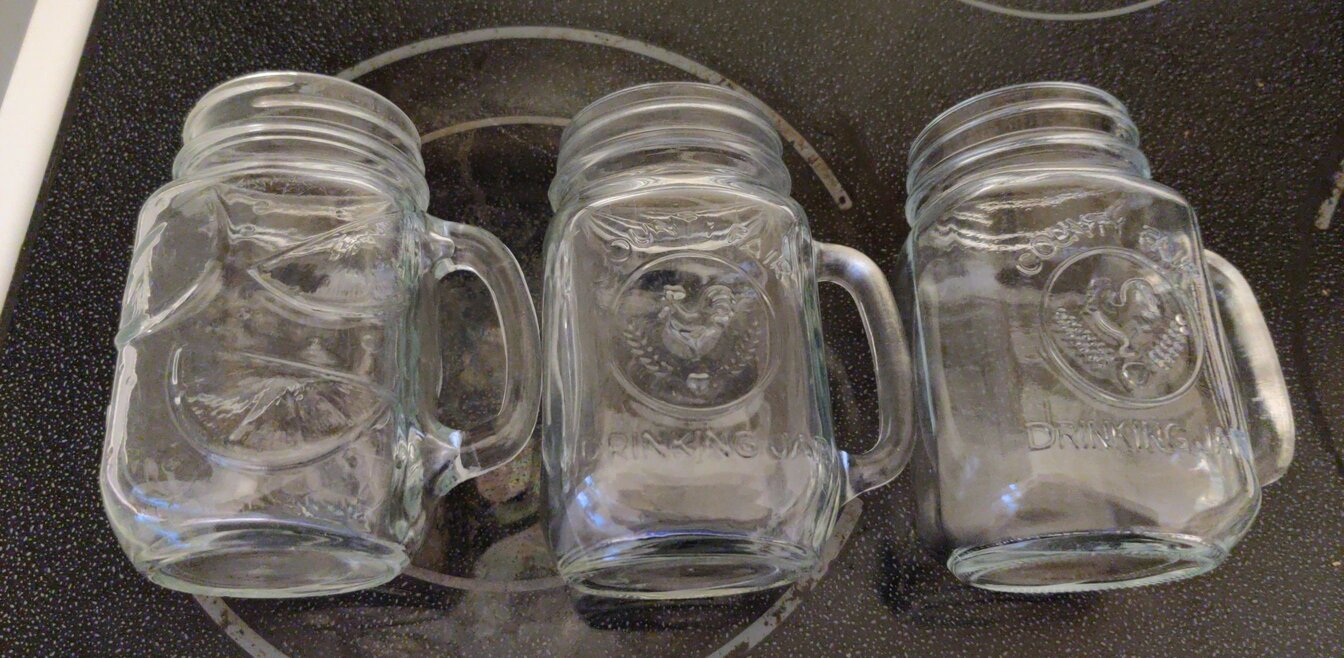
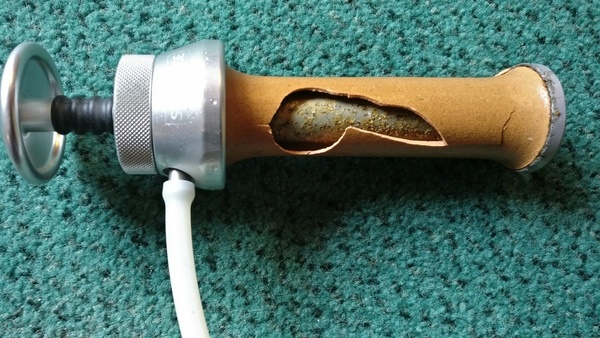
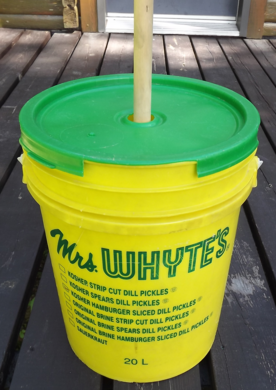
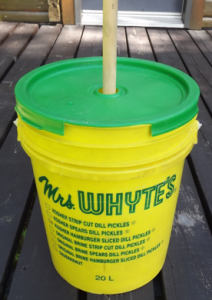
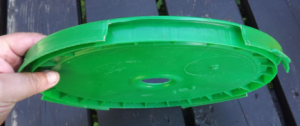
