Today’s cooking project from my recipe collection was bacon-wrapped chicken pieces, something I originally started making a couple of years ago for their value as an easy enough to make last minute hors d’oeuvres contribution for a party; now I principally make them for the value of having them pre-made in the freezer, including to possibly use at a later time as hors d’oeuvres at a party.
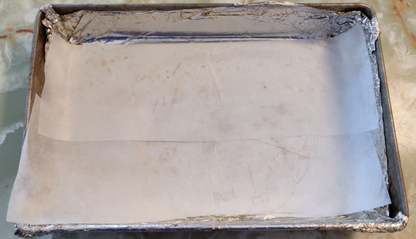
To begin, parchment paper was placed in a baking pan:
Placing parchment paper in a baking pan
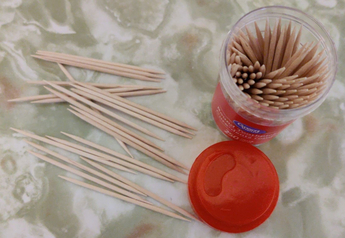
Wooden toothpicks were also taken out:
Wooden toothpicks prepared
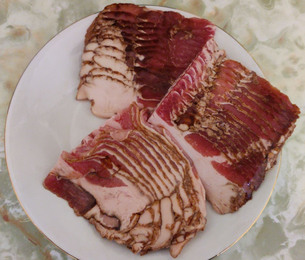
I cut a package and a half’s worth (375g each package, for a total of about 560g) of bacon into half-lengths, which worked out to 40 half-slices, the amount of pieces I target in my recipe.
40 half-slices of bacon, from a pack and a half of bacon (each pack 375g)
The rest of the bacon was placed in a bag and frozen, for later use.
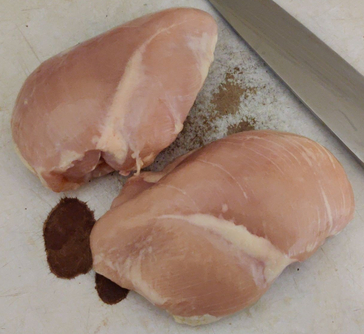
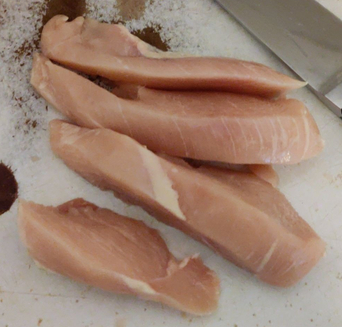
Two chicken breasts were placed on a cutting board:
Two chicken breasts placed on a cutting board, beside a kitchen knife
The chicken breasts were sliced along their length …
A chicken breast cut along its length
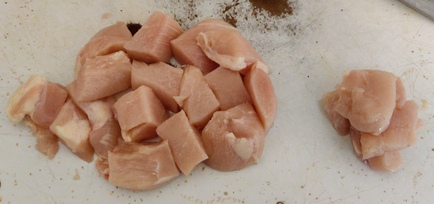
… and then each chicken breast was cut into approximately 20 cubes:
Chicken breast cut into cubes
In this case, the pile on the left are the cubes to be used directly, while the pile on the right are smaller pieces which were bundled together two or three pieces at a time in half-slices of bacon as though they were full pieces of chicken.
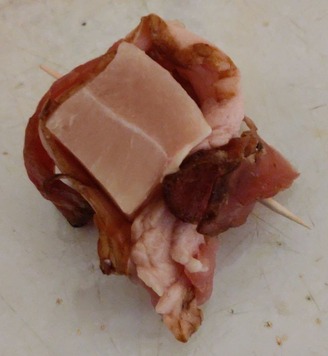
The cubes were individually wrapped in a half-slice of bacon, and skewered with a wooden toothpick:
Cube of chicken wrapped in bacon, and skewered with a wooden toothpick, to keep them together
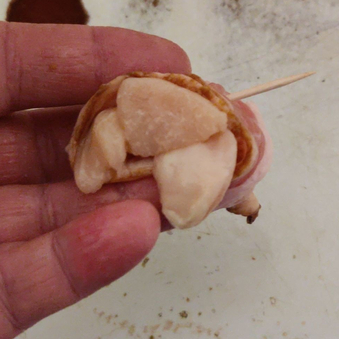
Smaller pieces of chicken were bundled together, two or three pieces at a time, and wrapped in bacon, then skewered with a wooden toothpick:
Smaller pieces of chicken bundled together
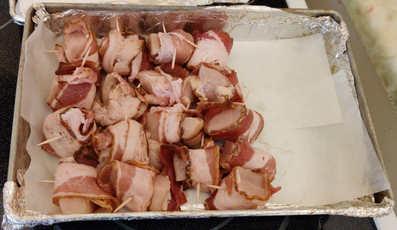
As each piece of bacon was wrapped in bacon and skewered, they were placed on the parchment paper in a baking pan:
Bacon-wrapped chicken pieces placed in a baking pan
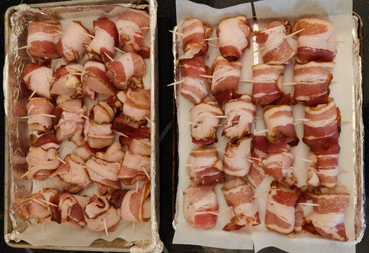
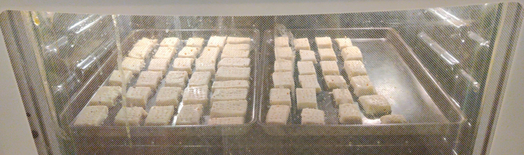
Once all the pieces of chicken were wrapped, they were equally divided between two baking pans that fit (one tray at a time) in my countertop convection oven:
40 pieces of bacon-wrapped chicken divided between two baking pans
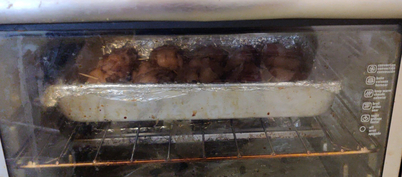
The first tray was placed in my countertop convection oven (and yes, the glass door was dirty, and was cleaned afterwards):
Tray of bacon-wrapped chicken pieces in the oven
Partway through the cooking (after about 25 minutes), the pieces were turned over (in this case, the three columns on the left):
Turning over the pieces of bacon-wrapped chicken
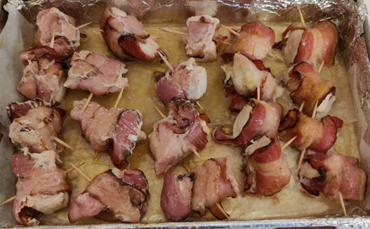
When the pieces were fully cooked after about 50 minutes, they were taken out of the oven:
Cooked pieces of bacon-wrapped chicken directly out of the oven
Cooked pieces were transferred to a clean tray to be placed in the freezer:
Cooked pieces were transferred to a clean tray
The first tray of cooked bacon-wrapped chicken was placed in the freezer to cool and freeze.
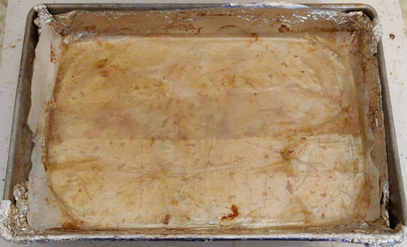
Meanwhile, the grease and drippings in the baking pan …
Grease and drippings in the baking pan
… were drained into a bowl, cooled and solidified, and then wrapped in paper, to be placed in the municipal brown box for composting.
Grease and drippings transferred to a bowl
The second tray’s worth of raw bacon-wrapped chicken pieces was transferred to the first baking pan, because of its deep sides and all the grease and drippings produced:
Second tray’s worth of bacon-wrapped chicken transferred to the first baking pan with its deep sides
The pieces of bacon-wrapped chicken were cooked the same way as the first tray, and once taken out of the drippings, looked like the first tray of cooked pieces:
Cooked bacon-wrapped chicken pieces on a tray, ready to place in the freezer before transferring to a plastic container
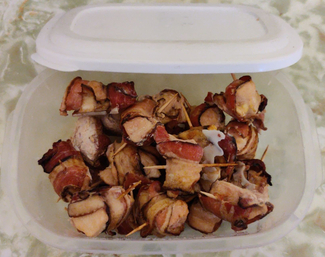
After the second tray of bacon-wrapped chicken had cooked, the frozen pieces from the first tray were transferred to a plastic container:
Frozen pieces of bacon-wrapped chicken placed in a plastic container to be placed in the freezer
Those from the second tray, once cooked, were also transferred to a separate tray, frozen, and then transferred to a plastic container.
All the bacon-wrapped chicken pieces are now in the freezer again, waiting to be eaten — some of them tomorrow!
Of course, the pieces were tasty (I tasted one to make sure they were good!)
Here is the next entry in my series of photo posts of me making the various recipes in my recipe collection.
This week, I took photos while I made more bran muffins for my mom, using a recipe I’d found on allrecipes.com and which so far I have not yetwhich I have now (20210214) converted into my own format. As a side note, I should I have now converted it to my usual recipe format, because when I make them, I use regular milk instead of buttermilk, and I normally make a major change: Instead of placing the batter into twelve muffin papers in a twelve-welled baking tin, I bake the batter in a six-welled baking tin (with slightly larger wells), lined with coffee filter papers, and the baking time was adjusted to 22 minutes.
This batch of muffins had a further deviation from the recipes above, which was the intentional omission of raisins for reasons beyond the scope of this post.
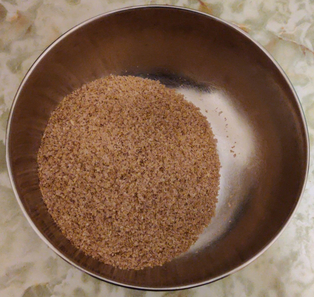
First, I measured out a cup and a half of wheat bran into a mixing bowl:
A cup and a half of wheat bran
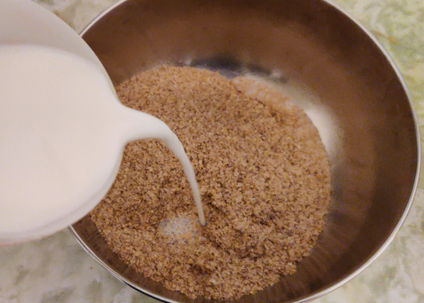
A cup of milk was added to the bran:
A cup of milk added to the bran
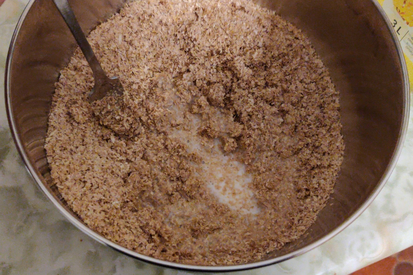
The bran and milk were mixed with a fork, and put aside:
Mixing the bran and milk
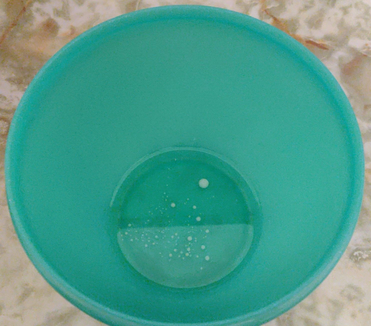
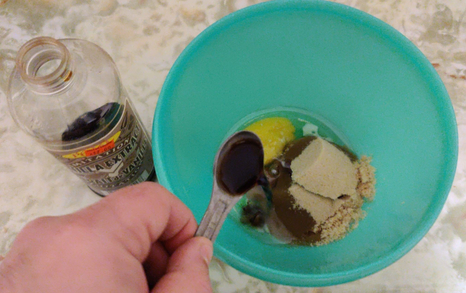
A third of a cup of vegetable oil was measured out and placed in a separate bowl (the white dots are milk leftover in the measuring cup):
1/3 cup vegetable oil measured out
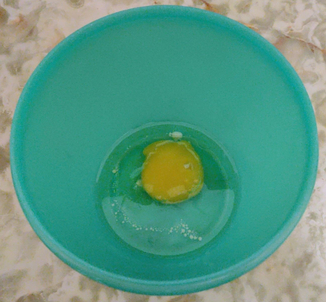
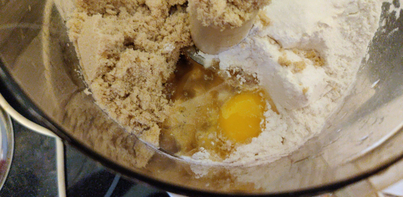
A large egg was added to the vegetable oil:
A large egg added to the vegetable oil
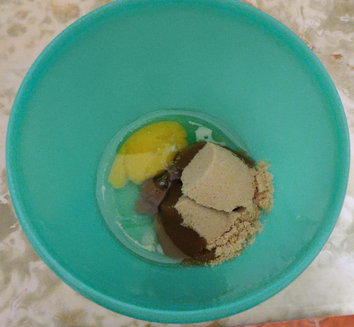
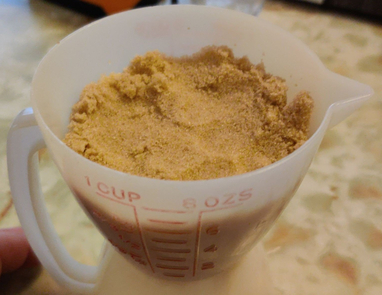
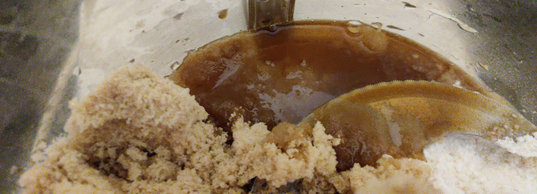
Two thirds of a cup of packed brown sugar were added to the oil and egg:
2/3 cup (packed) brown sugar added to the vegetable oil and egg
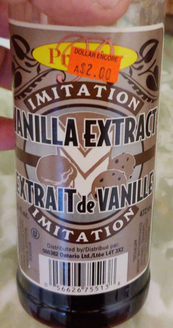
A teaspoon of vanilla extract was added to the vegetable oil, egg, and brown sugar:
A teaspoon of vanilla extract added to oil, egg, and brown sugar
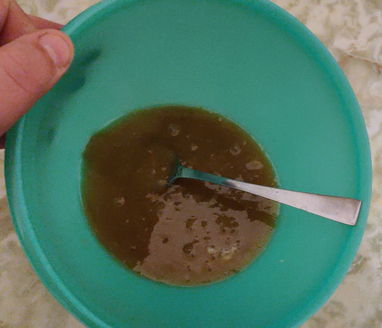
The vegetable oil, egg, brown sugar, and vanilla extract were blended with a fork:
Blending of vegetable oil, egg, brown sugar, and vanilla extract
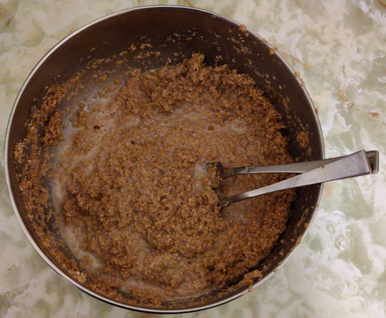
The vegetable oil, egg, brown sugar, and vanilla extract were added to the bran and milk mix:
Vegetable oil, egg, brown sugar, and vanilla extract added to the bran and milk mix
All the ingredients were blended together with a fork:
The ingredients were blended together
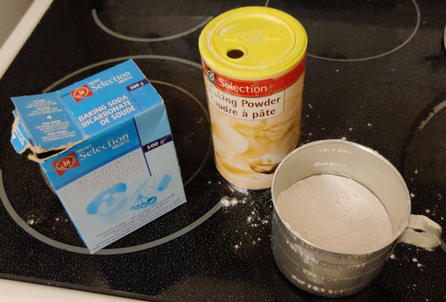
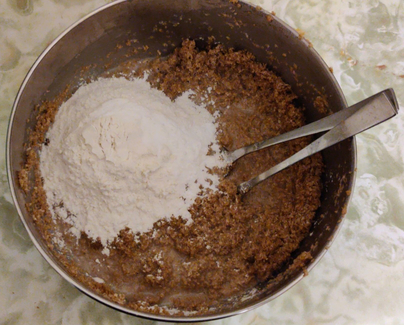
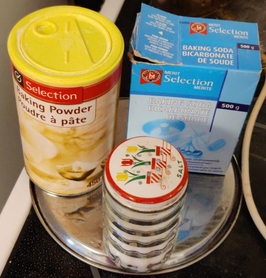
A teaspoon each of baking powder and baking soda were added to a cup of flour — unfortunately, I forgot to add the quarter teaspoon of salt, to no apparent ill effect.
A teaspoon each of baking powder and baking soda added to a cup of flour; salt was forgotten
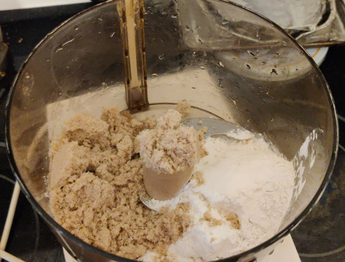
The flour, baking powder, and baking soda were mixed together in the cup, and added to the rest of the ingredients:
Flour, baking powder, and baking soda mix were added to the rest of the ingredients, and then blended together
Again, all the ingredients were blended together with a fork. At this point, I would normally have added three quarters of a cup of raisins, which I didn’t do this time.
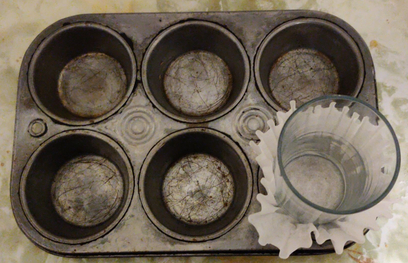
I make double sized muffins for my mom, so I use coffee filter papers, for which I use a glass to help form within the baking tin:
Forming the coffee filter paper in the baking tin wells
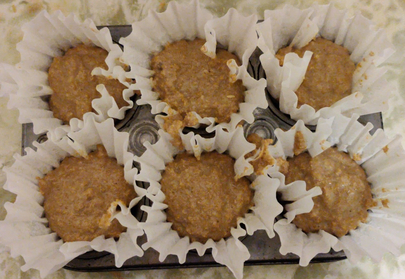
The batter was spooned into each of the wells:
Muffin batter spooned into each of six baking tin wells
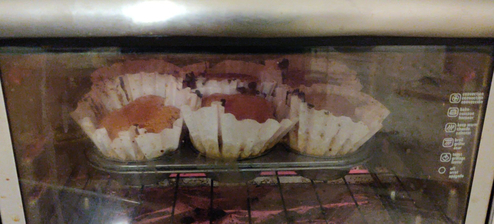
The muffin tin was placed in a counter-top convection oven preheated to 350F, and baked for 22 minutes (rotated 180 degrees part way through):
Muffins baking in a counter-top convection oven.
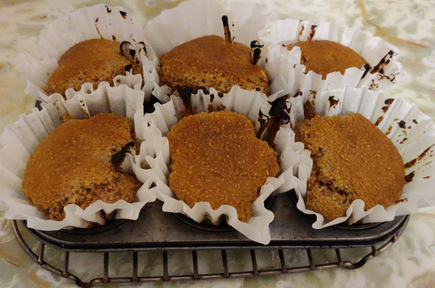
The muffins were taken out of the oven after 22 minutes and placed on a cooling rack:
Baked muffins placed on a cooling rack
After a few minutes, the still cooling muffins were taken out of the baking tin, and returned to the cooling rack to continue cooling:
Baked muffins placed on a cooling rack
Once cooled, I placed the muffins in a sealed container.
Mom was so impressed, she said that the following morning, she would have one from this batch, before eating the last muffin from the last batch!
Although I have already done someposts on my pickled eggs, as per my recent wont of photo posts of me making my various recipes, I took a lot of photos yesterday when I made pickled eggs. Sigh, the stores know how to get me every time when they advertise eggs on sale!
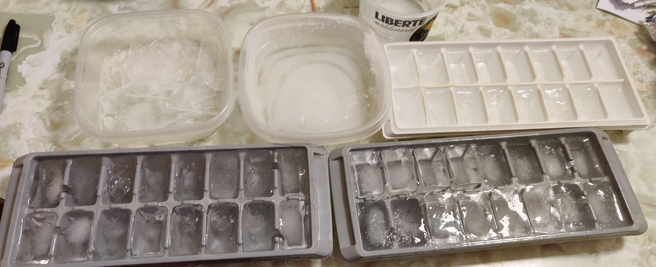
Before I went to buy the eggs, I prepared some extra ice, which would be needed later on once the eggs were boiled:
Ice made before leaving to buy the eggs; photo taken later when the ice was frozen
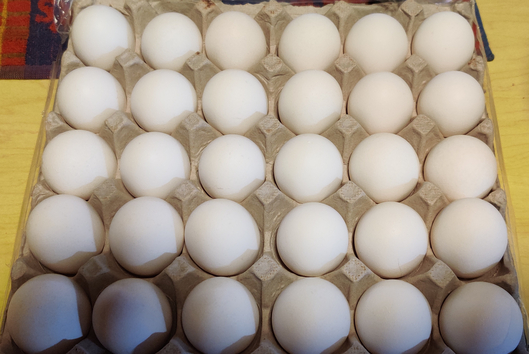
Then I went out to do some shopping and I purchased three flats of 30 eggs each, for a total of 90 eggs, at the advertised price of $4.44 CDN per flat (14.8 cents per egg).
A flat of 30 eggs; I purchased three such flats of eggs.
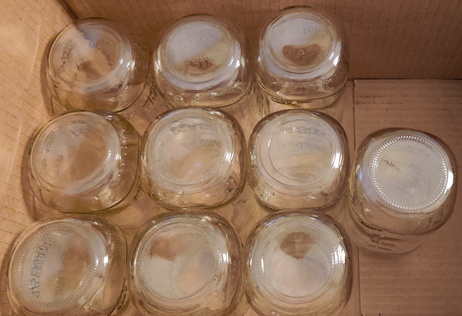
I took out ten jars with mason openings; although the jars shown aren’t strictly speaking mason jars, they have mason jar threading, and I’ve never had trouble with them.
Ten clean jars with mason jar threading
Of course, I also prepared ten rings and lids (in this case, clean reused lids, since I expect that I will be eating the eggs from most of the jars):
Ten rings and lids for mason jars
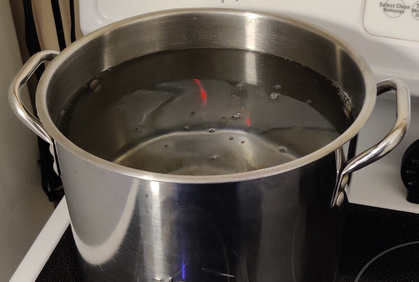
Cold water was put in a pot and heated, for later use when boiling the jars.
Cold water put in a pot and boiled, for later use to boil the jars
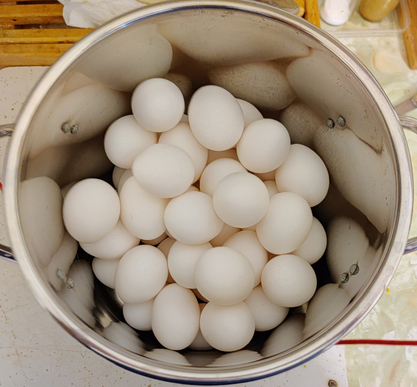
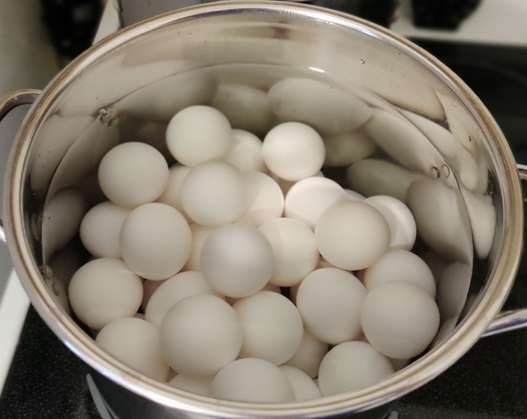
I boiled and shelled the eggs over two sessions of 45 eggs each, one after the other.
First, eggs were placed in a pot:
45 eggs in a stock pot
Cold water was added to the pot with the eggs, covering the eggs.
Adding cold water to the pot with the eggs
Pot of eggs with water, covering the eggs and about an inch more of water
The stove was turned on, and I brought the eggs to a boil, and then boiled them for eight minutes.
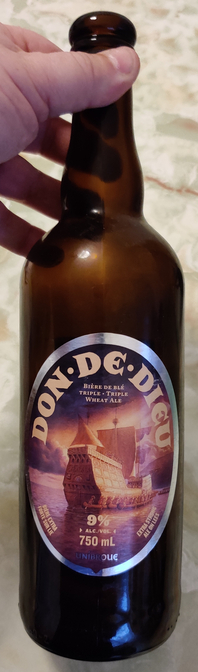
During the time it took to heat up and boil the eggs, the first thing I did was pour myself a nice beer:
Don de Dieu, a 9% bottle refermented abbey-style triple wheat beer
Yes, that is a double sized, 750mL bottle of beer containing 9% alc/vol; it’s called “Don de Dieu”, and it’s a bottle refermented abbey-style triple wheat beer, from Unibroue, in Chambly, Québec.
Yummy!
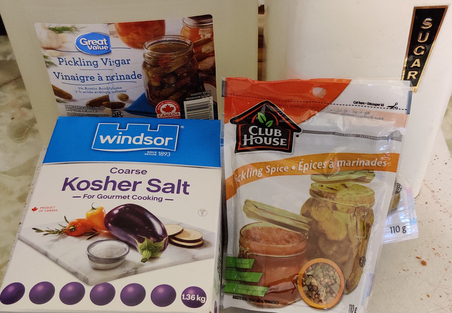
Back to work, still while the eggs were heating up and boiling, I prepared some pickling solution:
My pickling solution uses 7% pickling vinegar, sugar, salt, and a commercial blend of pickling spices
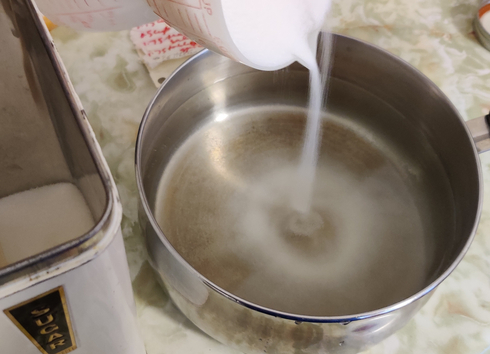
Vinegar was measured out into a pot (in this case, 7-1/2 cups; according to my recipe, I knew I would need another 3-3/4 cups, as well as the commensurate amounts of sugar, salt, and spices) :
Pickling vinegar measured out into a pot
Sugar (in this case, 1 cup) was added:
Sugar was added to the vinegar
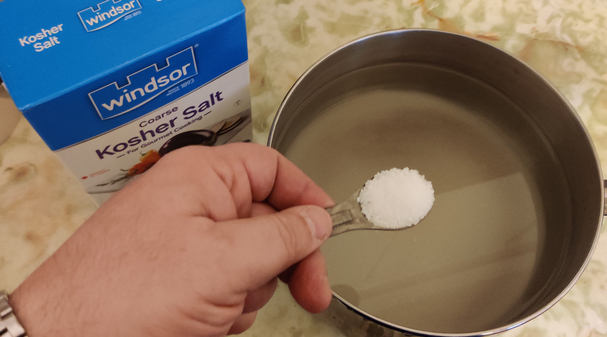
Salt (in this case, 3-1/2 teaspoons) was added to the pickling solution:
Salt was added to the pickling solution
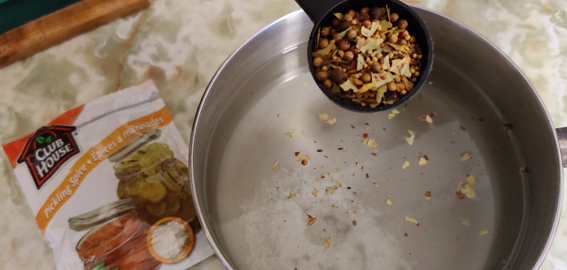
A commercial pickling spice blend (in this case, 3-1/2 tablespoons) was added to the pickling solution:
Pickling spices were added to the pickling solution.
The pickling solution was covered and put aside, to be boiled later.
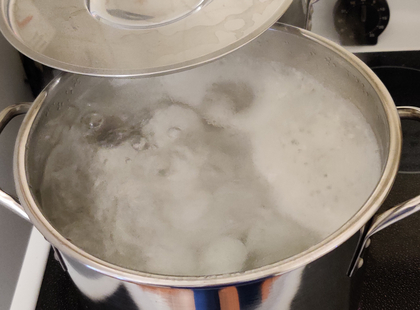
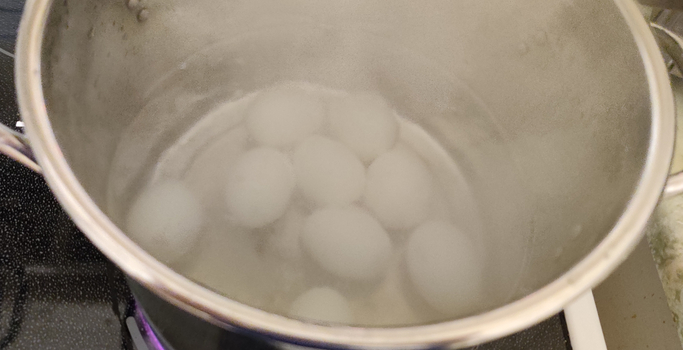
Soon, the eggs had reached the boiling point, and the eggs were boiled for eight minutes:
Eggs boiling for eight minutes
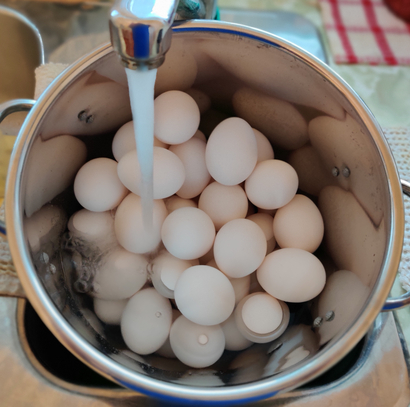
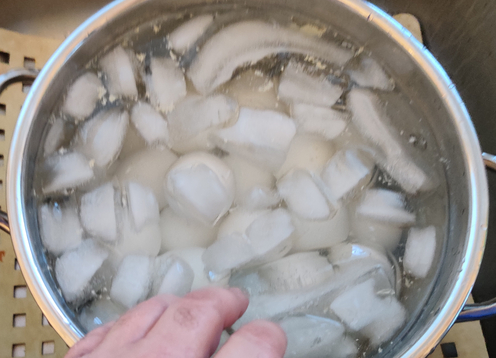
After eight minutes of boiling, the boiling water was immediately drained from the pot of eggs, and cold water was added to the pot of eggs, as well as ice:
The pot of eggs was drained of its boiling water, and cold water and ice were added.
The ice water and eggs were gently mixed by hand, in order to quickly and thoroughly cool the eggs, which takes a few minutes. This is necessary so as to avoid the development of a greenish-blackish ring around the egg yolks (which is harmless, but aesthetically undesirable), as well as to aid in the peeling; the sharp temperature change helps dislodge the membrane just inside the shell, which will then make it easier to remove the shells and minimize tearing.
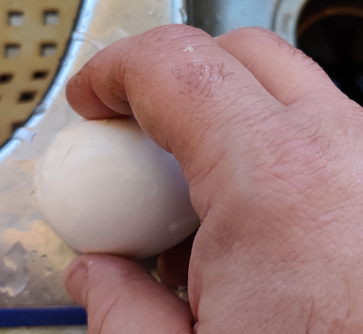
The eggshells were then peeled:
Cracking the shell on an egg against the edge of my sink
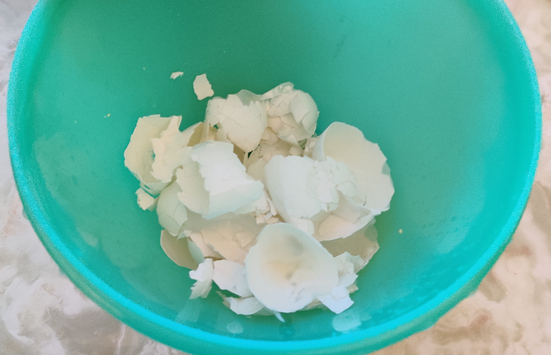
Egg shells collected into a bowl, and eventually sent to the brown box for curbside collection and municipal composting
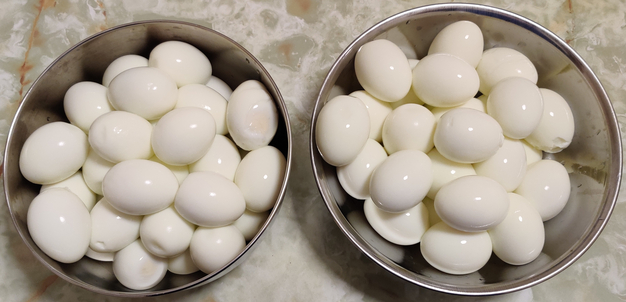
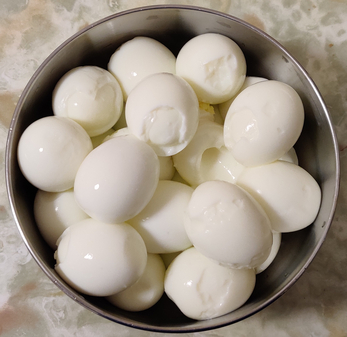
Shelled eggs were rinsed in cool water and placed in a couple of bowls:
Of the 90 eggs, the shells of 65 peeled nicely
Sometimes, there are tears when shelling eggs. In yesterday’s case, there were 25 eggs with tears; however, tears don’t affect the eggs’ ability to be pickled, they just make the eggs not always look as nice. As such, these eggs were merely placed in a separate bowl so that they could be bottled together for personal consumption, and to distinguish them from the nicely peeled eggs, should I decide to give away a jar of the “nice” eggs (see below).
.Bowl of 25 eggs with some tears
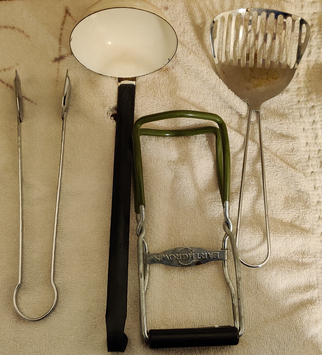
At this point, a few hand tools were needed: Some tongs, a ladle, a jar holder, and a slotted spoon. Not shown: mason jar filler.
Some tongs, a ladle, a jar holder, and a slotted spoon
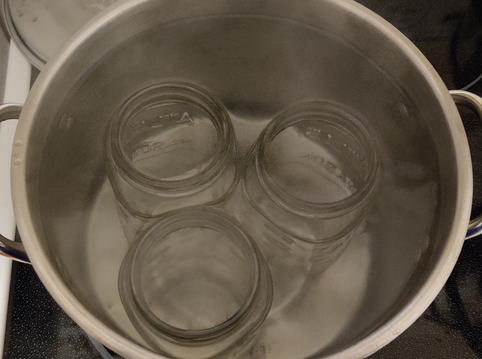
At this point, the water which was heated earlier for the bottles was brought up to boiling again, and jars were put in the water once it was boiling:
Mason jars placed in boiling water
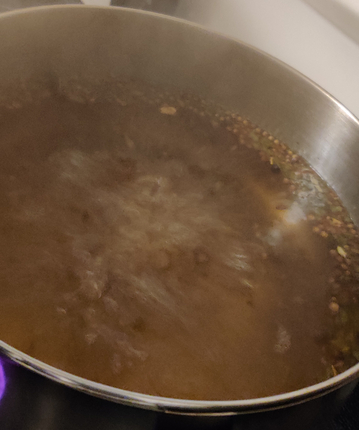
At the same time, the pickling solution was brought to a boil:
Pickling solution brought to a boil
In a third pot — the same one in which the eggs were originally boiled — fresh water was brought to a boil, and eggs (in this case, nine eggs at a time, the number of eggs which fit in the size of jars used) were added, once all three pots were boiling:
Shelled eggs reboiled for a few moments in a boiling water bath
Eggs are only kept in the boiling water long enough to take out a jar from the boiling water bath (just as the jars need only be in the boiling water bath for the time it takes to put the eggs in the boiling water bath.)
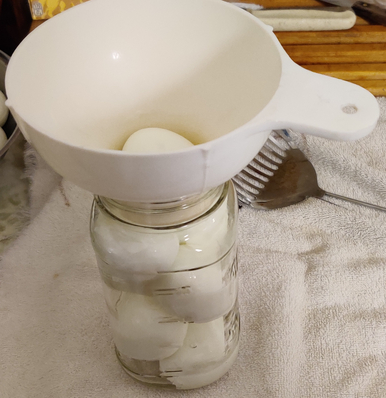
A jar is taken out of the boiling water bath, and the eggs in the boiling water bath are transferred to the hot jar:
Reboiled eggs transferred to the hot jar
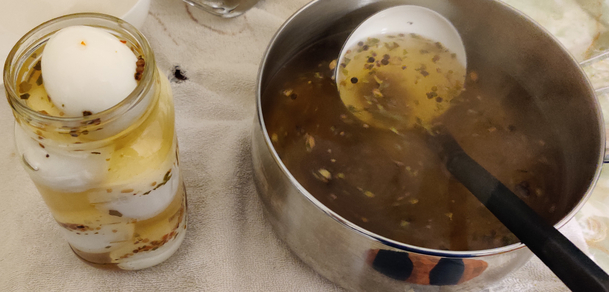
The pot of hot pickling solution — which is kept simmering to boiling on the stove in between filling jars — is brought over, and hot pickling solution is added to the hot jar with the hot eggs:
Pickling solution added to the hot jar filled with hot eggs
The lids and rings were individually placed in the mason jar hot water bath and immediately placed on the filled jars.
Seven jars were each filled with nine eggs without tears, and three jars were each filled with nine eggs with tears.
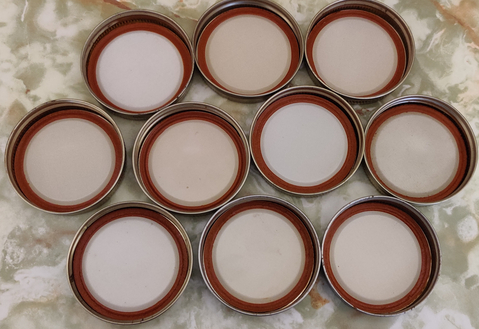
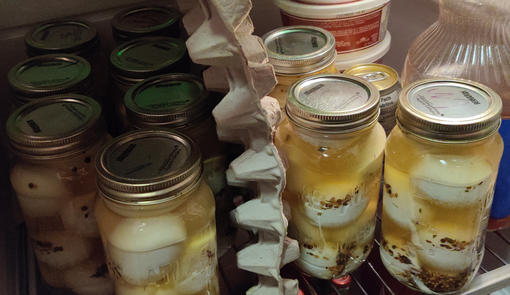
Once all the jars were filled, they were placed in a refrigerator overnight to cool the contents relatively quickly, in order to avoid the development of greenish-blackish rings around the egg yolks (which is harmless, but aesthetically undesirable.)
Jars of pickled eggs placed in the fridge, with a divider to help quickly distinguish between jars of eggs with and without tears.
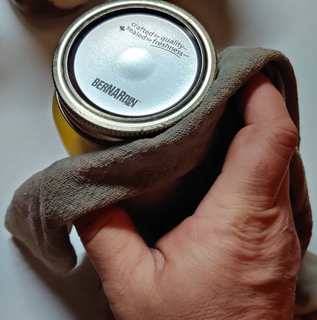
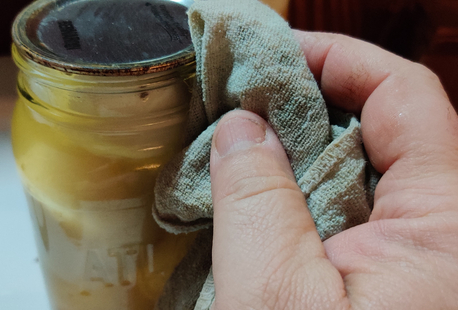
This morning, I took the jars out of the fridge, and wiped down the jars, since when filling the jars and putting on the lids, sometimes the pickling solution spilled a bit.
Wiping down the outside of the jars
This included taking off the rings to wipe down the necks of the jars, which wasn’t a problem since all the lids on the jars formed a good vacuum seal.
Wiping down the necks of the jars
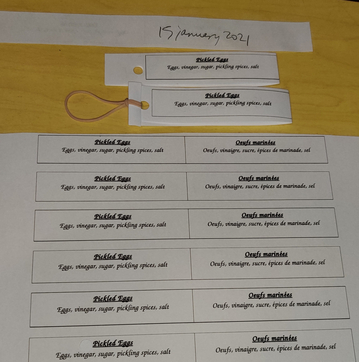
I have a computer file of labels I use for my pickled eggs, which I printed out. I do both English and French parts because I live in a primarily French speaking area, and therefore it’s good to have both languages for when I give away and sell jars. I cut out the individual labels, folded them over lengthwise, wrote the date on the backsides, punched a hole in each, and looped an elastic band in the hole of each label.
Labels for the jars of eggs
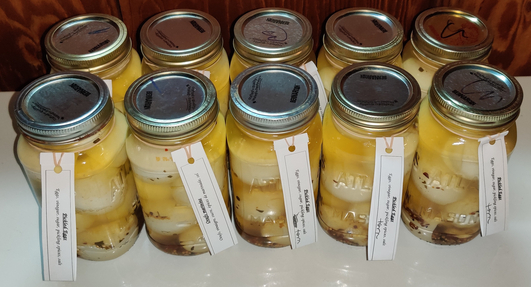
I placed the labels around the necks of the jars. In this photo, the three jars of eggs with tears are in the front row and on the right.
The ten jars of pickled eggs I made yesterday.
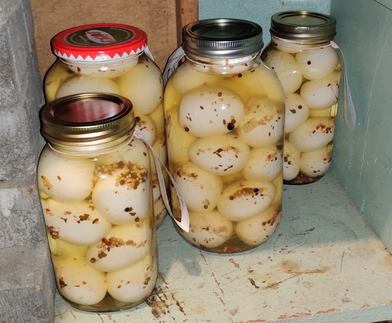
Since I already had some pickled eggs in stock (a total of 91 over seven jars), which I made about a month ago, I moved them around to make space in the storage room:
Four of seven jars of pickled eggs I already had in my store room
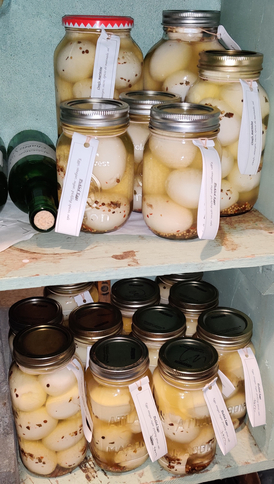
Things were moved around, and yesterday’s jars of pickled eggs are now all put away, on the bottom shelf below the existing jars:
My collection of 181 pickled eggs over 16 jars
As you’ll notice, there are also three extra jars of six pickled eggs in the stock I’d already had, that were not in the above photo; these will likely be given as gifts before I give away any of yesterday’s production since new lids were used when they were made.
And if I don’t give out any jars as gifts? Then I’ll have enough pickled eggs for myself until at least early summer of this year!
ps: And the beer? Of course it was good! It’s a beer I’ve had several times before, it’s from my favourite brewery (Unibroue — no, not the multinational brewery with a slightly different spelling), barring the fact that my favourite beer is from another brewery, and I have a particular taste for Belgian abbey beers and wheat beers.
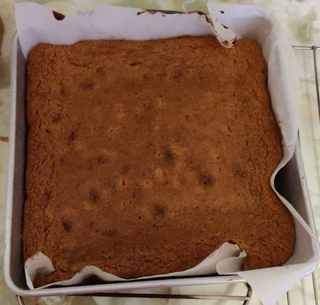
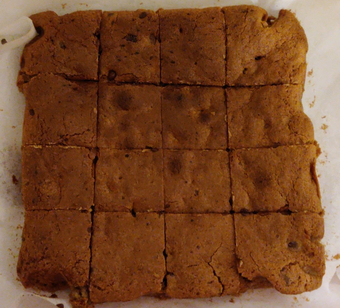
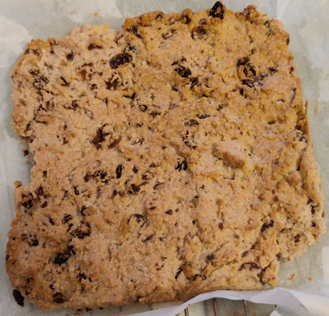
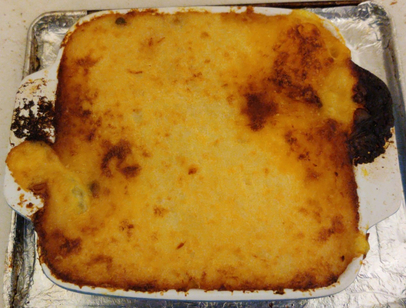
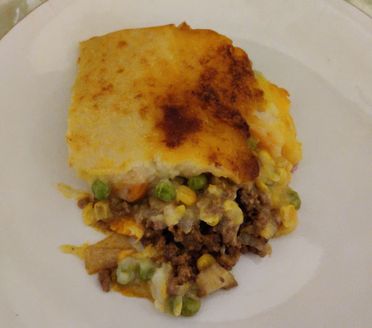
Unfortunately, the two batches I made today did not fully solidify into a fluffy cake consistency during the baking process, and fell a bit, creating a consistency like brownies.
My aunt has been making shortbread cookies for a long time, and used to even send batches of her shortbread cookies through the mail across the country to my grandmother. At one point, I asked my aunt to teach me how make her shortbread cookies so that I could make them somewhat more often and then bring them directly and personally to my grandmother. Alas, my grandmother passed away a few years ago, but I have continued making the shortbread cookies because they are tasty, and my mom has said “why should I bother making my shortbread cookies when you make them (an albeit different recipe) so well?” 🙂
I recently made them for the third time in the past month or so, this time to make as a Christmas gift for my brother who also really likes them; I reminded him that our aunt is the mistress, and I merely the student. 🙂
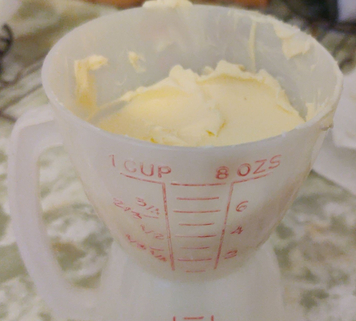
I started off by bringing a pound of butter to room temperature:
A pound of butter brought to room temperature
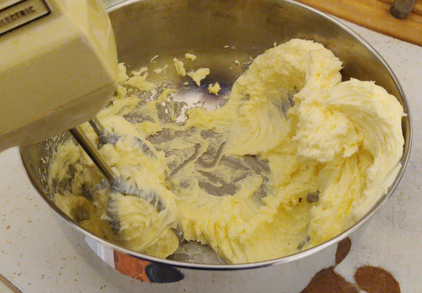
Then I creamed the butter with an electric beater (dating from the early 1960’s — it’s older than I am!)
Creaming the butter with an electric beater
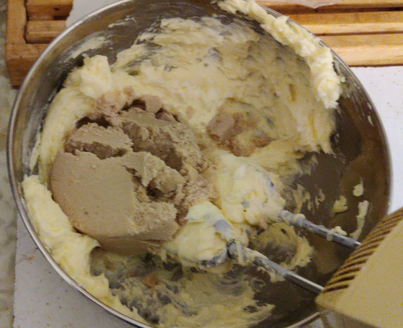
A cup (packed) of brown sugar was added …
A cup (packed) of brown sugar added.
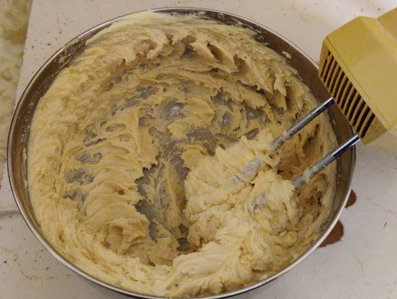
… and then blended with the creamed butter.
1 (packed) cup of brown sugar blended into the creamed butter
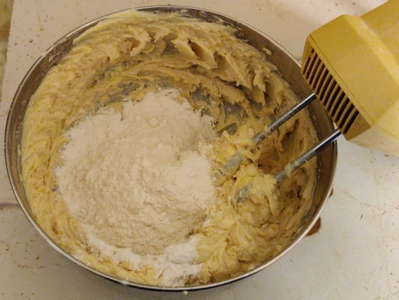
Four cups of regular flour were added, one cup at a time.
The first of four cups of flour added to the butter and brown sugar mix
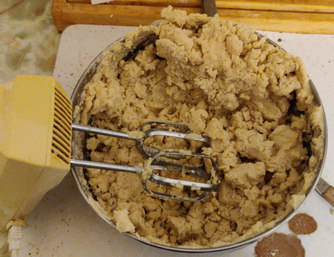
Here is the dough after all four cups of flour have been mixed in:
Dough after all the flour has been added and mixed together
Next, flour was spread on the cutting board to avoid sticking:
Flour on the cutting board
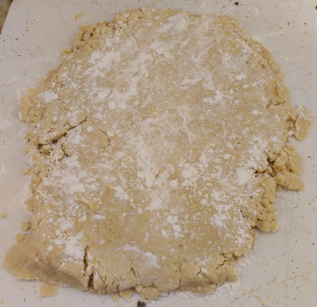
The dough was placed on the cutting board, floured a bit on top to avoid sticking, and flattened with my hands:
Dough on the cutting board, floured and flattened out by hand
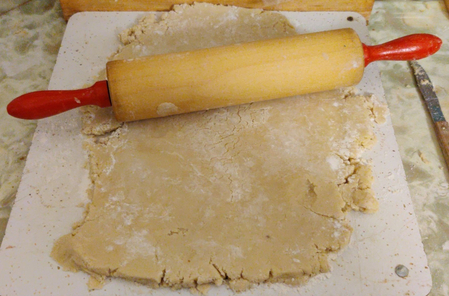
The dough was then further flattened out with a rolling pin.
Using a rolling pin to further flatten out the dough
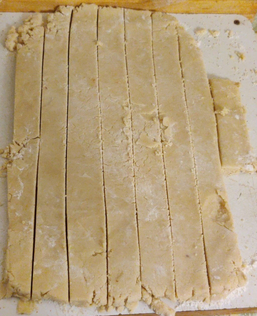
The dough was then cut into strips about an inch wide, and ends were cut off.
Dough cut into roughly 1″ wide strips
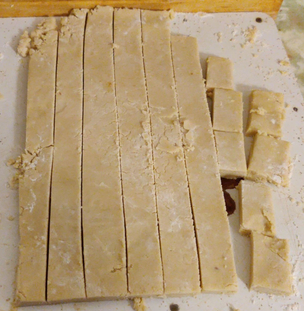
I started to cut the strips into roughly two inch lengths.
2″ lengths of dough were cut
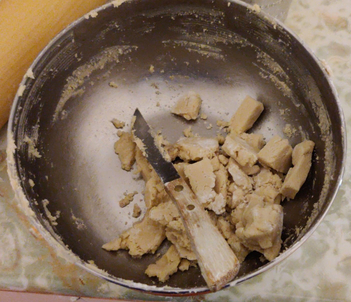
Cuttings from the edges and cookie pieces that broke were put back in the mixing bowl to be formed together again to cut more cookies.
Dough cuttings put back in the mixing bowl
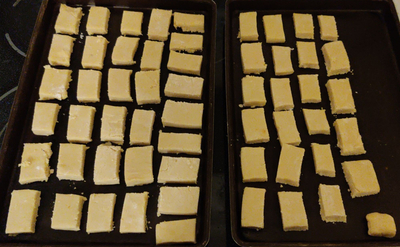
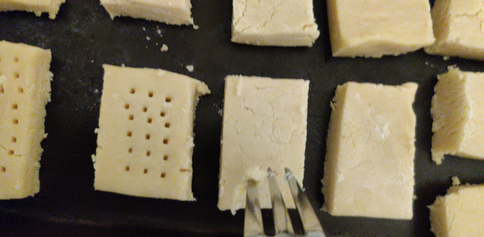
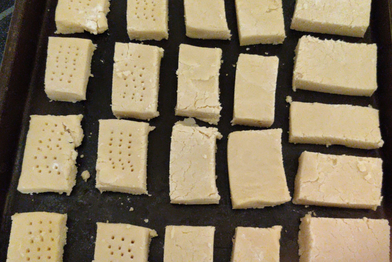
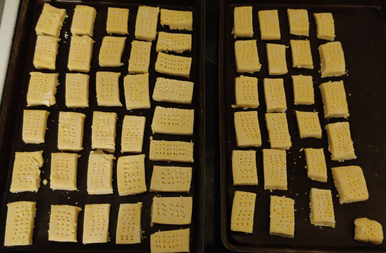
The rectangular cookies were placed on cookie sheets.
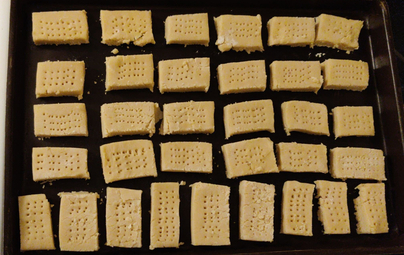
And here are all of my cookies, at the end of the pricking.
All of the cookies, pricked, ready to bake
Yet another closeup of the cookies, ready to bake
The cookies were placed in an oven preheated to 300F and baked for 22 minutes. This could vary somewhat based on your oven and the electrical load in your neighbourhood at the time you bake, but take them out when the bottoms just start to brown.
Shortbread cookies baking at 300F for 22 minutes
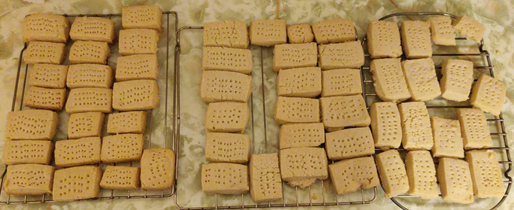
And here are the cookies, cooling on baking racks:
Baked cookies on cooling racks
Yes, there is a broken cookie in the upper right hand corner, it broke when I took it off the baking tray. Anyway, I had to do a quality control test, you must understand … it was yummy!
The cookies are now bagged up carefully and the bags placed in a box, which was placed in the freezer until Christmas Day when they will be given to my brother as one of his gifts.
A relatively long time ago, a neighbour brought over some stuffed pasta rolls au gratin, and they were rather tasty. I liked them so much that I decided to replicate them, and added the recipe to my repertoire of personal recipes.
I recently made a batch of my manicotti, and I took a lot of pictures.
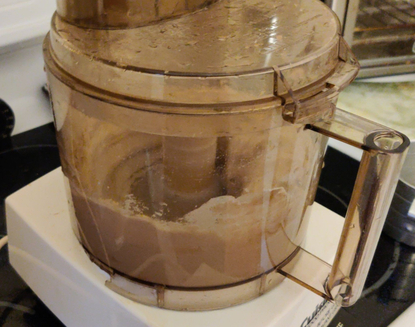
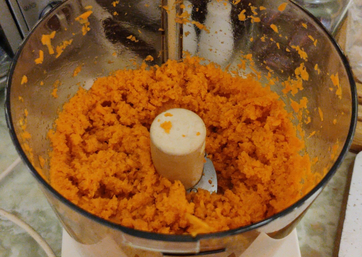
First, I finely ground some carrots in a food processor:
Finely ground carrots
As a side note, I use carrots because I love carrots, and at the time it seemed perfectly natural to me add ground carrots to the filling mix.
I also add ground onions, which to me are also a natural pairing with the beef. The two ingredients extend the beef used in order to stuff more manicotti shells, or conversely, as tasty fillers, reduce the amount of ground beef required.
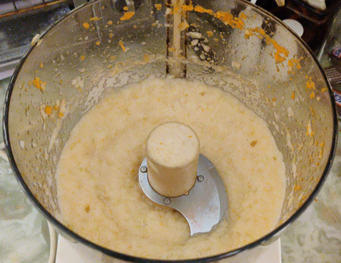
Then I ground some onions, effectively rendering them liquid:
Ground onions, at this point in near-liquid form
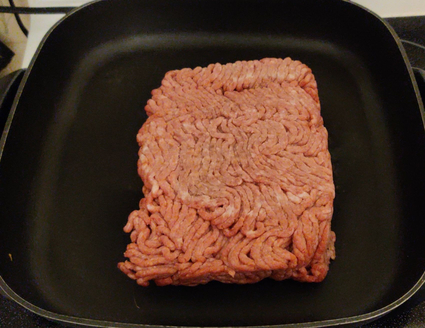
Ground beef was placed in an electric skillet:
Ground beef placed in an electric skillet
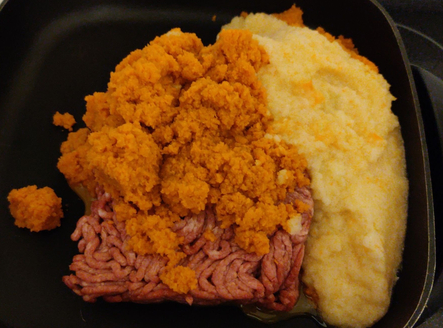
The ground carrots and ground onions were added to the beef in the electric skillet:
The mixture of beef, ground carrots, and ground onion placed in an electric skillet
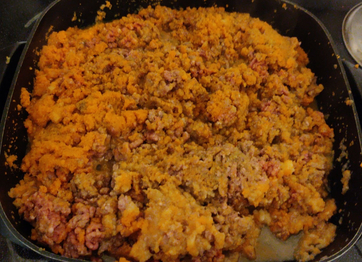
The ground beef was broken up with a spatula, and mixed together with the ground carrots and ground onions.
Ground beef broken up and mixed together with the ground carrots and ground onions
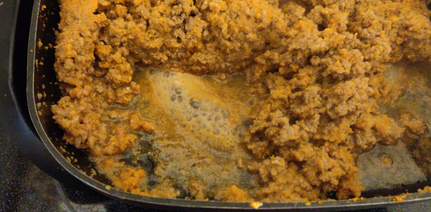
The mixture was fried, while being constantly mixed:
The mixture of beef, ground carrots, and ground onion frying
At this point, I was getting a little thirsty, so I served myself some homebrew (an Irish Stout):
A serving of some of my homebrew, an Irish Stout
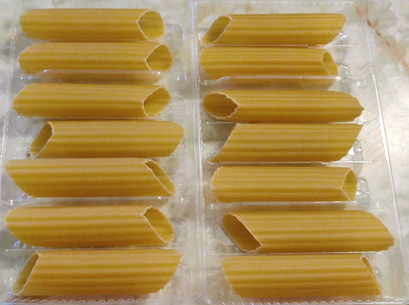
Next, some manicotti shells were taken out of their box:
Manicotti shells in the plastic trays from the box bought at a store.
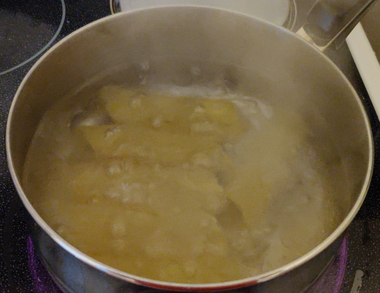
The manicotti shells were then boiled, six at a time, in salted water with olive oil for five minutes:
Six manicotti shells in boiling water
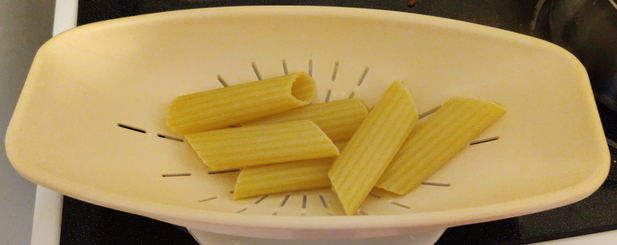
The manicotti shells were then drained:
Manicotti shells in a strainer
At this point, I stuffed the manicotti shells, six at a time, with the cooked meat, carrot, and onion mixture, holding a cooling manicotti shell in one hand, while transferring the meat mixture using a small dessert spoon.
Unfortunately, I didn’t take a picture of me filling the shells — my hands were dirty and greasy, and I didn’t ask for a photographer’s helper. 🙁
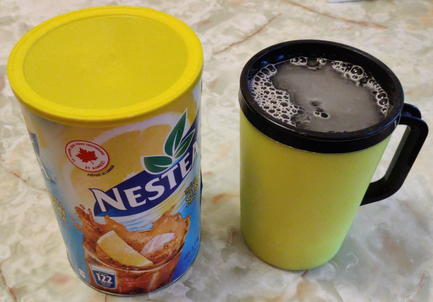
At this point, I may have been getting a bit tipsy from my beer, so I drank some iced tea to help deal with the effects of the beer.
I drink lots and lots and lots of iced tea every day!
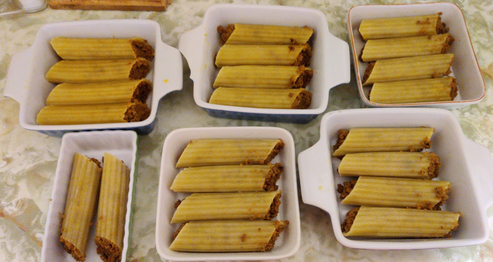
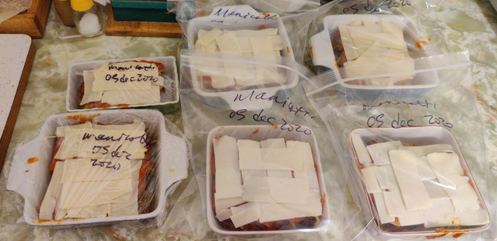
I stuffed a total of 22 manicotti shells. The stuffed manicotti shells were then placed in oven-proof and microwave-safe containers:
22 stuffed manicotti shells
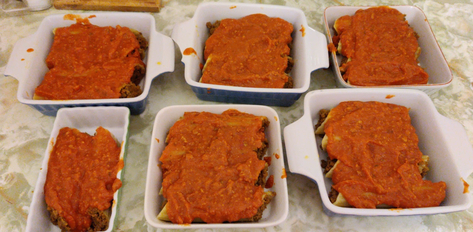
Tomato sauce — in this case, a commercial beef and pork tomato sauce — was spread on top of the stuffed manicotti shells.
Tomato sauce spread on top of the manicotti
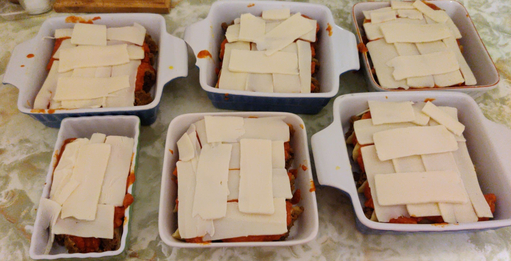
Mozzarella cheese was sliced off the block and laid on top of the manicotti.
Sliced mozzarella cheese laid on top of the manicotti
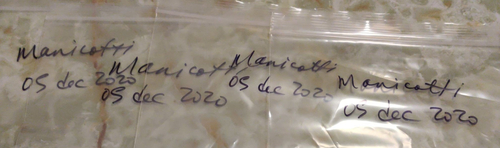
Freezer bags were identified with the intended contents and the date.
Freezer bags identified with contents and date
The manicotti containers were then placed in the bags, and then frozen.
Beef manicotti in freezer bags, ready to place in the freezer
When cooking, I defrost the manicotti, sometimes add a bit more cheese on top, start to reheat the manicotti in a microwave oven while preheating a countertop oven to 350F, and bake the manicotti until the cheese on the top is a desired level of browned and the sauce is bubbling up on the sides.
I say “relatively easy” since a good number (though hardly all) of my recipes are geared toward making large batches in advance meant to be frozen, and the making of which I treat as all afternoon affairs, often with a large bottle of very premium beer. The above cooking jobs, however, are individually of the smaller amounts variety, each being able to be made easily and quickly.
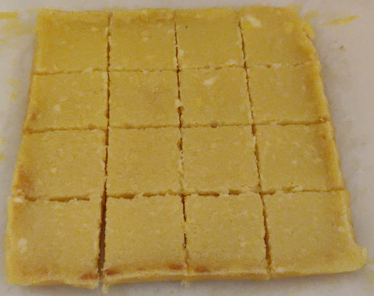
Today, I put my cooking plans into a bit of overdrive, and, by mid afternoon, my main cooking plans for the day were complete, with a few extras beyond the list to boot. The whole list was somewhat more ambitious than the lemon squares which I’d made at the beginning of the week during a spare afternoon I’d had.
An 8″ x 8″ pan’s worth of lemon squares made earlier in the week. They were delicious!
I started all this process somewhere around 09:30 in the morning.
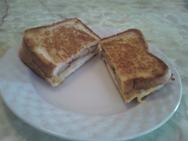
Breakfast was first, consisting of my breakfast sandwiches, which are essentially a grilled cheese sandwich with a fried egg and, in my sandwich, sliced breakfast sausages, while in my mom’s, bacon.
My breakfast sandwhich with sausage (this is an old picture taken several years ago, not this morning). The photos following this one were all taken today, of the foods I made today.
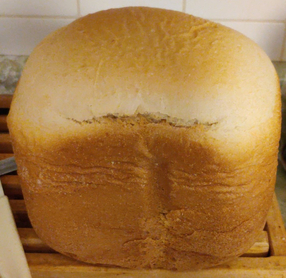
At the same time, I started by setting the bread machine to replenish my supply of bread slices in the freezer for sandwiches and the like. Three hours later, the bread came out of the machine, and was later sliced and frozen.
The bread sliced and on a tray between sheets of food grade plastic, for freezing
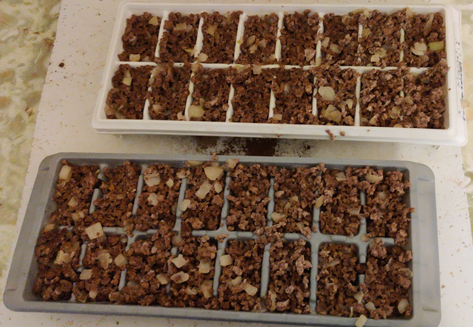
One of the things I now normally keep in the freezer is a cooked mixture of ground beef and chopped onions, cooked in advance and frozen in ice cube trays. The cubes are used for putting into the likes of tomato sauces for spaghetti and other recipes calling for cooked ground beef, or instead of chopped bacon in my pizza recipe. Cooked, two pounds of ground beef with onions will fill two ice cube trays:
Cooked ground beef and chopped onions in a couple of ice cube trays, for freezing
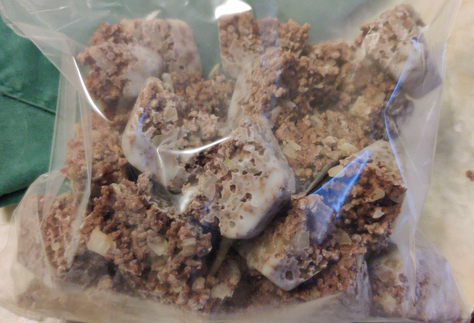
Frozen cubes of cooked ground beef and chopped onions in a freezer bag, ready for use in future meals
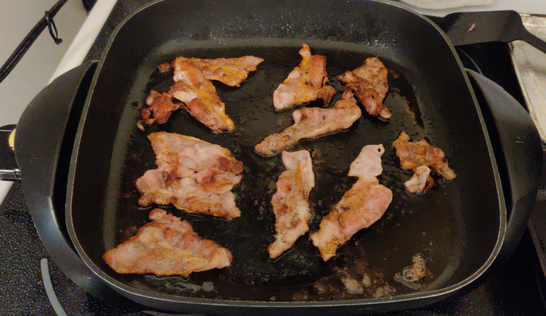
Next, I cooked a single 375g package of bacon (“mild sugar cured bacon”, each slice cut in half lengthwise), for the freezer, for my mom (I prefer cooked breakfast sausages for myself):
Some of the package of bacon cooking
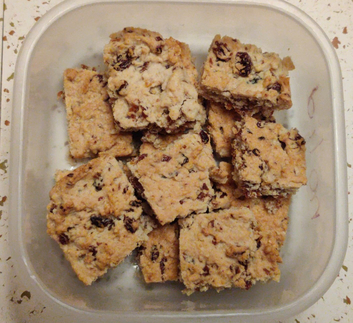
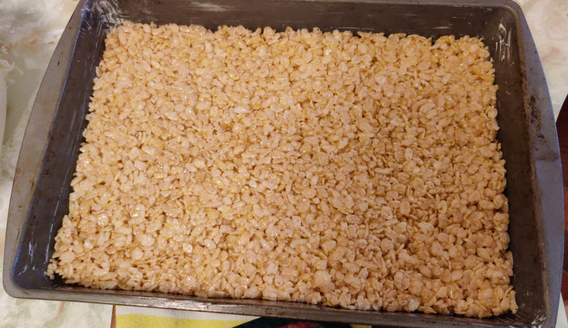
My next cooking job was oatmeal raisin squares, which I learned from one of Jamie Oliver’s TV shows. They’re nice enough, but I make them for my mom.
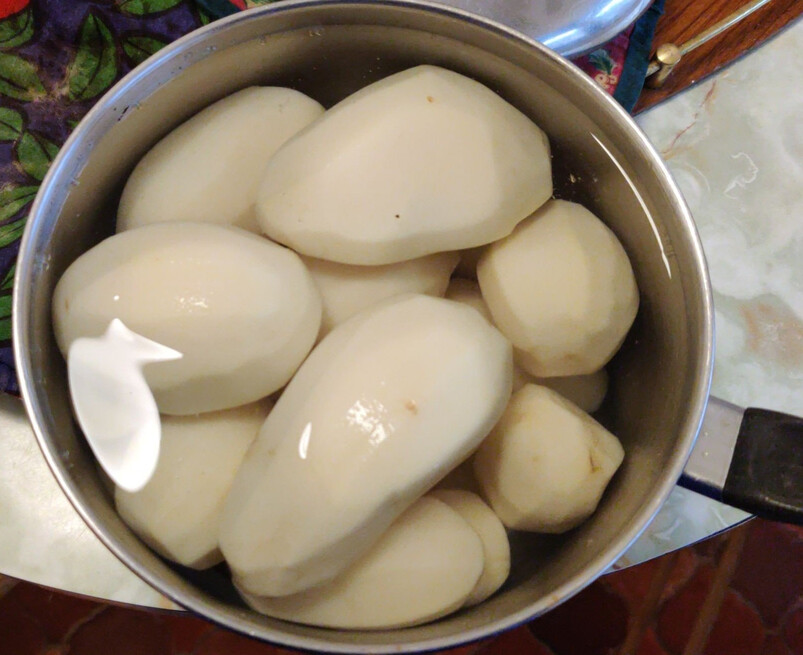
While the oatmeal raisin squares were baking, I peeled a few pounds of potatoes for roast potatoes for tomorrow’s Sunday Lunch.
A few pounds of peeled potatoes for tomorrow’s Sunday Lunch
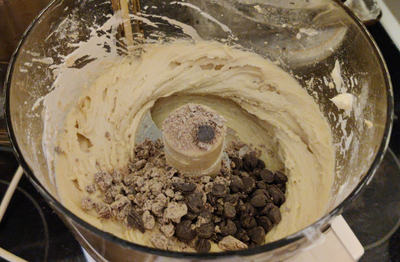
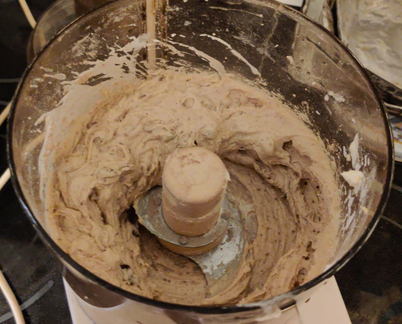
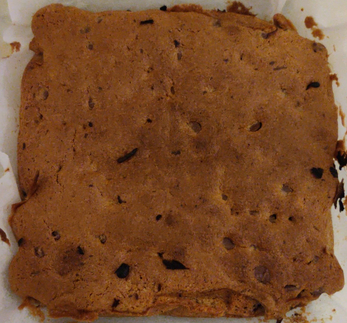
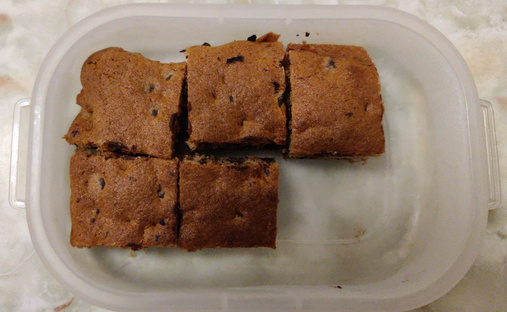
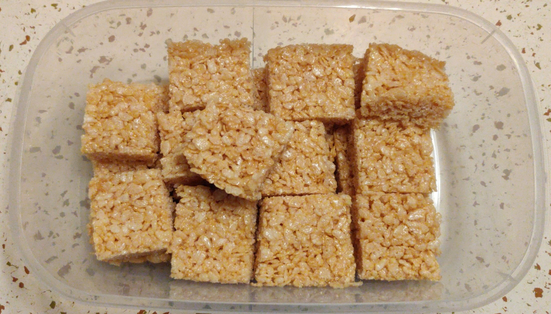
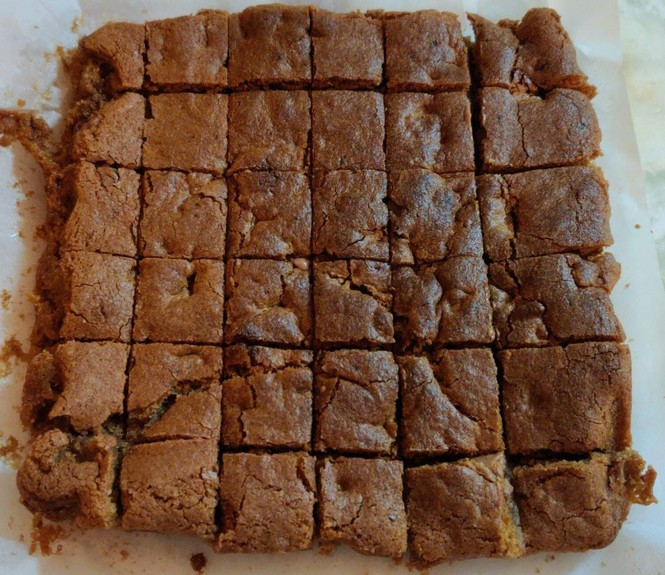
After that, I made blondies for myself. They’re supposed to be similar to brownies, but I add baking powder, giving them more of a cake consistency and height; they are of a tan or caramel colour, and with chocolate chips in it; I cut them into small bite-sized squares.
An 8″ x 8″ pan’s worth of blondies, before being cut into squares
Before beginning to makepickled eggs, I had never cared much for pickles of just about any sort all my life, although over time I have come to realize that I wasn’t as averse to pickled items as much as I thought, demonstrated by having begun making pickled eggs and continuing to love them for many years now.
My mom, on the other hand, has enjoyed several kinds of pickles as long as I remember. While I was growing up, every summer into the fall, she would be part of a group of ladies at our church who would be making various jams, jellies, and pickled vegetables to sell later each autumn at the church’s fund-raising bazaar. This in fact was an indirect inspiration for me, a couple of decades later, to make my pickled eggs to contribute to the same church bazaar table. To this day, every year my mom makes an English-style chutney containing rhubarb (which she grows in her garden), raisins, and onions, using the recipe the church group assigned to her to make in the early 1980’s.
Over the years, one of the things that I have been keeping my eyes out for at roadside farmers’ stands on my way up to the cottage are artisanal jars of pickles from the local farmers to keep my mom supplied with pickles, usually of the bread and butter pickles, and pickled beets, varieties. For several years, one stand in particular sold bread and butter pickles that my mom really liked; however, the stand has since closed. I won’t be trying to find out whether the lady who made them distributes them elsewhere; conversations over the years indicated that she found that making at least her bread and butter pickles was becoming too much trouble for the price she was able to charge.
A growing nagging feeling that I should at least experiment making bread and butter pickles for my mom has been developing over the past couple of years.
This year, after having found a different road side stand distributing various pickled vegetables from a local cabane à sucre (maple sugar shack) (here’s my archive), I bought some jars of the bread and butter pickles for my mom. She tried them, and found them to be representative of the style but not as good as those from the closed farmer’s stand, and further, that the jars appeared not as fully packed as the other jars.
This proved to be one of two imps pushing me over the edge to experiment, the other imp being having found a three litre basket of pickling cucumbers at my local grocery store shortly thereafter, which I decided to purchase.
Already having a supply of onions, sugar, and vinegar, I proceeded to wash then slice the cucumbers in my food processor using the slicing tool. The recipe was based on cups of sliced cucumbers, so given the number of cups of sliced cucumbers I actually produced from what I’d purchased in the three litre basket (14 cups, as compared to the base recipe’s 20 cups), I adjusted the amounts of each of the rest of the ingredients accordingly.
I deviated from the original recipe in the following ways:
– The original recipe called for thinly slicing the onions, while I coarsely chopped the onions;
– In addition to the pickling spice blend in the bag, the original recipe called for mustard seeds, turmeric, and celery seeds, which I did not have, and which I simply omitted;
– The original recipe called for packing sterilized jars with the cucumber slices, onions, and pickling solution immediately once bringing the mix to a rolling boil, and then boiling the sealed mason jars in a water bath for 10 minutes, while I instead boiled the cucumbers and pickling solution for ten minutes, then packed them in sterilized mason jars, and finally proceeded directly to cooling the jars, over concerns that, not having used the water bath method before, I would suffer jar breakage.
Tasting a leftover pickle that didn’t get bottled, I could tell that it tasted roughly like what I knew bread and butter pickles should taste like.
The whole process, including cleaning up, took about two and a half hours, and produced five jars of about 450mL each. I was pleasantly surprised at how relatively easy it was.
My mom was thrilled to learn that I’d conducted my experiment, and anxiously awaited my next visit so that she could try the results.
In the meantime, I had a nagging guilt about not following the instructions and not treating the filled jars in a water bath. The following week, when I happened to be back at the grocery store, I happened upon another display with more pickling cucumbers, and yet another imp convinced me to buy a three-litre basket of cucumbers.
This time, I decided to follow the recipe a bit more closely, given that I already had what I considered to be an otherwise successful batch of pickles in sealed jars already in storage: While I decided to continue omitting the turmeric, mustard seeds, and celery seeds, I sliced the onions thinly and into coins; I brought the cucumber slices, sliced onions, and pickling solution to a boil; then I immediately packed the sterilized mason jars with the mix; and then boiled the sealed jars in a water bath for ten minutes. I did not have any jar breakage. The second basket I’d purchased seemed to have more cucumbers than the first basket (16 cups of sliced cucumbers), and I produced seven 500mL mason jars, as well as one 250mL mason jar.
In the meantime, my mom had made some pickles using some instructions she’d received from a friend, involving the use of pickling solution saved from a number of previously consumed jars of pickles, and some English cucumbers she’d purchased.
The following week, I visited my mom, bearing a jar from each batch, and we set up a taste-test. Fortunately, I am not outright averse to bread and butter pickles; they just aren’t something for which I’ve acquired a taste – yet. 🙂
We had four jars of pickles to compare, which we rated as follows by preference (1 – liked the most, 4 – liked the least):
1: My batch #2 – perfect, and crunchy (refrigerated)
2: My batch #1 – almost as good as “my batch #2”, but not crunchy, at least not enough, and otherwise very good (not refrigerated)
3: Current roadside stand pickles – okay, but not as good (refrigerated)
4: My mom’s recycled pickling solution experiment with English cucumber (refrigerated) – fourth place, and okay but decidedly unremarkable.
We came up with a suspicion afterwards: Since “my batch #1” wasn’t refrigerated while the others were, we wondered if that could have made a difference in the crunchiness.
I received a phone call a couple of days later about “my batch #1”: After refrigeration, they were declared a complete success, since they developed a certain crunch in the fridge.
So my experiments seem to have been successful, at least until and unless I find some spoilage in the jars of “my batch #1” after a few months, if they last that long, and of course which I am not expecting to occur anyway.
For several years, I have had an on and off exposure to what within the family we have been calling “crunch” after my brother started patronizing a local candy shop not far from his home. The favourite treat he bought from the store was chocolate buttercrunch. My mother and I loved it, and of course my brother did as well.
Said “crunch” was difficult to resist; it got to the point that my brother would simply place orders with his “candy lady” to purchase the “crunch” in bulk, amounting no doubt to several pounds at a time. The boxes in which he received the “crunch” were generic cardboard packing boxes about the size of a couple of large textbooks. Curiously, sometimes his orders took a week or two to fill, “because it will be a week or two before I make it again.”
Over time, I quietly shared my suspicion with my brother that his “candy lady” may have simply been ordering the candy from a well known Canadian brand of high end chocolates, since at a mall location of said brand of chocolates, they were selling the same kind of candy in squares which visually appeared to be identical to those from my brother’s “candy lady”, and they certainly seemed to taste the same. I also recall seeing a clerk replenishing the supply in the display case from a generic cardboard box, which seemed to be very similar to the boxes that my brother had been getting from his “candy lady”. No matter, both were entirely scrumptious.
But alas, several years ago, my brother’s “candy lady” closed her shop and moved away, and I rarely patronize the mall locations of the well known Canadian brand of high end chocolates in order to maintain a supply of the candy.
In June, 2020, I began making the “crunch” at home, rather successfully, for the most part – although it is now, albeit but a few weeks later, beyond my recollection as to why I specifically chose to attempt to make it. To my surprise, it is remarkably easy, albeit still requiring plenty of patience, and at least some basic skill – even when it largely goes according to plan.
I first found a recipe(here’s my archive) and which is the basis for my recipe, although I have modified some of the key steps, such as:
a) although I use butter as the principal fat source as called for in the recipe, I use margarine to grease the heavy pot, simply because I have a lot of margarine on hand given that a number of otherbakingrecipes in my collection of recipes call for margarine (or can use either margarine or butter interchangeably, and we’re generally a margarine family. 🙂 )
b) I use maple syrup instead of corn syrup, since I live in a maple-syrup producing area, and it is commonly available; and,
c) I do not add nuts (a common ingredient in most “crunch” recipes), on the advice of my brother who (after relating a family story offering context) suggested that I “make what *I* like”, since I have not been fond of nuts, certainly in whole form, since I was a very young child.
(see later on for other modifications I brought to the recipe.)
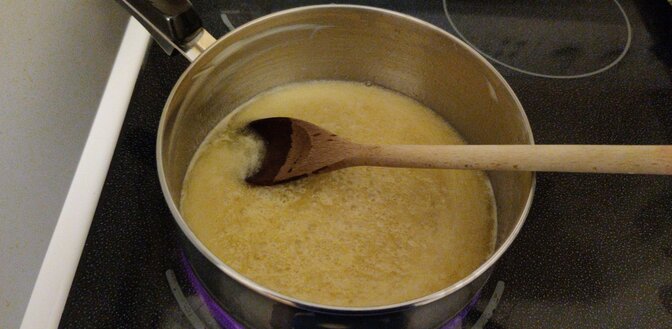
The first time I made the candy, I was surprised at how long it took for the buttercrunch part to rise to the 300F point, reminding me of a school chemistry experiment in which (as I recall) alcohol and water solutions would boil first at the lower boiling temperature of the alcohol, before rising to the boiling point of water.
The buttercrunch during the early stages of the cooking
Once brought to the correct temperature, I poured the (at this point liquid) buttercrunch in my baking pan, which temporarily warped due to temperature differences. This led to parts of the buttercrunch which were thicker than others, to the point of some parts being “too thick”.
Chocolate was melted in two parts, a portion for each side, with cooling in between each attempt. However, I had difficulty in setting the second layer of chocolate, which easily became detached from the buttercrunch once cooled, and especially when I broke the large flats into pieces.
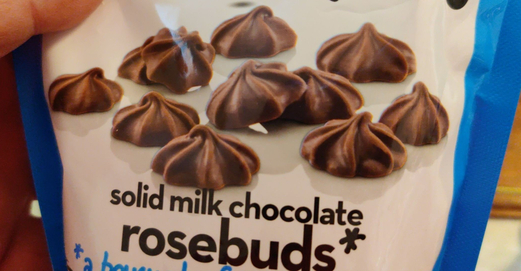
A separate problem with the chocolate was that I found that the milk chocolate bars I was using were on the one hand ideal for melting and pouring evenly (once melted) over the buttercrunch, yet on the other hand seemed to melt a bit too easily for my liking in the final product.
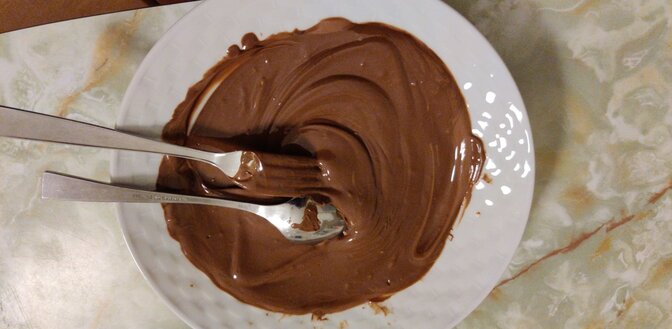
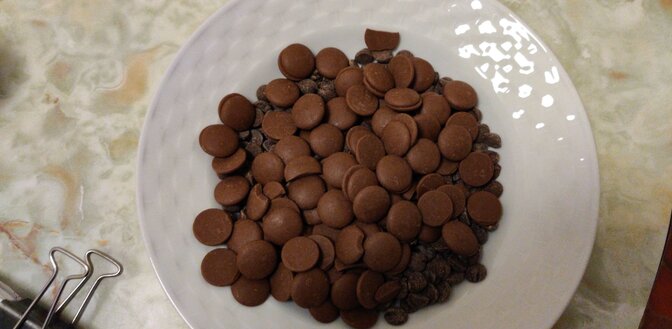
The melted chocolate, a combination of chocolate chips (traditionally used for making cookies and the like), and milk chocolate buttons
My brother and my mother both tried the “crunch” I’d made, and immediately took a great liking to it. My brother, whom I believe was being mildly gracious beyond otherwise liking what I’d made, asked about how hard it must have been to make the candy as good as the commercial offerings to which we were accustomed.
The time it took to cook the buttercrunch part had taught me to answer that it was principally a matter of patience while cooking the buttecrunch part as it took its time to rise to the correct temperature of 300F, and that beyond that, the success appeared to be largely due to a simple and successful recipe that I had consulted.
My next attempt experimented with separate parts of the recipe:
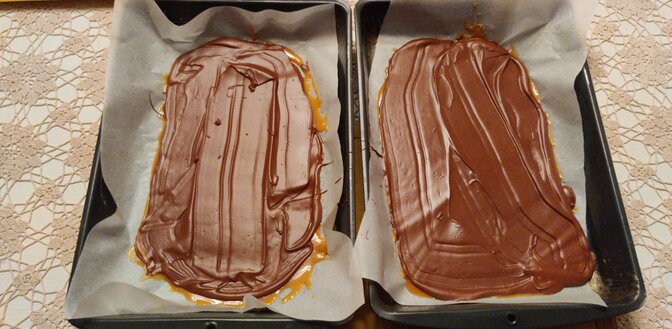
a) spreading the amount of “crunch” called for in the recipe over two baking pans instead of one, in order to make it less thick; and,
The buttercrunch poured and spread over two surfaces, using parchment paper
b) only attempting to coat one side of the candy with chocolate, instead of both;
The buttercrunch covered with the melted chocolate
c) using semi-sweet chocolate chips as the chocolate source, principally because its price was more consistently at the lowest price point of bulk chocolate at my local grocery store.
The first two items were largely a matter of technique, while the choice of chocolate to use was initially a matter of cost. This incidentally addressed my concerns with the melting point of the chocolate, since its melting point also appeared to be a little higher than a number of the milk chocolate bars I was buying, as evidenced by the semi-sweet chocolate chips appearing to take longer to melt in my hands while handling.
Reviews from my brother and my mother indicated that using the semi-sweet chocolate chips was as good as the first batch, but that there was a slight preference for the milk chocolate coating, and that I had largely succeeded at making the candy less thick.
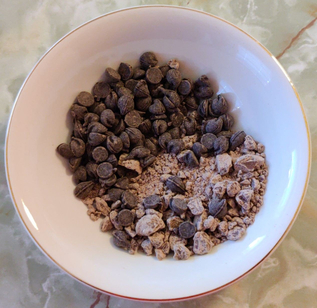
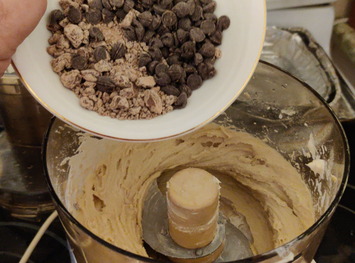
Given the success of the experiment with semi-sweet chocolate chips and the feedback I’d received, I decided to make a 50/50 blend of the semi-sweet chocolate chips and milk chocolate (be they buttons, chocolate bars, or otherwise), hoping to bridge the slight preference for milk chocolate with the apparent slightly higher resistance to melting in one’s hand of the semi-sweet chocolate chips.
This incidentally also lead to an opportunity during my upcoming summer holidays at the cottage to use up various collections of milk chocolate buttons which had been accumulating over a couple of years at the cottage – which is unheated over the winter when I am not there, hence presumably slowing any effect of time on its quality.
Bowl of chocolate chips and milk chocolate buttons, ready to melt (see picture above of melted chocolate)
During my summer holidays at the cottage, I made three batches of the recipe, with uneven results.
The first batch turned out acceptably, however, I noticed that the butter began to separate from the buttercrunch near the end of the cooking phase when I had reached 300F, and, that it seemed to take longer to reach the temperature than at home in the city. I also found that it was harder to manage the cooking of the buttercrunch part, due to the heat from the stove rising against my hand holding the thermometer and the pot, making it very hot and dangerous. The stove at the cottage uses traditional electrical coil elements instead of the radiant heat elements to which I’m accustomed at home in the city; the heavy pot I was using at the cottage was a large heavy aluminum pot with a different handle configuration as compared to the somewhat smaller stainless steel pot I used in the city.
Nonetheless, the results of the first batch were sufficiently satisfactory that I was confident to give samples to a couple of neighbours.
The second batch proved more difficult, and underlined two problems I encountered during the first cottage batch, viz. that it seemed to take longer for the buttercrunch to rise to the desired temperature, and the butter seeming to separate. I assumed that this was possibly because the pot at the cottage had a larger surface area, affecting the heating of the buttercrunch part, due to greater heat losses to the ambient air being somewhat higher than in the pot I used at home. I also remembered at this point that I knew that the main burner on that stove heated unevenly.
During this same second batch, the chocolate mixture melted with a bit of difficulty due to the microwave oven being a model of half the capacity power wise to the unit I use at home in the city, affecting how it melted the chocolate and at what rate. A hot spot formed in the mix that burned, but which ultimately mixed in well to the rest of the chocolate without apparent ill effect.
The result from this second batch was what I consider a failure, since the buttercrunch part did not turn crunchy, but rather retained a firm fudge like consistency. As a candy, it was fine and very tasty; however, as buttercrunch, it was a failure.
A few days later, I decided to repeat my experiment, using a smaller pot, hoping that the relatively smaller surface area of the pot would address the heating issue. Unfortunately, the firm fudge-like consistency was repeated, and I again failed to get the crunchy part I was hoping for. I also had some difficulty in with uneven melting of the chocolate, which only affected the spreading of the chocolate, leaving a particularly bumpy surface in the finished product.
My last experiment at the cottage was to have involved the use of a portable countertop induction stove with the pot I use in the city (having asked that these objects be brought to the cottage by my mother who came to the cottage at the end of my holidays.) Unfortunately, the pot was not of the variety of stainless steel that works with induction stoves, stopping the experiment in its tracks.
I did not attempt to make any more “cruch”at the cottage, having a fair amount of the “failed” results on hand, and being confident that I could not, at least in the short term, resolve the issues at hand.
Back at home in the city after my holidays, I decided to make the “crunch” again with the equipment with which I’m familiar at home, albeit with a bit of trepidation, given my failures at the cottage.
It was, both unsurprisingly and as well as surprisingly, a complete success: The buttercrunch reached proper temperature, butter did not seem to be separating from the buttercrunch part, and I got the desired end product. My mother immediately asked for some samples, and gobbled up the results with great pleasure.
In the process, it seems that my suspicion that the difficulty with the batches made at the cottage laying with the uneven heating of the stove’s main element had been confirmed.
I have also begun to wonder, given that I have had such relative great success from the beginning – barring the difficulties at the cottage – that my brother’s “candy lady” may indeed have learned how to make her own chocolate buttercrunch, and she may indeed have learned to cut consistently-sized squares, which appeared to be similar to those of the well known Canadian brand of high end chocolates. Presumably, packing boxes are readily available similar sizes, and coincidentally, each purchased similar sizes. And, presumably, when she said that she was planning to make the “crunch” only after a certain delay, she was indeed doing so because she had other production priorities at hand when my brother was placing orders of relatively large quantities of her product.
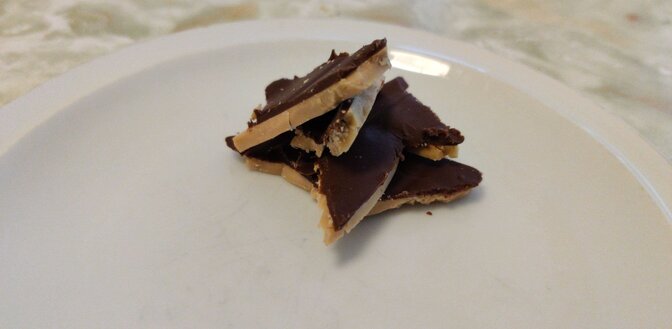
Either way, I seem to have learned how to largely replicate the taste and texture, and dare I say the essence, of the “crunch”, to the pleasure of the family’s various sweet teeth.
A serving of the end product
Update 20200831: I used my portable countertop induction stove and a cast iron pot I own to make the buttercrunch part, and a double boiler to melt the chocolate. No surprise, it worked. So now all I have to do is try making the crunch at the cottage.
Update 20200911: I again brought the countertop induction stove, as well as the cast iron pot, to the cottage in order to replicate the experiment. I also used the double boiler method to melt the chocolate. My brother proclaimed the results as my “best batch yet”. When my brother and I left, our mom greedily kept most of the batch after giving my brother one of four bags of the candy, rationalizing that she was to be at the cottage for a few more weeks, while my brother might benefit from a hypothetical “next batch” that I might make. I kept quiet over my disappointment that to me, the “crunch” part seemed to be somewhere between the desired, crunchy result and the somewhat soft, granular fudge that I had made during my summer vacation. This leads to a new conclusion that had previously been going through my mind, that ambient humidity affects candy making, too. (Here’s my archive) Obviously, home in the city is a bit more climate controlled with central air conditioning, while at the cottage, the humidity is whatever it is, including when it’s stiflingly hot and/or humid.
I recently tried a recipe I watched Jamie Oliver make on “Jamie’s Quick and Easy Food”. It presented a minor challenge, because all the measures were in metric units, a different system than that to which I am accustomed to using while cooking.
However, in Canada, we also deal with at least two traditional systems of measurements, in addition to the metric system:
Imperial Measurements (English Units) originating from the British Isles, because of historical ties from colonial times; and,
The United States Customary Units, which are derived from the British Imperial Measurements, and which are really important in Canada because the United States is Canada’s largest trading partner.
This means that in Canada, we regularly albeit informally deal with what could be described as a complex hybrid of (at least) three measurement systems. Although the Imperial System (English Units) has been slowly fading for decades, it has also kept a strong hold on things, such as through old measuring cups and other implements used in home kitchens, often inherited from parents and grandparents. The US Customary Units also have a very strong influence on Canada, especially since the units usually have identical names as their counterparts in Imperial units, as well as very similar though distinct measures.
In my personal experience, listing all ingredients in all home recipes in metric is uncommon in Canada, despite metrication back in the 1970s. In my personal experience, we still list ingredients in quarts, cups, ounces (both liquid and weight), teaspoons, tablespoons, and the like. This of course is complicated by some things like “new” pots being in litres, as well as things like jars, both of the mason and commercial product varieties, which are in millilitres and litres (while my pickled eggs recipe is based on Imperial units, for instance.) In any case, when food weights come into play, I usually I know how to estimate them, such as “about a pound of chicken or ground beef” (follow the weight on the package to help estimating), or a given number of pounds of potatoes, coming out of a bag that is known to contain 10 pounds of potatoes.
As mentioned above, many measuring cups and other kitchen implements are still in Imperial or American measurements, although some newer measuring cups (of which I do not possess save the one mentioned below) and other kitchen implements are also marked in Metric units, in addition to either Imperial or American units.
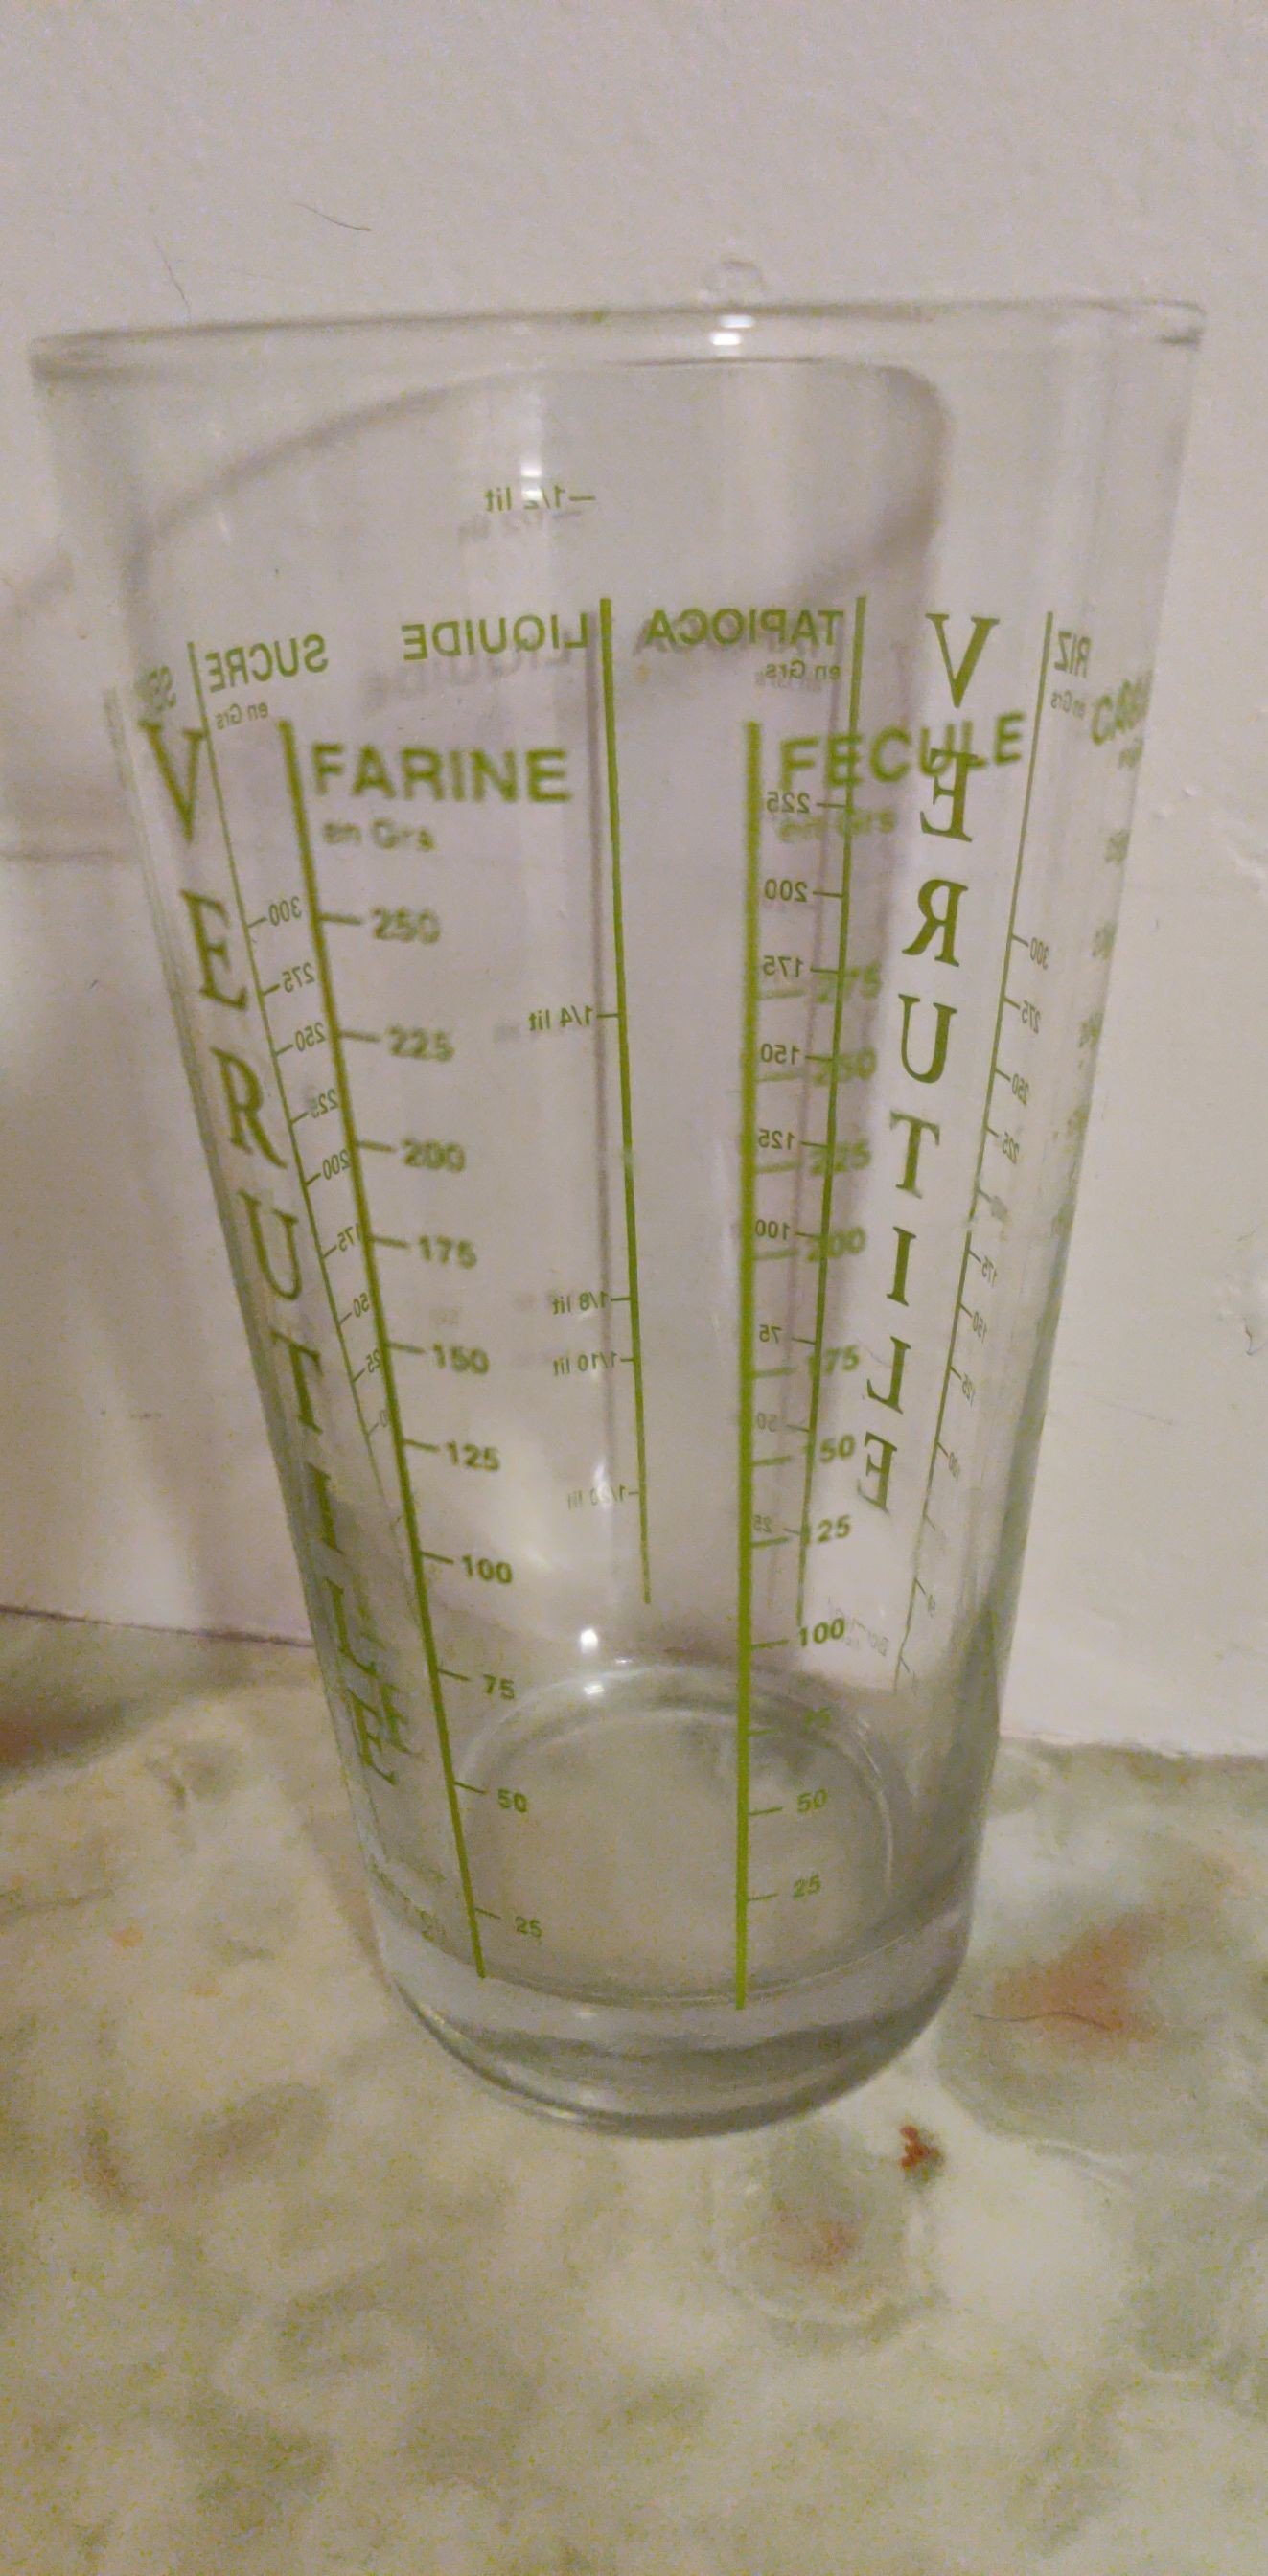
So, back to baking the squares: This is the second time I have followed one of Jamie’s recipes. The first time, several years ago, I guesstimated conversions. I was fortunate a few weeks later to find a glass measuring cup with multiple scales printed on its sides, each for different ingredients, such as flour, sugar, starch, rice, and the like, and showing graduations in grams for the given ingredient. In retrospect, I perhaps should have been searching for a kitchen scale instead. In any event, I largely forgot about the measuring cup after having used it once or twice.
When I was preparing to make Buddy’s Flapjack Biscuits, I had a minor problem. Since I had forgotten about the measuring cup with scales in grams, and I don’t have a kitchen scale, I couldn’t simply weigh out the ingredients (20230628: I bought a kitchen scale by August of 2020, a few months later, as described in this post). I had to convert the measures of Jamie’s list of five ingredients, composed of 100g of each ingredient. No doubt making each exactly 100g was an intentional novelty added to the original recipe, as well as, of course, being an easy way to remember how much of each ingredient to use.
In the process, I was reminded of a confusing reality of which I’ve been aware all my life: I navigate the above-mentioned three measurement systems, often without thought, almost on a daily basis. To wit, I found a website that converted 100g of flour to close to 2/3 cup in Imperial units, and close to 3/4 cup in American units. I didn’t immediately know which to choose. (20230628: here is a site with the difference between a “Canadian” cup and an “American cup, with my archive.)
I did remember at this point that I had the glass measuring cup with the various scales. I determined that 100g of flour was equal to about 2/3 cup in one of the kitchen measuring cups I have. I guessed that at least with said measuring cup, I would also need to measure to 2/3 cup each for oats and raisins. I was able to determine that golden syrup, through a recipe found on the internet, is almost completely composed of sugar, and in fact has very little water in it. Again using the glass measuring cup with multiple scales, I measured out 100g of plain sugar, and found that it is about 1/4 cup in my regular measuring cup; I chose to use brown sugar in the recipe I developed, and added one and a half tablespoons of water in order to simulate the effect of the liquid nature of golden syrup. An online conversion revealed that 100g of margarine was also about 1/2 cup.
But I am now finding it dissonant that I can’t be certain what the real capacities of each of my multiple measuring cups are, nor for which system (Imperial or American) each were designed. I would only ultimately know by securing a kitchen scale (for dry goods), or securing a graduated cylinder (for liquids), to systematically measure each and every measuring cup I have. Perversely, graduated cylinders to which I would have access are graduated in millilitres, a metric measurement.
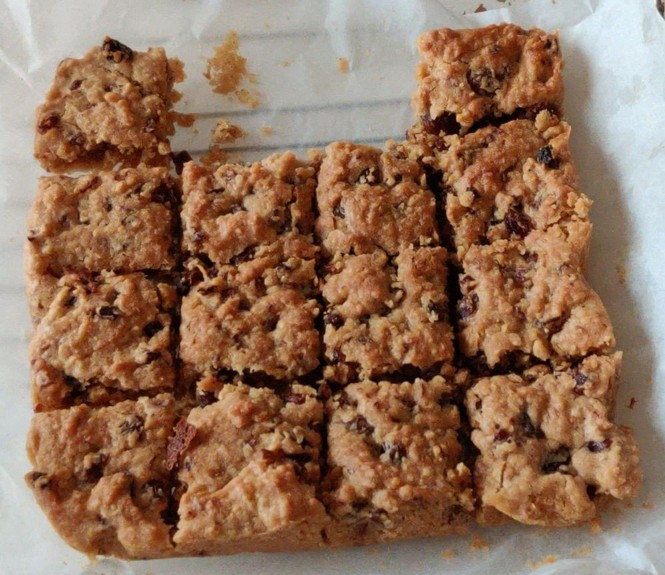
And what about the squares? “Buddy’s Flapjack Biscuits” are nice enough, although I think that there are too many oats. On the other hand, my mom likes them a lot. The “Blondies“, as their name may well suggest, are scrumptiously like a chocolate chip cookie version of brownies. Hence both have earned a place in my collection of recipes.


