My brother and I participated in the 2025 Star Trek Cruise, put on by Entertainment Cruise Productions.
My brother and I had gone on the 2018 Star Trek Cruise, and had a great time, but we decided that we weren’t so interested in immediately booking the following year’s sailing, nor during a nebulous period of “about five or so years”. We changed our minds in early 2020, thinking to book for 2021; however, difficulties in getting through the phone lines which were constantly busy and the subsequent world-wide event (which no doubt was the reason for all the busy signals!) made it clear that we shouldn’t continue with our efforts in 2020.
Fast forward to early 2024, we felt confident to book for the 2025 sailing: We booked passage on the 2025 Star Trek Cruise on the Royal Caribbean Explorer of the Seas in mid-March, 2024. This was still a somewhat challenging experience, since the phone lines to reserve were always busy. My brother mused to the effect of “the next time we book passage, I should take the whole day off!” Fortunately, my brother persisted and got through, and managed to get a reservation for the two of us. As returning guests for the Star Trek Cruise, we received a small discount whose amount I don’t recall, and a further 5% discount for paying the full passage at the time of reservation.
Flights were booked in early June, 2024, with a decision in November, 2024, to change things slightly toward flying separately.
We reserved hotel rooms in the Brickell area of Miami in mid-January, 2025. This area was chosen for roughly three reasons:
- We had stayed in Miami Beach in 2018, which proved to be an excellent experience, except that neither of us were interested in the beachfront luxury that was available;
- We had a perception, rightly or wrongly, that the Miami Beach area, which seemed to be all semi-luxury hotels and little else, required that any transportation considerations such as Ubers and taxis travel further than from other areas, although this may well have been subjective;
- We wished to find another location that was as close or (at least apparently) closer to the cruise terminal, while maintaining per-night pricing that was not exorbitant. (Unfortunately, this year, the cruise was at the very beginning of the spring break, and prices went up accordingly across the board.)
Leading up to our departure date, we installed the app for Royal Caribbean, which impressed me as to how sufficiently complete it is and how it integrated my reserved shore excursions and no doubt were I to have made other purchases, those too, the menus in the dining room, and my on-board bill.
Starting about a week before the cruise, and a few days after prompting from the cruise promoters, my brother and I checked in on the Royal Caribbean app – as we discovered, probably too late – and got later embarkation times of 14:00 to 14:30. We also looked at the shore excursion options, and only chose one relatively inexpensive trolley tour in Belize City – which was entirely pleasant and enjoyable.
We did not chose any other shore excursions because we checked sufficiently late such that it appeared that other cruisers had grabbed up many to capacity; as well, many that we might have considered were no longer available. As for the rest, little interested us, or otherwise involved activities that were too risky for the conservative, risk-averse approach we took to the trip (as in, we decided that even laid back swimming-related activities, in which we were not particularly interested anyway, could have been too risky.) Note that we also didn’t choose any on-board paid activities, as we had in 2018, perhaps simply because their availability never really caught our attention, certainly not in time.
My brother and I travelled separately to Miami and arrived at different times. I arrived first, and a few hours later, my brother arrived. Note that we arrived two days before the cruise not because we wanted to do touristy activities in Miami before the cruise per se. Rather, we wished to avoid the consequences of potential logistical changes and delays (and therefore miss boarding our cruise!) that can occur when travelling non-trivial distances. Concerns included airplane delays such as delayed or cancelled flights, airplane maintenance issues, airplane overbooking, and weather-related delays such as snow storms; the cruise was February 23rd to March 2nd, which is prime winter storm season in the northeastern part of North America where we live, as well as the broader region. Winter storms which easily can wreak havoc in multiple ways and multiple times with airplanes and travel, especially in eastern Canada and the US north-eastern seaboard, and which can cause domino effects with severe delays, are simply a fact of life in our region. Essentially, we were planning a buffer period to allow for an impromptu re-enactment of the movie “Planes, Trains, and Automobiles” (here’s my archive).
In the end, neither of us had any delays, and I was even sitting at the gate for my departure about four hours before I was to board the plane, in plenty of time for the previous flight at the same gate to have a waiting period. I also used the US customs app, which allowed me to go in a short line at my home airport, and I passed through very quickly.
At this point, I should note that I carried some commercially packaged iced tea powder to always have a drink during my trip, and some commercially individually packaged granola bars for times before and after the cruise, including travel days, when meals may not or could not have been timed conveniently during the trip. I did not have any trouble crossing into the US, despite having declared in the US Customs app that I had “food” which I did not specifically identify. Except as noted below in Cozumel, Mexico, I did not have any other problems with embarking on the ship, or crossing other checkpoints, with my iced tea or granola bars.
As I was waiting at my gate – about three hours – I noticed that it took an extra half hour for people I recognized in the longer lines without the app to pass through and barely make it for boarding for their earlier flight at the gate at which I was waiting!
My brother and I did not do any proper pre-planning for the expected time to be spent in Miami (two days) – despite always telling ourselves throughout the year that we should. The reason for this is a toss-up between mostly procrastination and, at least nominally, saying that the point of showing up in Miami at least 40 to 48 hours before our cruise embarkation was not to do some incidental tourism, but rather to plan for delays in the travel logistical obstacles listed above.
We did, however, do the following activities and go to the following restaurants / brewpubs:
- Friday evening: Bay 13, a microbrewery / brewpub that also serves excellent food — however, due to the travel arrangements, I had eaten a sufficiently large meal perhaps two to three hours earlier, and so I had to bring the chicken parmesan I’d ordered back to the hotel — a great early lunch on the Sunday morning just before checking out and going to the cruise terminal! Bay 13 was an excellent venue that brews its own beer, and while we were there, they were hosting a wedding practice dinner;
- Saturday morning: We revisited the Bay of Pigs regimental museum in Little Havana, as well as a costume store, and walked through a busy main thoroughfare in Little Havana, on a tourist-heavy Saturday morning
- Saturday lunch: We then went to the Tripping Animals Microbrewery tap room, at the brewery in an industrial park, where the beer was excellent, and the food, while secondary to the beer, was adequate and tasty; as I recall, I had the pulled pork sliders.
- Saturday evening: Black Tap Craft Burgers and Beer. This restaurant was quite nice, but a bit too commercial for my tastes; I was hoping for a more local beer and food experience, much as it had local beers. And, the location we visited in Brickell City Center had open air escalators in a sufficiently widely open area, which triggered my fear of heights!
Traveling with a cell phone:
Over more than 20 years of carrying a cell phone and several models and generations of cell phones, I have never, until this trip, experienced difficulties using my cell phone while traveling. Well, barring having traveled to London and Paris in 2003 and 2005, when I left my cell phone at home, assuming that my North American cell phone would have been incompatible for use in European cities at the time, and in the case that it may have worked, that use would have been prohibitively and exhorbitantly expensive.
Despite my confidence based on prior experiences, I should concede that my telephone is a unit purchased in April, 2020, therefore being about five years old at the time of this trip.
Upon arrival in Miami, I called back home to announce that the airplane had landed safely; while it took a few moments to connect to the network, I thought little of it, assuming that the delay was due to a combination of the unit being just turned on again and trying to connect to the local network, the number of other cellphones being simultaneously turned on and competing for cellphone frequencies, and the relative concentration of cellphones located at the airport, certainly as compared to the presumed number of cellphone towers immediately local to the airport.
However, from that point on, while I had roaming data and SMS texting, as confirmed by my having been able to freely use the internet data on my phone as well as receive confirmation texts from the hotel and airline, I never was able to make a voice call in Miami, nor in any of the ports of call in Mexico and Belize. There was an exception when my brother managed to call my cell phone while in Cozumel, but it was an experiment, and while I was sitting in front of him; further, in the moments following, I could not repeat the experiment by calling him back.
Vague technical notes:
- OnePlus 7, purchased in April 2020 (and cruise in late February to early March, 2025);
- The physical SIM card was changed from Bay 2 to Bay 1, to eliminate any presumed possible bias, to no avail;
- The settings were changed to choose and test with the various local cellphone providers, to no avail.
Sunday, embarkation day:
Come embarkation time, we were originally planning to arrive at the cruise ship port, against recommendations from the cruise promoter, about half an hour earlier than our embarkation time of 14:00 to 14:30. We eventually decided to leave even earlier than planned, at about 12:45 instead of 13:00. Unfortunately – note that I say “Unfortunately” – this proved to be a fortuitous strategy, because there were seven cruise ships embarking at the same time, and the traffic jam leading to the port was excruciatingly, and stress-fully, long. We were fortunate that the tunnel, which was closed at the time and making the traffic worse, opened up as we were approaching it at about 100 metres, and we could go through it. This avoided a long detour. We finally arrived at about 14:40, after a trip lasting close to two hours instead of a half hour or less. Embarkation itself was relatively smooth, during which we needed to simply present our boarding passes through the Royal Caribbean app at a few checkpoints, and pass our carry on bags through airport-style metal detectors and possibly x-ray machines.
Ship:
Explorer of the Seas, Royal Caribbean – this is the biggest cruise ship I’ve been on. It was quite the exercise every day to remember where we were relative to where we were going, including our cabins.
I was fascinated that the ship was wide enough to have five rows of cabins from side to side, at least in the areas fore and aft where there were said width of cabins, as opposed to the central part of the ship, which had four rows of cabins, plus the central promenade.
I found the shower in my cabin difficult to control for the hot water; either I got the room temperature “cold” water – which was far closer to room temperature – or with the slightest adjustment, the water came out too hot. It was not good at blending water. The rest of the room was eminently adequate for one person who spent most of my time in the room asleep.
TV on Board:
The encoding of TV shows was not great, although most of the time it didn’t matter.
- Some episodes of the various Star Trek series would suddenly lose their sound, which was obviously an issue with the source material being broadcast, because the same issue would repeat at the same time in the episode when the said episode would re-air;
- Some episodes from the shows that were originally filmed in the old 4:3 format were sometimes stretched to 16:9 or close, and sometimes not;
- Sometimes, the episodes from the original Star Trek series shown were in the old 4:3 aspect ratio as filmed, instead of the newer re-scanned and re-boxed in widescreen;
- Screen resolution was fairly low, which was especially noticeable in the movies, showing a good amount of pixelation;
- No channel was showing Star Trek: The Next Generation, nor did I notice airings of Star Trek: Prodigy;
- And, two or three 24-hour news channels, a 24-hour sports channel, and a drama channel or two, as well as a channel with the map showing the current location of the ship, as well as a channel with the host “JT” announcing the day’s activities.
Food on Board:
The food on the ship was plentiful, and sufficiently varied, but I was disappointed that there wasn’t more variation from day to day in the WindJammer buffet area, as well as the dining room — a First World Problem :). Not to say that there wasn’t any variation at all – there was, especially in the latter, but it seemed as though there was only daily variation of two of the items in each of the main course and dessert menus of the main dining room menu. I nonetheless managed to find different meals every day, and lots of fresh buns and croissants and butter, a treat for me. A significant number of the desserts in the WindJammer buffet area were disappointing: They looked like professional pastry shop offerings, but were actually rather bland and tasteless. I also, ahem, sought out prune juice – which Lt. Worf described as “a warrior’s drink!” – a few times starting early to mid-week, which I found you could order (for free) at the WindJammer buffet area. The prune juice indeed helped me maintain a warrior’s approach during the rest of the cruise. Ahem. 🙂
Drinks:
I didn’t get a drinks package because while I enjoy nice beers (which incidentally are usually significantly more expensive than most macro-brewed beers – which normally, in theory, could figure in calculation of the cost-value proposition), I am usually a rather light drinker; to make the drinks package worthwhile, I would often have to had to consume, based on a conversation with someone who had such a package and was taking full advantage of the programme, about nine alcoholic beverages per day, every day, of course depending on the value of the individual drinks – about as many alcoholic drinks per day as I reckon I had consumed over the whole eleven days of my vacation! (Including in Miami before embarking, and in the tourist zones at the ports of call.)
I did manage to bring a commercially packaged iced tea powder with me on the trip, which was the bulk of what I drank throughout the trip.
Internet:
I had purchased internet access before leaving for the trip, and I had installed the Royal Caribbean app on my phone. Once on board, I wondered how to access the internet; on my smartphone, I joined what appeared to be the ship’s “free WiFi”, and the app figured out how to sign into the internet on its own, based on the knowledge (sent to the Royal Caribbean app) that I had purchased internet access; the app gave me a code to activate internet access for my laptop. I then wondered how to know that I was connected to the internet (as opposed to simply the ship’s intranet), and asked the person I was travelling with how to access the internet – using an app that required the internet! (The suggestion was to try visiting a well known news website which, were it inaccessible – and were one to have properly working internet access – would be newsworthy on an international level.) The internet was excellent and more than adequate in its speed, with no limits, with no down-times or brownouts or lack of availability that I could tell. (My brother could not use wifi calling on his iPhone, nor VPNs, but he learned that the lack of WiFi calling was probably a problem with the cell phone supplier, not aggressive internet filtering on the ship.) My brother and I constantly used the Signal messaging app on our phones to keep in touch with each other; we learned later in the week that some people found the messaging function in the Royal Caribbean app to be slow and often enough time-delayed, inefficient, and apparently without an obvious notification function.
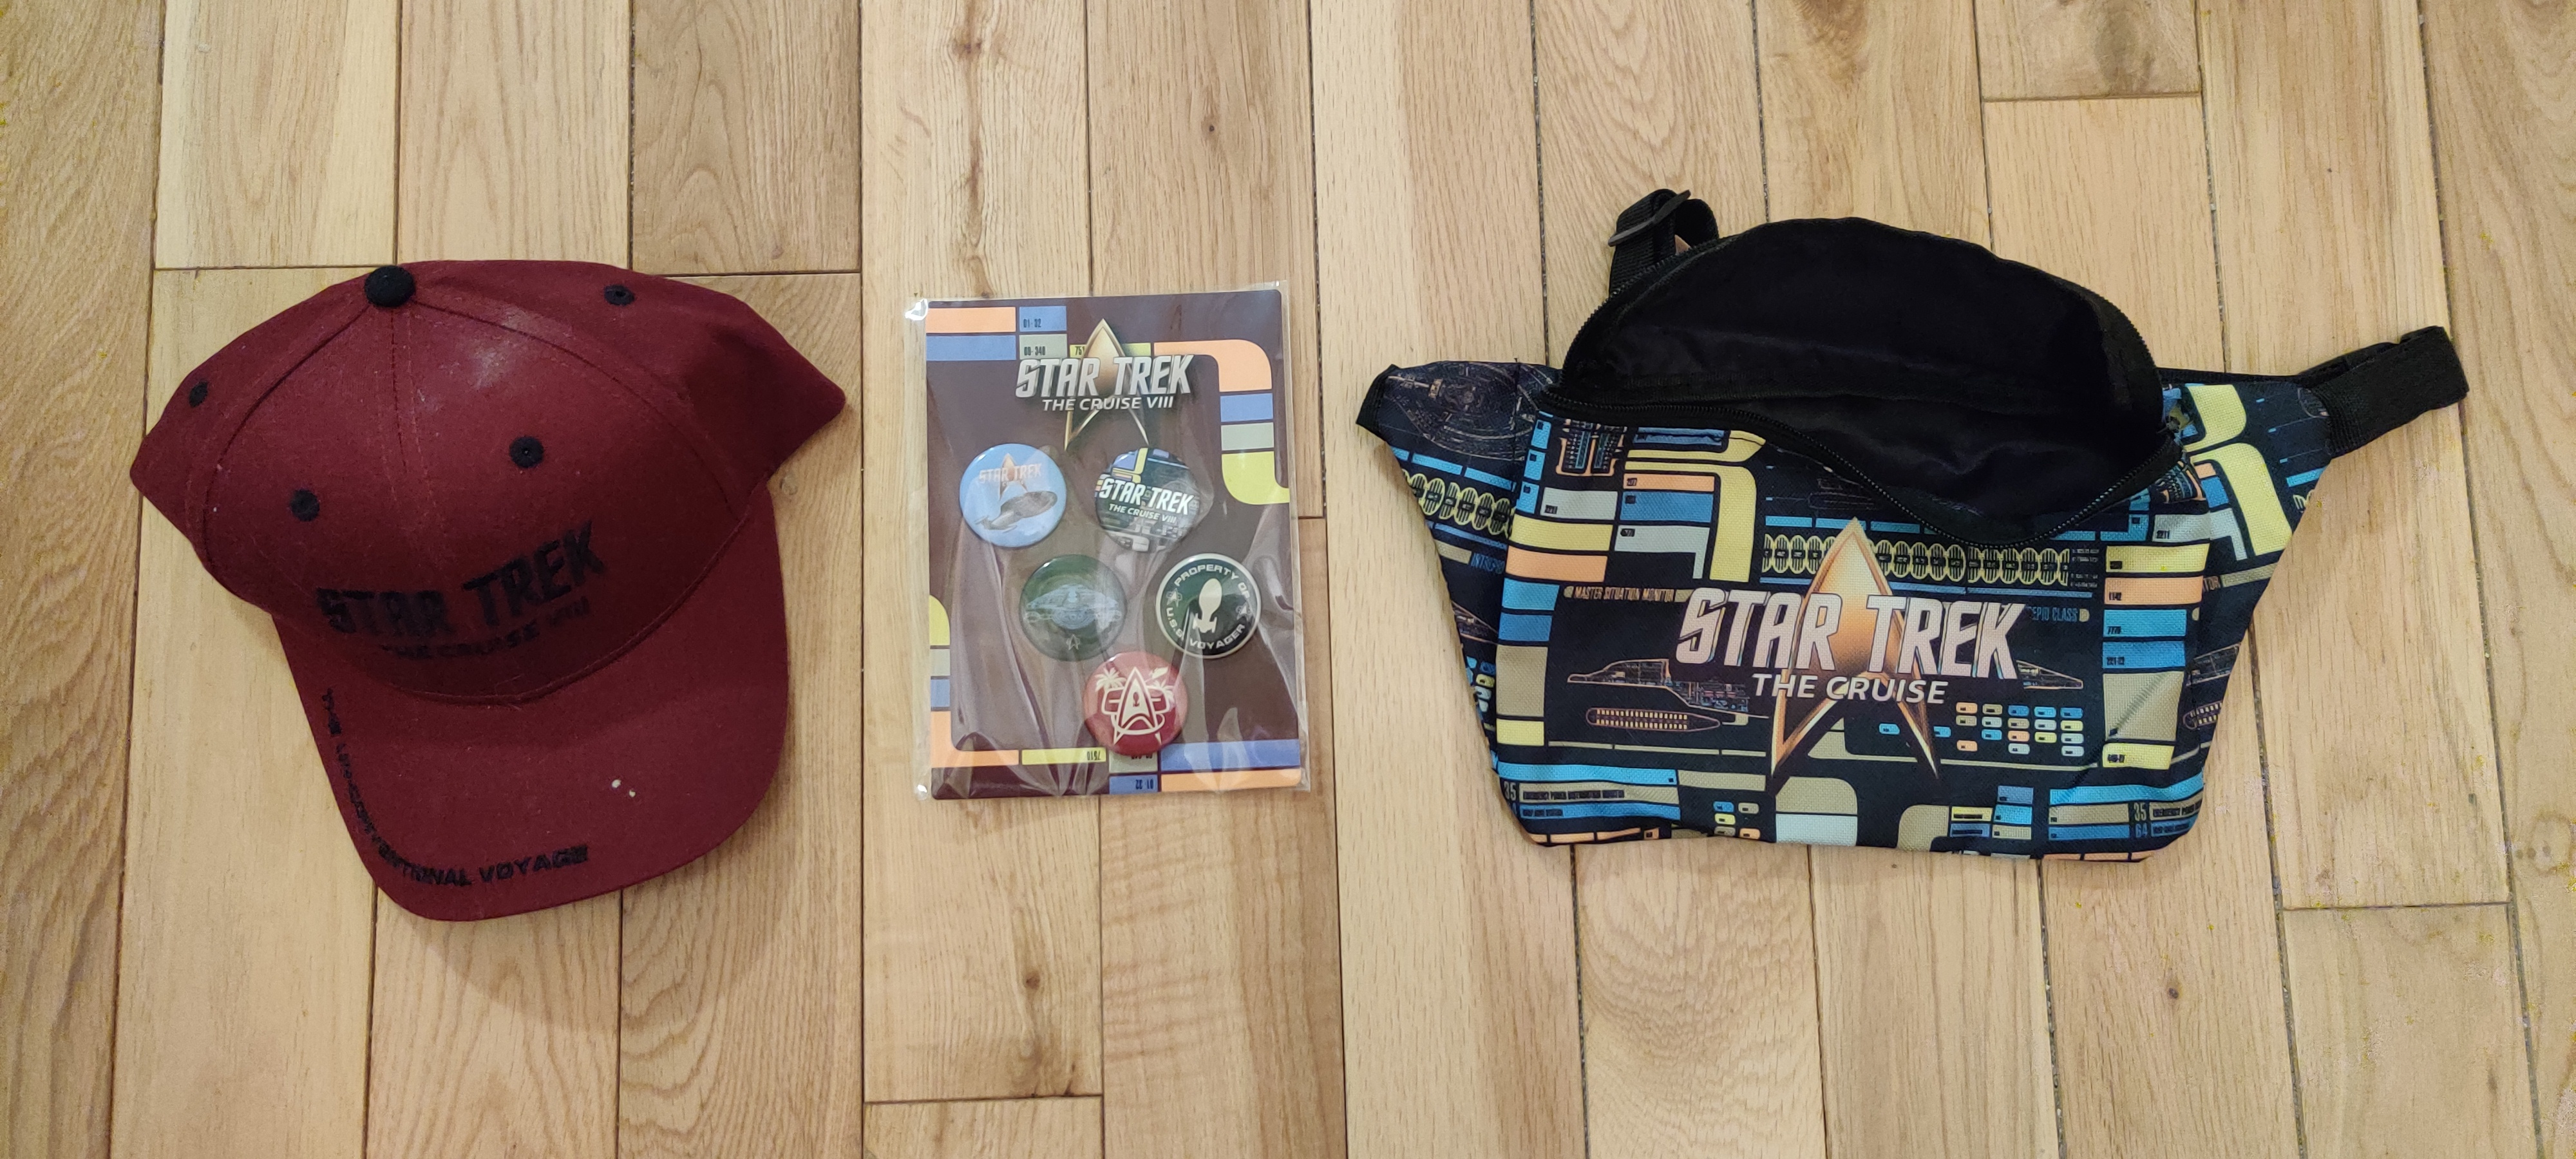
Swag:
As part of the cruise, we received the following items, which were delivered in our rooms on a daily basis:
- a poster celebrating the cruise’s theme of 30 years of Star Trek: Voyager, which I left behind because I didn’t want to carry it home;
- a Star Trek baseball cap;
- a palette of small Star Trek themed buttons;
- a Star Trek themed fanny pack;
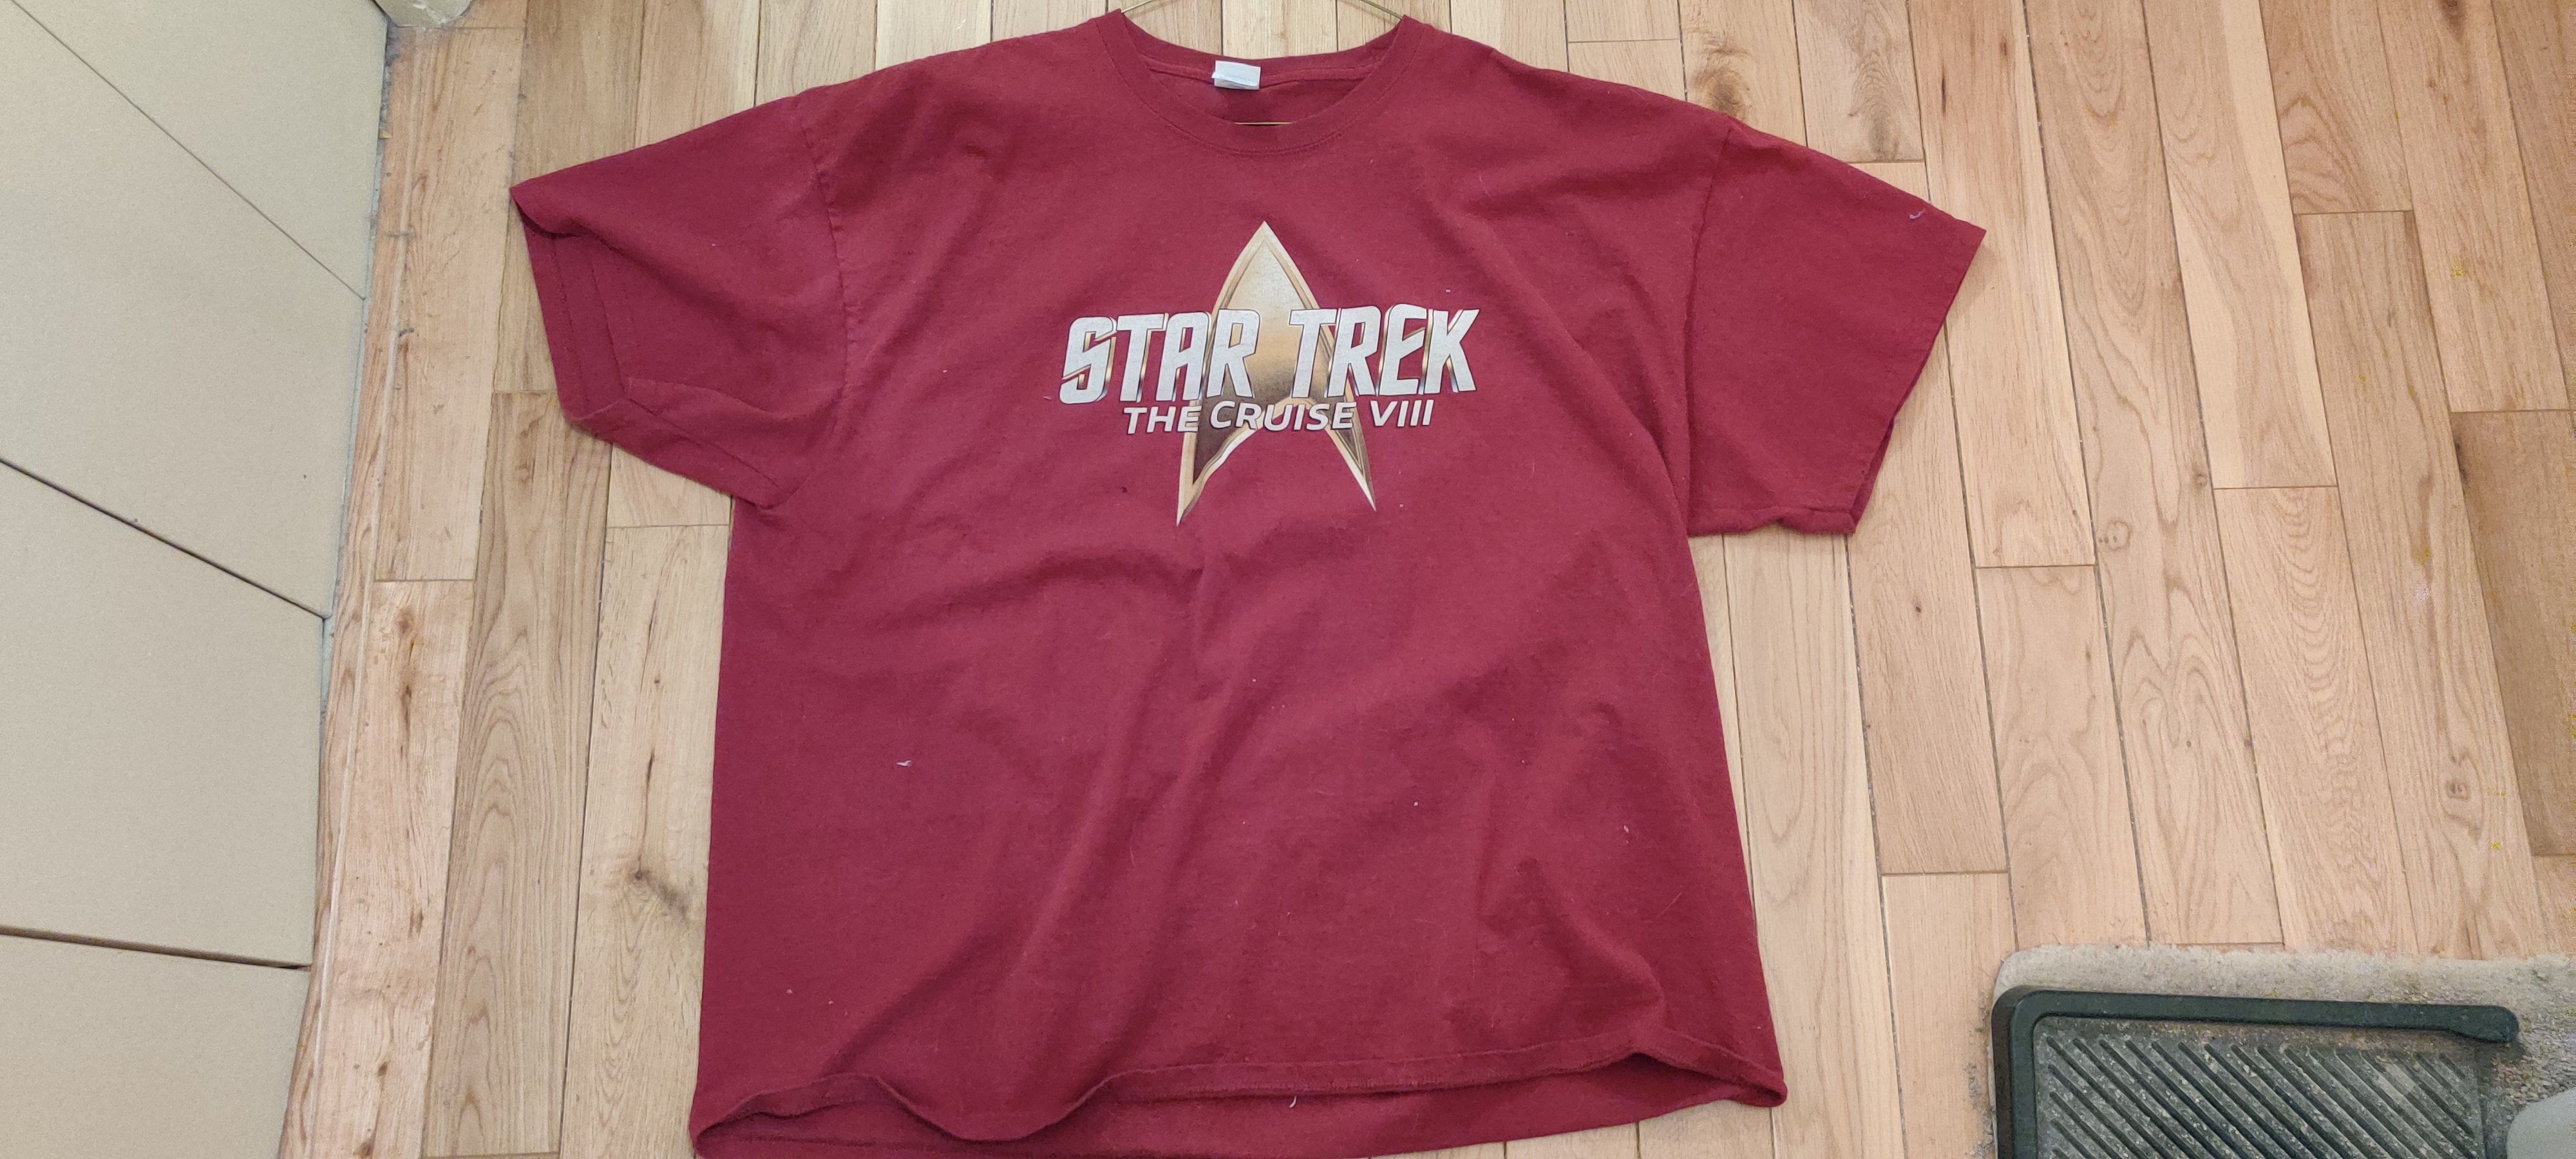
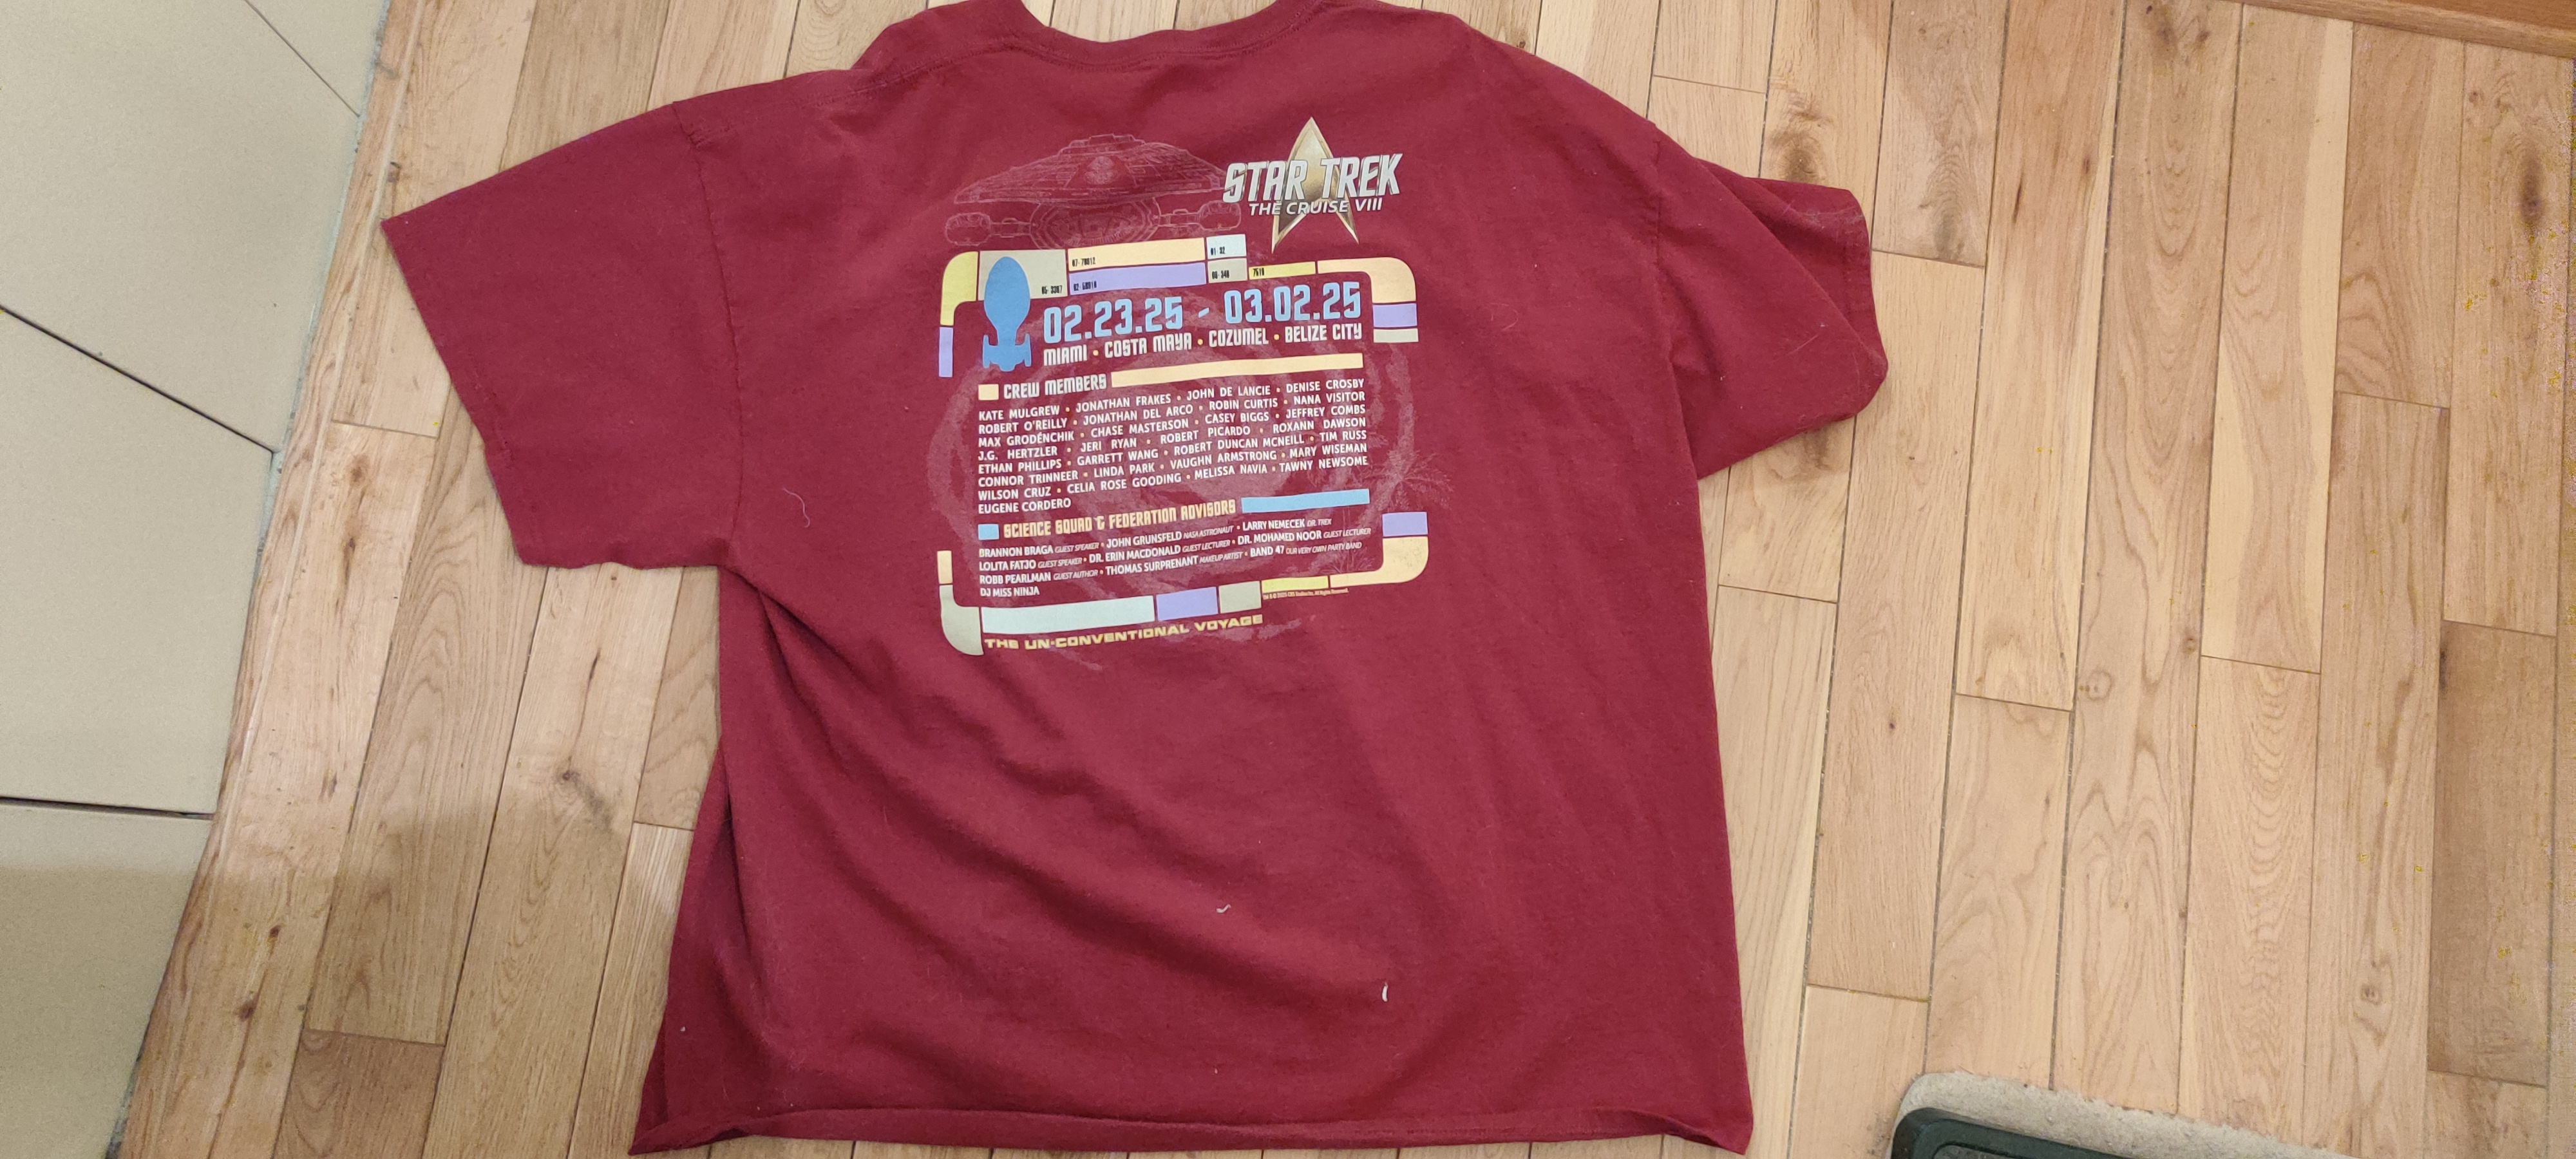
- a cruise t-shirt (front, back) late in the cruise (no doubt timed to coincide with the pool party with the complimentary watered down drinks, as well as to not compete with the “embarkation day” shirts you could purchase in advance, and which presumably were sent to the purchasers in advance of the trip via courrier; I did not purchase one);
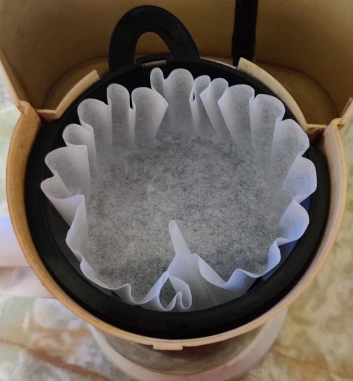
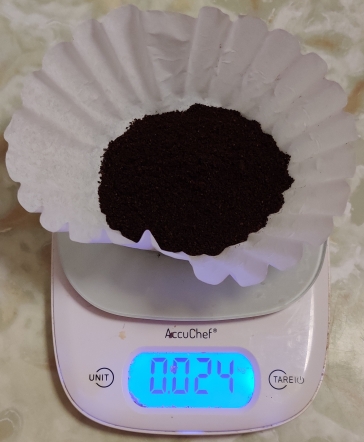
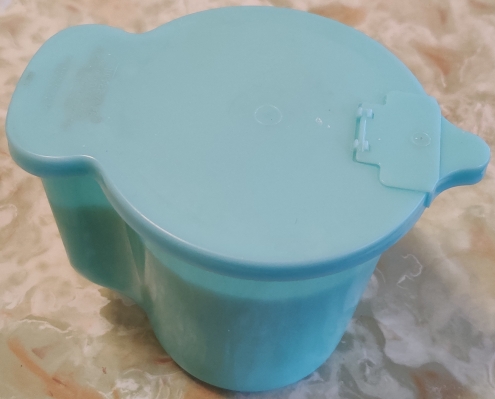
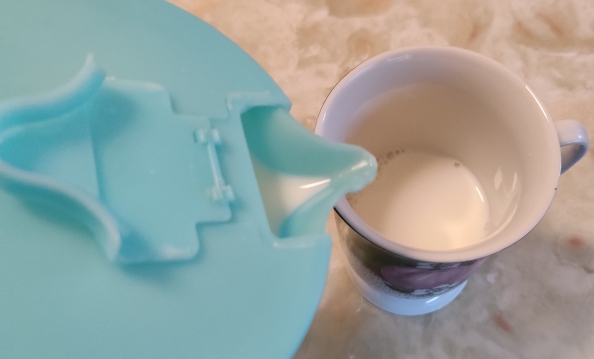
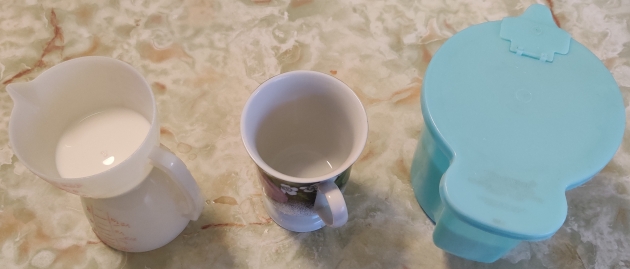
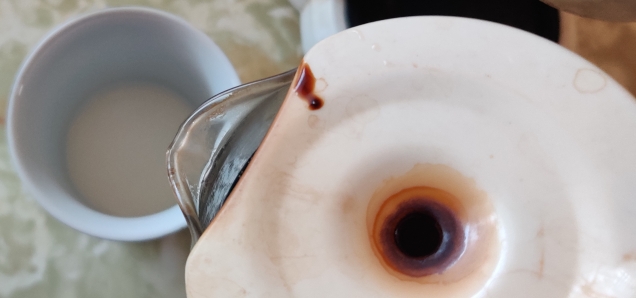
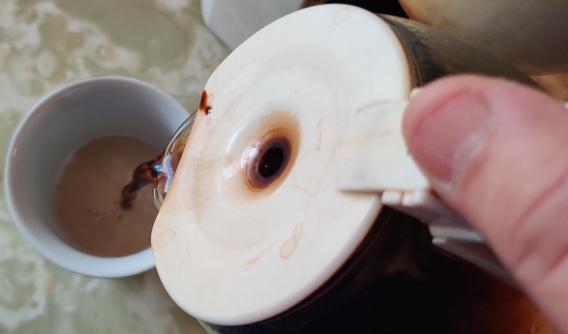
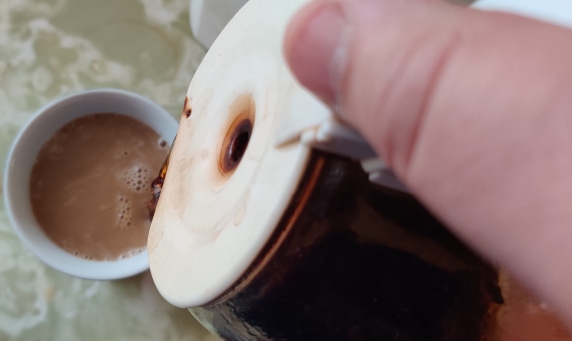
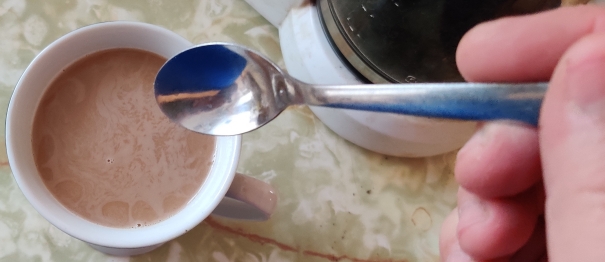
- and a bag of roasted coffee beans thematically branded to the cruise and Captain Janeway, who liked coffee a lot, but who had to limit her intake due to resource limitations because of their being stranded in the Delta Quadrant with no access to Federation supply chains (including, in the Star Trek Universe, an ample supply of matter and antimatter to create the energy required to do things like operate food replicators, which were rationed). This was a sore spot for me because I immediately thought that it would be a problem bringing it back into the US upon debarkation in Miami at the end of the cruise (it wasn’t a problem for all the people I saw disembarking), let alone returning back home to Canada (according to the ArriveCan app, it wouldn’t have been). I rashly returned the commercially sealed bag to a room service trolley because I didn’t want the problem of carrying a food product across borders (ironically, considering that I had been carrying iced tea powder and chewy bars, both in commercially sealed packaging, which I had brought from Canada), let alone very fragrant roasted coffee which may be suspected of being used to hide the smell of illicit items (ie. drugs, which *of*course* I wasn’t carrying!)
Cabin door decorations:
Many cabin doors were decorated in various ways, including one door near our cabins that was giving away things like various buttons of the kinds that have messages and cartoons on them, of which I took one, and key chains; the occupants must have spent several hundreds of dollars making the many items they gave away. Neither my brother nor I planned any such activities, perhaps mostly for lack of imagination and creativity on our part. Perhaps, this would also have been seen by ourselves to have been a frivolous expense, and perhaps a not so frivolous logistical difficulty to transport with us given a risk of damage, or inherent (and expensive) logistical difficulties involved in bringing certain types of decorations, which may have ultimately required significantly larger luggage.
Costumes:
There were a lot of costumes, mostly excellent, and even more shirts with a plethora of Star Trek messages on them. I had several such shirts from when I’d been on the cruise in 2018, and all of them still just barely fit, but rather snugly. I had also trimmed my sideburns to the curved Star Trek officers’ style, but nobody said boo (I must admit that I never looked for them on others, let alone noticed any). There was one particular person on the trip who could have replaced Scotty in some of the movies as a body double including his face, and it would have been easy to believe that he was James Doohan of that period of time.
I was fascinated and impressed how certain communities became more visible on the cruise than on land, as expressed through their costumes and other markings, and how several times the expression “safe space”, in reference to the cruise and its participants, was invoked, and sorely appreciated.
Again, we did not bring any costumes (beyond Star Trek themed t-shirts we had from the 2018 cruise), mostly for lack of any interest in participating in cosplay, but also perhaps also because it would have been an expensive additional expense. We also no doubt recognized a definite logistical difficulty to transport costumes with us given a risk of damage, or inherent (and expensive) logistical difficulties involved in bringing certain types of costumes in extra luggage. In fact, I could have brought a Star Trek: The Next Generation era toy phaser, and perhaps another item or two stowed in my luggage, but which I decided were not worth bringing. I have heard stories of people being questioned at national borders for toy replicas of weapons, even if in this case I would hope it to have been impossible to mistake the “phaser” for anything other than a harmless toy (at least insofar as the “weapon” part was concerned); I was also concerned that it could nonetheless be confiscated as being a suspicious item for just about any reason that I might consider inexplicable, but impossible to argue against.
Star Trek Actors / Stars / Special Guests:
I should preface my comments in this section with the following:
I understand that, putting aside the specific agreements for how many appearances the individual actors may have had with the promoters and to which I could never be privy, there were numerous reasons why I didn’t see some of the guests and celebrities as often (or so it seemed) as I might have liked, because of any of the reasons in the following non-exhaustive list:
- they were busy with photo sessions and autograph sessions throughout the cruise, which did not interest me;
- “I’m not interested in a sushi class, even if it’s given by Linda Park from Star Trek: Enterprise”;
- “this show in which such and such is appearing was in conflict with another show which I did choose to attend”;
- having chosen to be a “day person” who tried to take advantage of so many of the main shows and ports of call during the cruise, I was exhausted by the time the main show came around at 21:00 every evening (sometimes falling asleep during said evening show), and was at a point when I was going to bed. As such, I therefore would miss a show that I might have seen, which may have starred a celebrity I would have liked to have seen, were the show to have been at another time during the day, and were I to have found a time slot during which to attend it;
- there were a number of paid activities (ie. wine tastings, fundraising breakfasts, etc.) featuring or hosted by a given guest celebrity, and the like, which did not interest me, nor which in any case had I been, did not catch my attention early enough to make a reservation;
- We saw most if not all of the celebrities throughout the collective of the various shows, but not much outside of those events; I suspect that the “Dilithium Pass Holders” (who paid a premium for them) may have had access to special private shows and autograph sessions that kept the celebrities busy beyond the public sessions, and which I did not purchase;
- and, a somewhat minor point, but which was the case at least one evening: Lining up for the evening shows in the main theater every evening in order to secure seats which we wanted involved missing out on parts of earlier evening shows which we might have seen, were we not lining up.
I did spot John de Lancie sit at a table near me at the WindJammer Café. I saw Tim Russ walk by me one afternoon. I was mildly disappointed that the likes of Robert O’Reilly did not get made up as Gowron, at least not when I saw him; apparently he *may* have been in costume for another event I did not attend.
Guests seen often, whom I am calling “the hard workers”:
- Lolita Fatjo: Ms. Fatjo, perhaps best known in Star Trek circles as a script coordinator for Star Trek: The Next Generation, Star Trek: Deep Space Nine, and Star Trek: Voyager, hosted a number of the panel shows and other shows I saw. Interesting thing I learned in writing up this post, after the cruise: According to her website, Ms. Fatjo’s current career appears to include managing “many actors from Star Trek and other sci-fi shows for convention appearances”, a role my brother and I surmised that she seemed to be performing while on the ship;
- Dr. Erin McDonald, a science adviser for many of the Star Trek series, who hosted a few science shows as well as some guest panels;
- Dr. John Grunsfeld, a NASA astronaut who was on at least three space shuttle missions to service the Hubble Space Telescope, who hosted a couple of science and Hubble Space Telescope shows.
Guests seen often:
- John de Lancie, who played Q (Star Trek The Next Generation, DS9, Voyager, and Picard), and who led the “War of the Worlds” dramatic re-enactment, and spoke about his sailing adventures, among other things;
- Jeffrey Combs, who played Shran (Enterprise) / Brunt (DS9) / Weyoun (DS9) / Penk (Voyager) / Tiron (DS9) / Krem (Enterprise), and who was in “The Rat Pack”, the DS9 panel, and “The War of the Worlds”, among other things;
- Ethan Phillips, who played Neelix (Star Trek: Voyager), and who was in “The Rat Pack”, Star Trek: Voyager panels, and other shows;
- Robert Picardo, who played the Doctor (Star Trek: Voyager), was in an opera show one evening, hosted a charity auction benefiting the Astronomical Society, and at least one Star Trek Voyager Panel;
- Garrett Wang, who played Harry Kim (Star Trek: Voyager); I learned, after thirty-some-odd years, that his family name is pronounced the way an English-speaker would pronounce the family name Wong, rhyming with “song”, “wrong”, and “gong”, not, well, pronounced the way the family name Wang is spelled in English, rhyming with “sang”, “rang”, or “gang”. Mr. Wang was in was in the “Voyager Family Feud” show, Star Trek: Voyager panels, and was the center square in Star Trek Squares;
- Interesting story, again learned more than 25 years later, but starting with something I already knew a long time ago: When the Seven of Nine Character joined Star Trek: Voyager, the producers decided that they needed to eliminate an existing character for the obvious cost issues associated with the rather large ensemble cast that they had. Apparently, they’d chosen Harry Kim to remove from the show, and I’d presumed at the time that Harry Kim was chosen over Kes because the writers had originally seen more potential in writing Kes stories. However, at that point, Garrett Wang, the actor, had just been ranked rather highly in People Magazine’s “Most Beautiful People of the Year” list, and so the producers could not choose to kill off the Harry Kim character.
- But here’s what I learned on the cruise: Apparently, Mr. Wang was quite the party person during approximately two years early on in Star Trek: Voyager production, and apparently commuted from Los Angeles to Las Vegas every single weekend to take advantage of Las Vegas party life. This led to his being late several times on Monday mornings, often enough delaying production, especially during expensive location shoots (ie. at some outdoor set in an “alien environment” instead of on a constructed studio set), and this led to his being an obvious choice to be cut, until of course he was listed in the People Magazine ranking.
Guests seen almost often enough:
- Jeri Ryan, who played Seven of Nine (Star Trek: Voyager), and who was in the “Voyager Family Feud” show, Star Trek: Voyager panels, at least one of the Star Trek: Voyager panels I saw, and other shows which escape my memory at this point;
- Robert Duncan McNeill, who played Tom Paris (Star Trek: Voyager) (who had to leave mid-cruise due to other commitments, and had to wear a mask to hopefully reduce the likelihood of getting sick, because people working on his project at the time of the cruise had had a *lot* of illnesses, and as the director he wanted to not get sick, which would force a temporary shutdown of the project, instead of just a slowdown but under circumstances which would allow for some re-arrangement of the shooting schedule to accommodate ill actors and crew members as well as those who weren’t ill), who was the Star Trek Family Feud show, at least one Star Trek: Voyager panel, and possibly other shows which escape my memory at this point;
- Tim Russ, who played Tuvok (Star Trek: Voyager), who was in “Voyager Family Feud” show, Voyager panels, and possibly other shows which escape my memory at this point;
- Jonathan Frakes, who was a judge in “The Gorn’s Gong Show”, and hosted a Strange New Worlds panel.
Guests Seen Rarely:
- Kate Mulgrew, who played Captain Janeway in Star Trek: Voyager, and who only arrived mid-cruise, made an announcement on the PA system, appeared in the “War of the Worlds” dramatic reading, a Voyager panel, and in her show on the last evening. No doubt she was also involved in private-pay-to-attend events and autograph sessions.
- Denise Crosby, who played Tasha Yar and a Romulan Commander in Star Trek: The Next Generation, as well as being known for her “Trekkies” documentary; she was a judge in “The Gorn’s Gong Show”, and according to the schedule, she did a late-night ad-libbing of the lines to a silent showing of some Star Trek episode, which I did not see because it was too late for me, and frankly I was so unimpressed with a similar rendition on a previous cruise that it did not seem to be worthwhile to me;
- Linda Park, who played Hoshi Sato on Star Trek: Enterprise, hosted a trivia session while I was at the first evening’s show, and hosted a sushi making event for which I didn’t get tickets;
- Chase Masterson, who played Lita on Star Trek: Deep Space Nine; she hosted a charity breakfast for which I didn’t purchase tickets;
- Wilson Cruz, who was Dr. Hugh Culber on Star Trek: Discovery, who was in the Star Trek Squares show and was very complimentary toward Canadians;
- Jonathan del Arco, who played the Borg Hugh in Star Trek: The Next Generation, and Picard, was in the Star Trek Squares show;
- Celia Rose Gooding, who played a young Nyota Uhura in Star Trek: Strange New Worlds; I did see her in a Strange New Worlds panel, and she was in a “birthday party” show early on during the cruise given that it was her birthday a day or two before the beginning of the cruise, and which I did not attend due to its late night time slot.
- Nicole de Boer, who played Ezri Dax in Star Trek: Deep Space Nine, who was a judge in “The Gorn’s Gong Show”;
- Melissa Navia, who plays Erica Ortegas in Star Trek: Strange New Worlds, who was in a Strange New Worlds Panel;
Guests I don’t recall seeing at all:
- Mary Wiseman, who played Ensign Tilly on Star Trek: Discovery, was supposed to be on the cruise, according to the cruise t-shirt, and figured in the official photos for which a link was sent out a few weeks after the cruise; however, I’m not sure that I even remember her being presented at the opening day party!
- Robin Curtis, who played the second Saavik in Star Trek III: The Search for Spock and Star Trek IV: The Voyage Home, and a Vulcan disguised as a Romulan in Star Trek: The Next Generation, again who was listed on the cruise t-shirt and according to the photos from the welcoming party was there, but whom I certainly don’t remember seeing at any other time (and ever so barely during the party)
- Tawny Newsome and Eugene Cordero, who respectively played Mariner and Rutherford in Star Trek: Lower Decks; same story, I don’t remember seeing either them, certainly not after the welcoming party.
- Max Grodénchik, who played Rom in Star Trek: Deep Space Nine, as well as the unrelated Ferengi in the Star Trek: The Next Generation episode “Captain’s Holiday”; I knew during the cruise that he had to cancel his appearance at the last minute, after the cruise t-shirts had been printed up.
Shows:
My brother and I attended a lot of shows. Usually at breakfast, which we usually ate “early” at about 7am or thereabouts, we would take out the day’s printed out show schedule and start choosing the shows that we’d like to see that day, marking up the sheet with a pen in order to not forget.
There were a lot of panels with question and answer periods, and often started with “what are you up to these days?” – especially since of course most of the actors were not on the currently produced shows, some for several decades at that point, and of course had current professional and life projects.
The evening shows had an annoying, (presumably) unintended feature: In order to get in and have a decent chance of getting seats of our choice, we had to line up about 45 minutes before the show, since lineups would typically easily extend well beyond a hundred feet. As a result, we spent a lot of time every evening lining up and waiting; as well, this effectively made it impractical to see even a small part of other shows after our early dinner seating but before the main evening show.
We did not got to the even later shows and parties after the main evening show, which we saw every evening at 21:00, and which typically ended at 22:00 or slightly later. At that point, we were tired every day and usually went to bed, except for a couple of evenings when we went to the WindJammer buffet for midnight snacks; unfortunately, the WindJammer buffet only reopened at 23:00, making a couple of the nights we did do this particularly late affairs for us.
Sunday:
- Pool party / countdown to launch at the pool level, with introduction of the various guests;
- After dinner, we went to a Star Trek trivia show with J.G. Hertzler, hosted by … I’m trying to remember, might it have been one of the “Morale Officers”, who were young-ish ladies dressed in StarFleet uniforms, who would often help out at shows with things like passing around the public microphone, or marshalling the guests into and out of the theatre, and if they happened to be “just wandering around the ship”, could also provide basic concièrge services relating specifically to the cruise’s theme;
- Evening show: Star Trek: Voyager Family Feud with Jeri Ryan, Tim Russ, Robert Duncan McNeill, Garrett Wang, against four passengers, chosen by throwing out stuffed “Murf” dolls from Star Trek: Prodigy into the crowds, and the people who caught them got to go on stage.
Monday:
- “This Year in Space Science” with Dr. Erin Macdonald;
- “In the Hotseat” with Connor Trineer and Roxann Dawson;
- Star Trek: Voyager Panel #1 with Robert Duncan McNeill, Jeri Ryan, Garrett Wang, Tim Russ, and Brannon Braga;
- Strange New Worlds Panel with Celia Rose Gooding and Melissa Navia, hosted by Jonathan Frakes;
- Qapla’! Meeting the Klingons with Robert O’Reilly, J.G. Hertzler, and Roxann Dawson, hosted by Lolita Fatjo;
- Federation Trading Post, later in the afternoon of the first day: the lineup was ridiculously long, and the relatively limited selection of goods (and limited selection of shirt sizes, especially in the larger sizes) was rather wanting, and the prices expensive;
- Evening Show: “Star Trek Rat Pack” with Casey Biggs, Jeffrey Combs, Vaughn Armstrong, and Ethan Phillips: This was an excellent show that surprised me. During the 2018 cruise, I did not see this show; my memory was that they usually performed late at night after I went to bed, and I assumed that they were another musical act that was generic and unrelated to Star Trek. In fact, at least for this show, it seems that Max Grodenchick (who played Rom on DS9 but wasn’t able to make it this year) wrote new Star Trek related lyrics for well known songs, while the group as a whole played parts / roles apparently reminiscent of the Rat Pack from 1960s Las Vegas (which I initially found distracting, but which quickly became endearing for me.) This was a treat of a show!
Tuesday:
- Port of call: Costa Maya, Mexico, a port we had visited before. We disembarked the ship early, enjoying walking through the shops. We saw “Danza de los Voladore” in action – a ceremony in which people tied to ropes wrapped around the top of tall pole would jump off their perches simultaneously, and “fly” down as the ropes unwound, until they got to the ground. We also drank beer in the tiki hut restaurant, then returned to the ship by lunchtime.
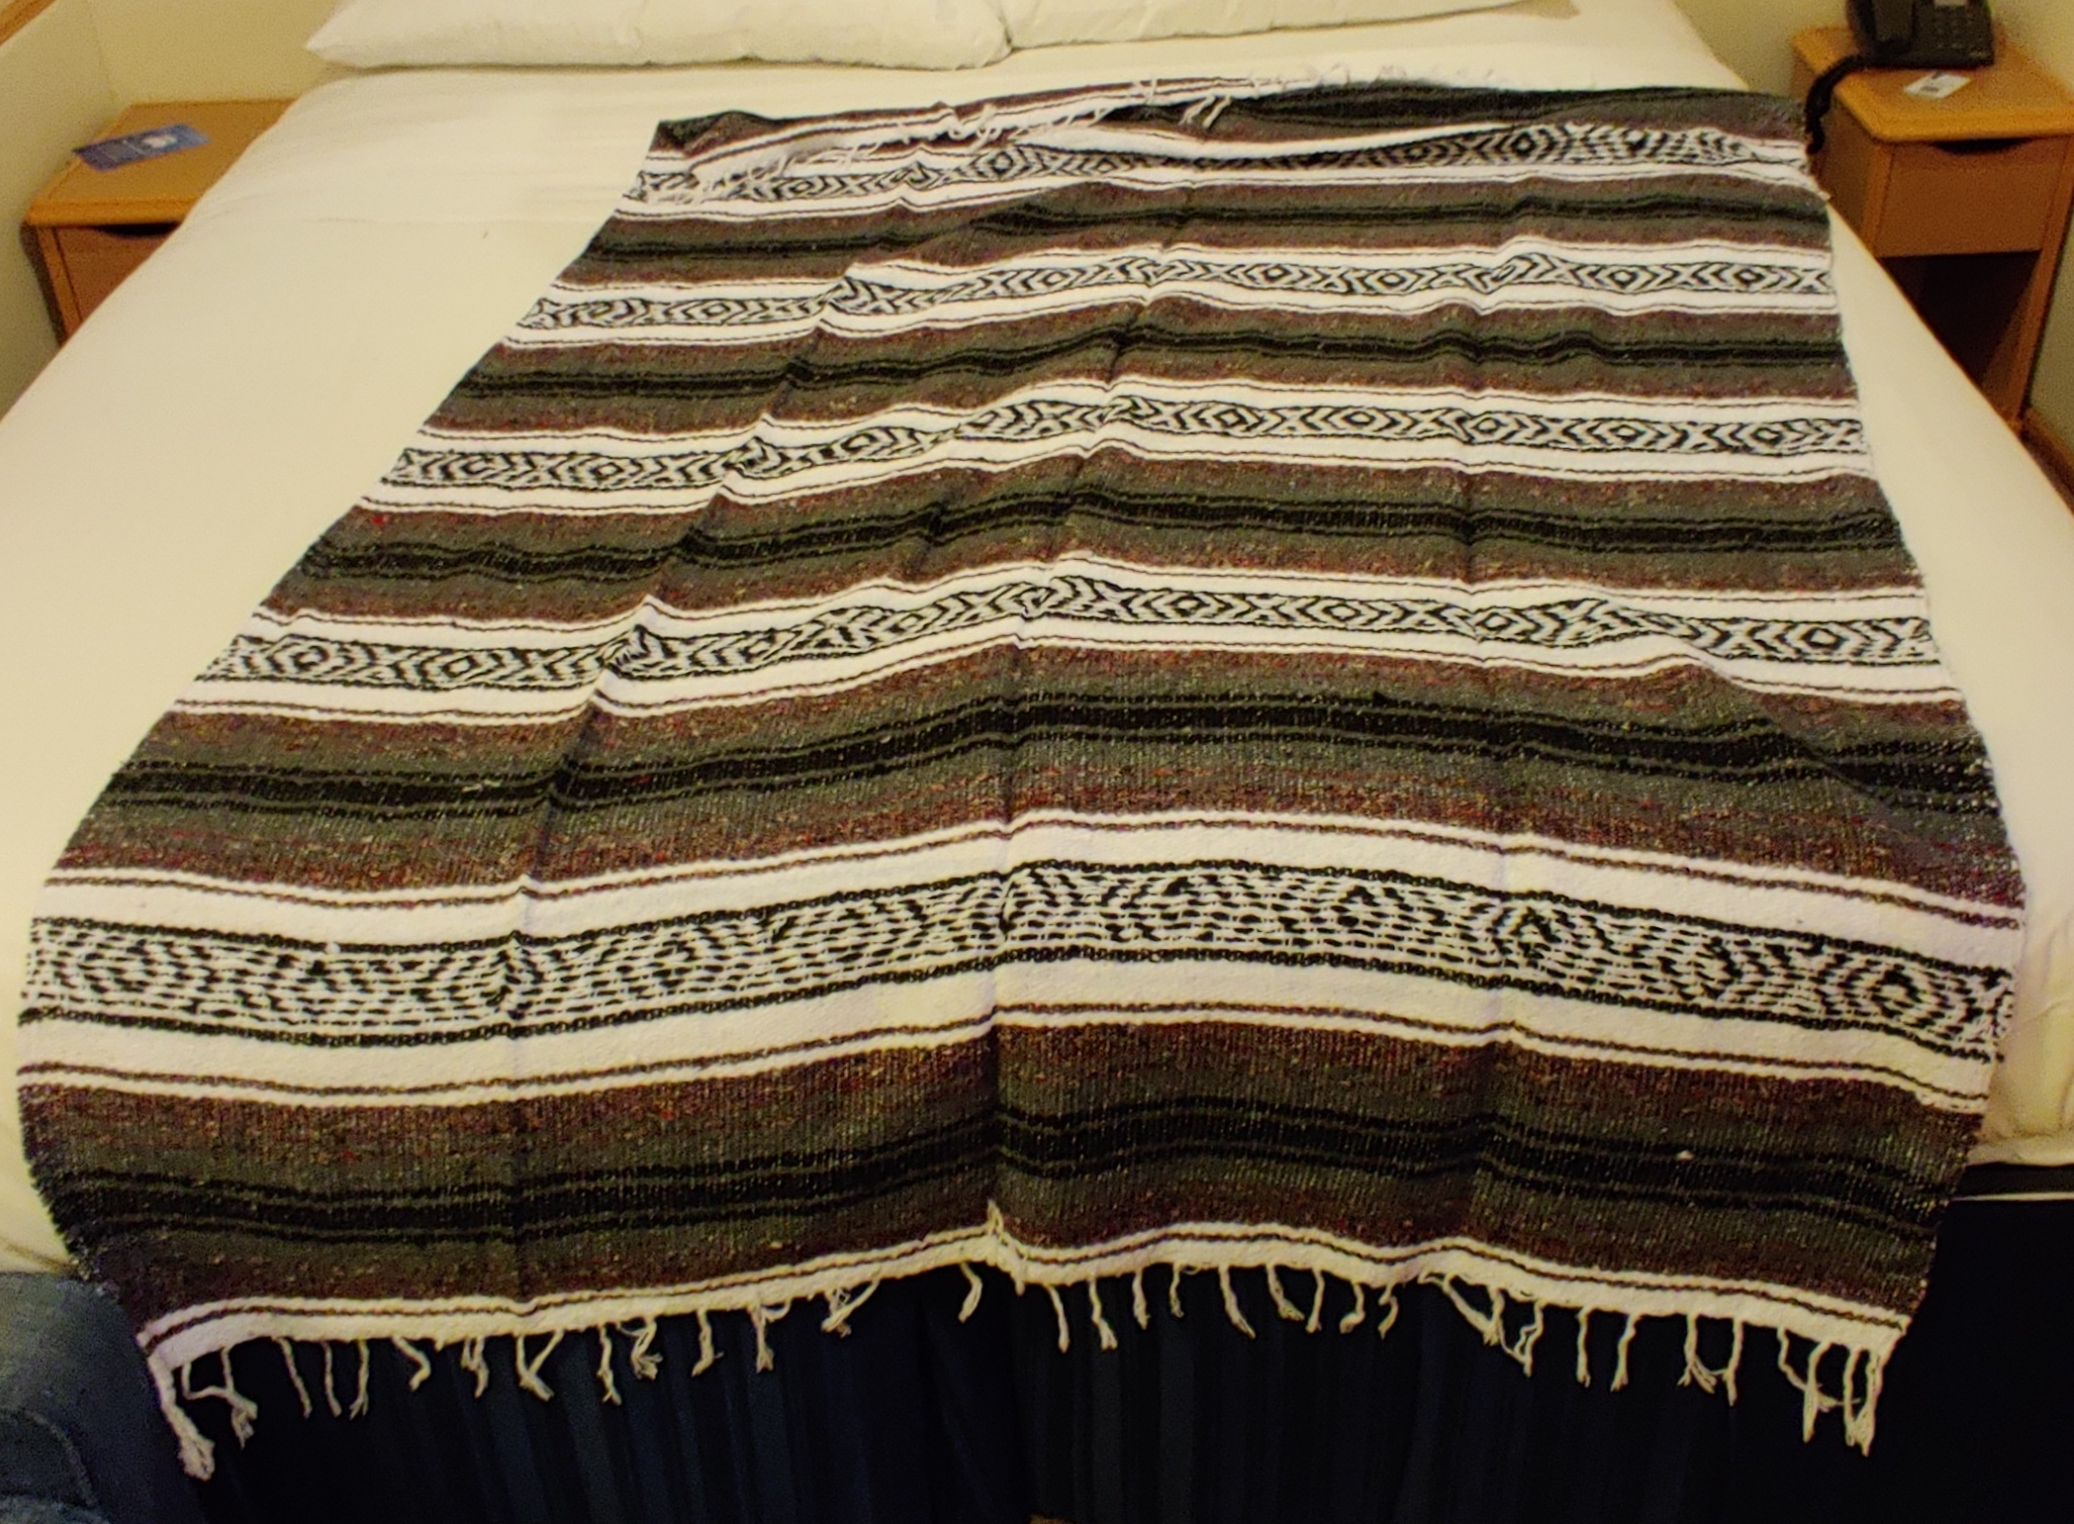
- One notable thing – in my mind only – is that in 2018, at this very tourist zone, I purchased a “Mexican” blanket, on the premise that the only true authenticity that I expected was that it was indeed a blanket, that was indeed purchased in Mexico. I paid $75 USD for it, after negotiating the price down from perhaps $100 USD (or possibly more), as I recall. At the time, I was suspicious that I may have been a “mark” to see how much money they could extract from me, because I was a tourist coming off of a cruise ship and that I was in a tourist zone. I nonetheless decided that I wasn’t completely taken for a fool, although perhaps not by much. Indeed, I like the blanket very much; I use it regularly to this day, and I expect to continue using it for many more years to come.
- On this trip in 2025, I had the notion that it might be interesting to purchase yet another “Mexican” blanket, despite my past suspicions, and despite that I already possessed two such blankets meeting the above criteria of “authenticity”. However, I had a hard price limit of $30 USD, and I walked away from the piles of unpriced blankets in Costa Maya without even inquiring about the price, figuring that I would never get the price I was willing to pay, especially since I wasn’t all that invested in buying another anyway.
- Note that I am supposing that had such a comparable blanket been purchased in Canada (where I live) or in the United States, the $75 USD may have probably been a reasonable market price, or possibly even at the low end. (See below.)
- As such, having walked away, I moved on with my day, and I bought a souvenir for my Mom back home.
- Back on the ship, my brother and I spent the afternoon either lounging at the pool or in our separate cabins.
- When shows started up again, we went to a “Hubble Space Telescope” presentation with Astronaut John Grusnfeld: A standing room only event!
- Evening show: Based on the announcements, I had hoped that this would be a dramatic reading of the original Star Trek series’ episode “For the World is Hollow and I have Touched the Sky”. However, it proved to be somewhat rewritten to include a lot of juvenile jokes, so it was disappointing. However, the audiovisual part on the video wall was well produced, and unfortunately was perhaps the star of the show for me, given my perception of a poorly adjusted script with juvenile jokes inserted at various points (which normally might amuse me in my mind, but not as much in real life watching it on a stage. To be fair, I should state that I found similar humour far more amusing the evening before in the “Rat Pack” show.)
Wednesday:
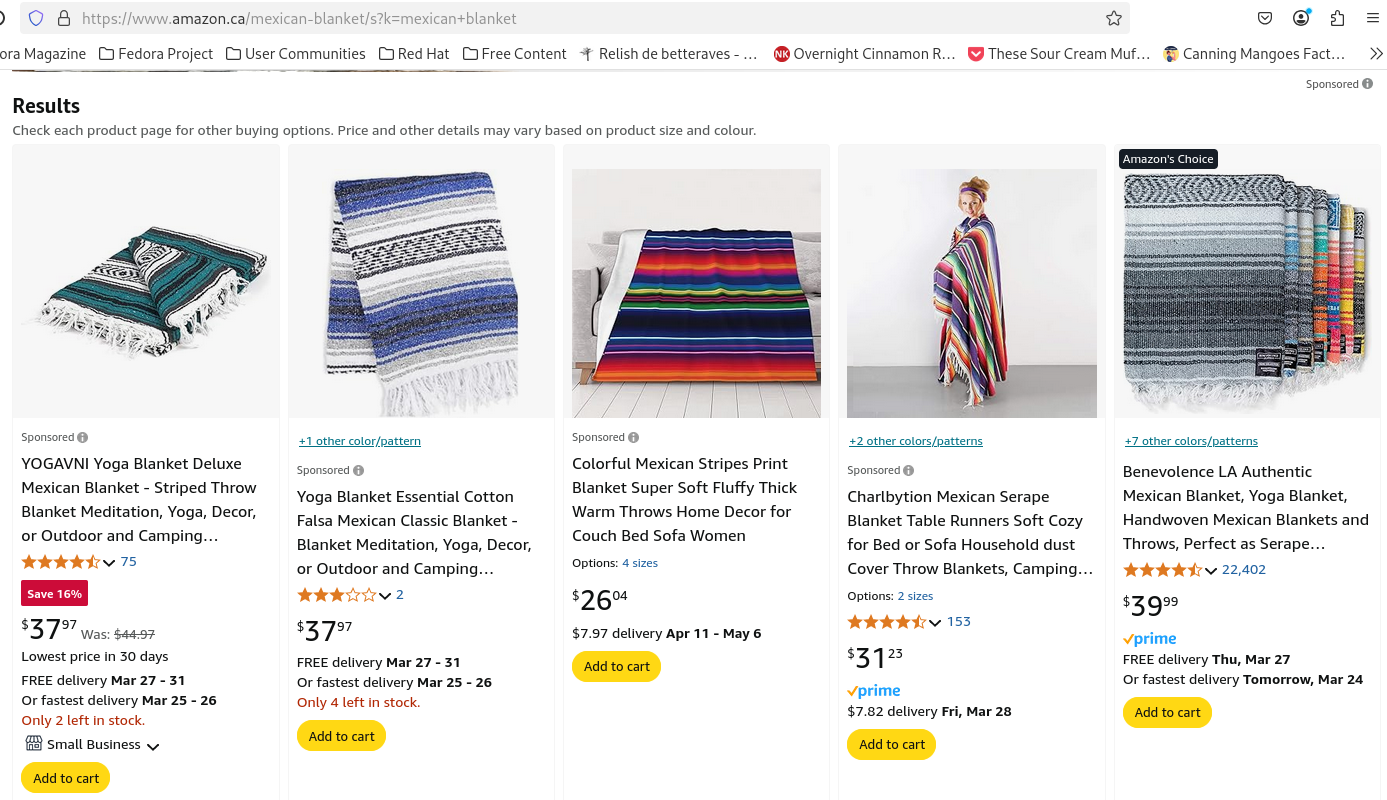
- Port of call: Cozumel, Mexico. My brother and I went to the tourist zone, which was principally a bunch of shops much like Costa Maya, some of which we browsed through. Indeed, at one such shop I found – and purchased – yet another “Mexican blanket” that I liked, but only for $8 USD. Given this spectacularly low price, I am now rather convinced that I might have been overcharged in 2018. However, I also think that the $8 USD price was severely below what the blanket may well have been worth, and would have certainly sold for far more back home in Canada. (Note after arriving back home in Canada: A well known internet marketplace listed “Mexican Blankets” for prices ranging from about $14CDN to about $40CDN with a few outliers up to about $60CDN, plus shipping, about $9.50USD to $27.50USD, and up to $41.50USD — so I *was* overcharged in 2018.)
- Afterwards, we left the tourist zone, going beyond the gates “to see what there was to see”. We quickly set our sights on a sports clothing store which we could see across and just down the street, to see if they had extra-large size shorts or swim trunks for myself and my brother, which they did not. However, in short order, I insisted on returning to the tourist zone, feeling uncomfortable for unspecified, nebulous reasons related to being in an uncontrolled environment, and – beyond the sports clothing store – not being able to immediately see anything that caught my fancy to continue exploring.
- Back in the tourist zone in Cozumel, Mexico, we decided to return to the ship by noon or very early afternoon. As a brief reminder, I had always carried a backpack with water and my iced tea powder, which proved to be an issue on this day. Not having brought the commercial package with me when I went ashore, the iced tea I was carrying was a problem when passing through the x-ray security operated, by appearances, by Mexican authorities on shore: The authorities asked about the powder I had, as well as the brown liquid I had in a drink container. They ultimately allowed me through without any hassle when a supervisor agreed – after inspections of both containers – that they were iced tea, and not some other suspicious substance. This was a stressful moment for me since my Spanish skills amount to “Holà” (“Hello”), “Gracias” (“Thank you”), and “No hablo español” (“I don’t speak Spanish”), while the officials principally worked in Spanish (though thankfully appeared to understand English quite handily).
- Well, okay, I have a spattering of following words and expression in Spanish, which I do not have the wherewithal to use:
- “Señor” — “Sir”;
- “Señorita” — “Madam”;
- “Por favor” — “Please”;
- “Uno cerveza, por favor” — “One beer, please”, which is such a cliché coming from, well, a “Gringo” — “Foreigner”, usually a derogatory term for an Enlish speaking (North) American which for the purpose of this conversation to which I am equivalent as a Canadian, and which former expression I would think twice about using, even at a bar serving beer;
- “Amigo” — in the familiar ways that one would use “Amigo” alone, “My friend”, meaning that I would likely never have an opportunity to use it.
- We again spent the rest of the afternoon relaxing on the pool deck and/or napping in our cabins.
- Evening Show: Star Trek goes to the Opera with Robert Picardo: This show was better than the “BFF” show that Robert Picardo performed in 2018 (and if I correctly understood half-heard snippets of conversations around me, Robert Picardo repeated his “BFF” show over several Star Trek cruises since, and possibly up to 2024!) for two reasons:
- In Star Trek: Voyager, the Doctor sang opera on numerous occasions, so they were able to make a show out of the various opera pieces that were featured in the show, with each piece being introduced as being from a given episode, with a large TV screen also showing some of the relevant scenes or pictures therefrom.
- Also, I thought that the quality of singing was far better than in “BFF” – well, the professional opera singer was unsurprisingly excellent, while Robert Picardo, in my estimation, sang better this year. I should note that I am not a fan of opera at all – in fact, I have a personal running joke about opera to the order of “Call 911! The person on stage is obviously hurt because they are screaming in agony!”
- Additionally, there was an excellent piece sung, as a duet, in which there was opera music expressly composed so as to be used while singing the well known “Khaaaaaaaannnnn!” scene from Star Trek II: The Wrath of Khan!
Thursday:
- Belize City, Belize, where we only got off the ship at about 11:00 since we purchased a trolley tour around Belize City starting at 13:30, which was to last for about an hour.
- At this point, my brother and I were becoming mildly disenchanted with the completely commercial nature of the tourist zones, which consisted of stores selling souvenirs, silver, cigars, tequila, and rum, hence why we got off the ship so relatively late
- This port of call required that we use tender boats to go ashore; seeing some discoloration of the water around the ship while eating at the breakfast buffet, I assumed sand was being stirred up by the ship’s stabilizers, which led me to believe that a port for cruise ships was not practical there, due to shallow water.
- The Belize City trolley tour we had booked was very informative and pleasant: We passed through an area with a high density of schools, we were welcomed by an impromptu school drum band on the street, and we learned about the local stores and restaurants that were proudly mentioned by the guide, but which came across as small, local businesses that might not have existed a few years before, and hypothetically may not exist in however many more years from now, and replaced with another local business.
- Belize City came across as a lot poorer than the impression that the (admittedly and very obviously completely contrived) privately-owned island in Belize run as a resort by NCL that we visited in 2018 as part of the 2018 cruise gave us. Nonetheless, this was a very pleasant tour.
- Shortly after the tour, we returned to the ship early, and again, that afternoon, we passed extra time napping or relaxing on the ship.
- Evening show: Star Trek Squares, with Garret Wang as the center square – I was expecting the center square to be Kate Mulgrew. Unlike in 2018, a Gorn with (intentionally) unintelligible speech did not occupy a square. (See below.)
Friday:
- First part (about an hour) of “To the Journey: Looking Back at Star Trek: Voyager” documentary;
- “The Weird and Wacky Science of Star Trek: Lower Decks” with Dr. Erin McDonald;
- Trek Stars with Dr. Larry Nemecek and Dr. Erin MacDonald, discussing various stars relatively and not so relatively near the Sol System (our solar system!), and often a connection to star systems mentioned in Star Trek;
- We did a short visit to the pool party with free watered down drinks;
- “The Search for Life in the Cosmos” featuring Astronaut Dr. John Grunsfeld;
- Writing for Star Trek with Brannon Braga, where we learned that while Star Trek: The Next Generation did accept spec scripts from the public (which we knew already), at a certain point early on in Star Trek: Voyager, they stopped accepting spec scripts. Apparently, they had roughly 30,000 on hand, and putting aside the overwhelming numbers and presumably the amount of work for re-writes that would no doubt be required in using spec scripts, they were concerned with copyright issues and the logistics of balancing said issues. I presume that were they to mix elements from various spec scripts, or two or more had purportedly similar premises or other elements, by using one, the author of another might decide to sue because Star Trek had their script, which may have been unopened, and may have had a similar idea in it to one that was used;
- John de Lancie Presents: “War of the Worlds”, which was a well produced recreation of the as-aired “War of the Worlds” broadcast in the 1930s, including a (small) live orchestra, and an increasingly growing Mars on the video wall screen behind the actors throughout the show. However, the show had the problem of not being directly nor specifically relevant to Star Trek, even if we were a receptive crowd given the subject matter. (I was later reminded that the radio programme’s copyright protection might have expired, although some cursory checks cast doubt on this hypothesis. Later still, I learned through Wikipedia that John de Lancie has a history with this radio show (here’s my archive of the page with the reference), having performed it with other Star Trek alumni for Public Radio in Los Angeles in 1994.)
Saturday:
- “Science Balderdash” with Dr. Erin Macdonald and Dr. John Grunsfeld; the “Balderdash” game with audience participation, and Dr. John Grunsfeld wearing Spock ears and a Spock uniform;
- The second part of a charity auction of various posters and other paraphenalia, props, and ephemera made for, and publicly displayed throughout the ship during, the cruise and autographed. It was rather stunning to see how much money people were willing to spend on such items, including one item, which proved to have a secret twin which was revealed at a point when there were extraordinary bids between two sole bidders; each sold for an identical extraordinary bid which would have been at or perhaps even beyond what the most luxurious cabin on such a cruise would have cost. (I also wondered how the winning bidders of various items would have been able to pay for some of the more expensive items; surely even most people’s gold cards could not clear at least some of those amounts!)
- Star Trek: Voyager panel #2 with Lolita Fatjo, Brannon Braga, Kate Mulgrew, Robert Picardo, Roxann Dawson, and I remember Garrett Wang.
- Star Trek: DS9 panel: Casey Biggs, Jeffrey Combs, Chase Masterson, Nana Visitor
- “The Gorn’s Gong Show”, a talent show judged by Jonathan Frakes, Denise Crosby, and Nicole de Boer. There were ten contestants: Five were gonged by the Gorn. One participant was a great singer singing a Whitney Houston song I think from “The Bodyguard” movie (but *not* “I Will Always Love You”); another very good lady from Great Britain singing opera (who won with 107 dB of applause);
- Three acts which were gonged were:
- A Klingon belly dancer;
- A lady using lighted balls at the end of strings to dance with, but the batteries for the lights died as she was about to start;
- And another dancer with something like streamer dancing but using lit glass fibre optic cables.
- An Evening with Kate Mulgrew, who answered a lot of questions asked by the audience, including a crowd pleasing answer to a contentious question at the end.
Sunday:
As we were leaving the ship, we saw that a good amount of the branding for the cruise’s Star Trek theme had been taken down overnight from Saturday evening to Sunday morning, changing the theme to an 1980’s theme (Radio Shack, anybody? 🙂 )
After the cruise:
We had planned to stay an extra night in Miami, so that we could plan a little extra touristy type activities; if nothing else, following our previous Star Trek cruise leaving from Miami in 2018, we were inspired by some impromptu good luck we’d had with a friend who was visiting Miami at the same time, who provided us with some tourist-like activities while we assisted them with some last minute purchases, before we headed for the airport for our evening flight.
Alas, this year, we did not plan nor do any such tourism; while we indeed did stay the extra night, we were so exhausted that we spent most of the extra time at the hotel resting or napping, save for going out on the last night to yet another brewpub, Biscayne Bay, which was in “The old Post Office building” in Miami. This restaurant had (literally) in house brewing capacity for presumably mostly in-restaurant consumption, as well as a remote microbrewery location where some of the products that are served at the restaurant are brewed, as well as in volumes to satisfy sponsorship agreements with external clients and for general distribution. I was personally so exhausted that upon our return from the restaurant at about 19:15, I went to bed within approximately 20 minutes. Further, due to our offset travel plans, while my brother left the hotel mid-morning on the next day, I only left the hotel at about noon (I couldn’t get an extended checkout beyond noon). I spent the morning in the hotel, and several excruciatingly long hours waiting at the airport during the afternoon.
Also of note, we learned in the days following our disembarkation of unfortunate news from the ship we were on, during the following week’s 1980’s themed cruise by the same production company, leading us to be glad that we were not on that particular sailing. Suffice it to say that any discussions about being on said following sailing – be it specifically for that theme, or as a case of “wouldn’t it be nice to do a second week in a row and not even have to change ships, and have a different theme to boot” – were purely whimsical. Our cruise was sufficiently expensive: Even as compared to a comparable but otherwise un-themed cruise, apparently the pricing for the following week was even more expensive than our (already expensive) trip, while we know that the shows would have been rather different and not as much to our liking as our whimsical discussions might lead one to suppose. That being said, the incident we heard of – which I will not specify for reasons of it being sufficiently upsetting and in any case beyond the scope of this post – would likely have been quite the damper on the on board spirits, as well as no doubt being something of a public relations nightmare for the cruise promoter and the cruise line.
My impressions of the 2025 cruise compared to the cruise in 2018:
This cruise had a slightly different and more polished feel to it compared to the 2018 cruise; this iteration was the eighth year that it was produced, versus the 2018 cruise, which itself was only in its second year. In that sense, such a perception made a lot of sense, especially since the promoters also organize other themed cruises (such as the aforementioned 1980’s cruise, a motorcycle-themed cruise, some jazz-themed cruises, at least one 90’s cruise, and so on) and benefited from not only years’ worth of experience, but also many cruises’ worth of experience.
Some things in this polish included the video walls during the shows, and general branding, which no doubt due were due to experience in having produced 1, 2 (x2), 3, 4, 5, 6, and 7, instead of just one previous year in 2018 (admittedly, they had a “practice run” the week before with the first sailing).
While there were a number of similar shows in both years, some were produced more smoothly; my principal example would be the “Scopes Monkey Trial” script reading on the 2018 cruise vs. the “War of the Worlds” script reading on the 2025 cruise.
Firstly, while I am aware that in this section, I am discussing better production values between the 2018 cruise and the 2025 cruise, I first would like to comment on the propriety of their inclusion in the schedules. Ironically, these two performances are examples in my mind of inappropriate shows that could have been replaced with other shows, such as more dramatic readings of Star Trek scripts, or other similar Star Trek content.
However, I do begrudgingly characterize both as generic performances adjacent to the core subjects of “Star Trek”:
- The former, questioning and upsetting the unquestioning societal behaviour reacting to arguably arbitrary directives from beyond the situation’s actors (ie. not tv actors but the “real people” in the situation), admittedly a recurring theme in Star Trek;
- While the latter, a (supposed) visit to a planet from (supposed) outsiders, which itself is effectively at the core of Star Trek’s mantra to “… explore strange new worlds, (and) to seek out new life and new civilizations …”
Secondly, I nonetheless stand by my 2018 characterization of a number of shows put on by John de Lancie and Robert Picardo as “Had the cruise been themed for the Stargate franchise, both John de Lancie and Robert Picardo, who also were secondary characters in that franchise, could have performed almost all of the same shows I saw them perform on the Star Trek cruise, and there would be little difference”, even though for 2025, I can’t include Robert Picardo as much in that characterization. I will also underline that I said “… while I was clapping at the end and otherwise (usually) thoroughly entertained, I was often scratching my head as to what the show I had just seen had to do with Star Trek …” This year, I can say that more of the shows I saw addressed the second comment. In the specific case of Mr. Picardo’s opera show in 2025, I will give full credit that it was tied to the opera appearing in Star Trek: Voyager.
As part of the added polish, “The War of the Worlds” show seemed well-rehearsed – in fact, for the musical parts and the scheduled interruptions in the script, it would have had to be – and the inclusion of the video wall graphic of the planet Mars slowly growing in size over the length of the show. (The “Scopes Monkey Trial” in 2018 was more relaxed, because it *had* to be due to participation by members of the cruise participants, even if they were selected “sufficiently in advance” earlier in the day to allow a short rehearsal before the show.)
Despite my comments above regarding the Tuesday evening show, a reading of “For the World is Hollow and I Have Touched the Sky” in which I found the humorous re-writes distracting, I also found the video wall integration into the show to have been well done, despite the somewhat fuzzy pictures, which I presume were from the original show. Whether this was a result of enlarging shots done on 35mm film well beyond the size one could have ever expected out of such resolution, whether in 1969, or in 2025, or, if the resolution was intentionally somewhat reduced for any of a variety of reasons, or both, is unclear to me, and is of secondary importance.
Overall, in 2025 I didn’t think as much about copyright issues, although in my mind, it was clearly still an issue. A number of the shows were, entertaining as they were, neither existing Star Trek material, or original Star Trek material: Instead, there were a lot of panel shows, and, perversely, Family Feud and Star Trek Squares (ie. a renamed “Hollywood Squares”) (that were probably concepts reused on the 1980’s Cruise as well as their other themed cruises) which no doubt included royalty payments to the format copyright holders. I have to concede that the panel shows were of course composed of the various personalities, and *of*course* we all wanted to hear from the people who we saw on TV or who worked behind the cameras to learn about the shows and the personalities and the shows.
Music piped through to the public speakers across the ship was, as in 2018, composed of a lot of 1980’s tracks, but was more diverse than the playlists I recall from the 2018 sailing; I expect that this probably an evolution of style, planning, more securing of the rights to play a larger list, and, possibly a desire to be able to reuse the playlists at least during the following week’s “The 1980’s Cruise”.
In my eyes, there seemed in some ways to be fewer trappings than in 2018 – at least in the sense of invoking my “Paging the Squire of Gothos” perception – although in some ways there were at least as many in 2025 (ie. the storefronts in the promenade were “renamed” according to a large variety of Star Trek references.)
Final thoughts:
We thoroughly enjoyed the cruise, and to the surprise of some to whom we have told stories, we were thoroughly exhausted at the end, due to taking advantage of the cruise and its activities as fully as we believed was reasonably possible. (Friends and acquaintances appeared to expect a response along the lines of “Oh, a cruise, how relaxing!”)
Will we be going on next year’s cruise?
(Perhaps, unfortunately) No, since we have other life priorities which we believe outweigh the value of doing so, as well as believing that we thoroughly enjoyed this experience because of the time elapsed between our two Star Trek cruises, as opposed to doing them on a yearly or otherwise more frequent basis.
But did we enjoy it? Of course!


.png)
.png)


.png)

resized.png)
resized.png)
resized.png)
resized.png)
resized.png)
resized.png)


