Merci à M. Pierre-Luc Daoust pour l’édition du vidéo, M. Éric Bélanger pour la gestion des sites web et YouTube, et bien sûr l’inconparable M. Martial Bigras, d’avoir créé les conditions gagnantes afin que la présentation puisse prendre place! (Et un grand merci à M. Éric Cothenet pour son encouragement initial!)
Thanks are due to M. Pierre-Luc Daoust for processing the video, M. Éric Bélanger for the website and YouTube channel management, and of course the incomparable M. Martial Bigras, for having created and maintained such a great club where great presentations, as well as my humble presentation, could be made! (And of course a big thank you to M. Éric Cothenet for his initial support!)
Since about 2018 or 2019, I have been using the Fedora upgrade tool (here’s a link to my backup) to upgrade my fleet of computers to new versions of Fedora, normally skipping a version at a time, and having settled on odd numbered versions (as a matter of convenience to take advantage of Fedora’s roughly year long life cycle) since about Fedora 15.
In December 2023, I blogged about upgrading my fleet of five computers — all of which I still have and are still running — from Fedora 37 and 38 to Fedora 39. This included two baremetal installs, which proved to be the most difficult. So, despite the title above, I want to underline that the upgrade tool makes upgrading a breeze, even when there are issues, which are usually trivial, and, usually not difficult to resolve … admittedly, if one has a bit of experience! 🙁
As I recall, the upgrade cycle at the end of 2024 from Fedora 39 to Fedora 41 was rather unremarkable. Meaning, I have no recollection of the experience beyond that it happened, especially given the evidence of having just spent the last year using Fedora 41!
The release of Fedora 43 came around a few weeks ago, and I embarked on the upgrades on a sunday afternoon at the very beginning of November, 2025, and was finished and writing up this blog post by the Tuesday evening a couple of days later.
To begin, I looked up my post from December 2023 as a reference throughout the process, and was constantly referring to the following commands, performed as root:
Despite the experience largely being a breeze and relatively unremarkable, I had three distinct problems of note over three systems on the upgrades.
Problem #1: Download of new version blocked by existing packages
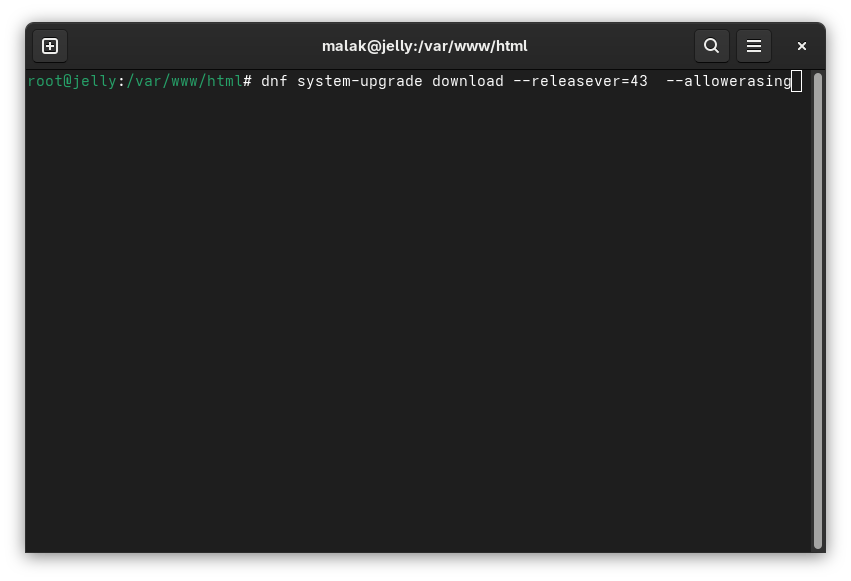
On my desktop and later on one of my laptops, I received what was to me cryptic errors about some packages on my systems, which were listed, which somehow blocked the upgrade. Looking around on the internet but before even finding a solution, I recalled that I could add “—allowerasing” to the end of the
dnf system-upgrade download –releasever=43
command to start downloading the packages; this allowed the system upgrades themselves to proceed “like a breeze”. Well, sort of, but not quite.
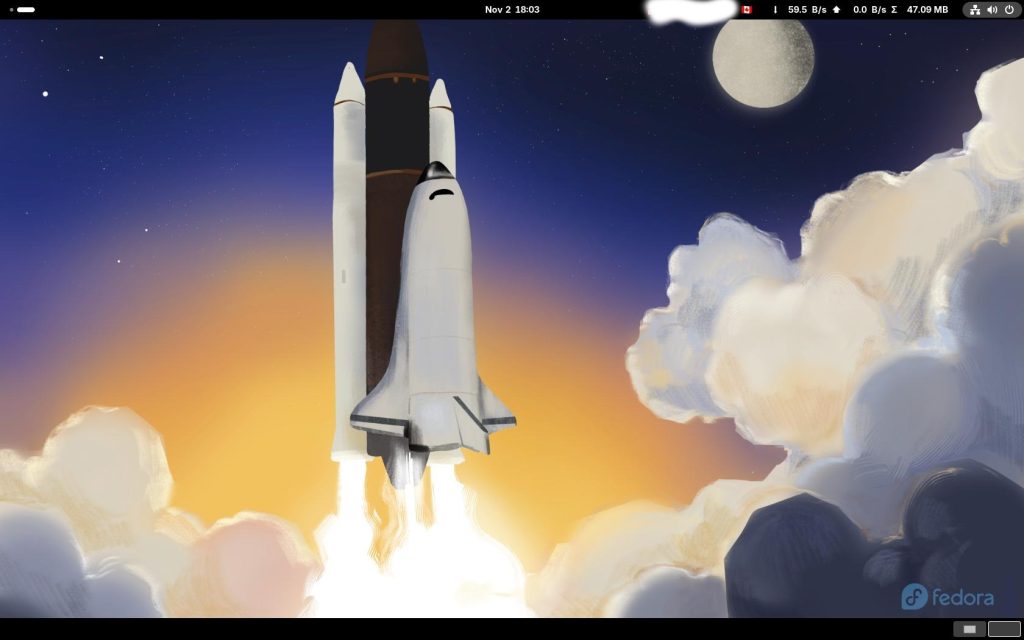
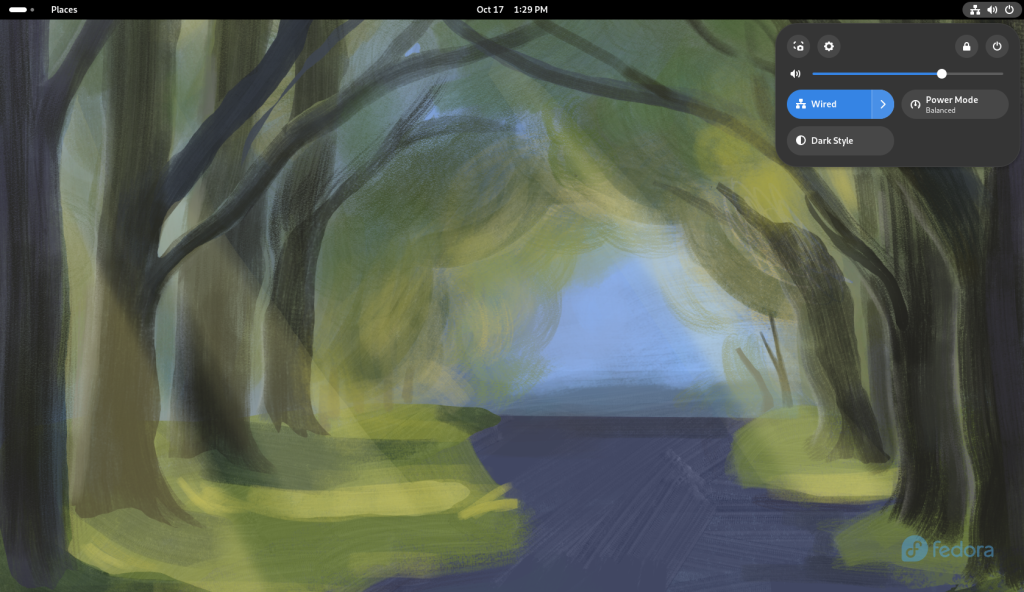
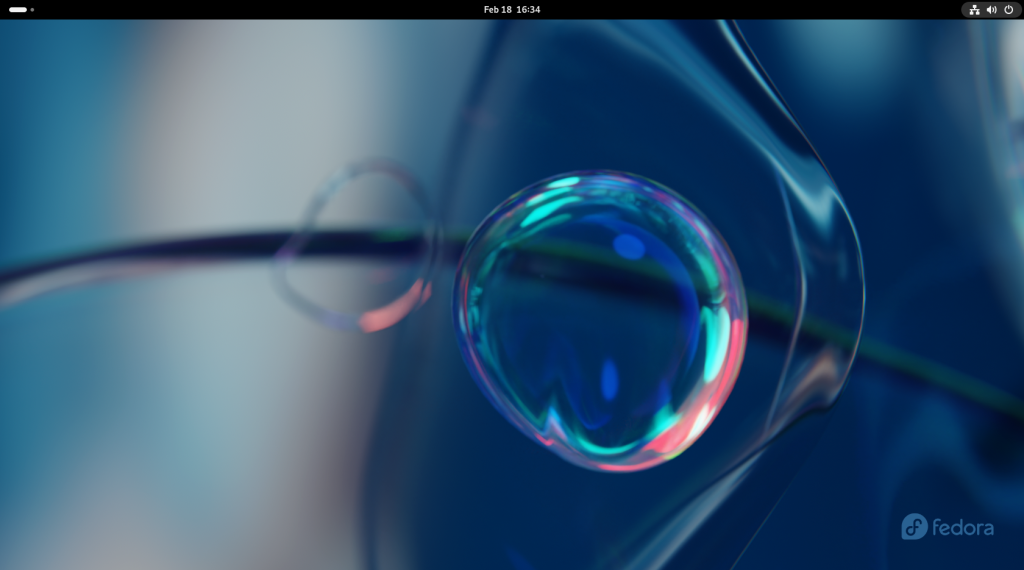
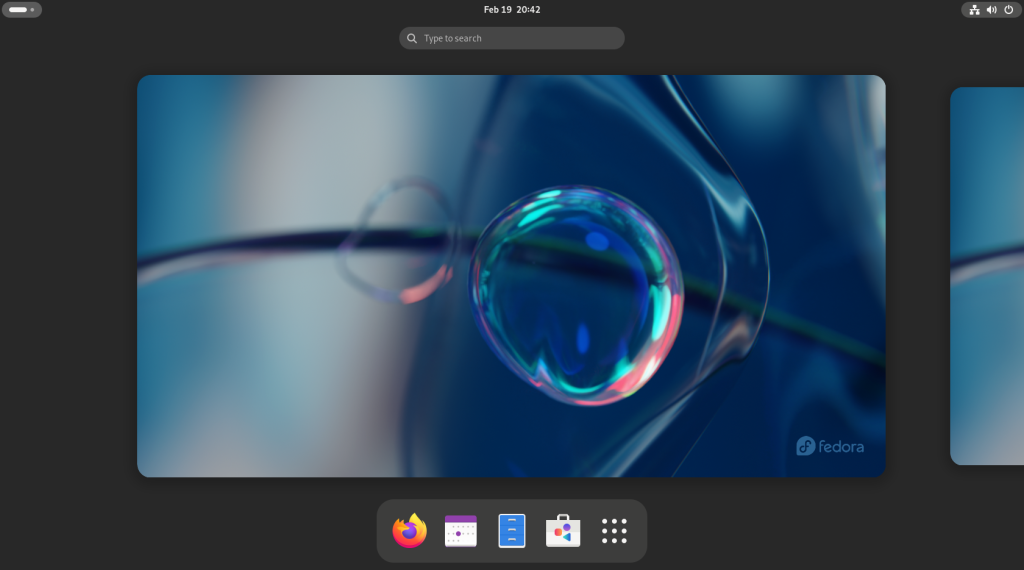
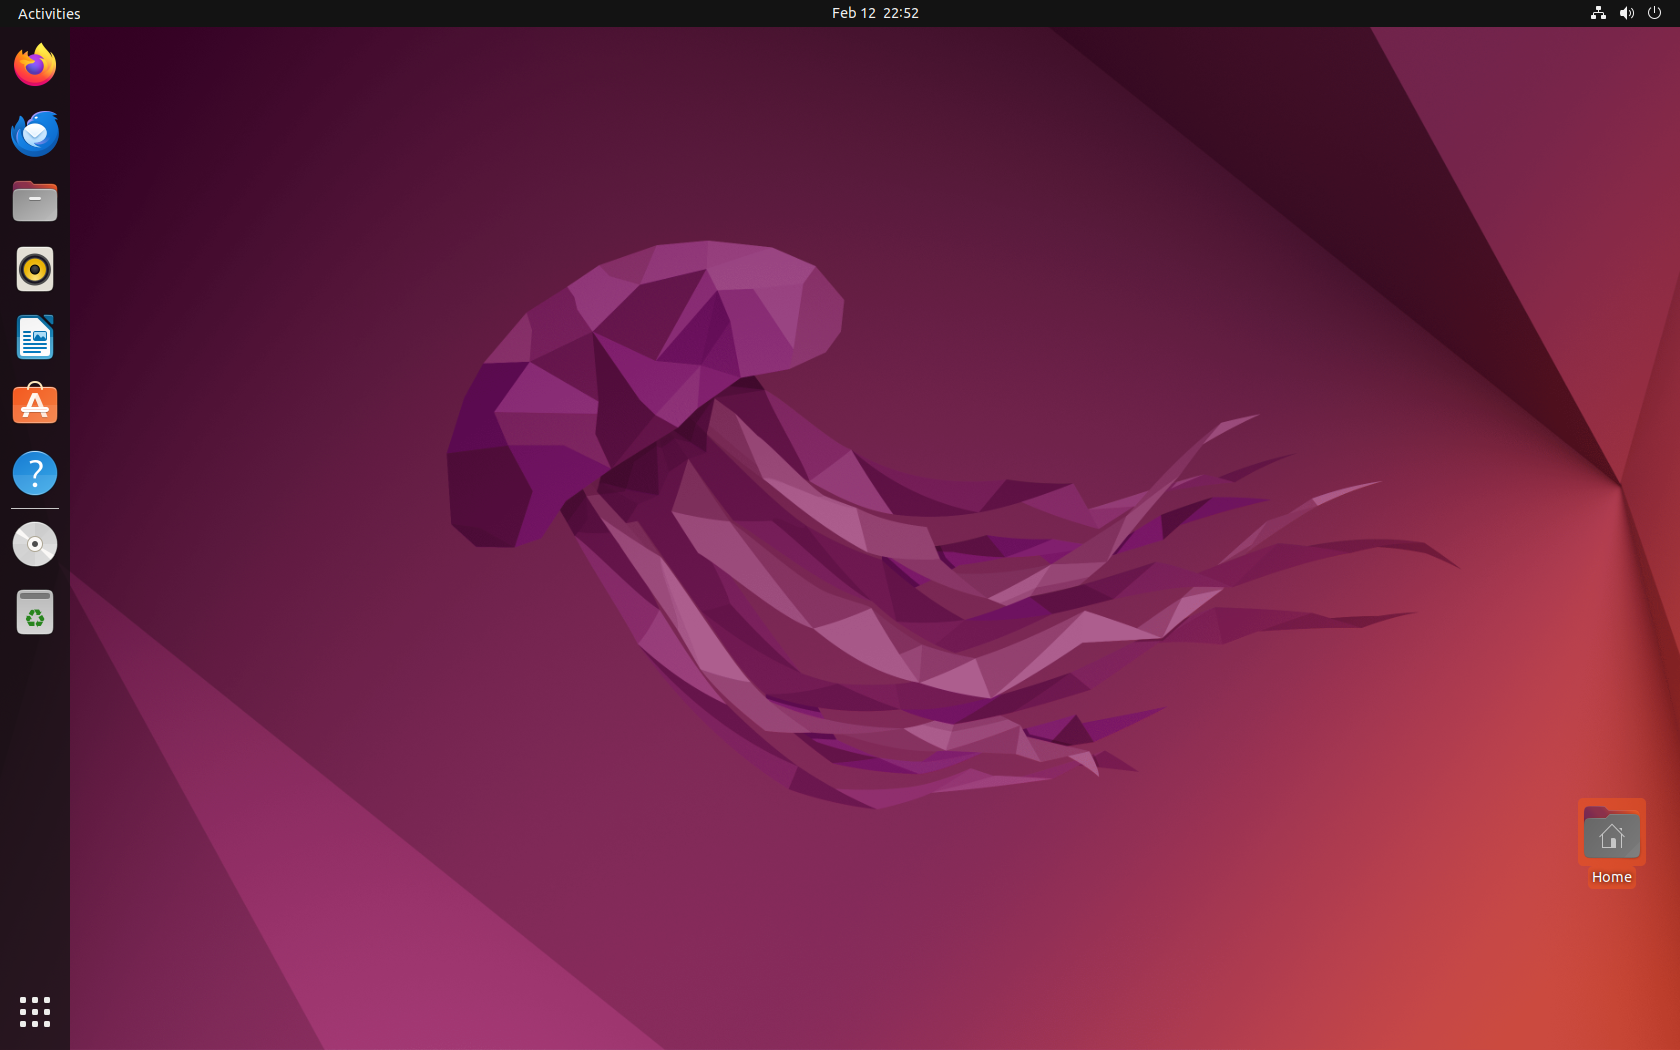
And here is a screenshot from my desktop post-upgrade, but before I started dealing with Problem #2:
Desktop on my desktop computer, with new Fedora 43 artwork, and my IP address shaded out
Problem #2: Gnome Extensions causing system to freeze:
According to my recollection, which of course is subjective at this point, one of the points highlighted as a positive in the transition from Gnome 2 to Gnome 3 — in the Fedora world, beginning with Fedora 15 in May, 2011 — was that Gnome 3 was designed to be extensible. (Looking back, this may well have been a concession on the part of the Gnome developers since the code, being open source, naturally lends itself to such, at least in the short term.) This way it allowed both the Gnome developers to present the desktop environment according to their vision, and allow users to modify it to behave as they pleased. From this, for instance, the Cinnamon Desktop, initially really just a heavily extended variant of Gnome 3, was born.
Unfortunately, what has really occurred in my experience — including during this upgrade cycle — is that with just about every upgrade comes breakage of many Gnome 3 extensions; and from this, for instance, the Cinnamon Desktop finally forking itself away from Gnome 3 due to the extensive work they had to do with each release to maintain their extensions and their functionality. As such, I have had many Gnome extensions over the years — which I have gotten directly from extensions.gnome.org to boot! — that have come and gone simply because maintainers could not devote the time to update them for each release. This is doubly frustrating, because:
on the one hand, I would love Gnome to have some kind of pathway such as stable APIs or whatnot that would keep extensions alive instead of having to be (sometimes massively) rewritten with every release of Gnome, and,
on the other hand, you get what you pay for, which in my case, is a wonderful operating system for which I paid nothing more than the internet connection to download it, and if I don’t like what I get, I can always change desktop environments — there are several!
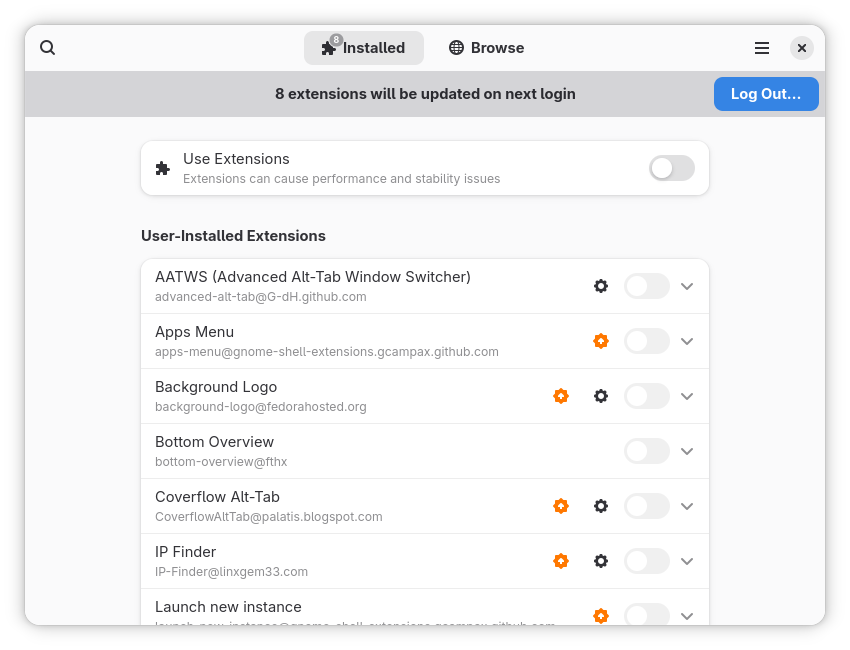
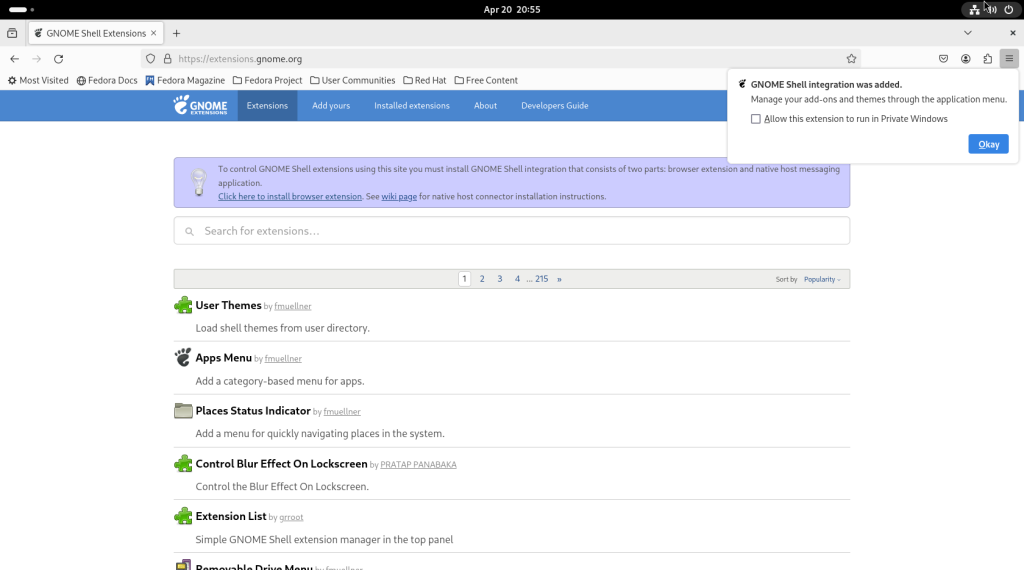
To wit, on my desktop, existing and active extensions made the system freeze, usually within roughly 15 minutes or thereabouts: The mouse would not work, they keyboard would not work, the screen would freeze, the time and date display would freeze, and I could not ssh into the machine from another machine. After the third or fourth hard reboot requiring powering down with the power button and after about a day, I noticed a notification window come up after a reboot, saying that there were extensions that needed to be updated; I proceeded with this, and the problem was solved.
Popup window indicating extensions to be updated (window taken from a laptop system, not my desktop)
The “Log Out” button was pressed, and I logged back in; all seemed to be solved.
Problem #3: Deprecation of X11 would cause systems to not boot into a graphical desktop
On my webserver — the host of this blog! (and which is in my bedroom, not colocated in some datacenter or some virtual machine in a cloud service — I use Fedora Workstation (graphical) instead of the server edition. This is simply because at its core, both editions are essentially the same operating system, and at the time that I installed the current instance, I hadn’t ever used the server edition. Of course, each has different subsets of packages and different settings in their default installations, but at their core, they are the same OS, a few “dnf install” commands and settings away from each other. And, while I indeed normally treat it and administer it as a headless server, there have been a small handful of occasions over the years during which my significantly-less-than-expert abilities have allowed me to do things with it using the graphical desktop that I would have had more difficulty doing on the command line.
At this point I should say that usually, one should do backups before proceeding with the upgrades, a practice that with one exception I don’t normally do.
However, I did do so with my webserver, which is also a passive backup for my data from my other computers … which is a bit out of date, although I expect / hope not substantially.
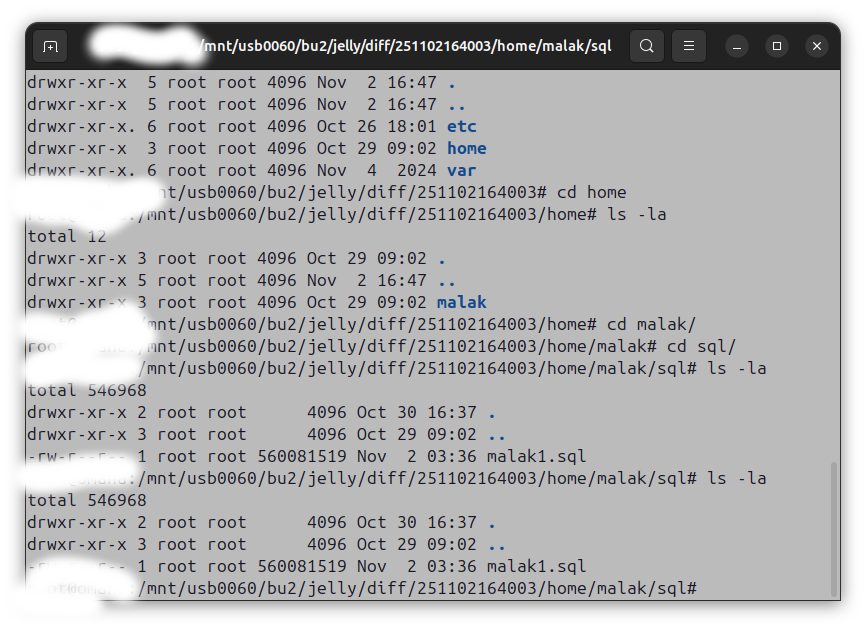
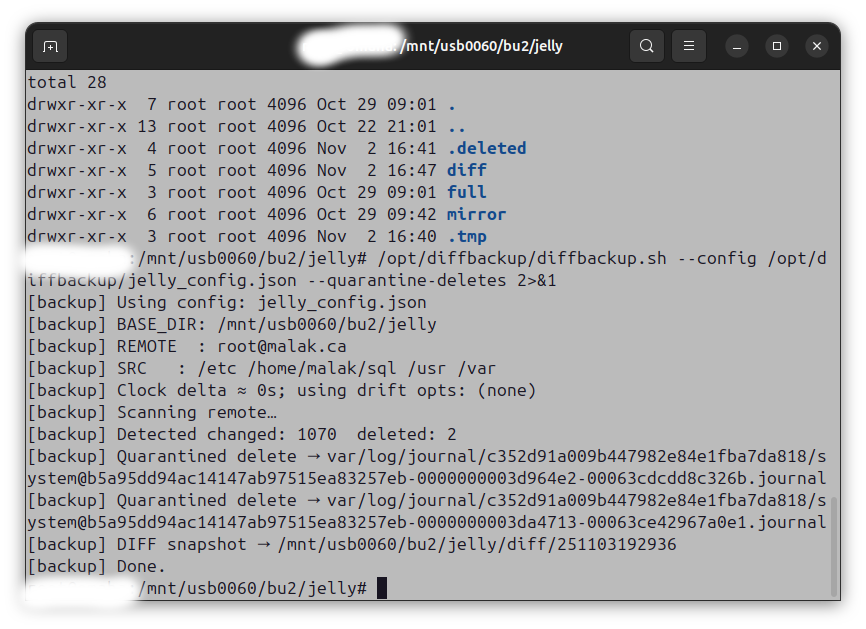
So I asked my brother to do a backup to his network, which just required a manual differential update, since we had already set up cron jobs to do so:
Backing up my server data
Backing up my server data
Backing up my server data
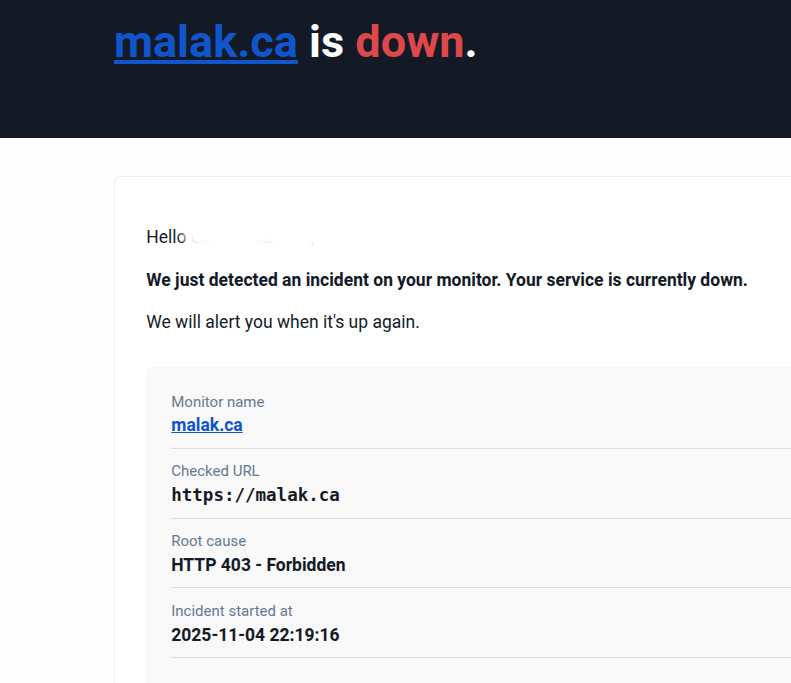
The next day, I started doing things like dnf updates and then the upgrade. Whaddya know, I got a couple of messages from my brother while I was upgrading. He sent me some screenshots:
Warning from my brother that my website was down
My brother has an alert on my website to detect downtime. I told him that I was aware, because I had manually disconnected the external hard drive with the static parts of my website.
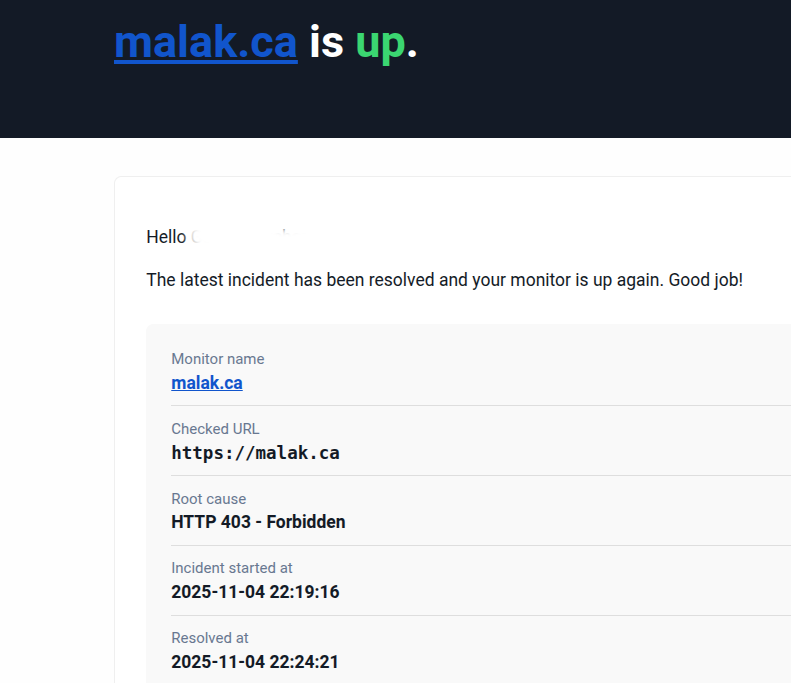
Then a few minutes later, I got another message from him:
Warning from my brother that the site was back up
I responded to him again saying well of course, but I’m still in the process of doing the upgrades!
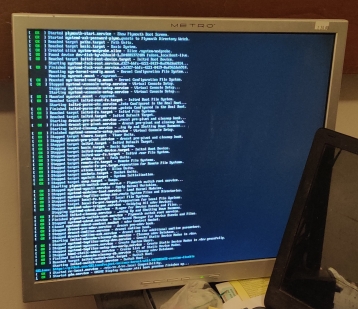
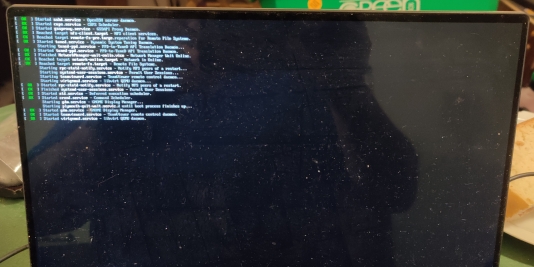
I went through the upgrade, which seemed to work. Yet, upon the reboot after the upgrade, I got the following screen:
Server bootup stalled
Oddly, it stopped during the reboot. However, I managed to ssh into the machine, as well as check to see if it was able to serve web pages. Both worked.
In the meantime, I also got ambitious and started upgrading one of my laptops. Again, once I’d done the “–allowerasing” addition to the download command (above), and the system went through with the upgrade, I got the following screen:
Laptop bootup stalled
Fortunately, I was able to ssh into the laptop.
But I was wondering what was going on, especially since both machines appeared to stop at different times — although, I suppose, the webserver had a few other services to start, but that’s beyond what I actually checked.
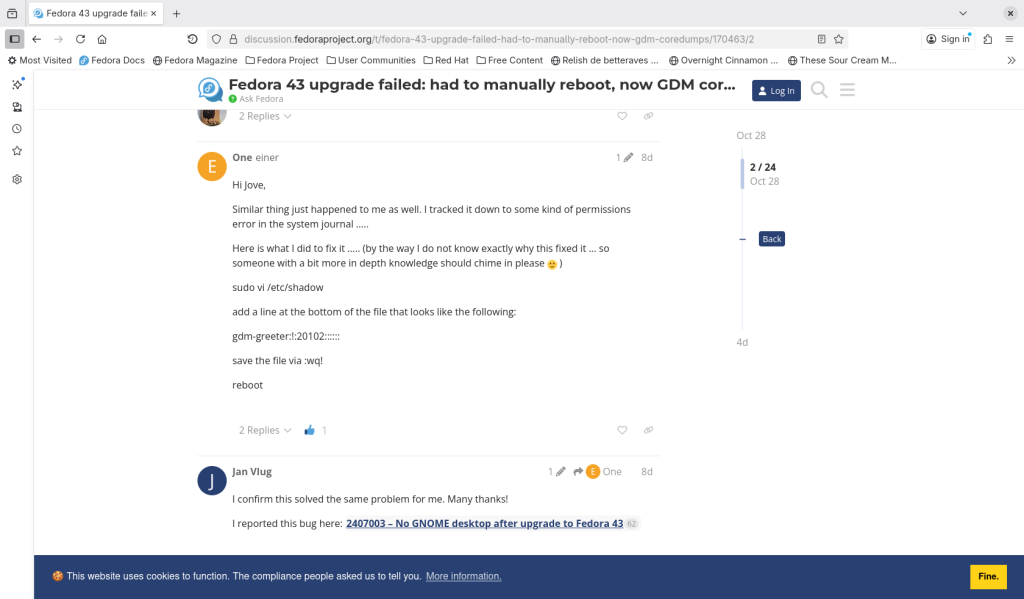
So I tried to ask on the internet, and the first suggestion I found was on the Fedora discussion boards (somehow I can’t seem to create a proper PDF of it …) suggesting that I modify a shadow file:
This did not work for me.
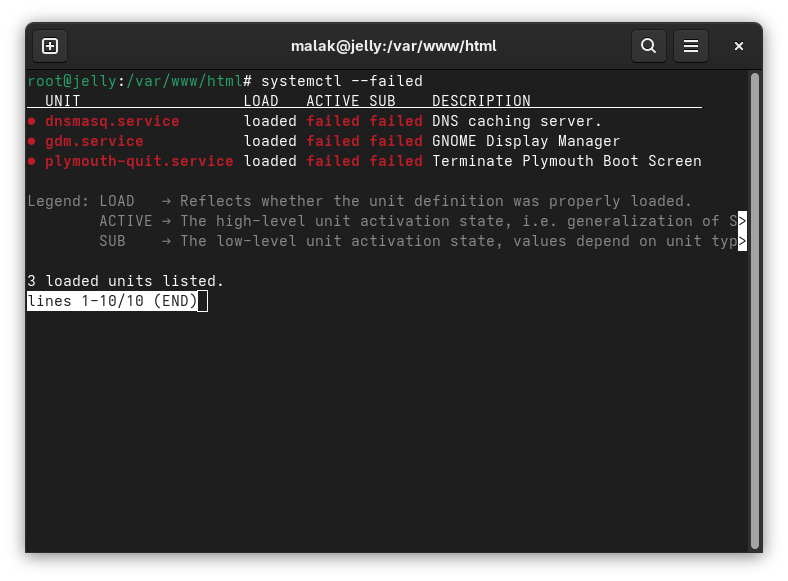
Another suggestion I found elsewhere was to check what failed, so as root on my server I entered:
systemctl –failed (that’s two dashes, wordpress decided to combine them!)
and I got the following information:
systemctl –failed results
This seemed to tell me that there were issues with starting up the graphical display. I suspected that this could be the same problem I was having on my laptop.
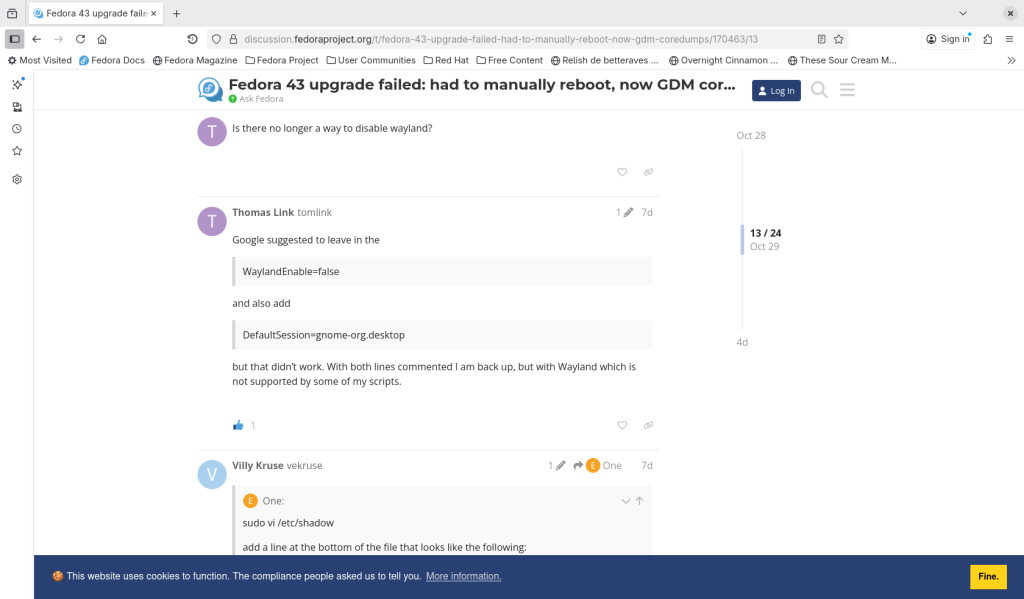
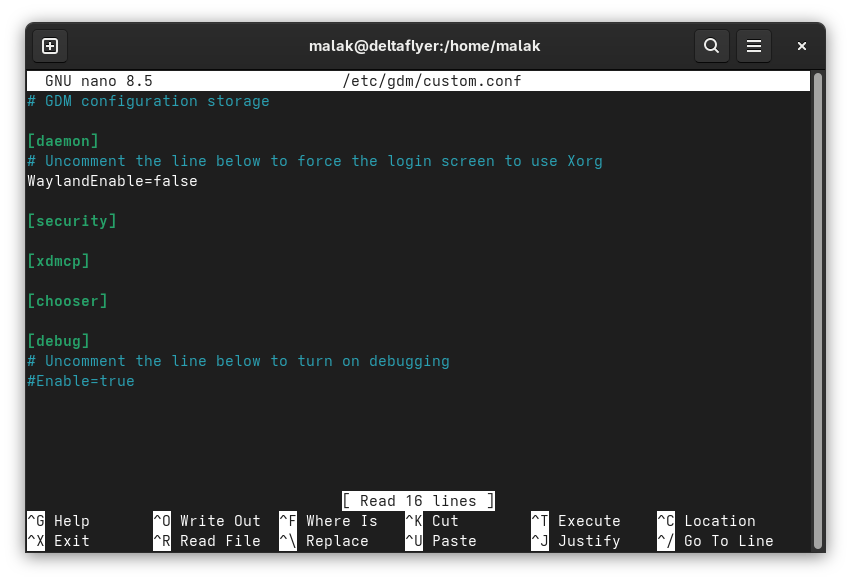
The advice was to edit the /etc/gdm/custom.conf file by commenting the line “WaylandEnable=false”
With this I remembered that on my webserver and one of my laptops, the windowing system was X.org for historical reasons related to my brother helping me a lot with these systems, and, until recently, X.org was easier for him to remotely help administer those systems if he needed to use the desktop. Alas, X.org has been deprecated in Fedora Workstation Edition using Gnome (here’s my archive), although one can still use it elsewhere in other editions and spins.
WaylandEnable=false uncommented, telling my system to not use Wayland, therefore making my system hang
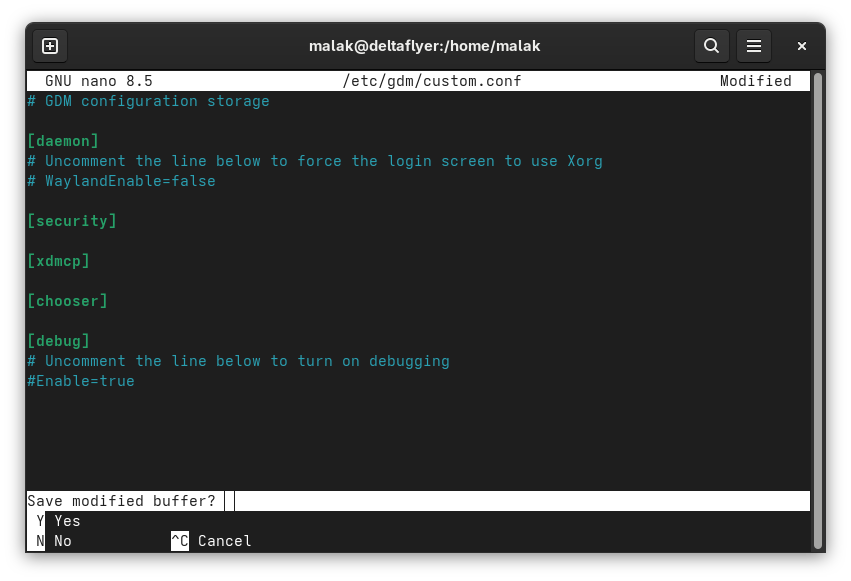
WaylandEnable=false commented out, allowing my computer to reboot properly and get to a GUI
Well once the WaylandEnable=false line was commented out, that solved my problem easily on both my webserver, and on the laptop that was affected.
Note about desktop on abovementioned laptop:
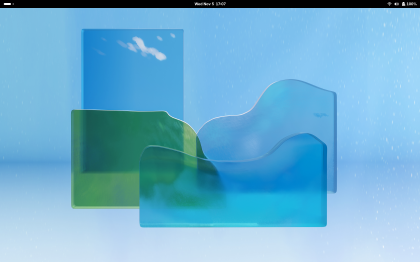
Curiously, the laptop’s wallpaper wasn’t changed. In fact, it still has the wallpaper from its original install of Fedora 36 when it was new!
Wallpaper on one of my laptops, from Fedora 36, its original image when new
(Maybe I should check the settings to see if something was set to permanent on the wallpapers when it was initially formatted when purchased new. Maybe.)
And yes, on my desktop, my other laptop, and my webserver, which all have the Workstation Edition, the wallpapers upgraded to the Space Shuttle design for Fedora 43. Only the VPN server, which is the Server Edition, doesn’t have any wallpaper at all.
The “Breezy” systems:
And the other two systems I have? Upgrading them was a breeze — an old PIII 3.4 something or other I found in a building slated to be demolished in 2016, now running Fedora Server edition, and currently used as a VPN gate and soon as a backup server, and a 2015 laptop that I still use regularly, including for teleconferencing and videos. Both upgraded like a breeze and without saying boo.
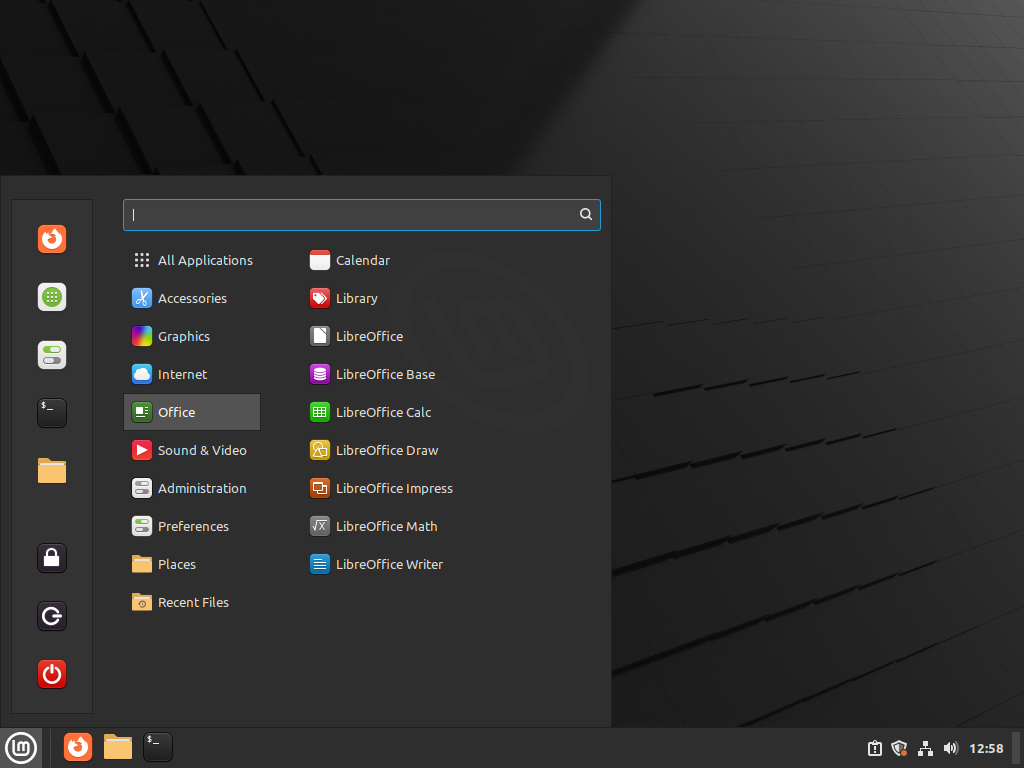
Note: Although it has been a while between posts and I had planned on another subject for what would have been this post, given the time lapse I decided to take advantage of a new version of Fedora that had been released to show how to easily upgrade the OS version, in this case, from version 39 to version 40. Note that many different versions of linux (Ubuntu, Mint, Debian, etc.) have similar functions and upgrade paths; since I began using the automatic upgrade tool in Fedora in about 2018, I have had good experiences.
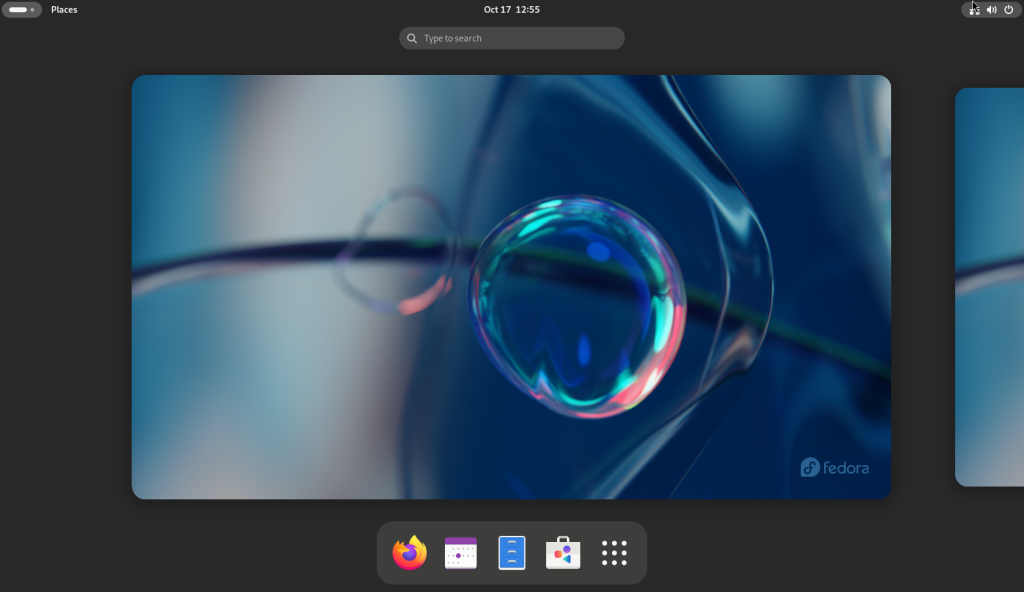
Firstly, the “Activities” screen happened to open when I logged into the system, and I chose the software icon in the dock on the bottom (the white “shopping bag” with the red, black, and blue symbols):
Activities screen with dock on bottom
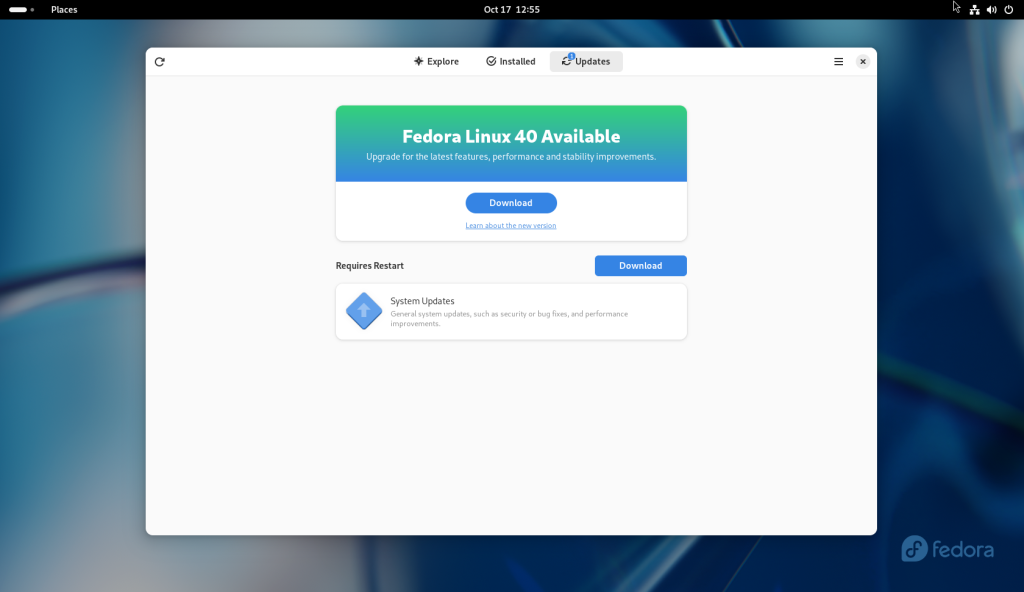
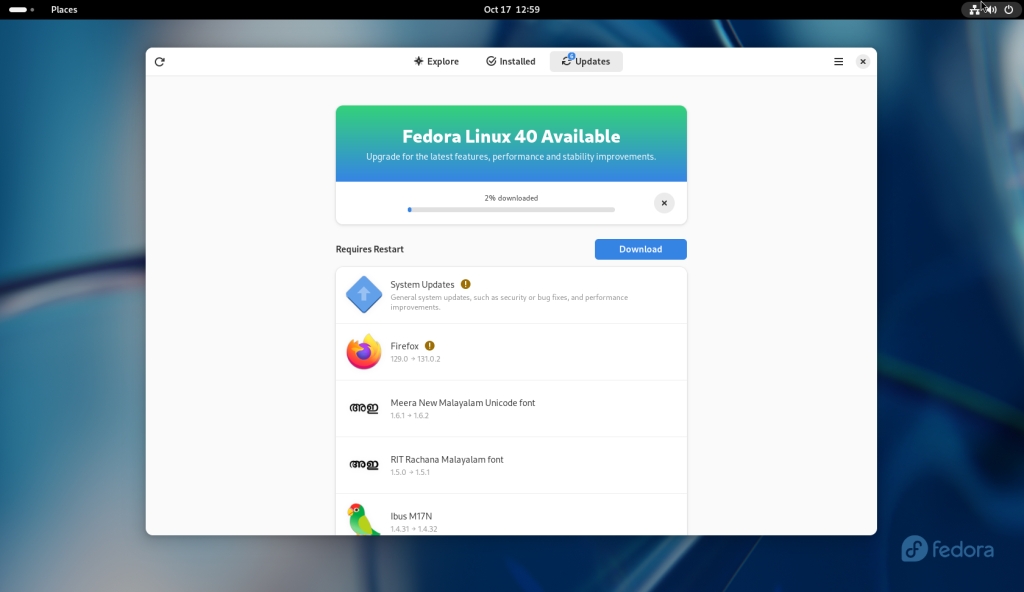
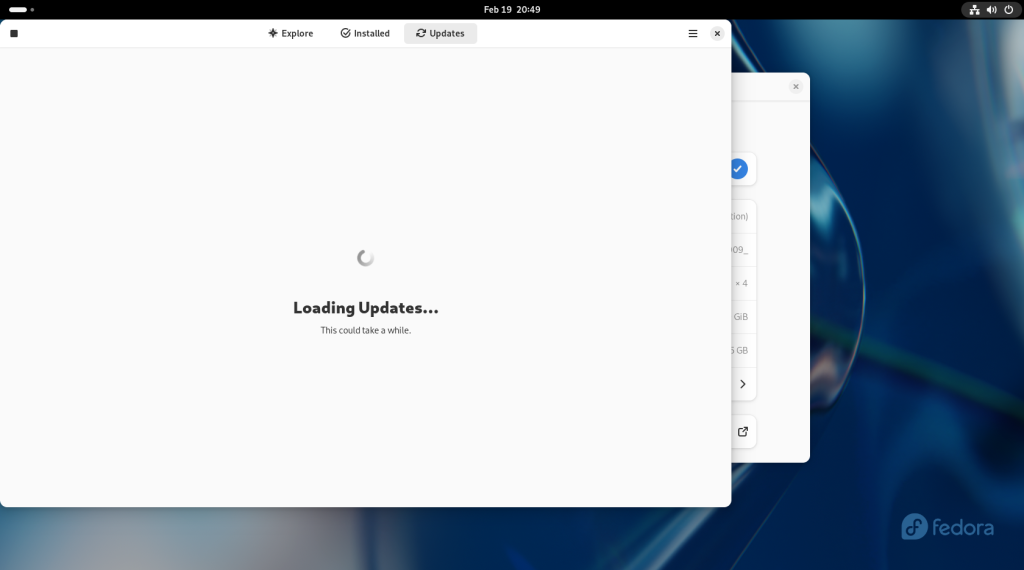
Which brought up the following screen, telling me that there were general updates, and that a new version of Fedora was available:
Software icon chosen
The system updates were first chosen and downloaded:
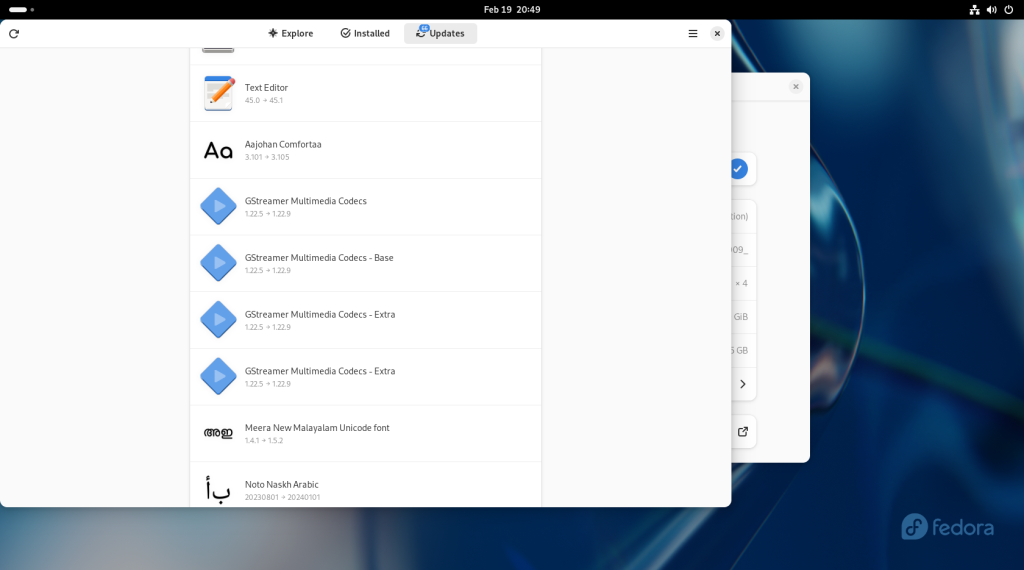
Updates downloaded
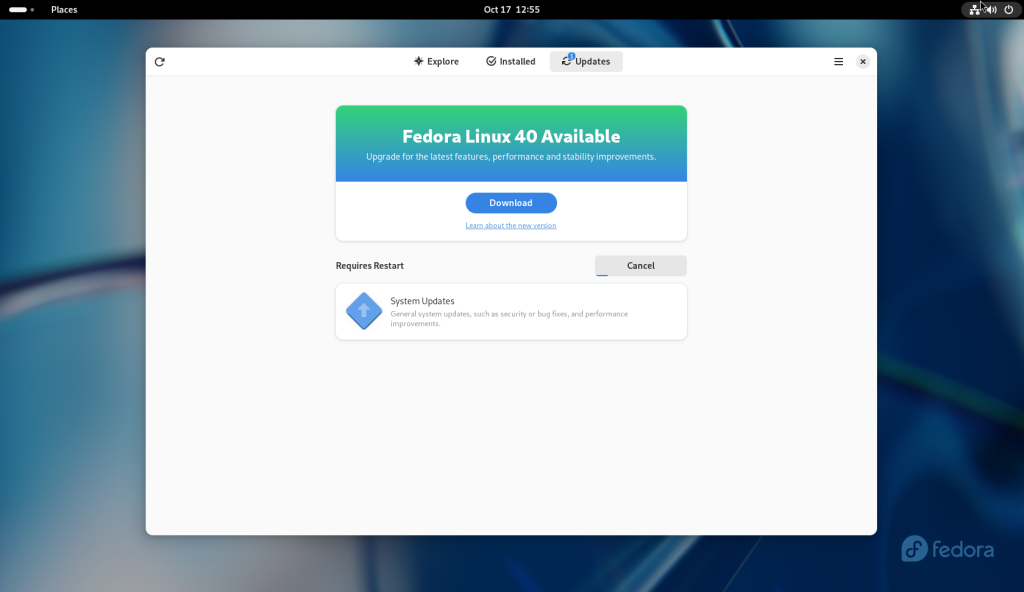
Once the updates were downloaded, the system was ready to be rebooted for installation:
Updates ready to be installed
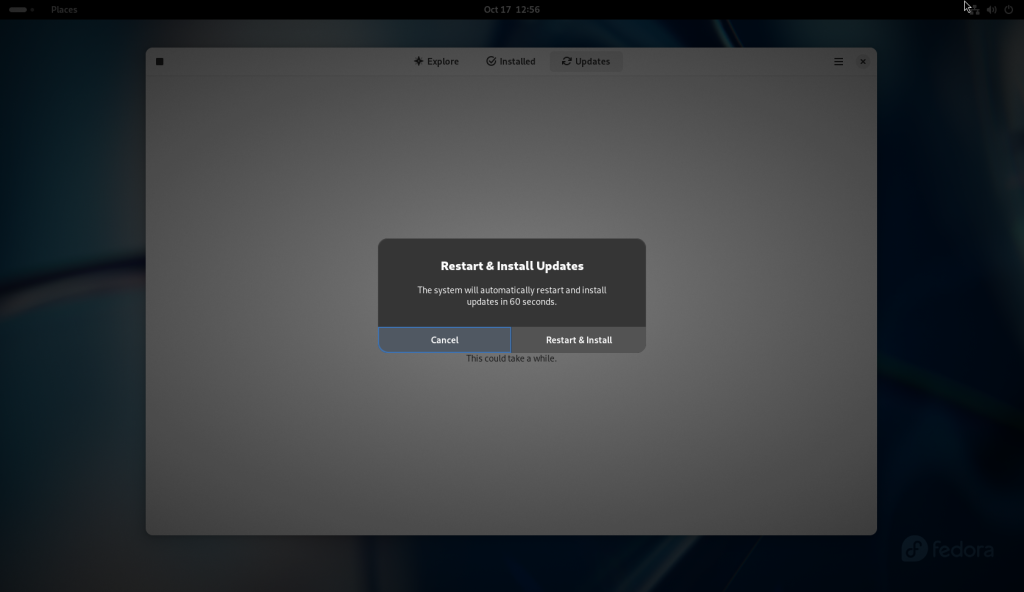
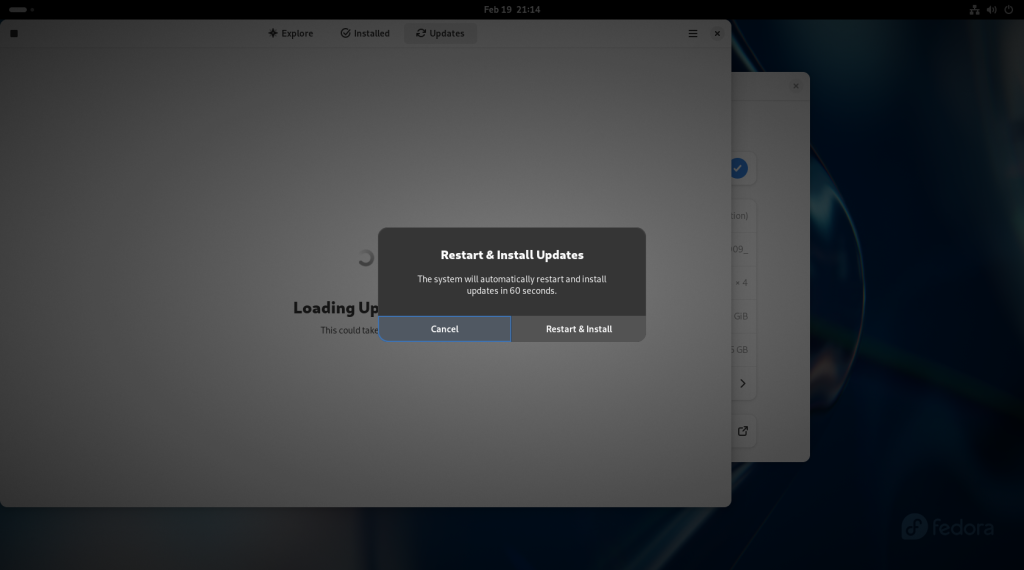
The “Restart & Install” button was chosen to confirm the reboot:
Restart and install updates dialog box opened
The system rebooted:
System rebooted
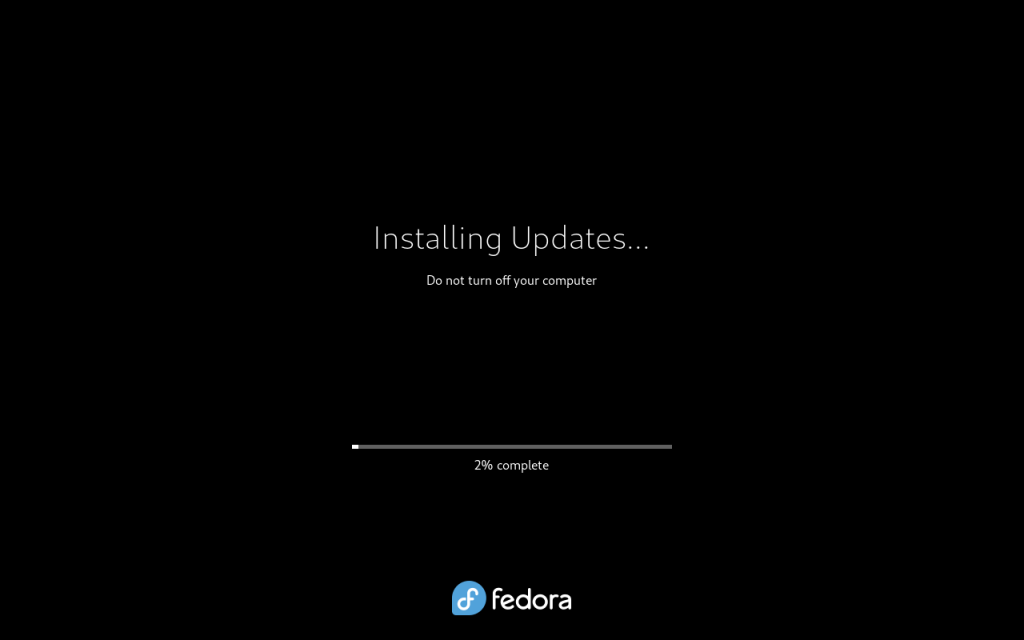
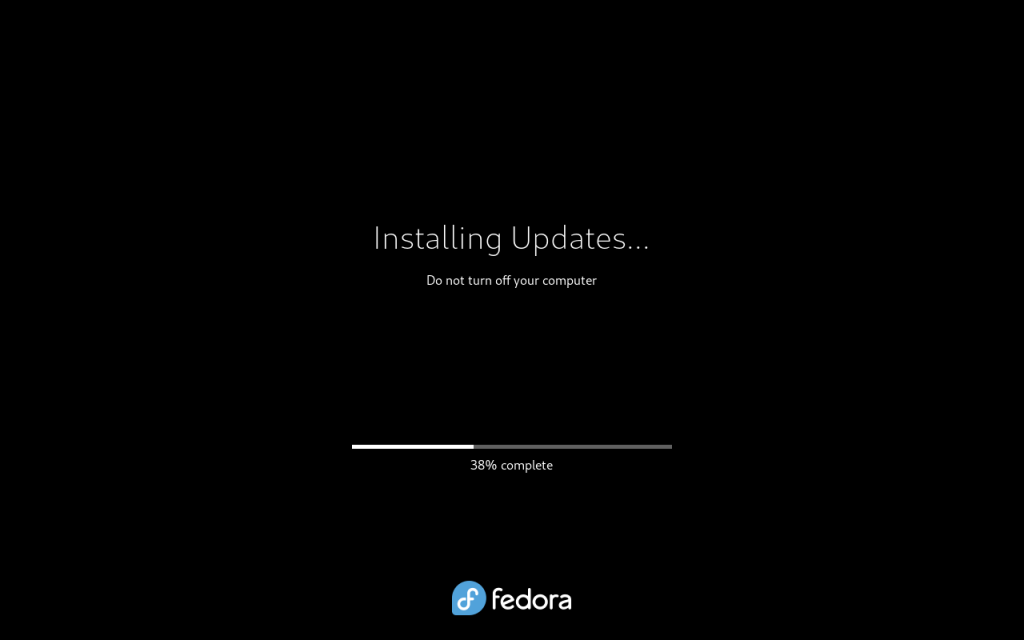
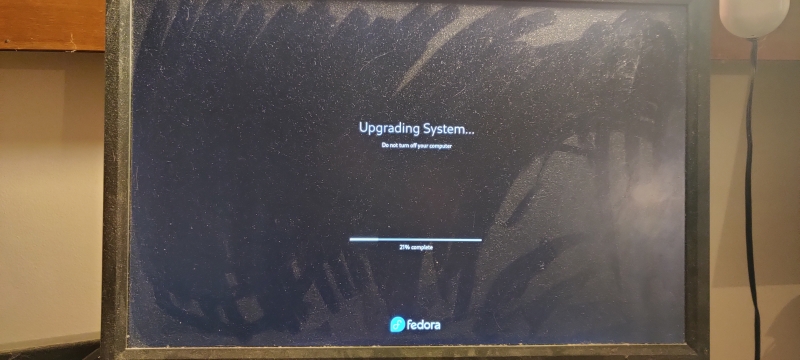
… and updates were installed:
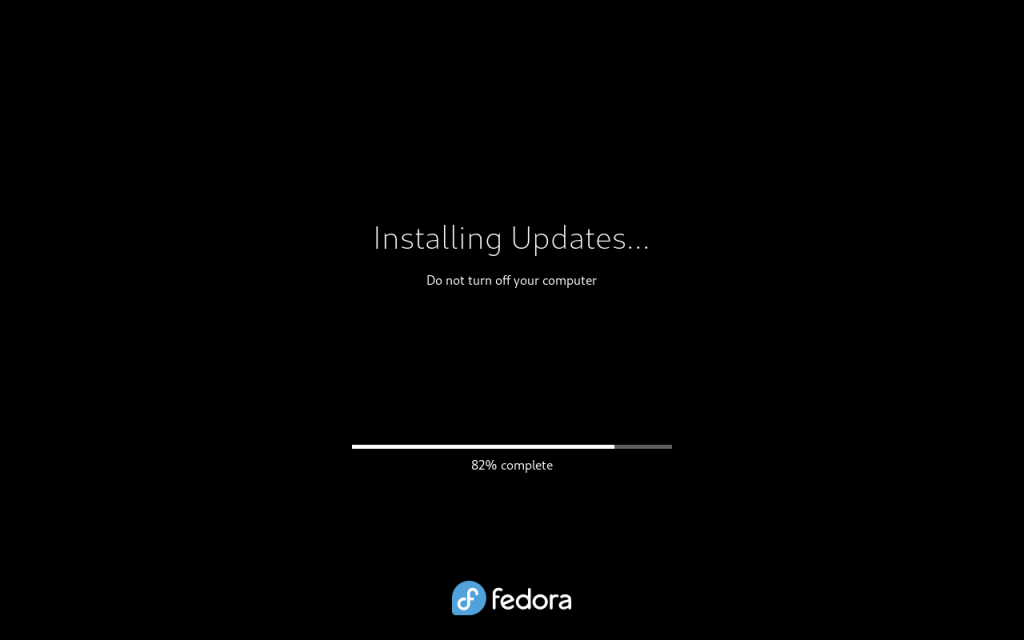
Upddates installing
Once the updates were installed, the system rebooted:
System rebooted after installation of updates
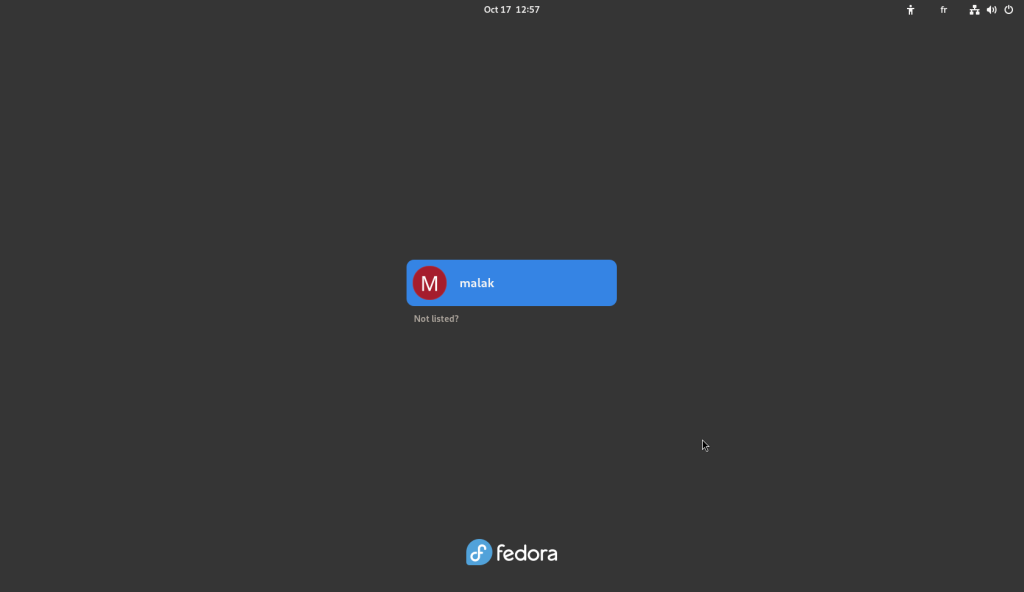
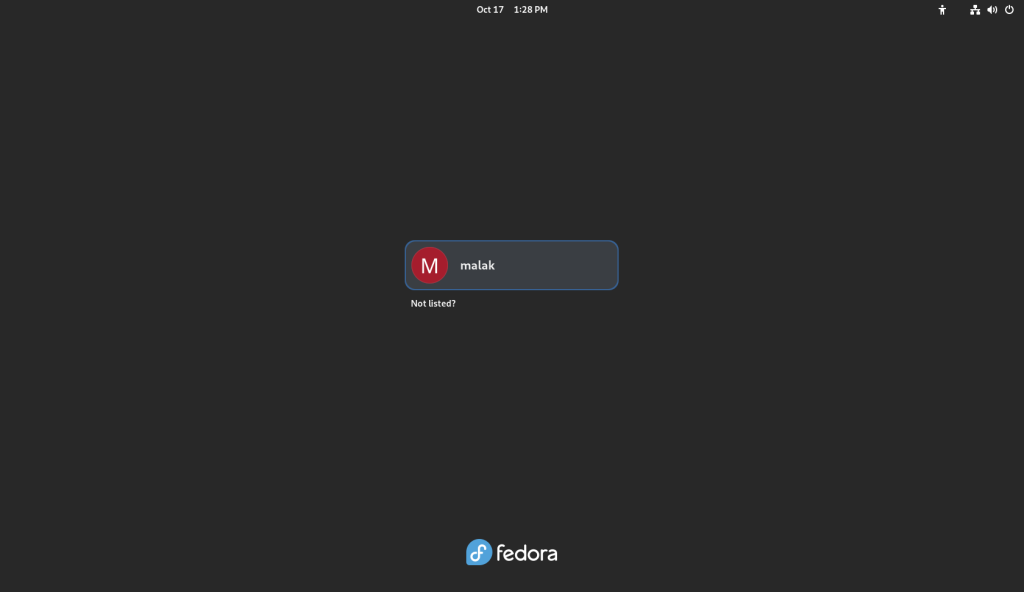
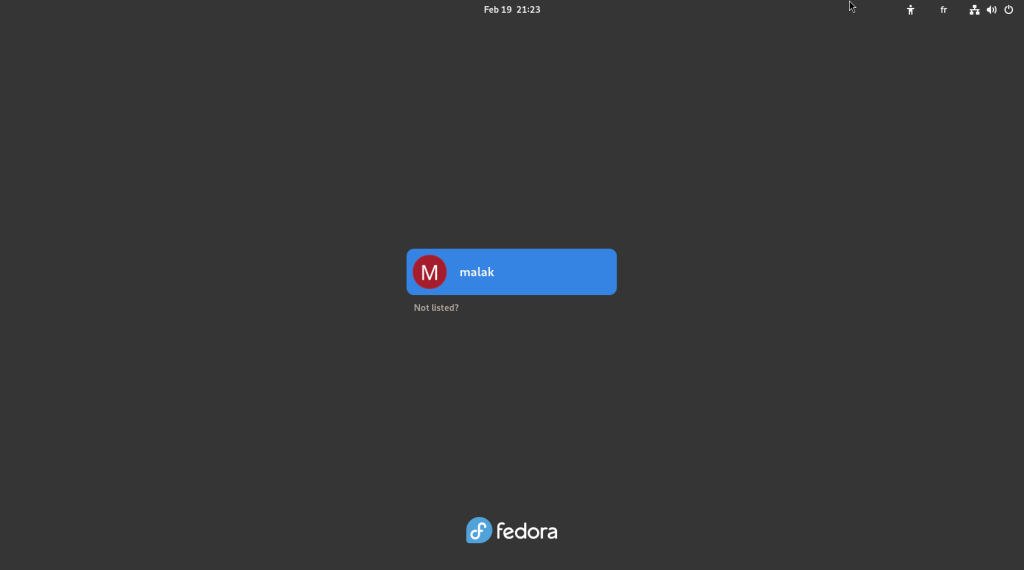
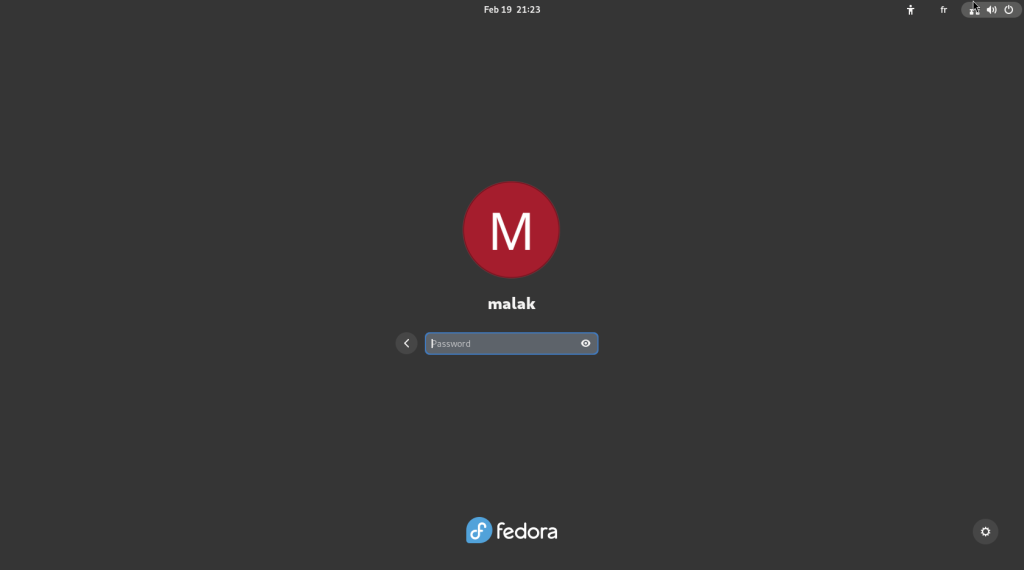
… leading to the login screen:
System login screen
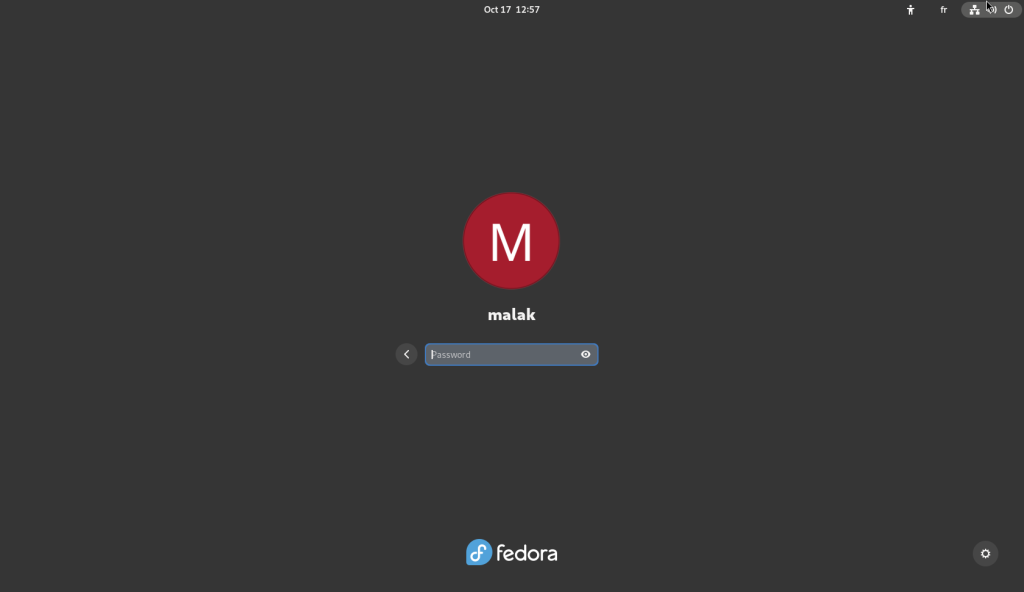
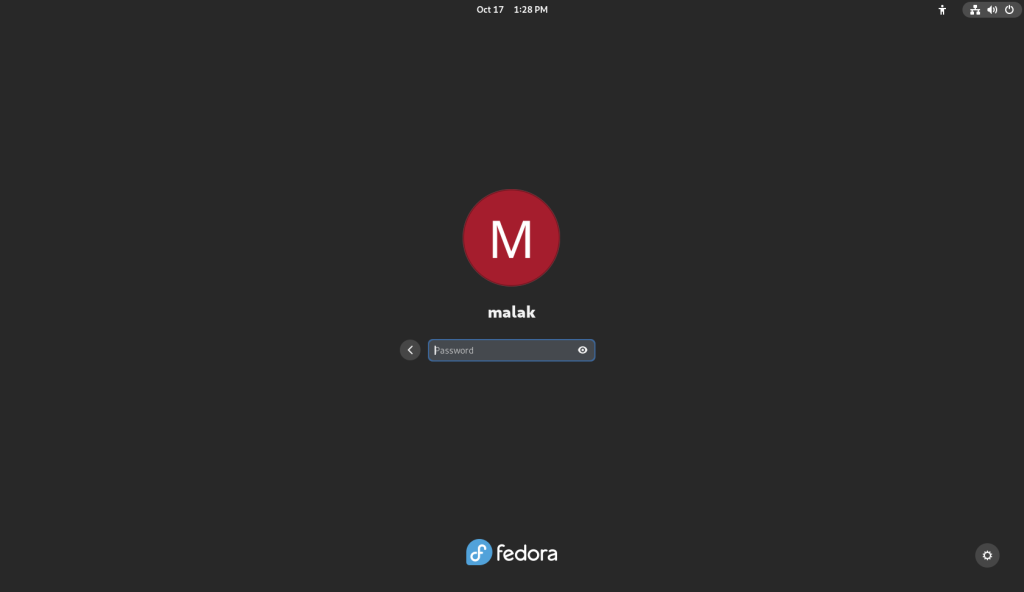
… where I entered my password:
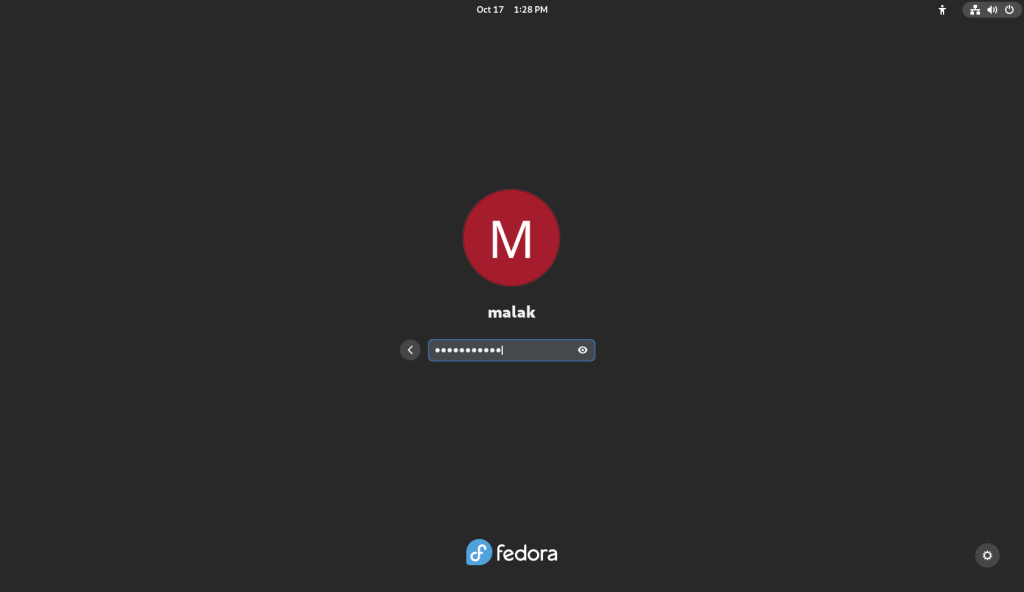
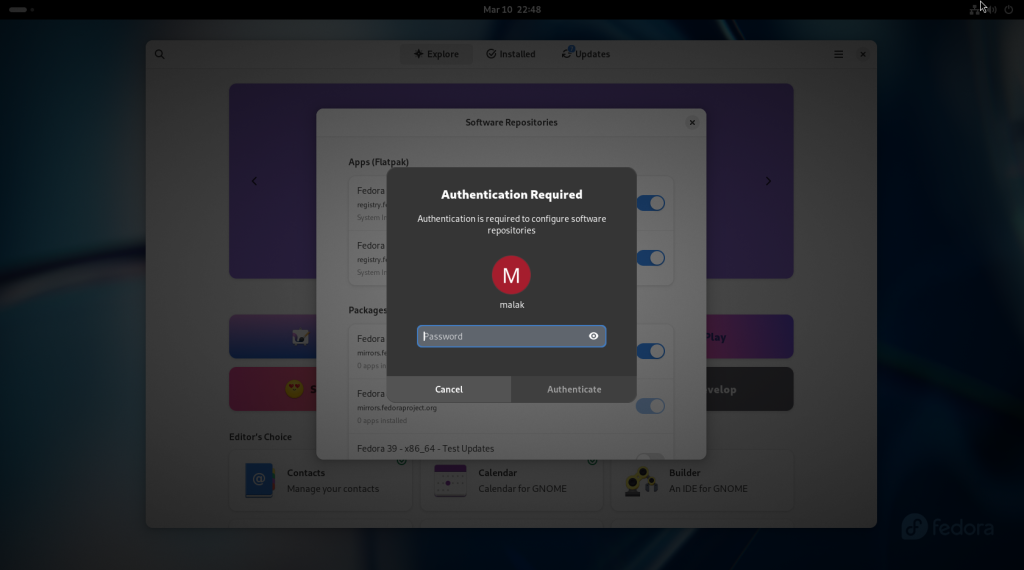
Password challenge
Once logged in, I clicked on the software icon again in the dock, and chose to download the upgrades for Fedora 40:
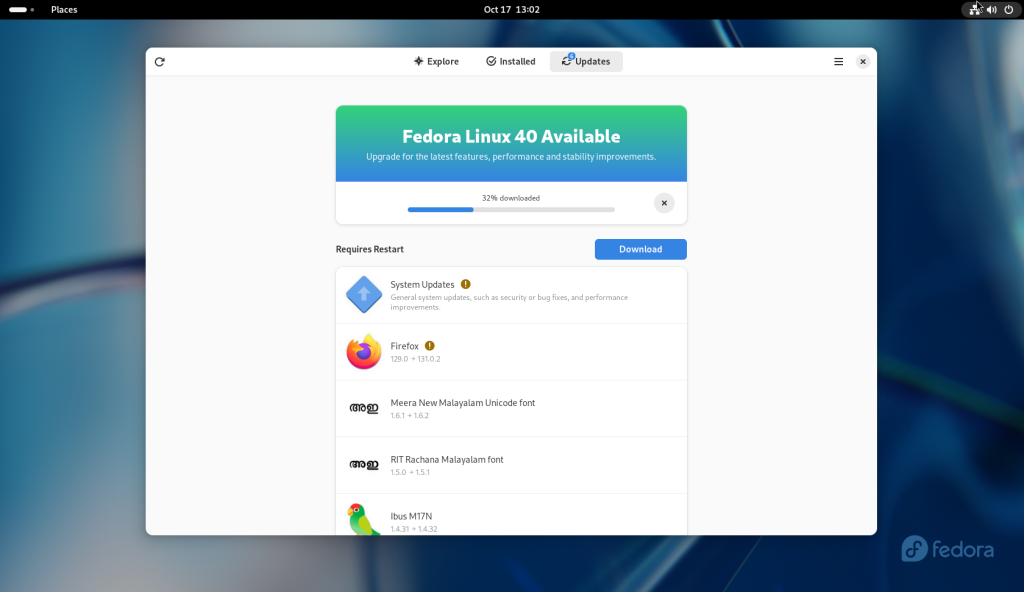
Software store opened again, and upgrade packages downloaded (2%)
Upgrade packages downloading (19%)
Upgrade packages downloading (32%)
Upgrade packages downloading (56%)
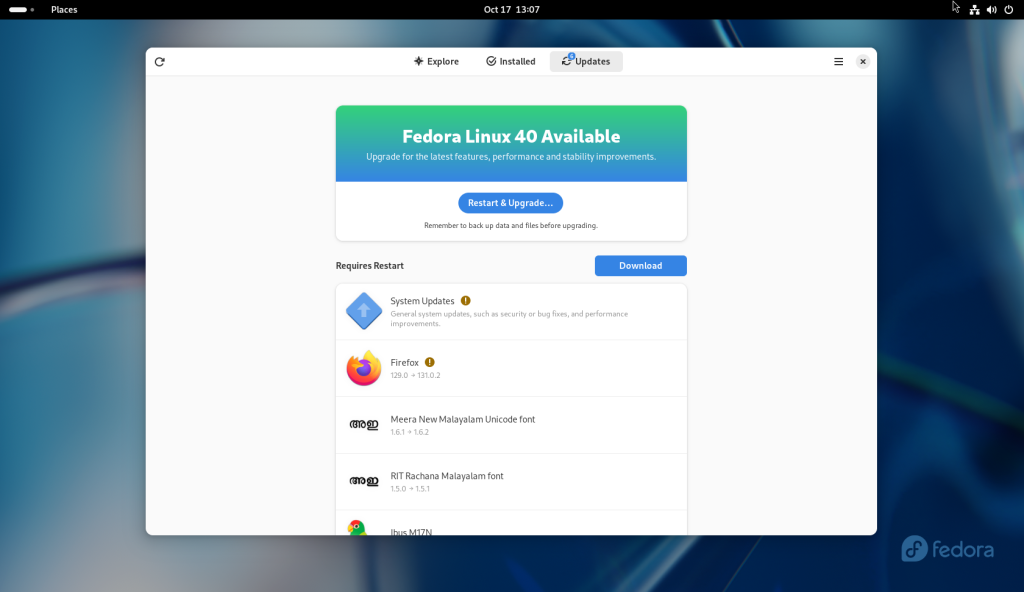
Once the upgrade packages were downloaded, the “Restart & Upgrade” button was pressed:
All packages downloaded, and Restart and Upgrade button pressed
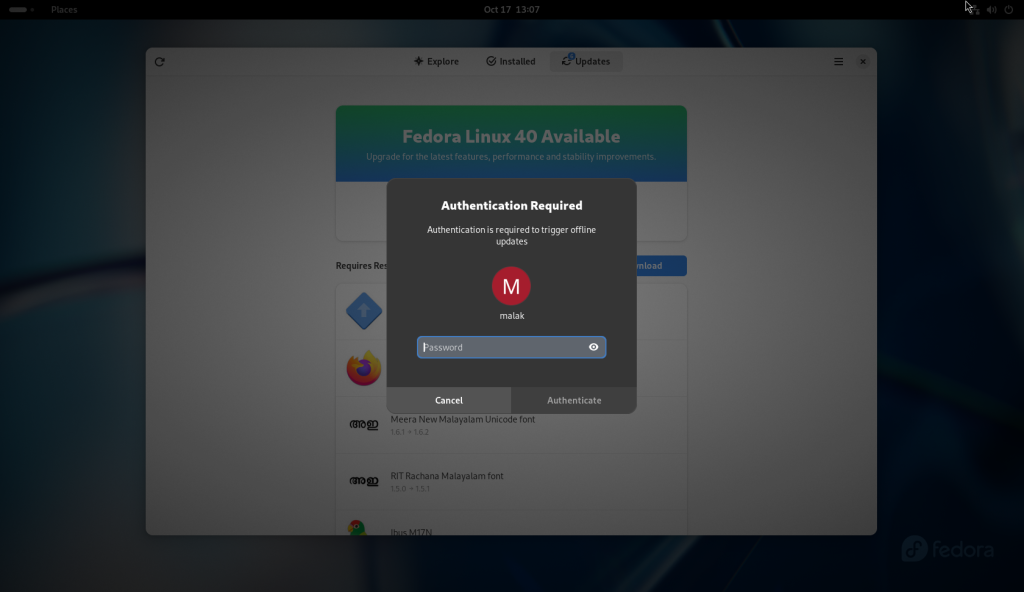
… which required authentication, so my password was entered:
Authentication required for the major changes
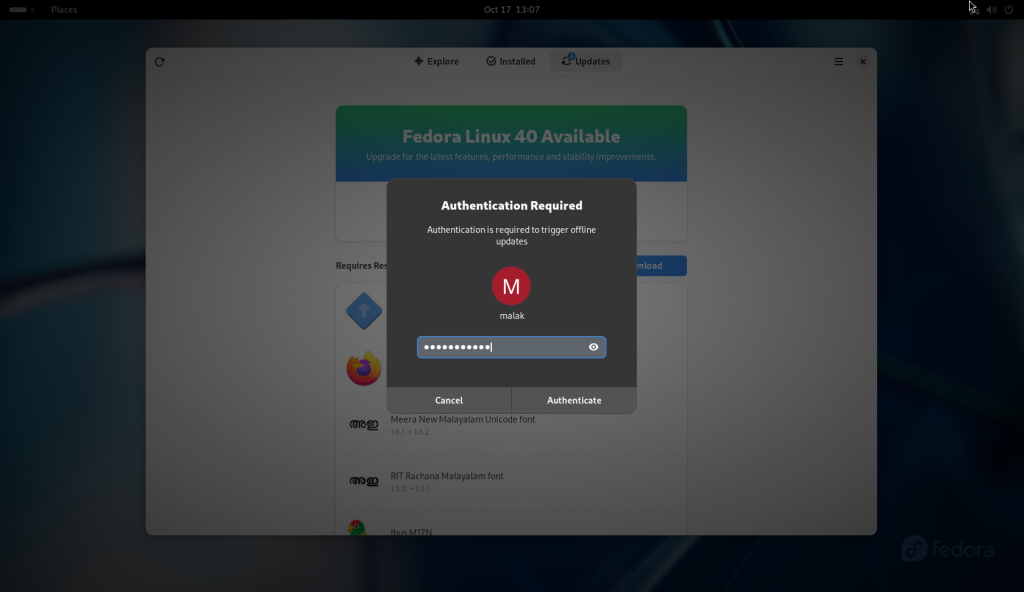
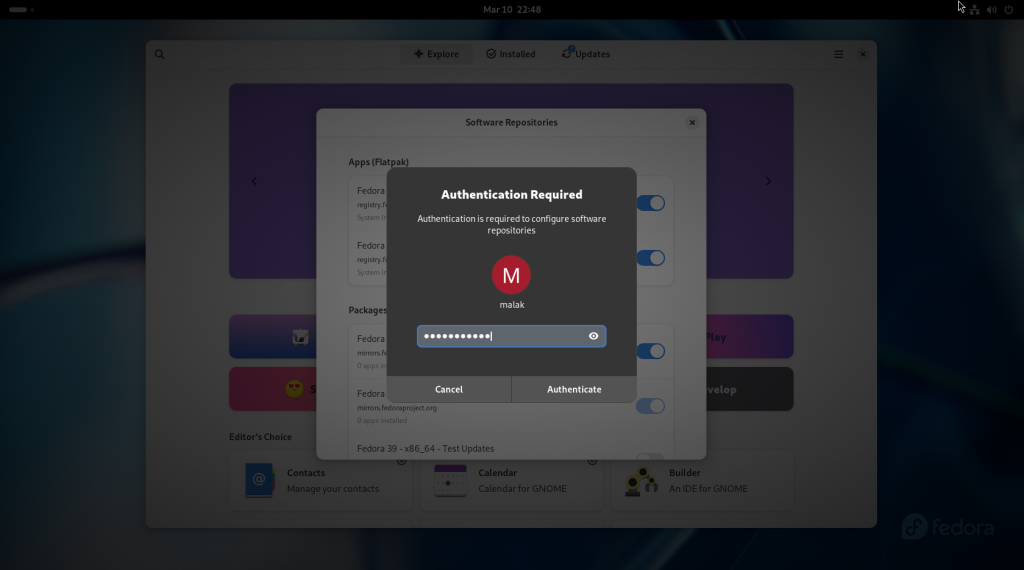
Password entered
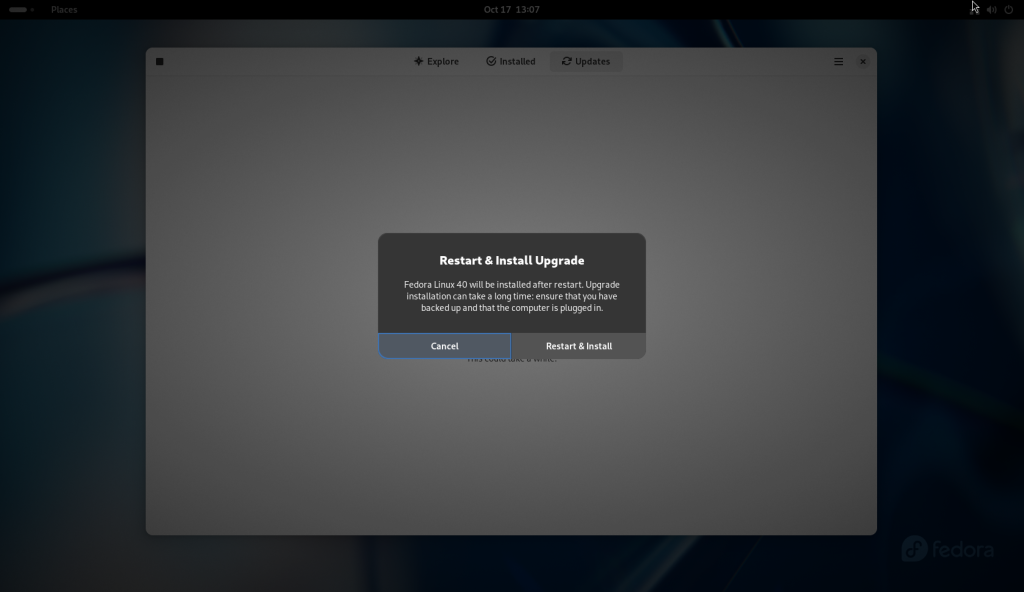
The system asked again if I wanted to restart and Install the upgrade:
Confirmation requested to restart and upgrade the system
The “Restart & Install Upgrade” button was pressed:
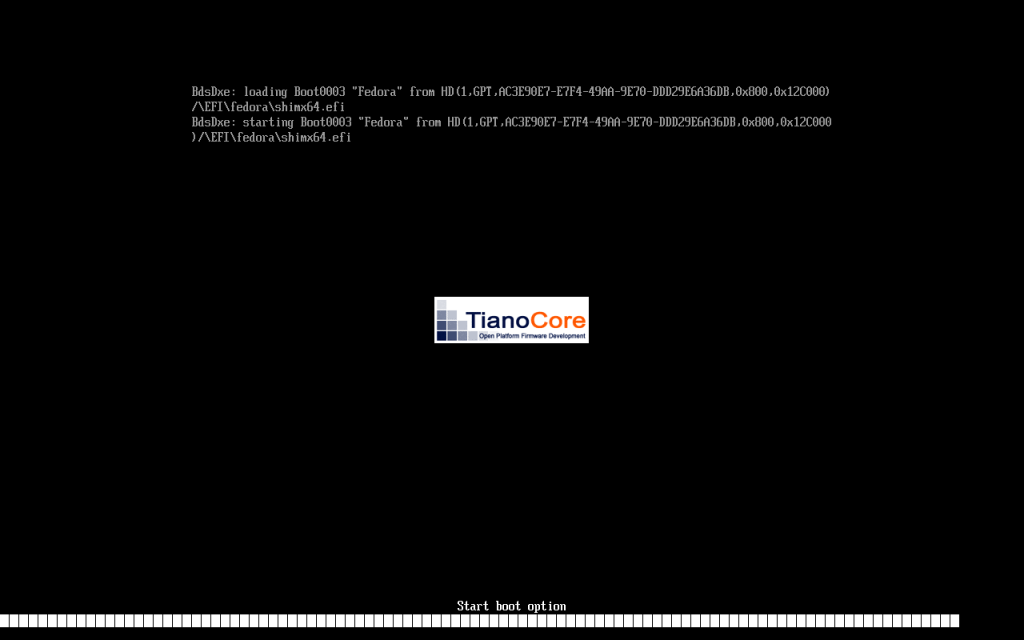
System rebooted
System rebooted
Updates installing (3%)
Updates installing (14%)
Updates installing (39%)
Updates installing (52%)
Updates installing (59%)
Updates installing (77%)
Updates installing (93%)
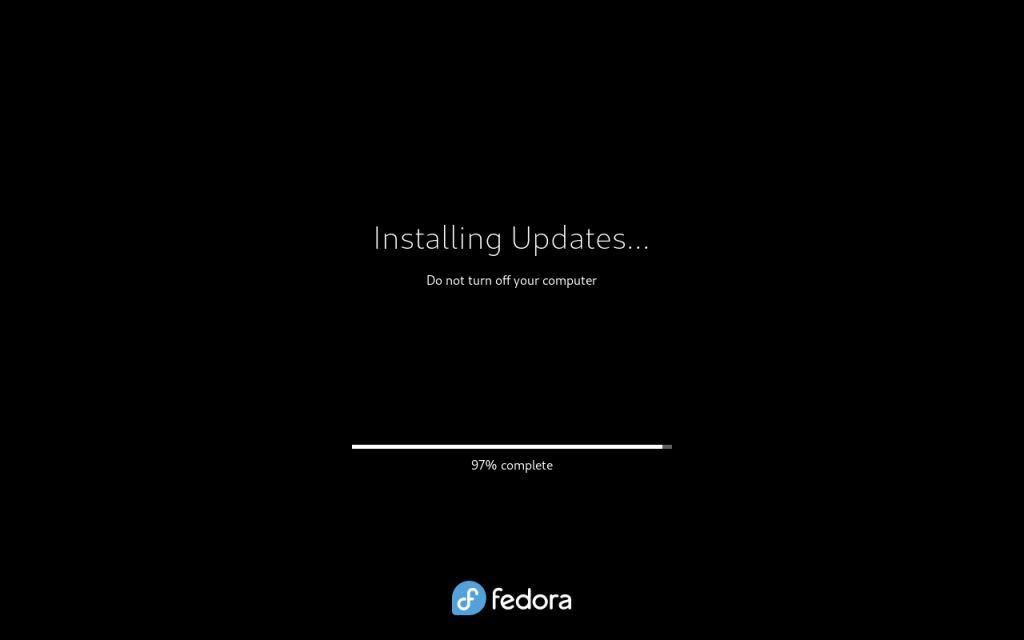
Updates installing (97%)
Once the upgrade was complete, the computer rebooted:
System rebooted after upgrades applied
The login screen came up again:
Login screen
And again I provided my password:
Password challenge
Password entered
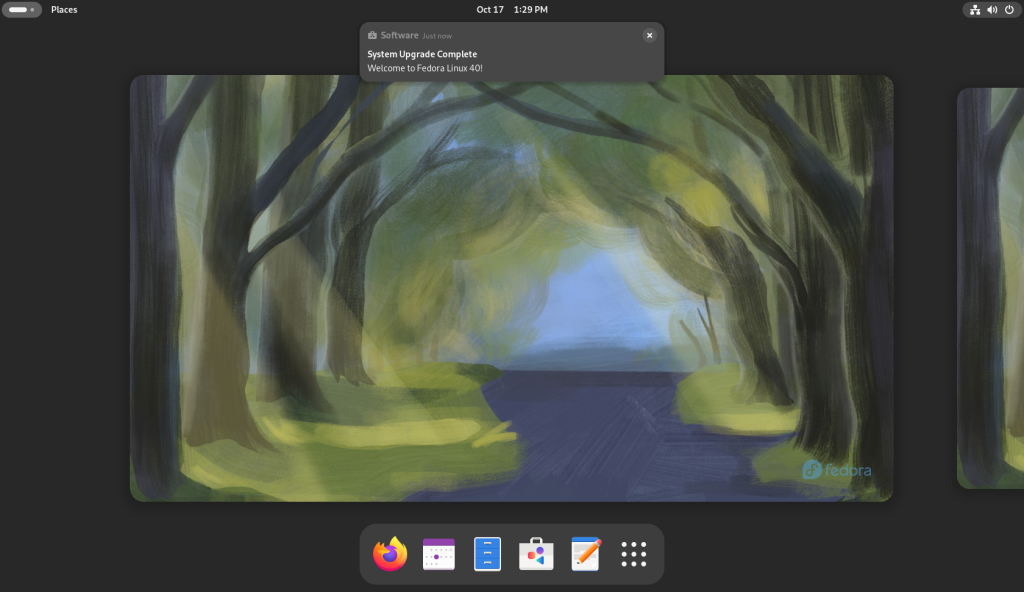
Once logged in, new artwork for the new version came up, as well as a notification that the system had been upgraded to the new version (in this case, Fedora v.40):
New artwork for Fedora 40
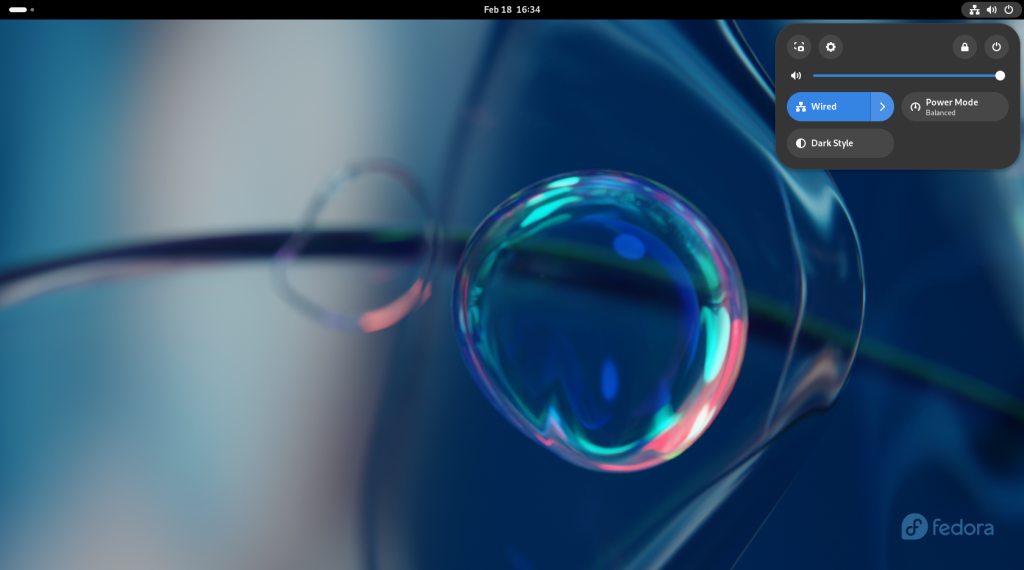
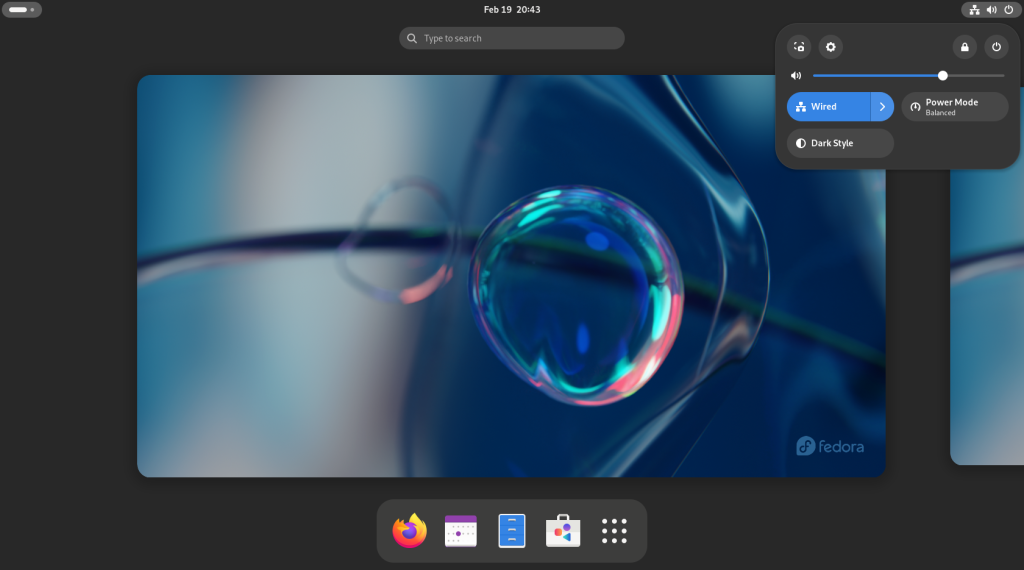
Just to finish off some checks, the menu at the power button was opened, in order to open the settings screen, accessible from the little gear second from the left on top:
Menu for settings opened
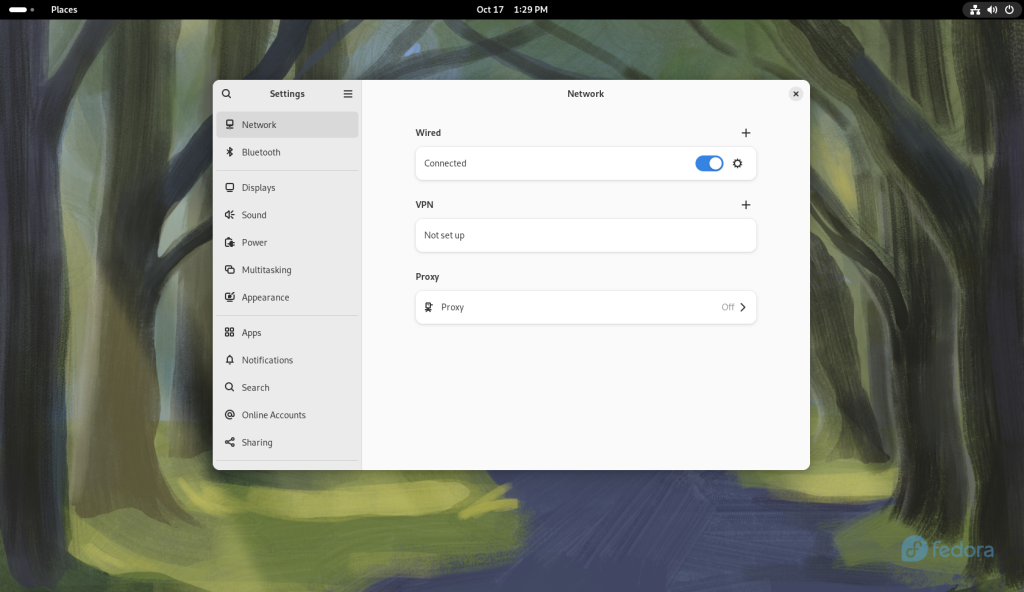
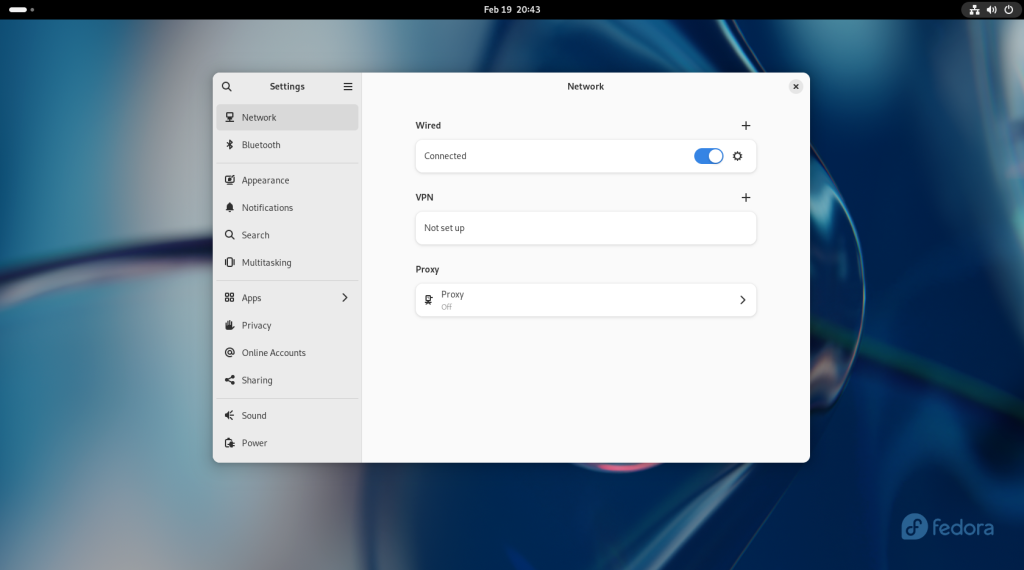
The settings were opened:
Settings opened
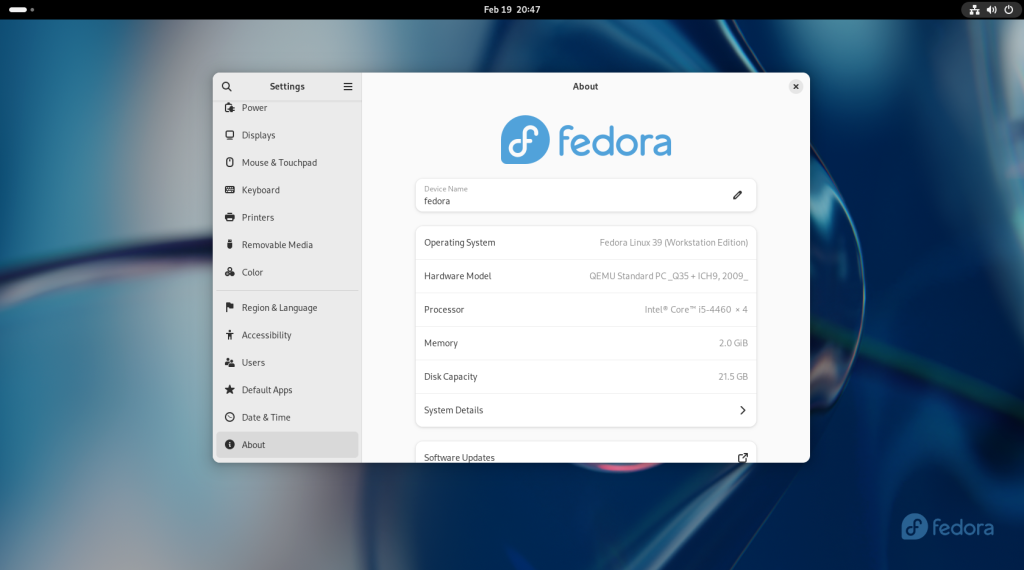
I noticed that the name of my computer was curiously changed back to “Fedora” in the upgrade:
System renamed after curious change by upgrade
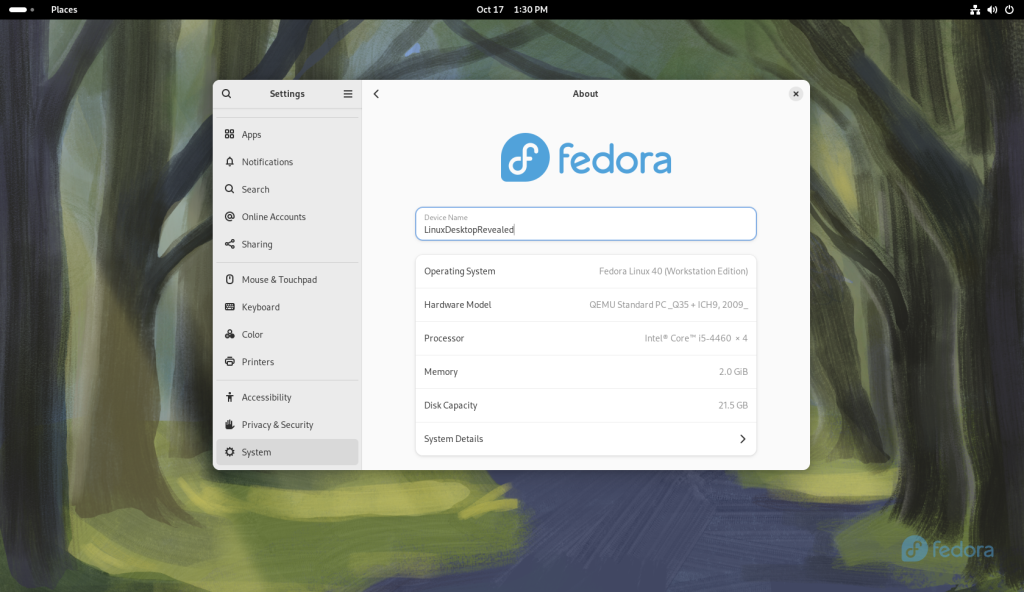
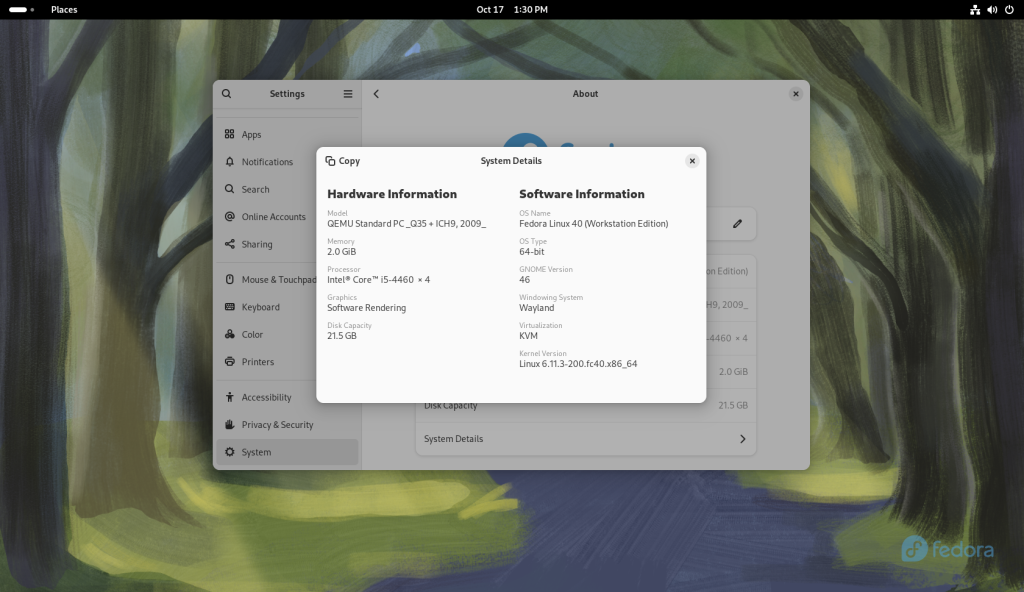
Then I chose the “System Details”, showing that the system had indeed been updated to version 40:
Confirmation that the system had been upgraded to Fedora 40
Next chapter: Using common pieces of desktop software
In this chapter, Gnome Extensions will be briefly discussed, and basic file transfers and manipulation will be highlighted.
Gnome Extensions
Gnome was designed to be extensible, or have its behaviour be changed with extensions. There are hundreds of extensions, most produced by volunteer programmers.
Launch Firefox from the dock at the bottom of the screen (the icon at the left). Firefox will launch, leading to the Fedora Project main page (a setting you may wish to keep, or change at a later time.)
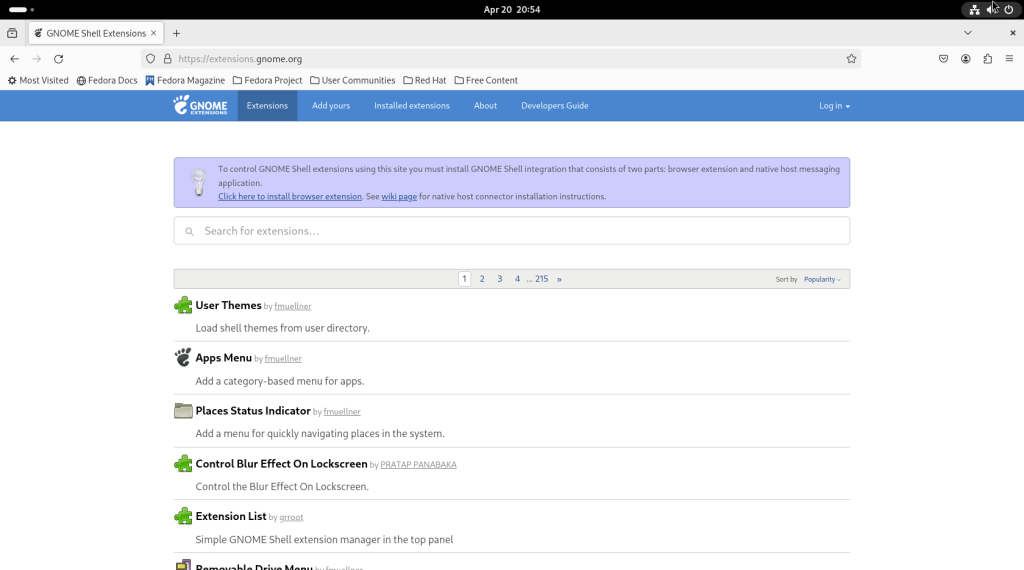
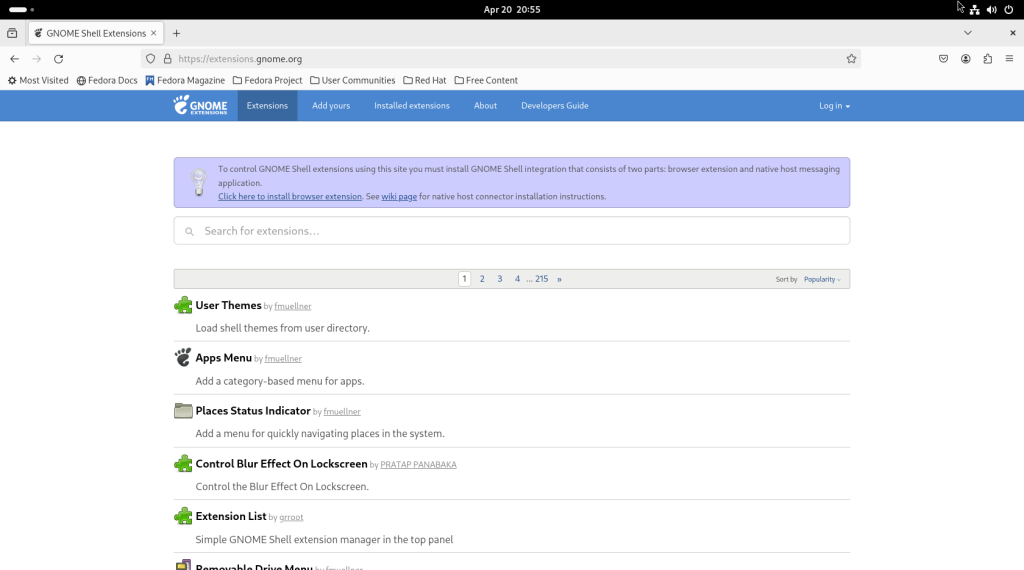
In the navigation bar, enter the site https://extensions.gnome.org. (Some distributions may manage extensions locally; Fedora has opted to only do so partially.)
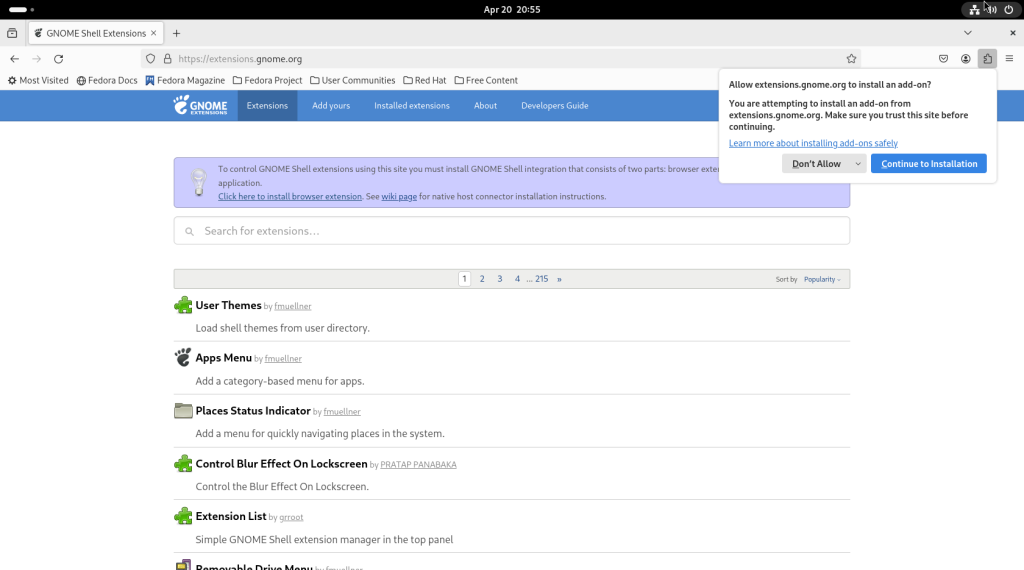
Click on the link “Click here to install browser extensions”, which will eventually allow for the installation of the Gnome Shell integration tool.
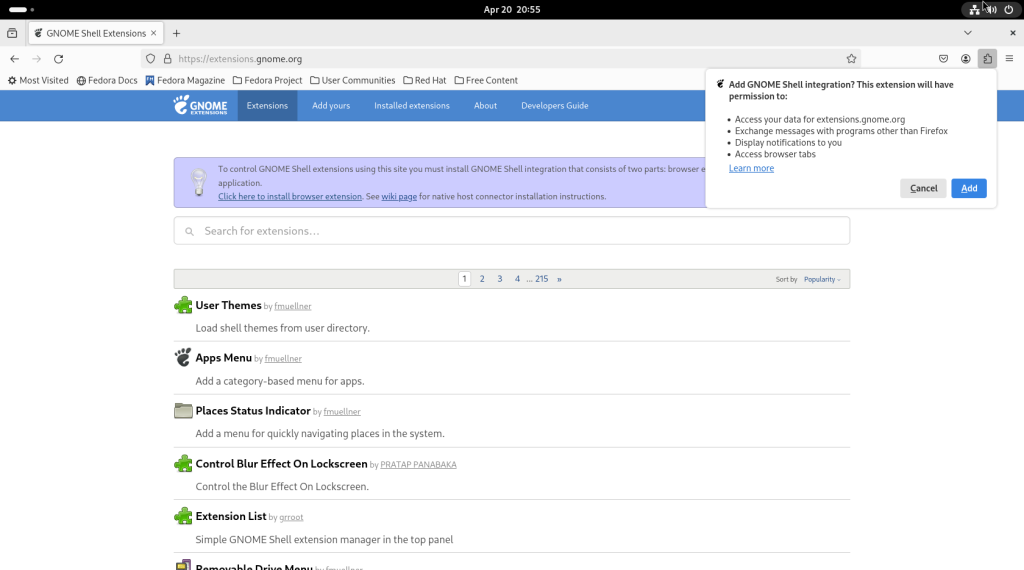
Click on “Add”:
I recommend that you click on “Allow this extension to run in Private Windows” and press “okay”.
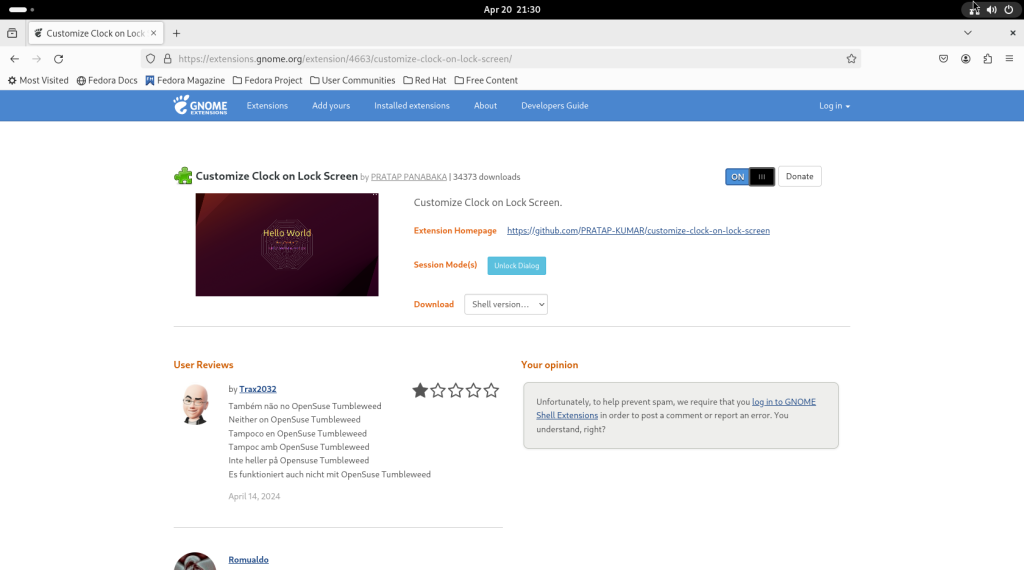
As of when the following screenshot was taken, here is page one of the available extensions, along with a brief description:
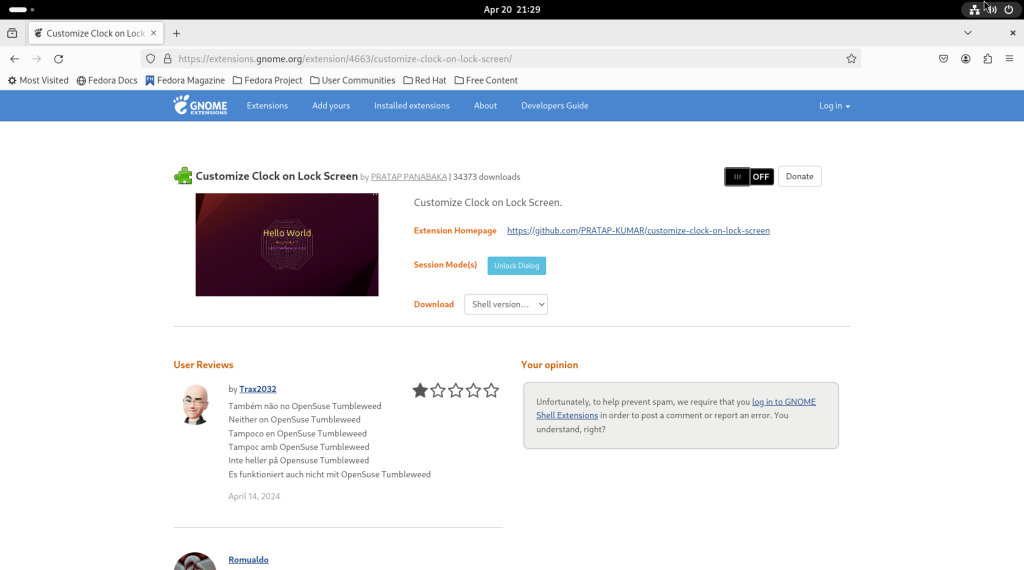
To install an extension that interests you, click on the black switch that will be set to “Off”.
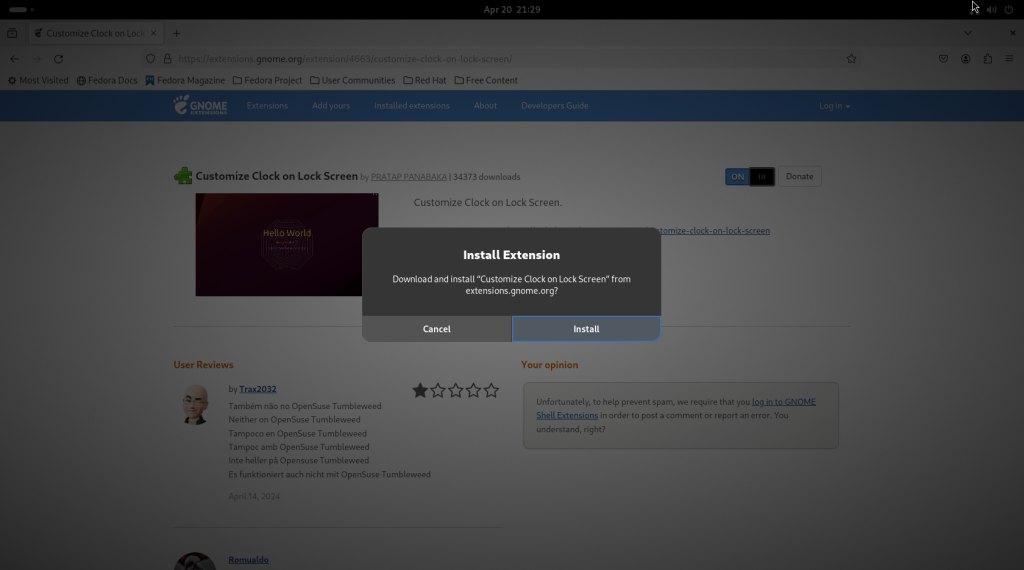
Click on “Install”:
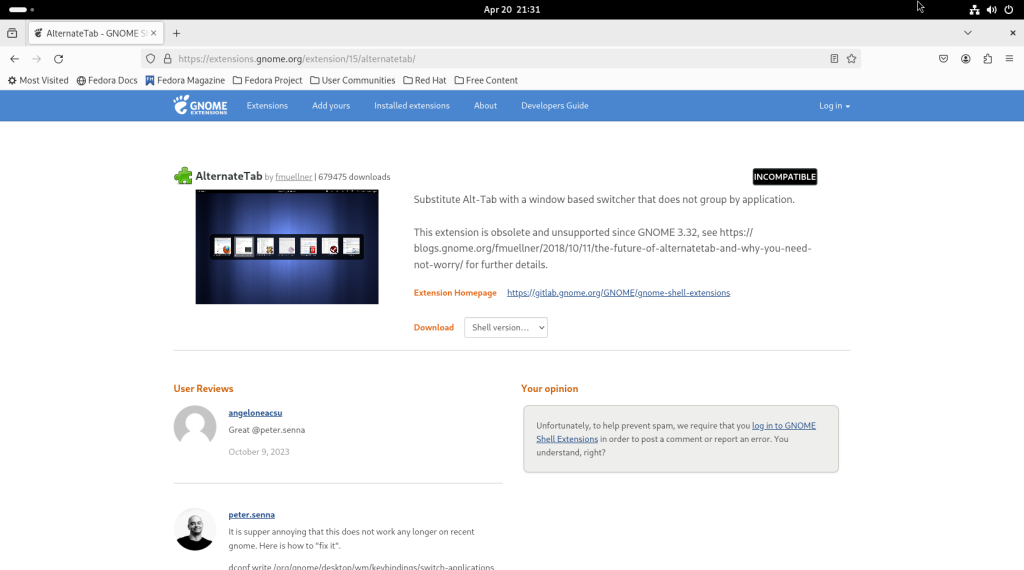
Sometimes, an extension will be incompatible with the current version of Gnome, and the page will say as much:
When you have selected all the extensions which interest you, close Firefox:
Basic file manipulation:
Starting from the main screen, click on the activities bar in the upper left hand corner:
… leading to the activities screen, with the dock:
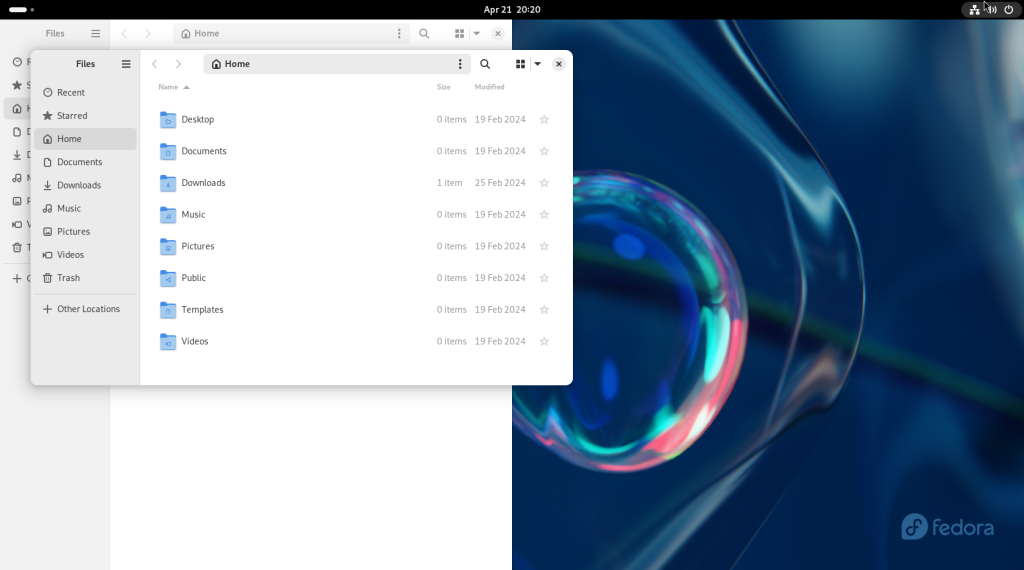
Click on the blue rectangle meant to resemble a filing cabinet, in the centre.
For convenience, I moved the window to the left, and it “snapped” to take up half the screen:
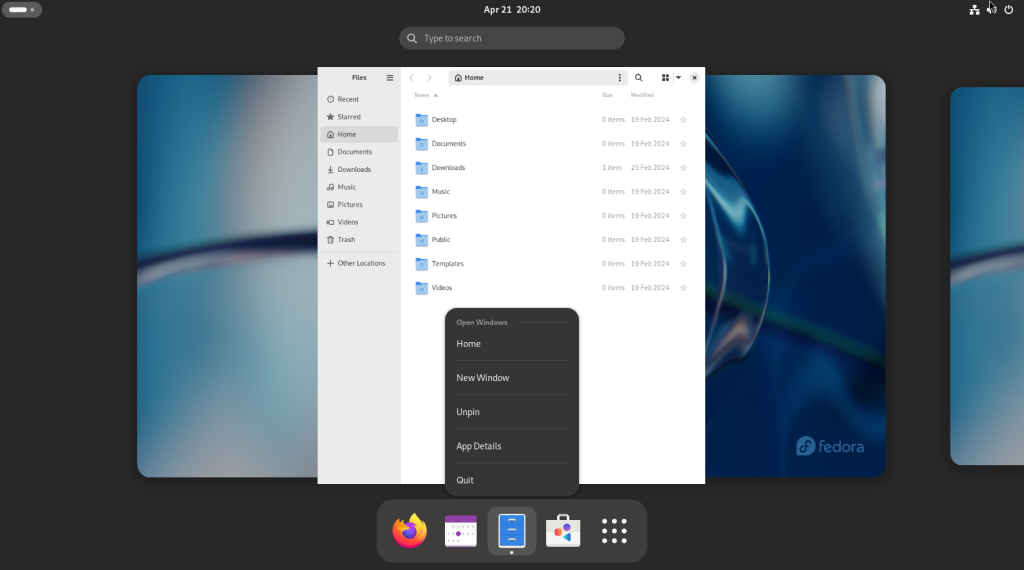
The activities screen was accessed again, to access the dock, and right-clicking on the file manager icon:
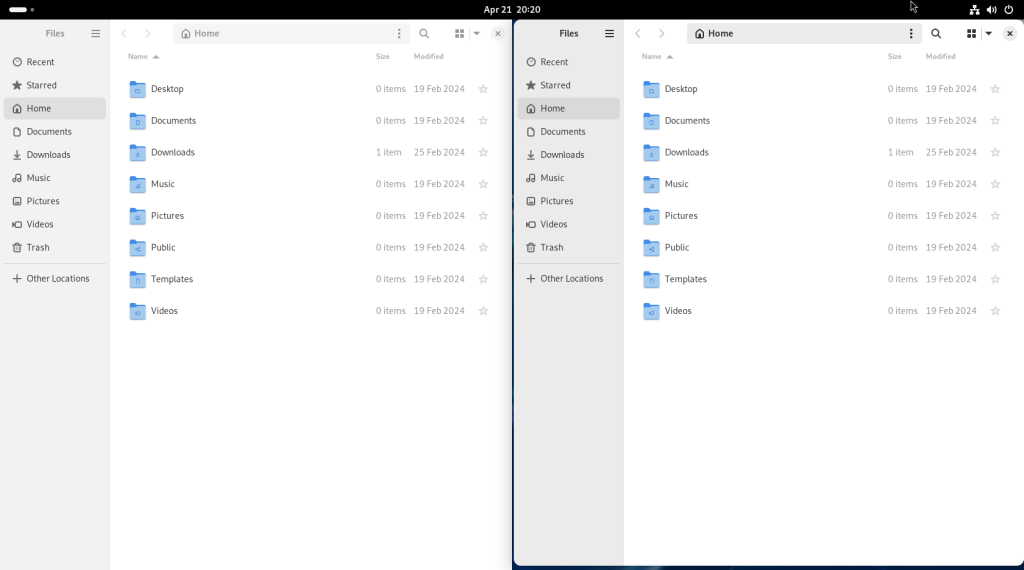
Choose “New Window”, in order to launch a second file manager window:
The size and location of the second window were adjusted in order to have a second window on the right:
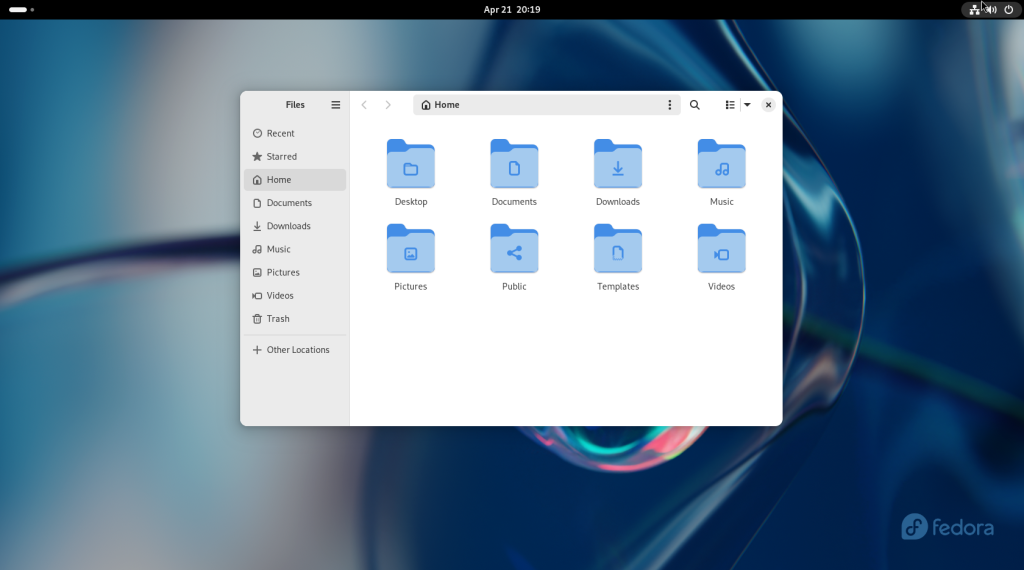
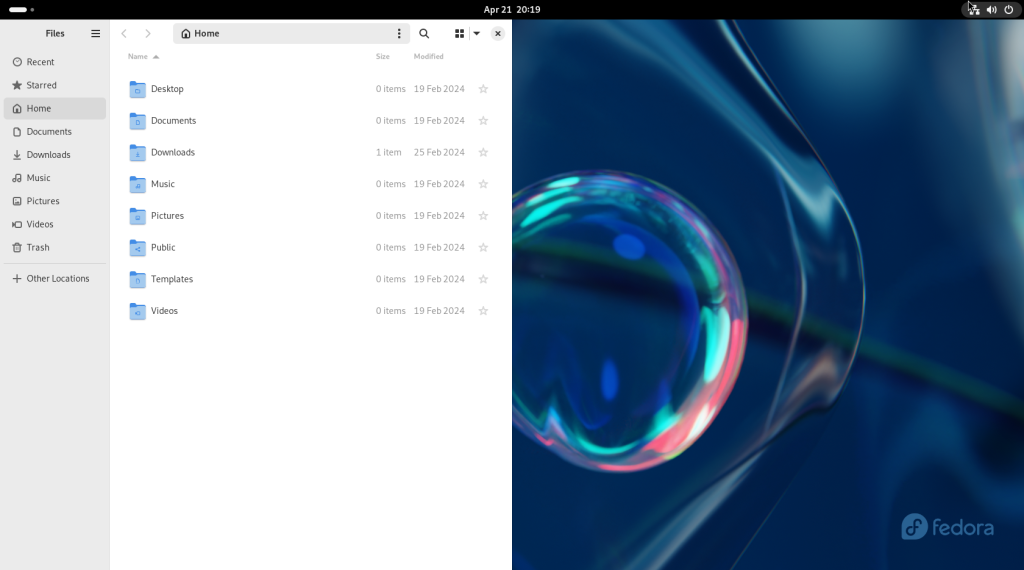
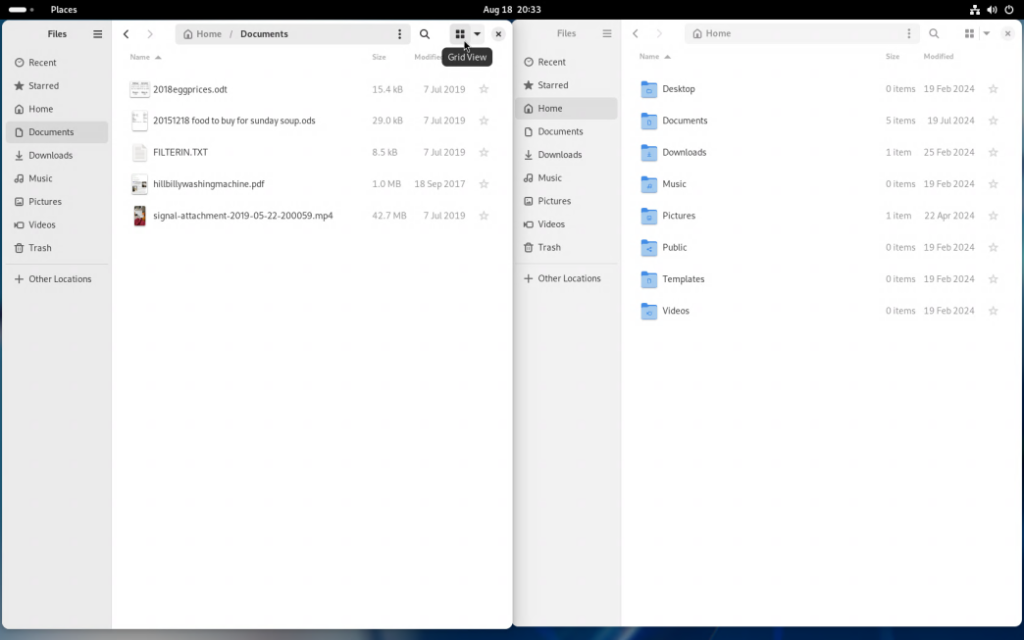
Before moving on, I am going to point out that I personally like file listings with full information; however, files can be displayed with previews (the following shots were taken after the following operations were completed):
By hovering the pointer over a button with four blocks in it, you can toggle between lists and icons:
Clicking on the icon will change the filenames to icon size:
Hovering over the same square icon can revert to a list view.
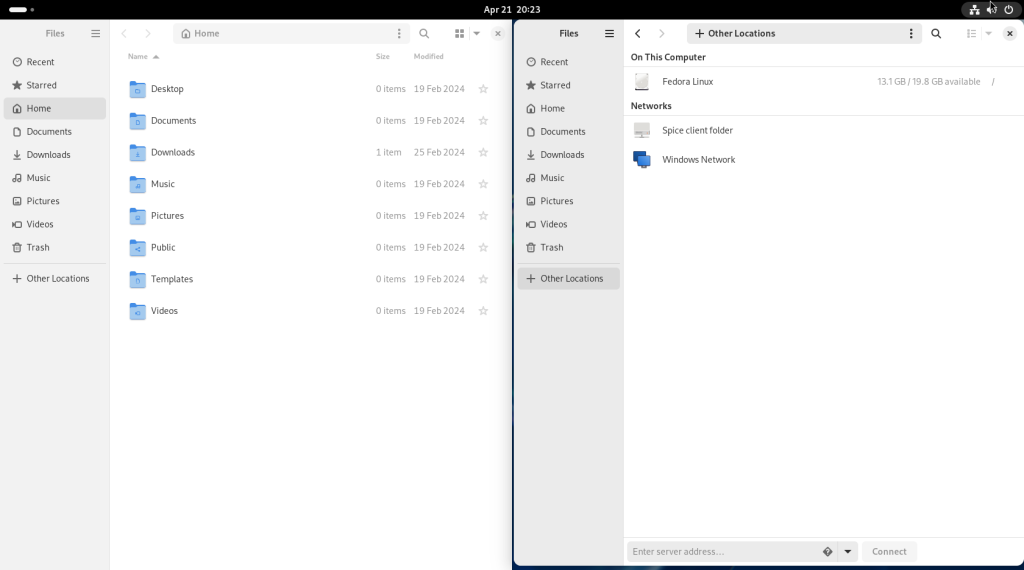
At this point, you can insert a USB key with some files or a backup, or a CD/DVD drive, or a portable USB hard drive.
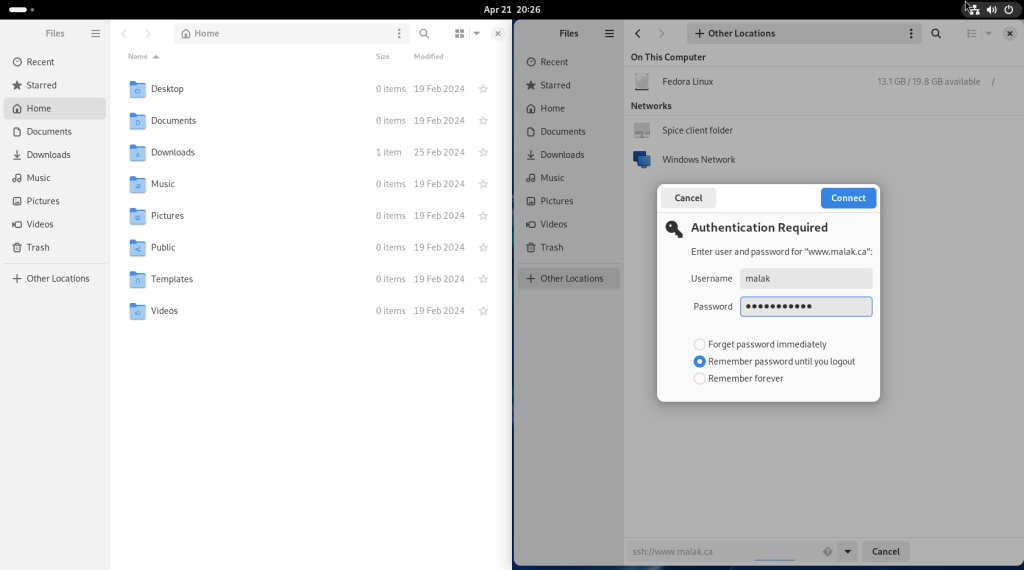
In this case, I decided to copy some files from the computer hosting my website, and some file backups. Clicking on “+ Other Locations” reveals, as per the window on the right, access to other computers accessible to your computer:
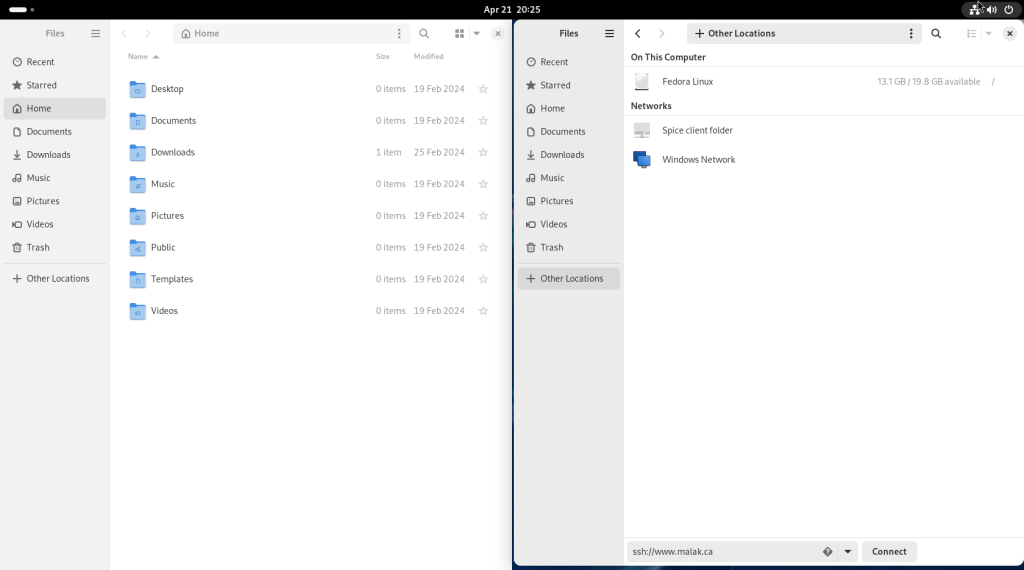
I entered into the address bar at the bottom of the window the address of my website, and telling the file manager to use the ssh protocol to securely access the location:
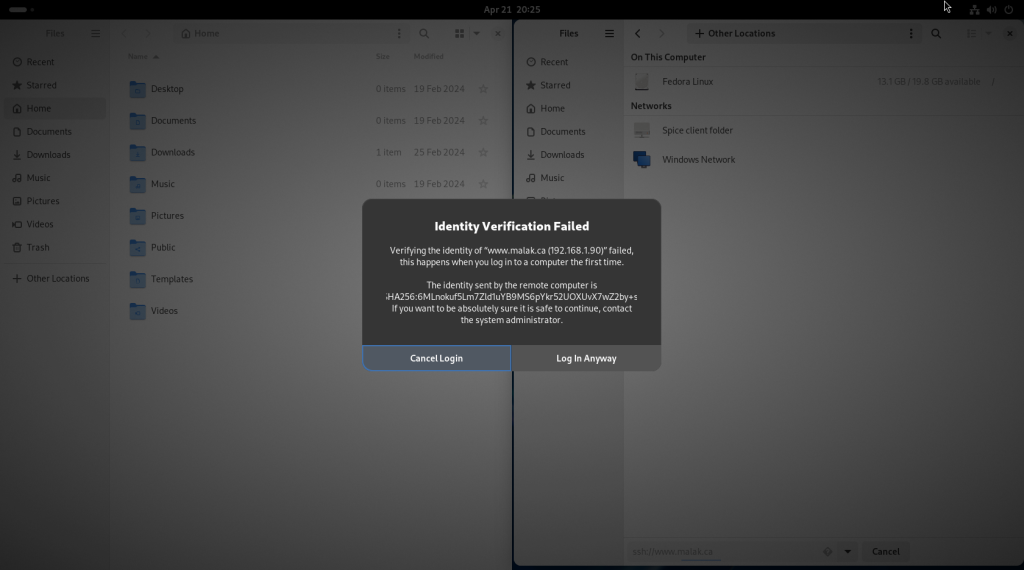
As part of the initial connection, my computer asked me to confirm if I wanted the connection, since it was the first time this instance was connecting to my website. Should you get such a challenge, click on “Log In Anyway”:
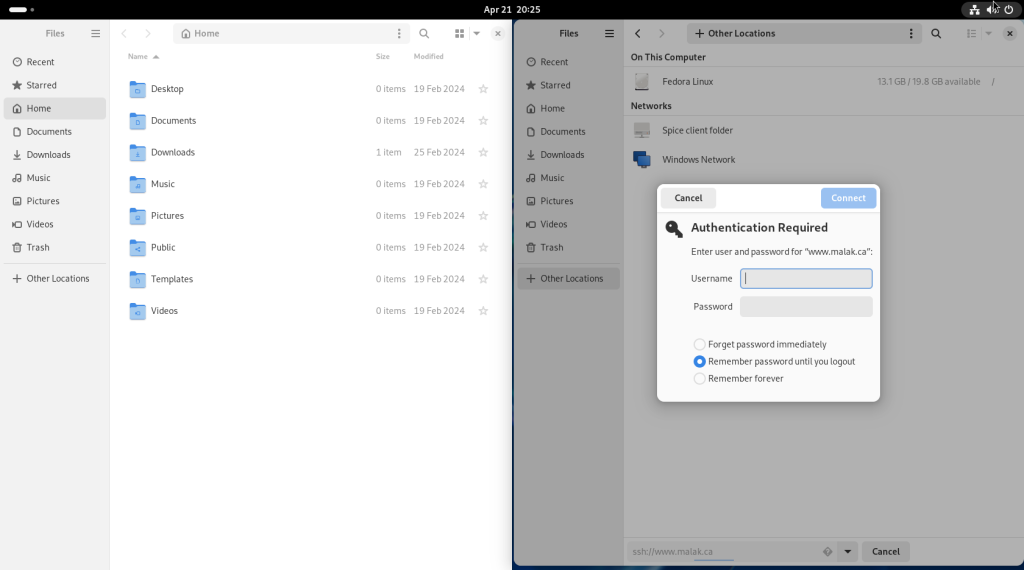
My website server presented an authentication challenge:
I entered my username and password, chose “Remember password until you logout”, and clicked on “Connect” (you may choose either of the two other options, at your discretion):
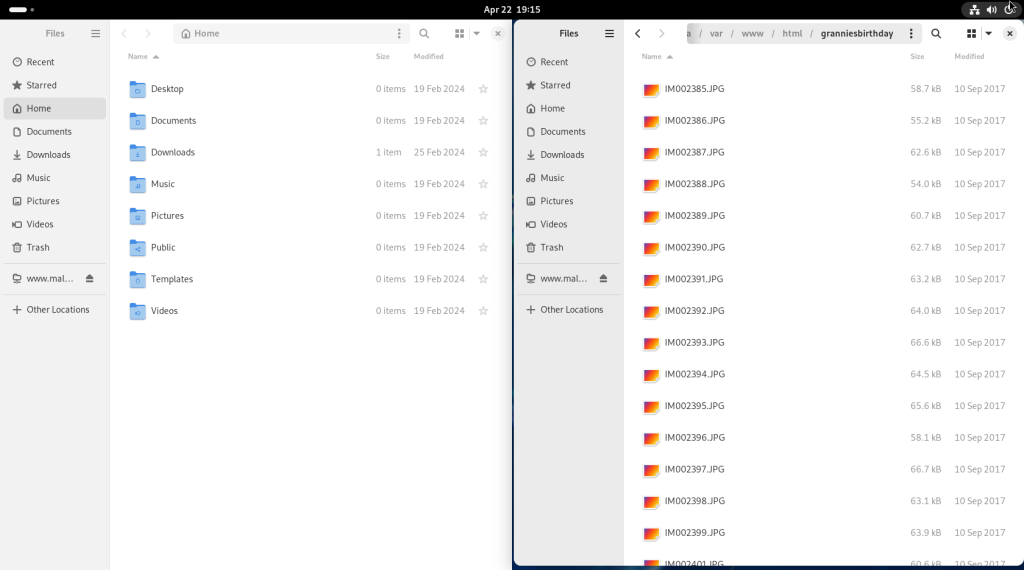
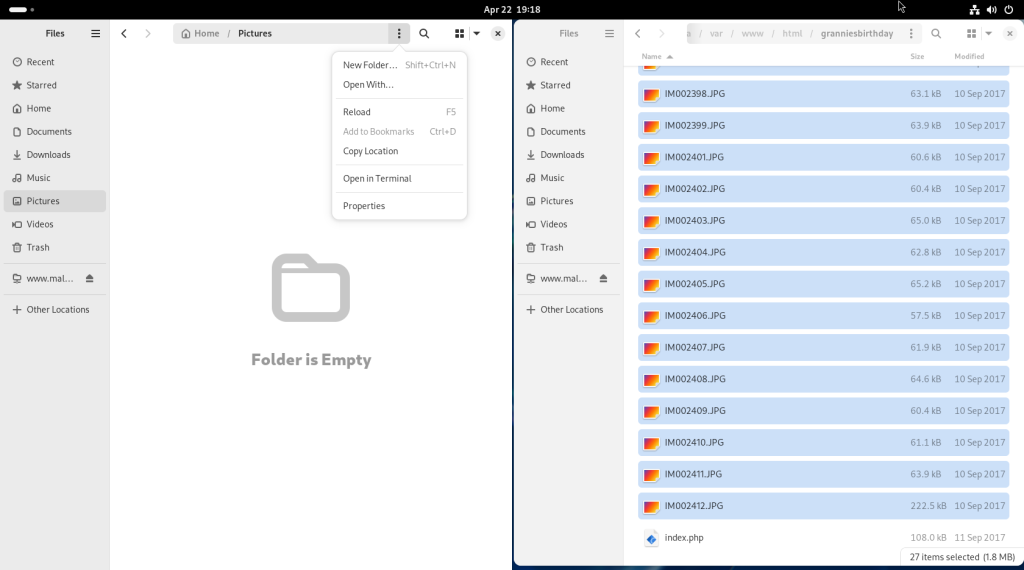
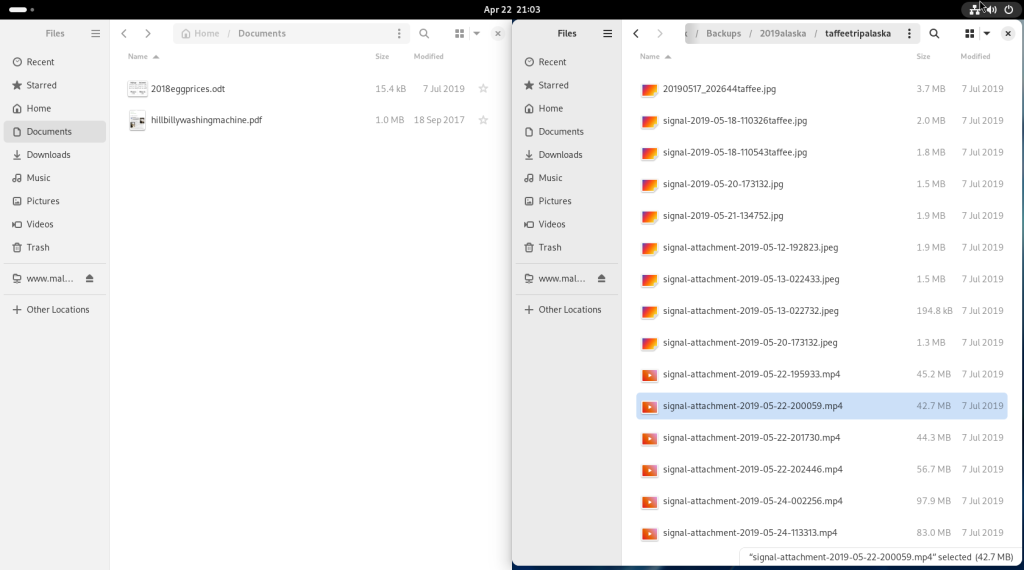
Once there, I navigated to a directory with some photos from a past birthday celebration for my grandmother:
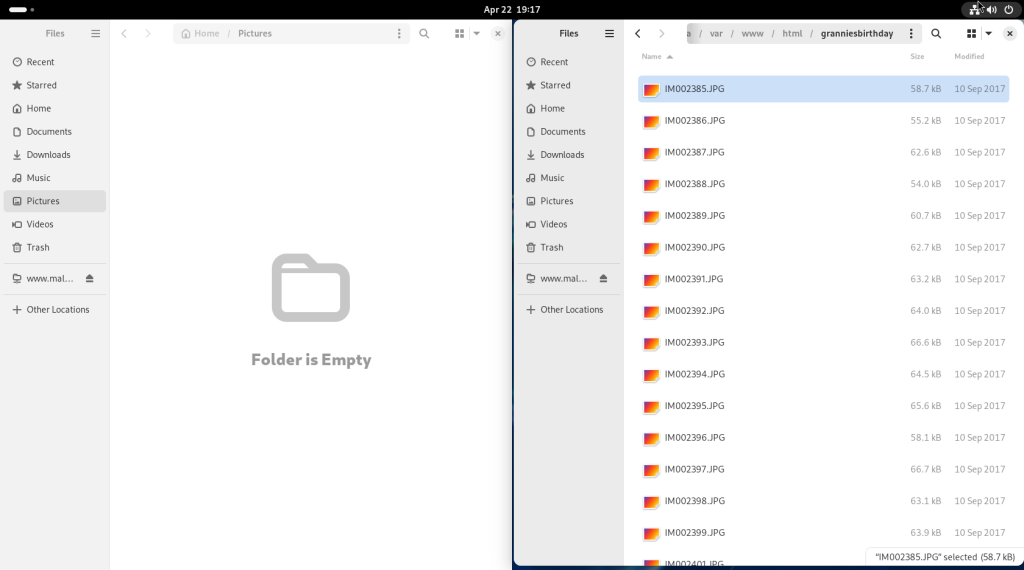
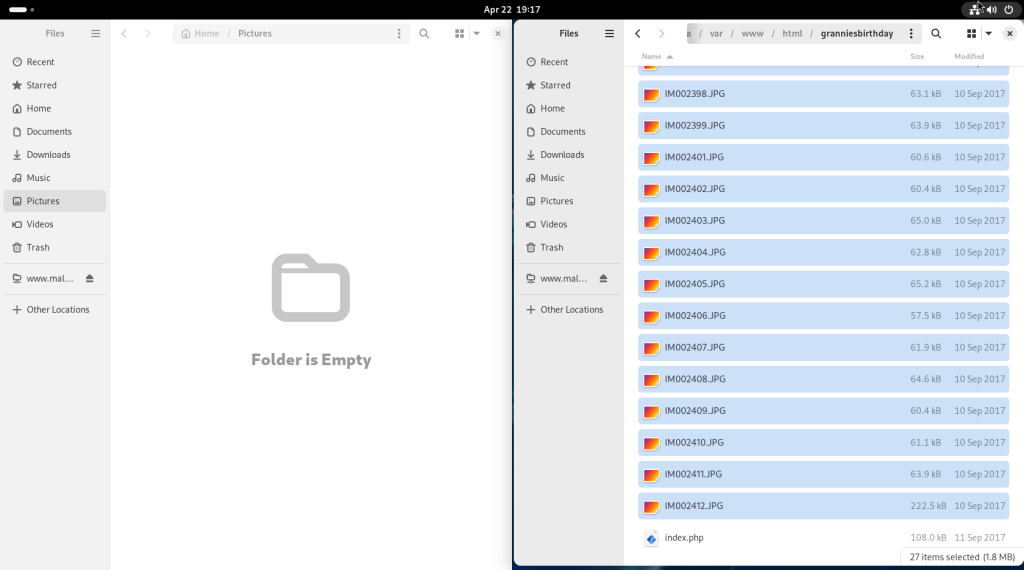
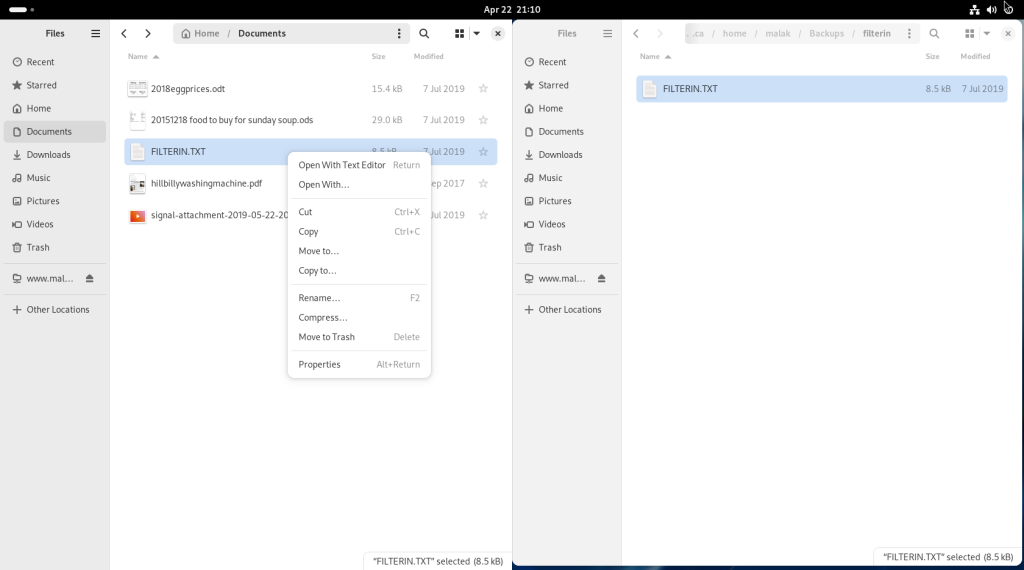
Wishing to copy all the files on my server (on the right) over to the computer (on the left), the first file was selected by clicking on it …
… and then scrolling down to the bottom of the file list, and while pressing on the CTRL key, clicking on the last:
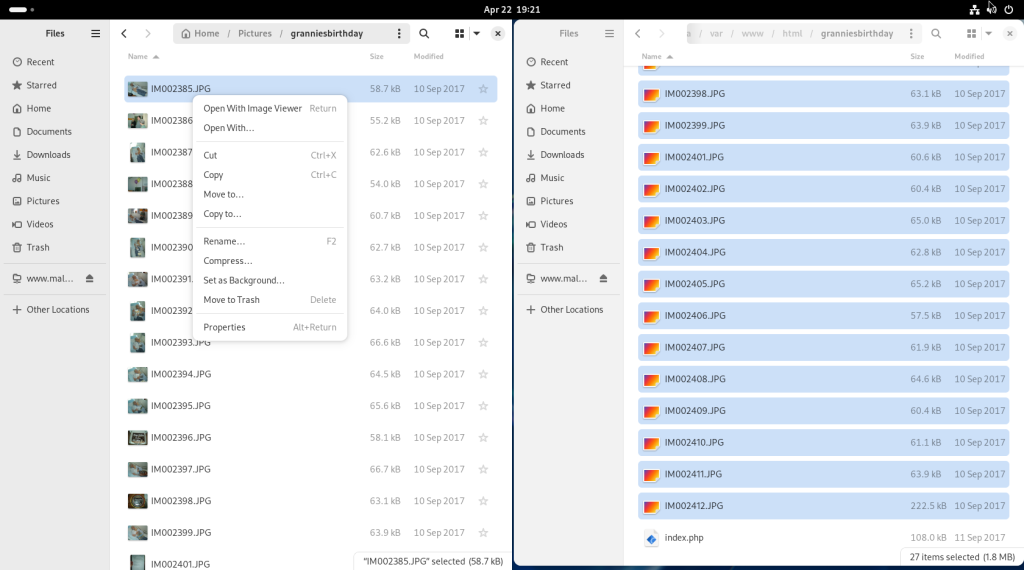
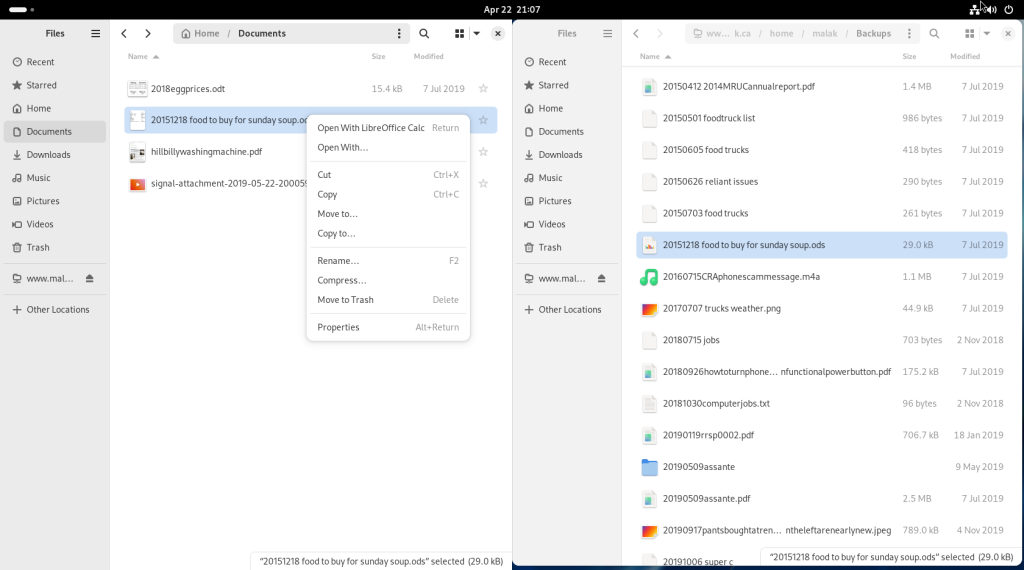
Instead of drag and drop, I right clicked my mouse over the right …
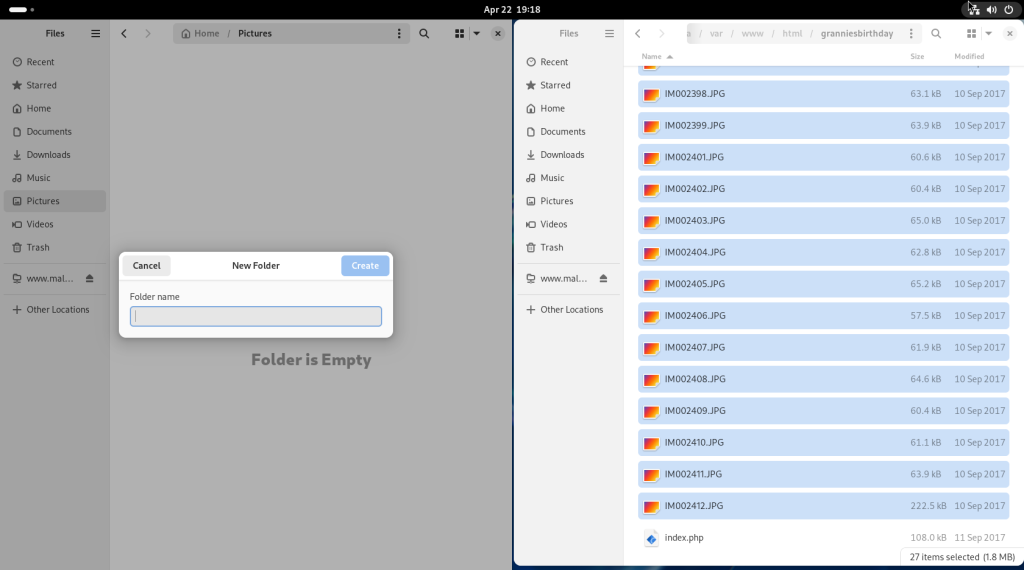
… which opened a contextual menu, in which I chose to create a folder, leading to the opening of a dialog:
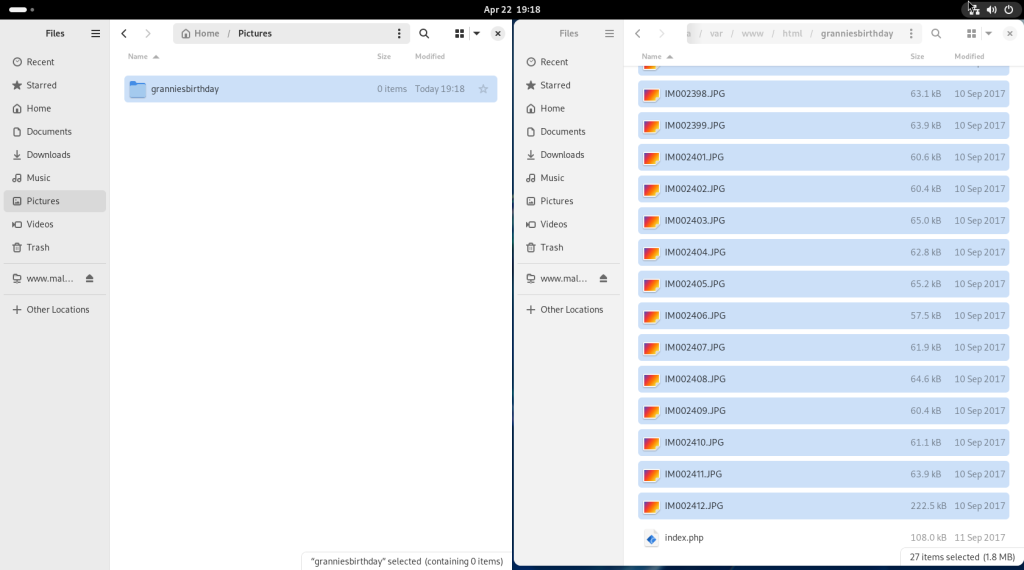
A name for a new directory, in this case reflecting that it was from my grandmother’s birthday one year, was entered into the dialogue, and the directory was created:
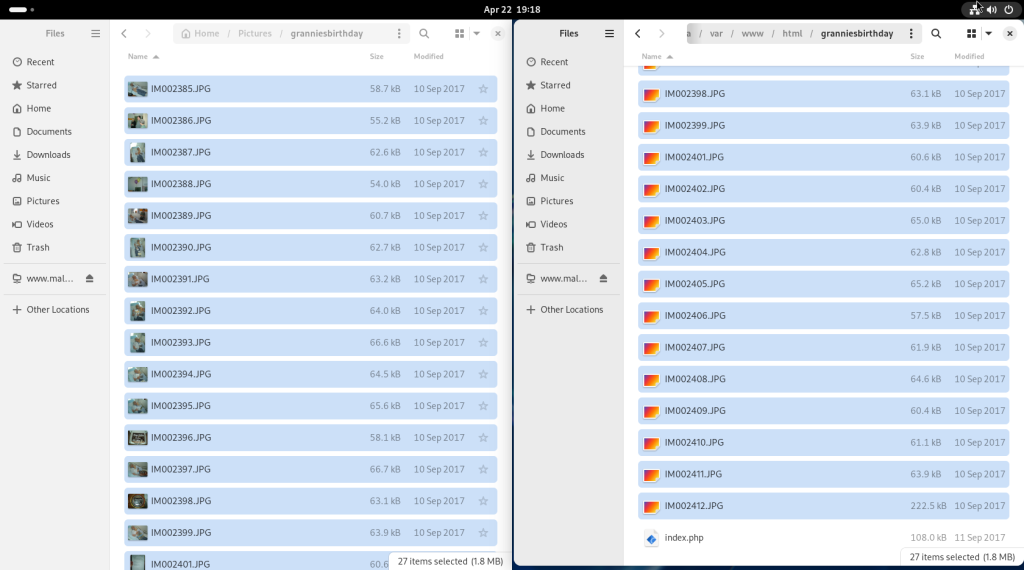
The previously selected files on my server were transferred via “drag and drop” to the newly created directory:
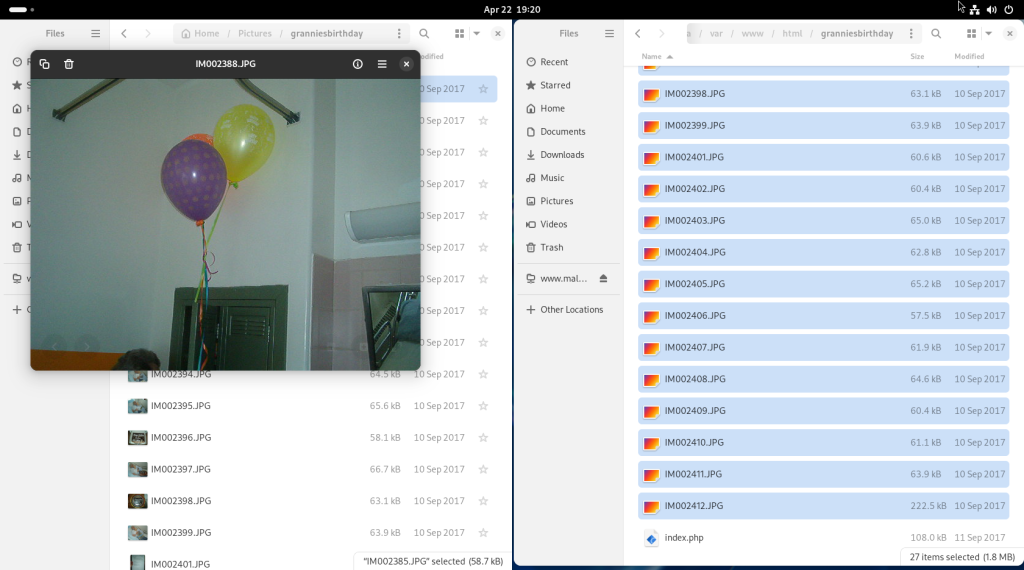
A photo was selected, and a right click opened a contextual menu, offering a number of options. The first, “Open With Image Viewer”, was selected …
… opening the selected photo.
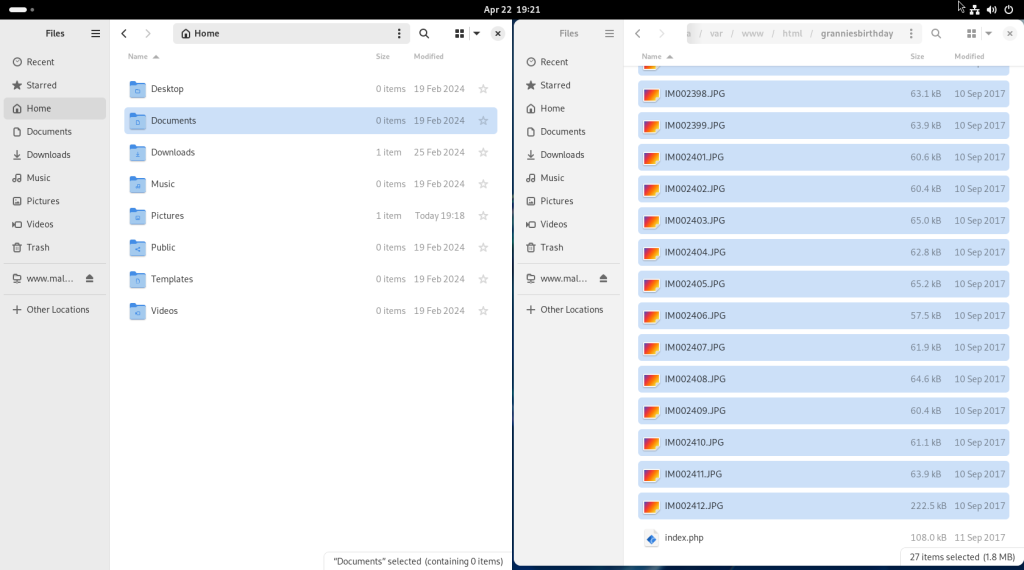
On the local machine, I clicked on “Home” …
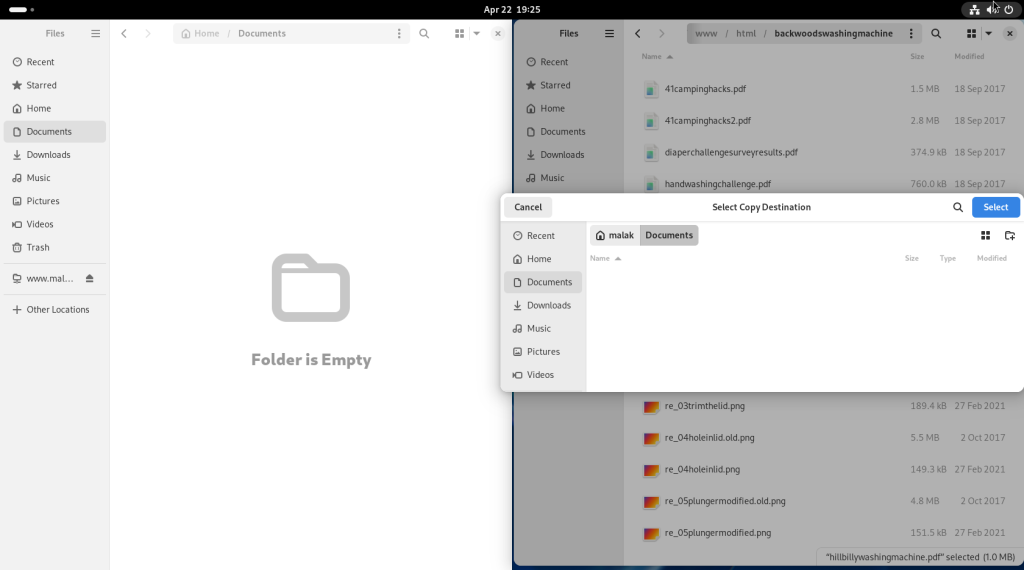
… then on “Documents”, while on my server, I navigated to another directory where I chose a PDF document:
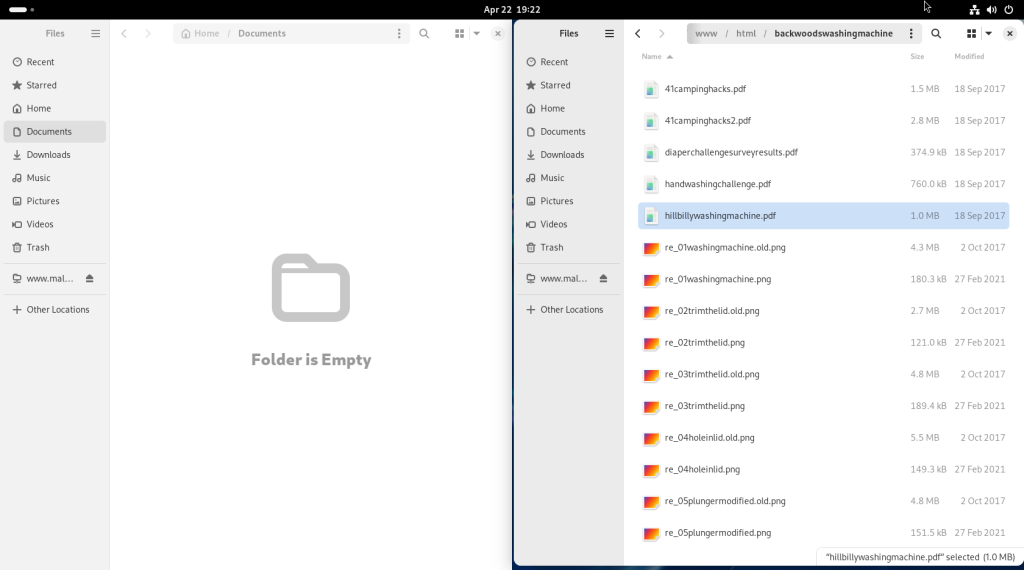
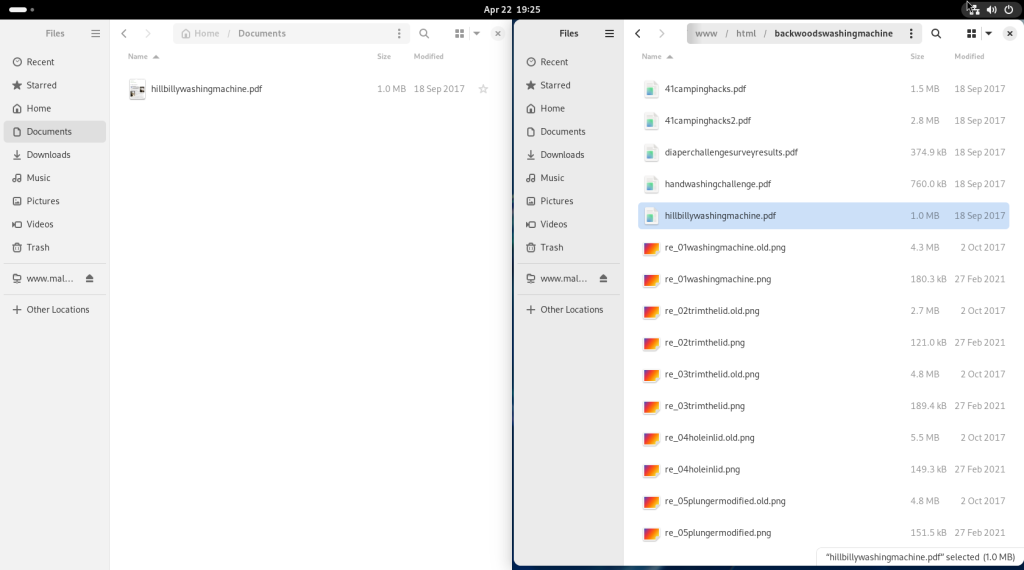
This time, I used a right-clicked contextual menu on my server side to chose “Copy To” to copy the document over to my local machine.
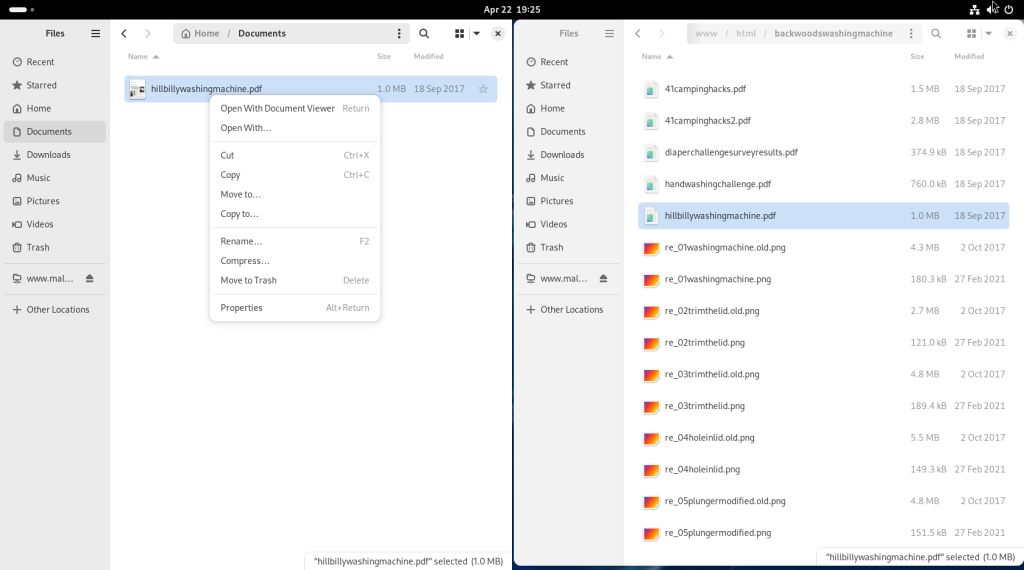
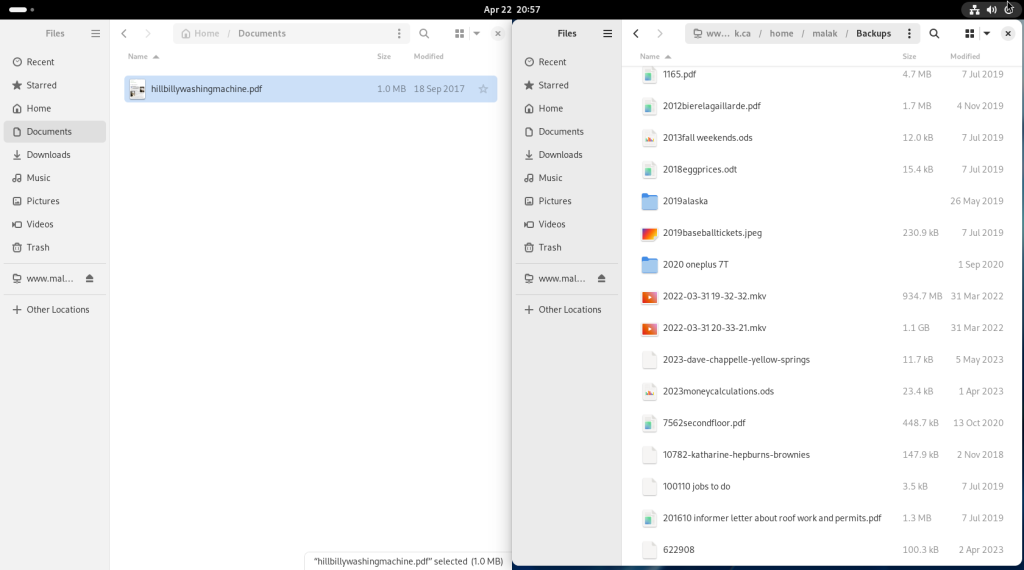
The file was then selected, and a contextual menu (right click) was opened, which offered “Open with Document Viewer”:
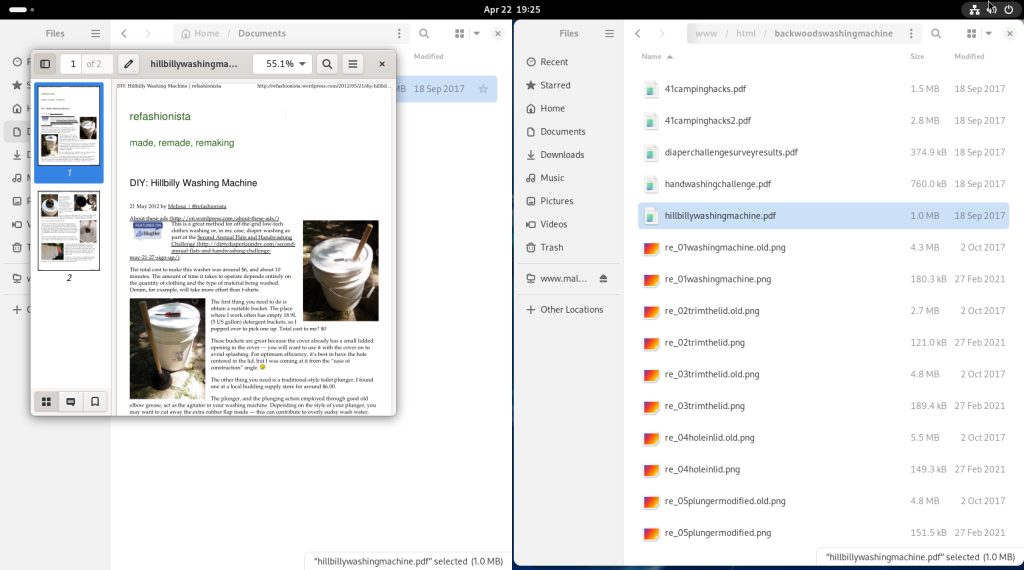
… opening up the document, in this case about how to make a backwoods washing machine:
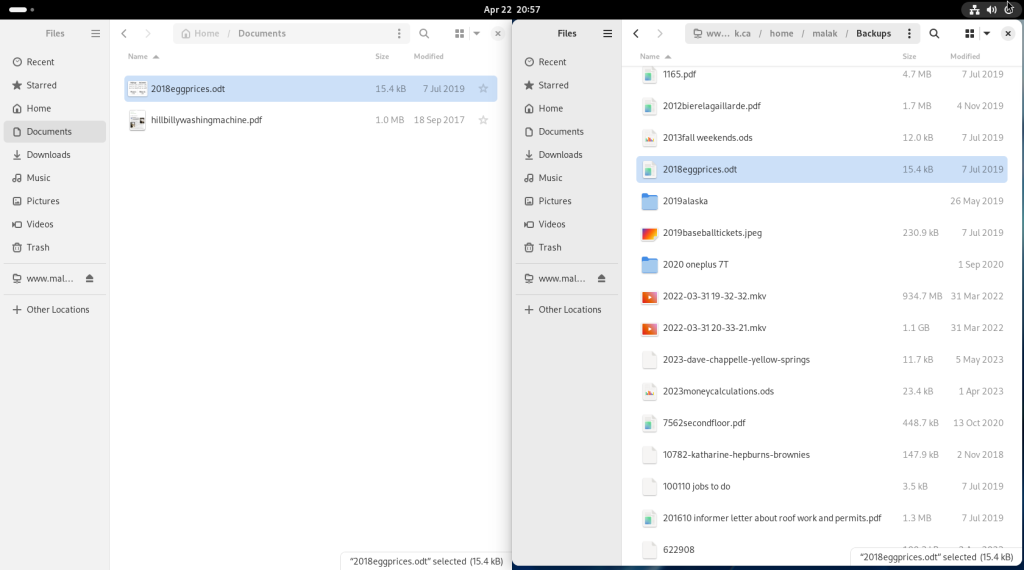
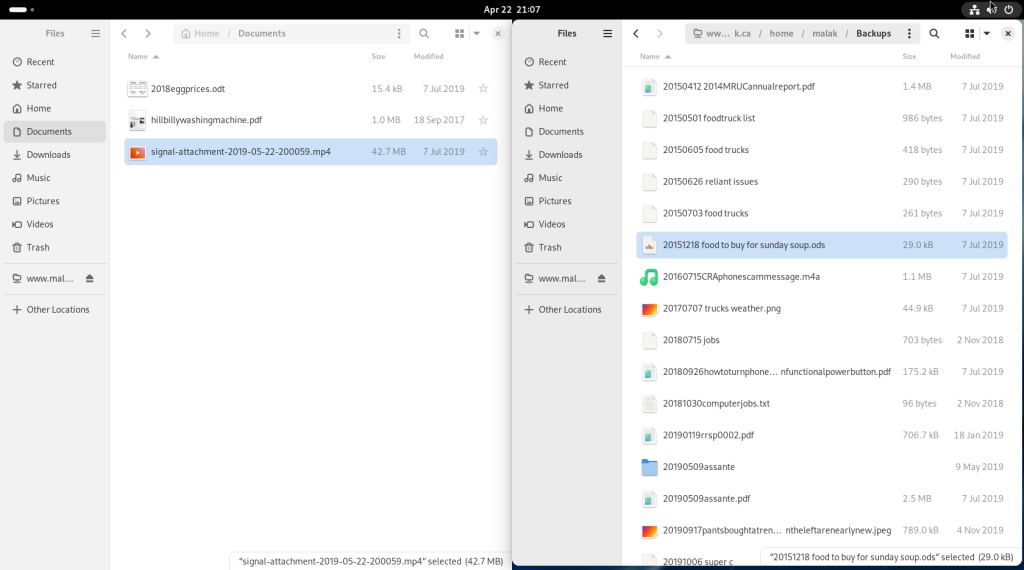
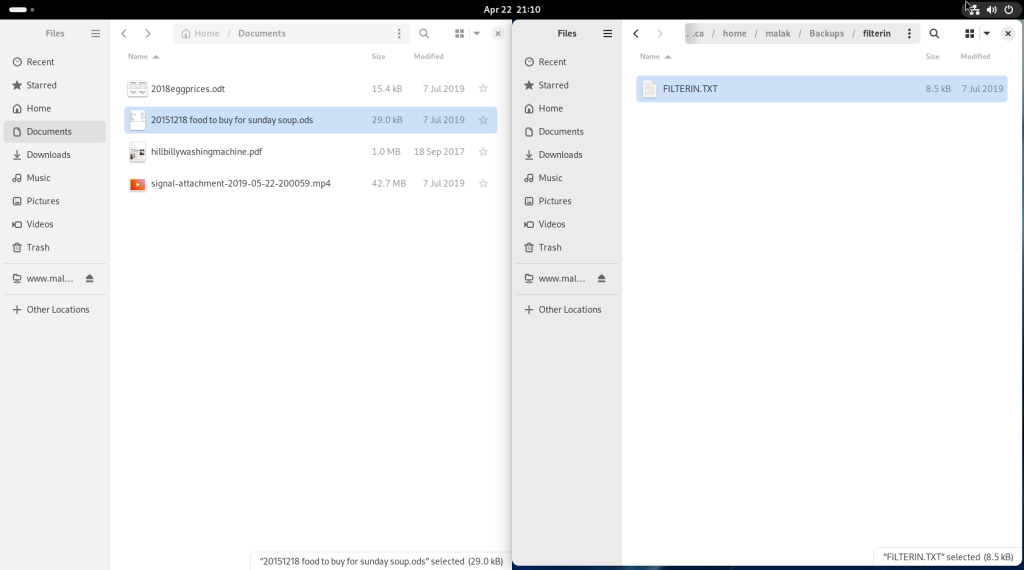
Again on my server, I navigated to another directory, this time in my backups:
… and selected another file to transfer, in this case, a spreadsheet:
The spreadsheet was dragged and dropped onto the local machine:
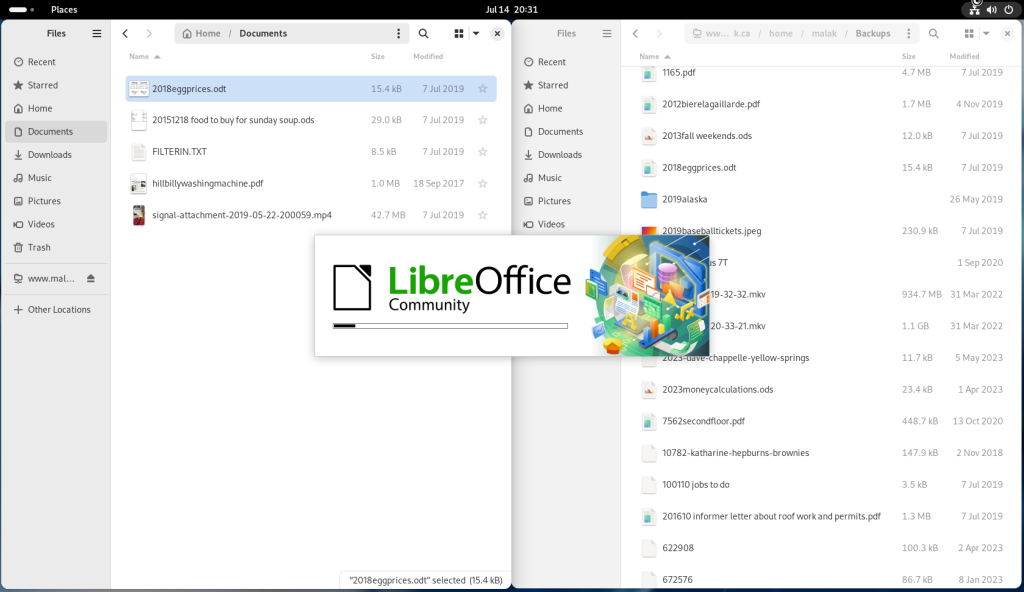
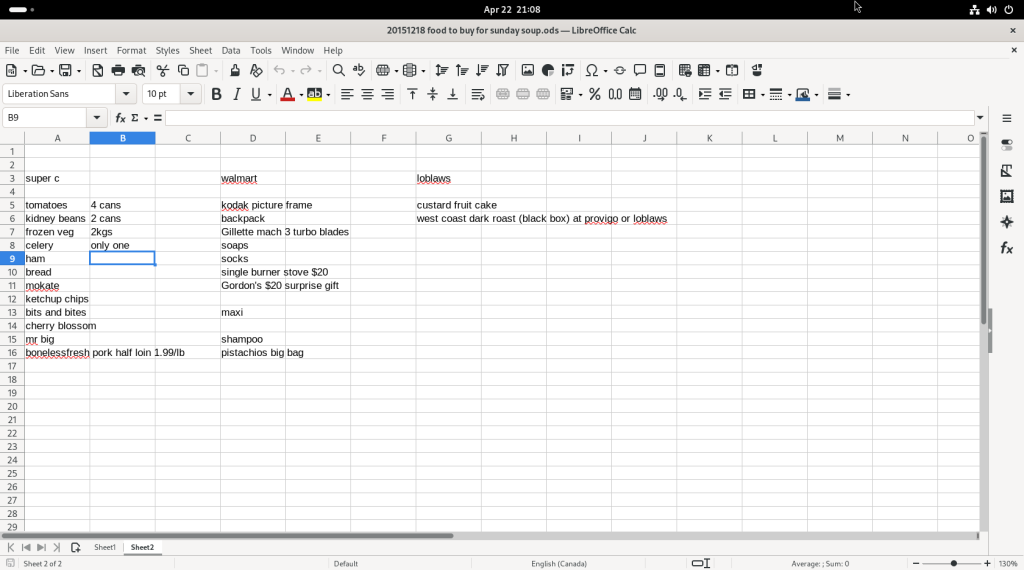
Recognizing the file extension as that of an OpenDocument spreadsheet file, LibreOffice was launched:
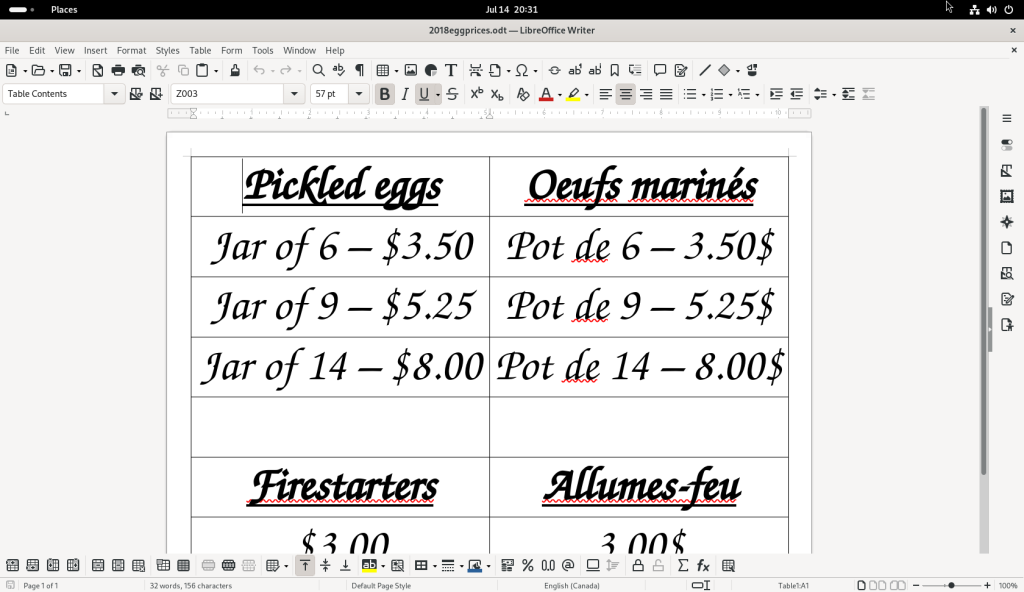
… and the file was opened, in this case, for a table of prices for a number of items I sell at a flea market near my cottage:
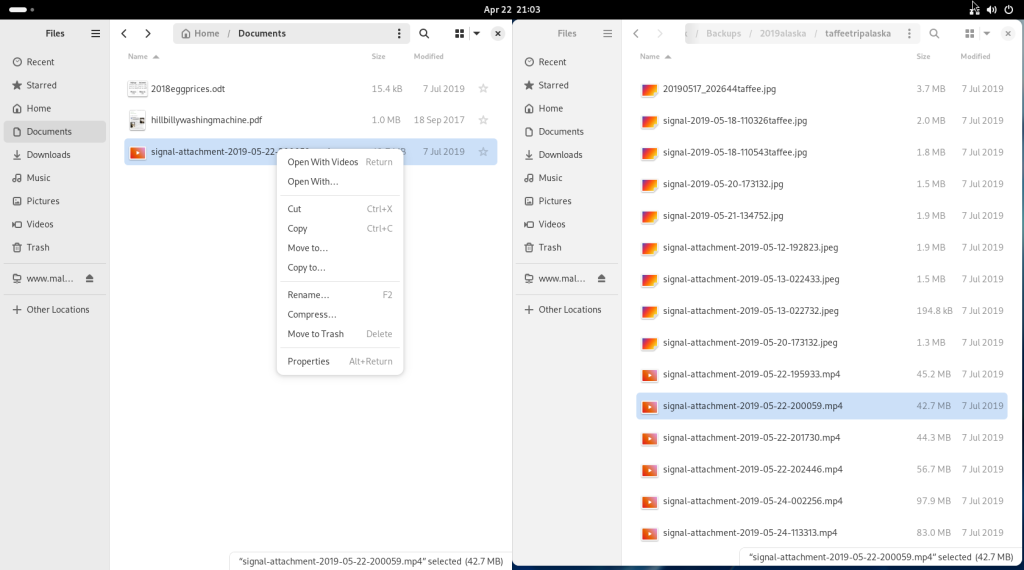
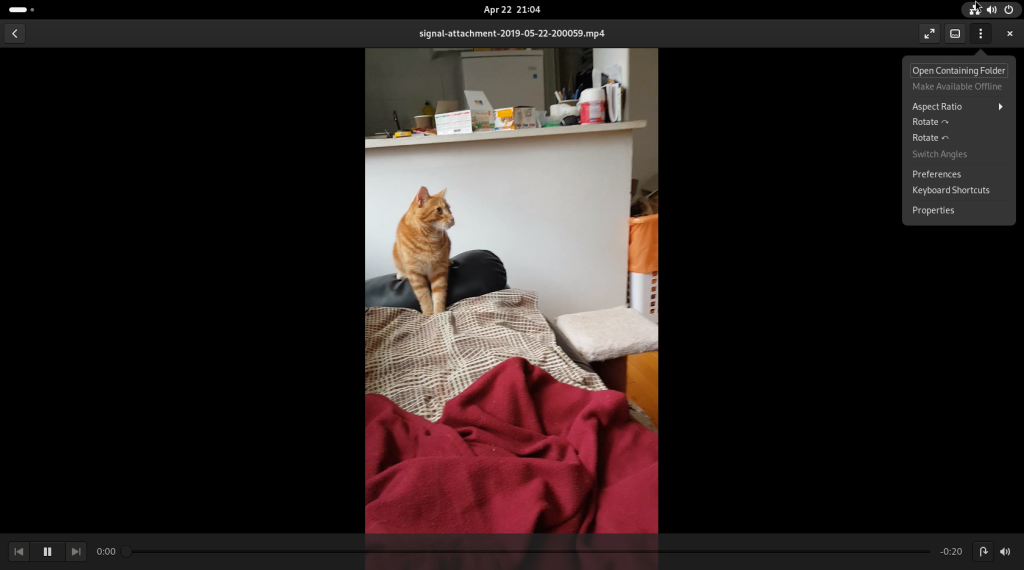
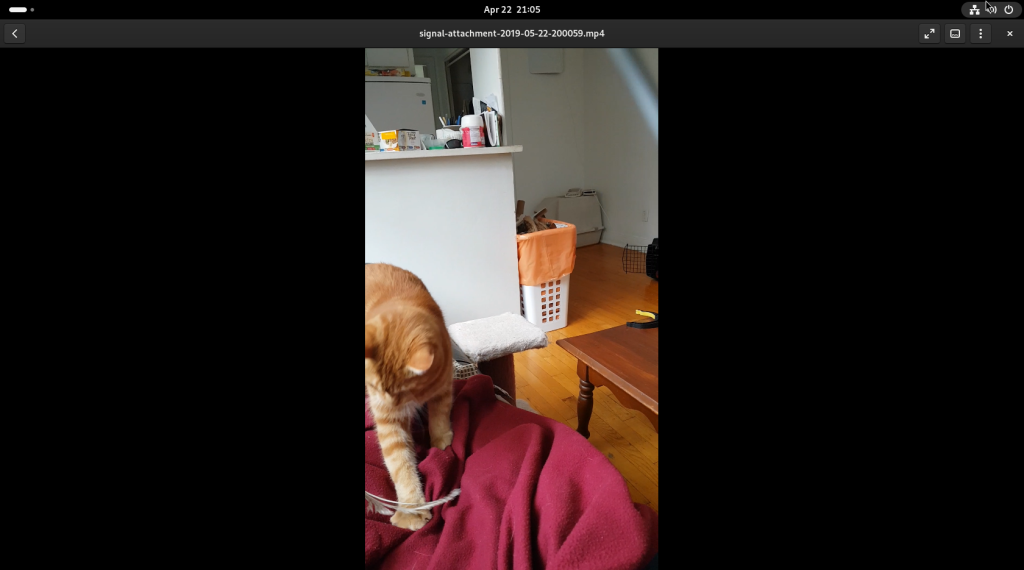
Back to the file transfers, a video file in a directory with pictures and videos of my cat was selected …
… and dragged and dropped over to the local machine, and the file selected and right clicked, revealing a contextual menu, allowing for the opening of the video file:
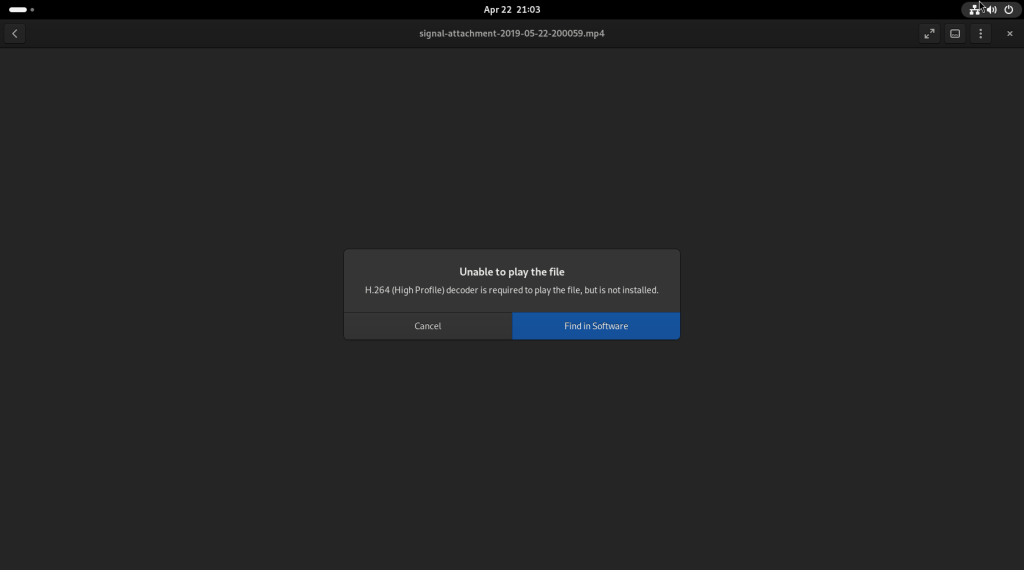
The Gnome Videos player was opened; since the relevant codec had not been installed in the base install, Videos asked if it should attempt to install the codec, which it proposed might be available in the software repositories:
The “Find in Software” button was clicked, leading to the following window:
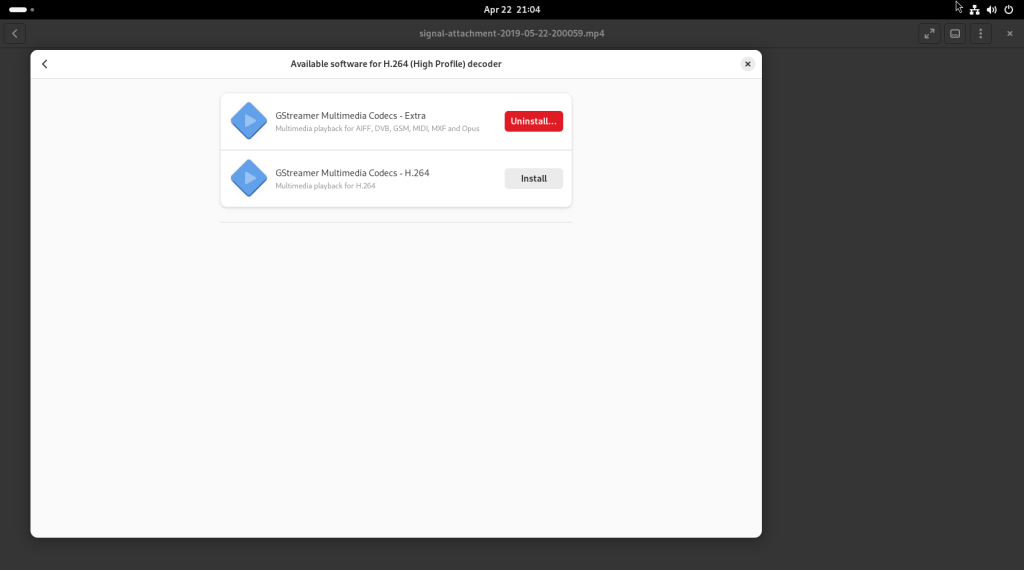
The required codec (“GStreamer Multimedia Codecs – H.264”) was chosen for installation; once installed, a video of my cat, playing with a feather toy, was shown:
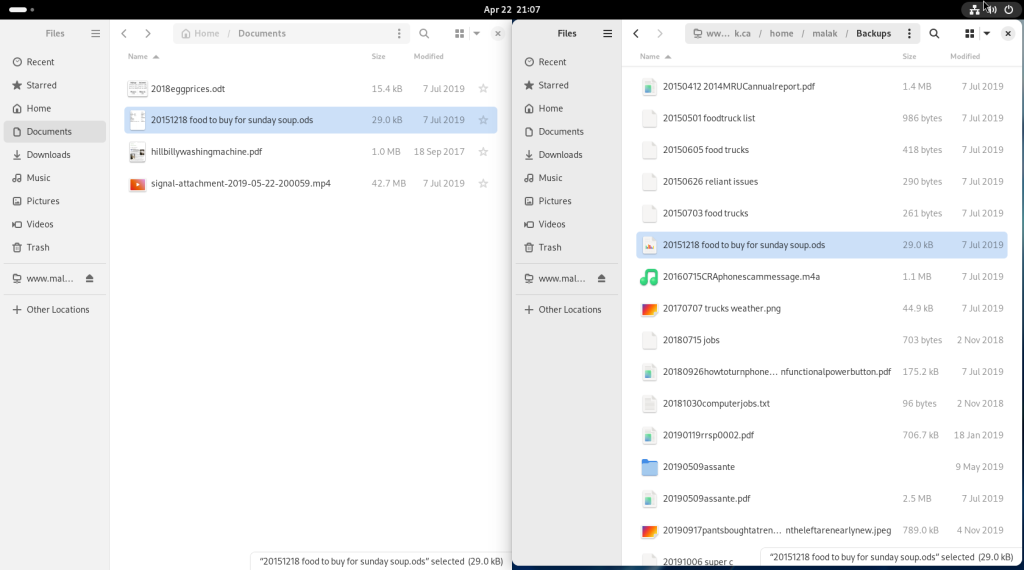
Another file, another spreadsheet, was selected on my server …
… and dragged over to the new setup:
Using a right click contextual menu, the new selected file was opened:
… revealing my shopping plans for a large amount of soup I was going to cook for a community meal:
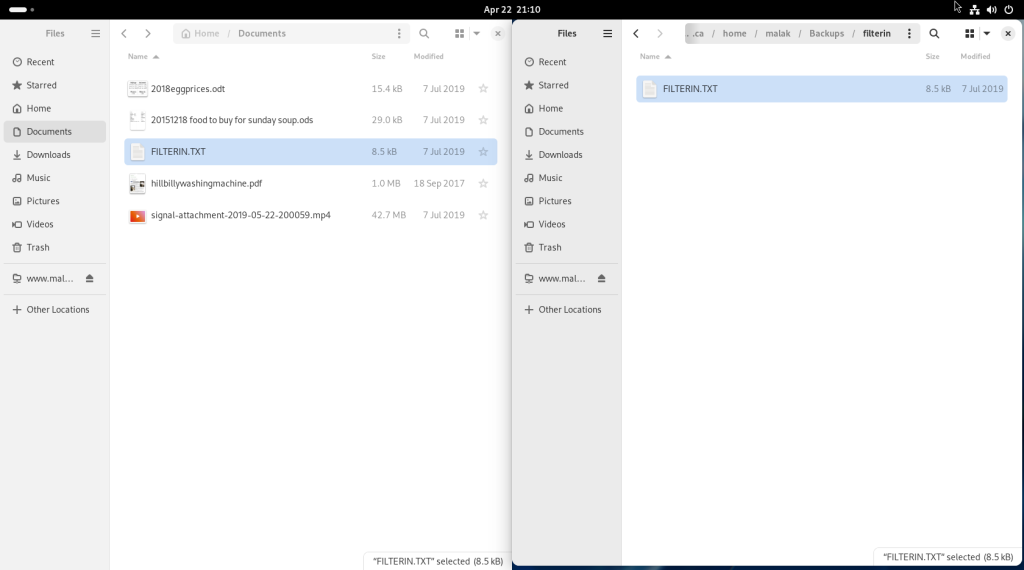
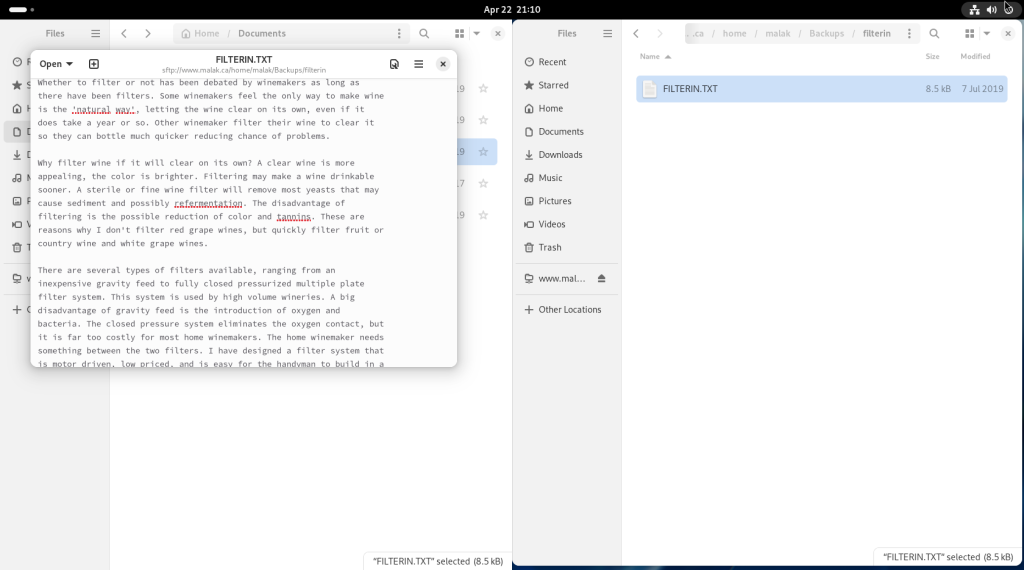
Another file, a text file, was selected on my server …
… and dragged over to the new setup:
Using a right click contextual menu, the new selected file was opened:
… and a text editor window opened up with the text file:
Many other things can be done with the file manager, including launching template documents in a click if templates have been placed in a templates directory.
In this post, the installation of a version of Linux, in this case Fedora Linux, will be demonstrated. The USB key created as a result of the previous chapter, as well as the computer on which you will be installing Linux, will be needed. Note: As per previous recommendations, you should perform the install on a computer that does not have any other active OS installation or data; should you be recycling one of your older computers, back up any data that may be present.
The computer should be physically set up and plugged in, with the various parts connected to each other should it not be a laptop computer, and connected to the internet via an ethernet cable, or later on or as prompted, connected by wifi (not covered in this post.)
Note that some of the following screenshots may have been created somewhat out of order as compared to the narrative.
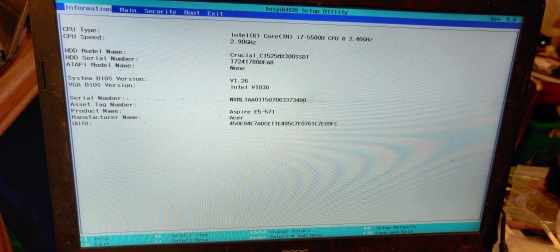
Once the USB key is plugged into the computer and the computer turned on, you should immediately go into the BIOS (often F2 or F12 at boot up):
The BIOS screen on one of my laptops
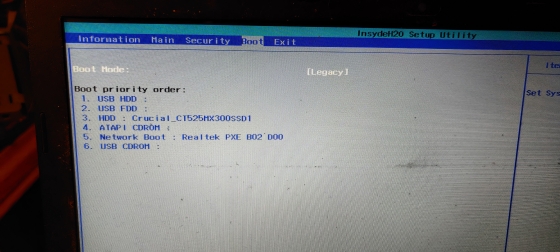
… and adjust the boot order to allow for booting from USB first:
Boot menu setting giving priority USB hard drives and floppy drives
Depending on the age of the computer you use and whether it predates UEFI, you may choose to boot under either régime. If the computer is UEFI enabled, you should install Linux under UEFI, although as explained below, a BIOS setup will be available; should the computer not be UEFI enabled, the point is moot and you will have to install under BIOS, which will be eminently adequate. (Ironically, the laptop shown above is UEFI enabled, but is set up under BIOS mode; since I purchased it new in 2015, I have never been able to properly install a Fedora image on it under UEFI that is functional, hence the unit being set up under “Legacy” — meaning “old fashioned” BIOS.)
Once exiting the BIOS screen, you will see the following screen:
Grub screen offering three options
Choose the “Start Fedora-Workstation-Live” option using the up and down keys. You will then see a screen similar to the following:
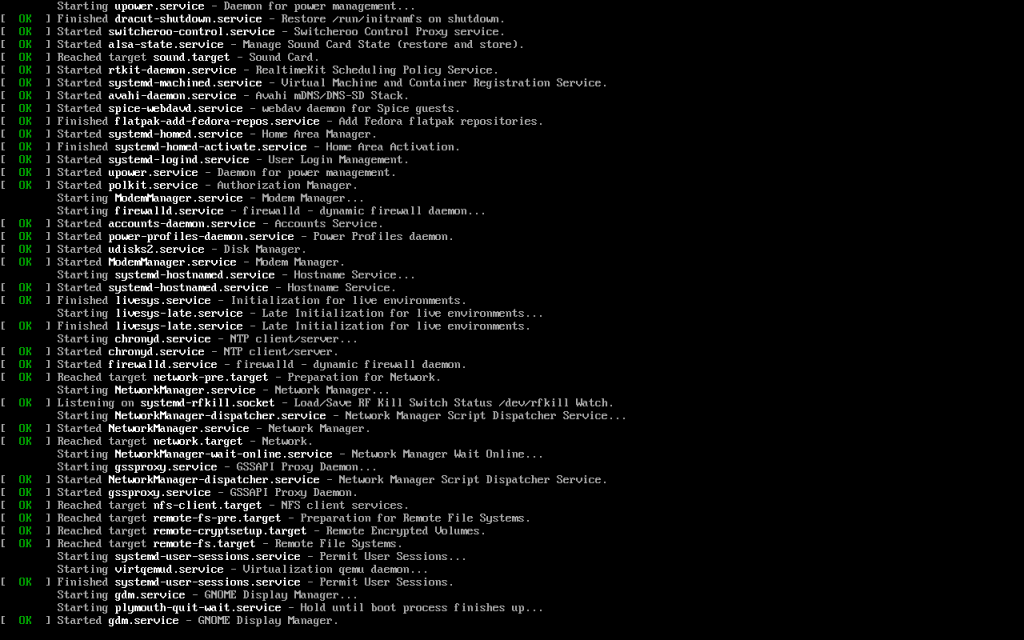
Live USB booting up
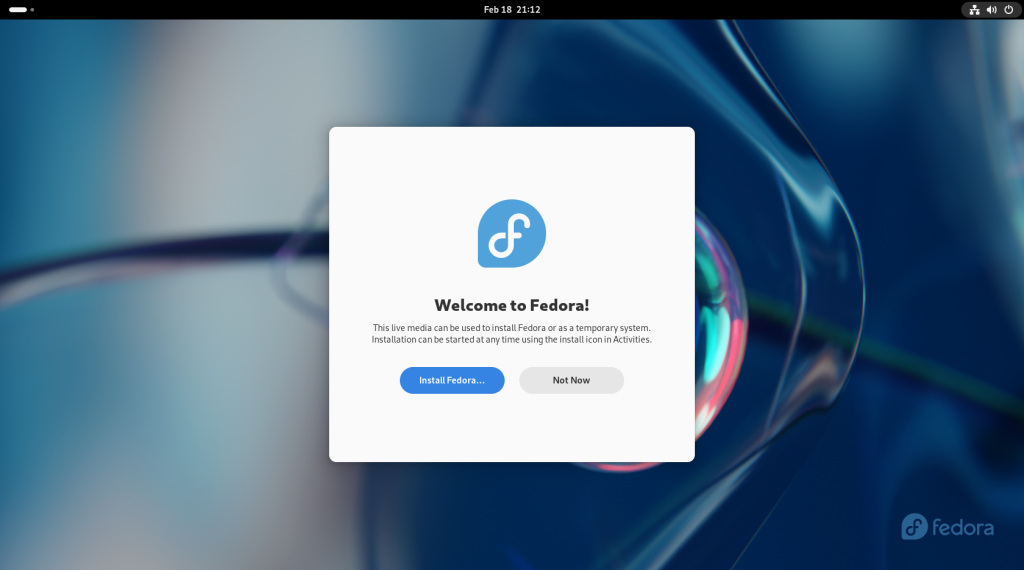
Once the computer has booted up, a welcome screen will appear:
Welcome screen
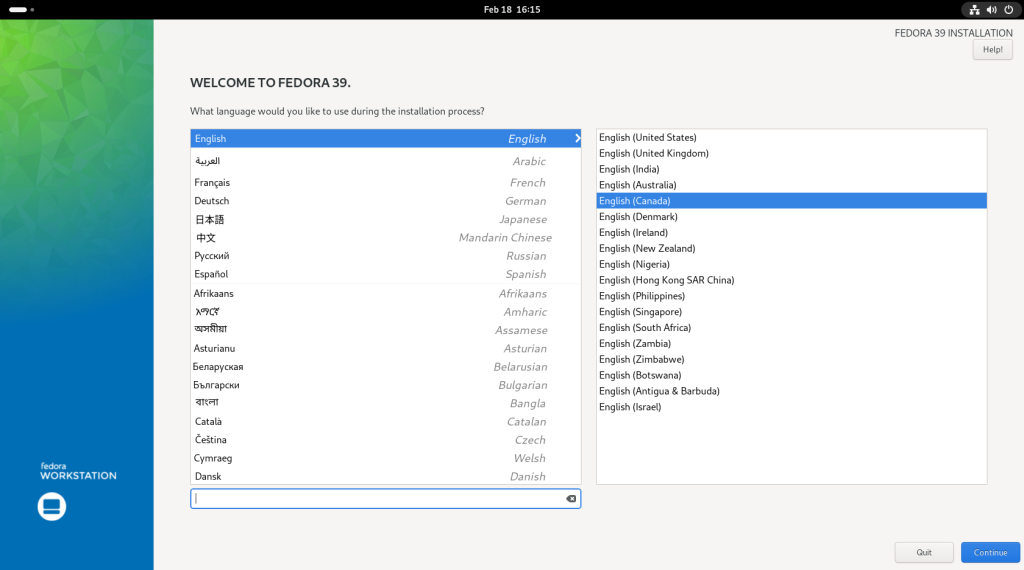
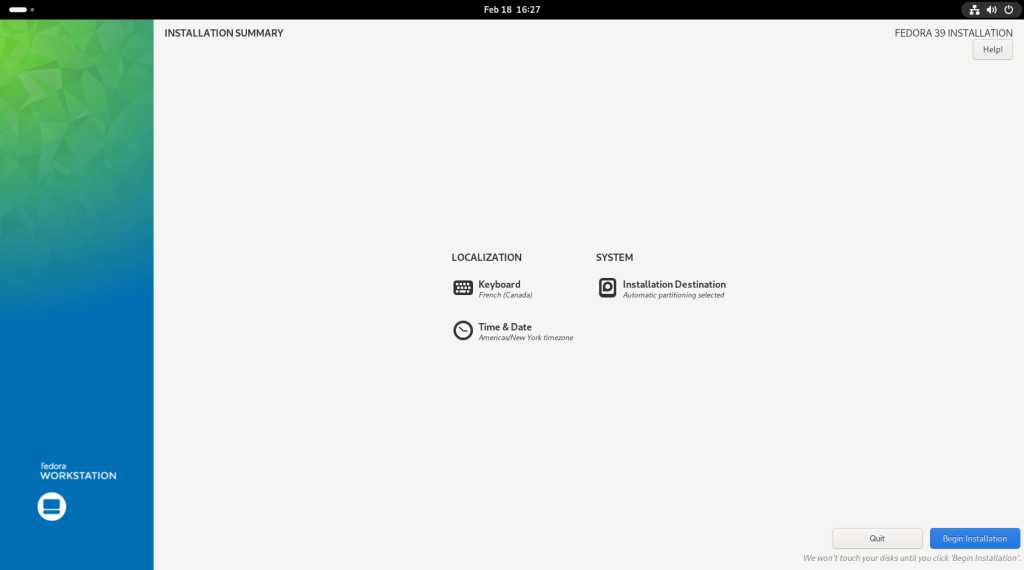
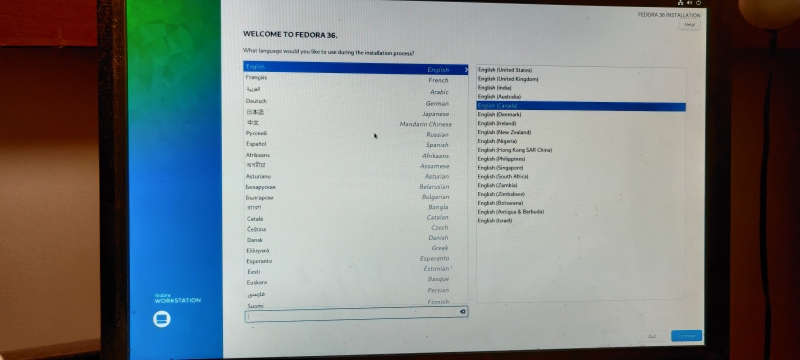
Choose the option to “Install Fedora …”, which will bring you to the following screen in Fedora’s installation utility named Anaconda, and will ask you to choose which language and which regional variant, as per the case, to use during the installation process:
Anaconda screen, with English chosen and Canadian English variant chosen
Once the language has been chosen, click on “Continue”.
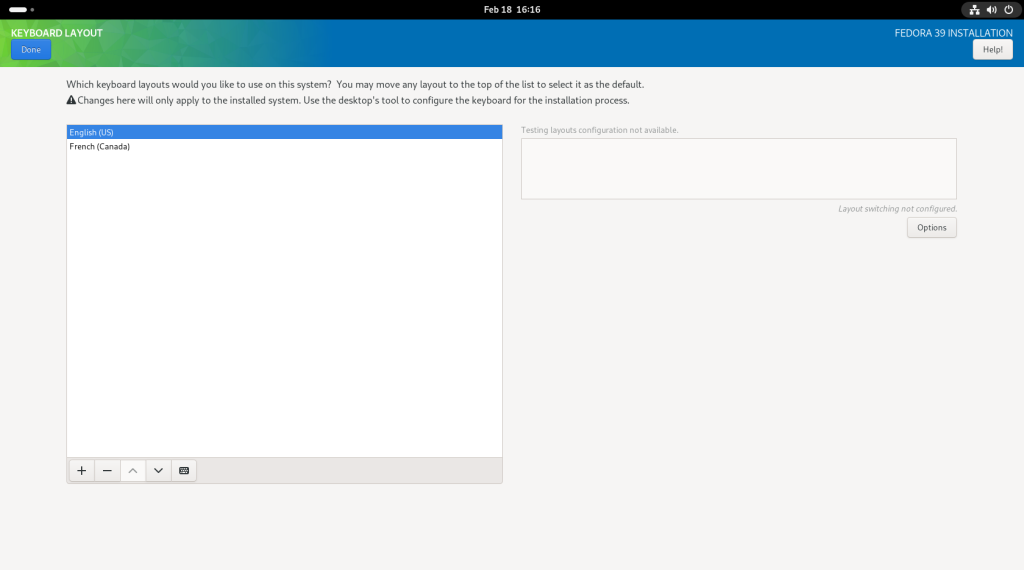
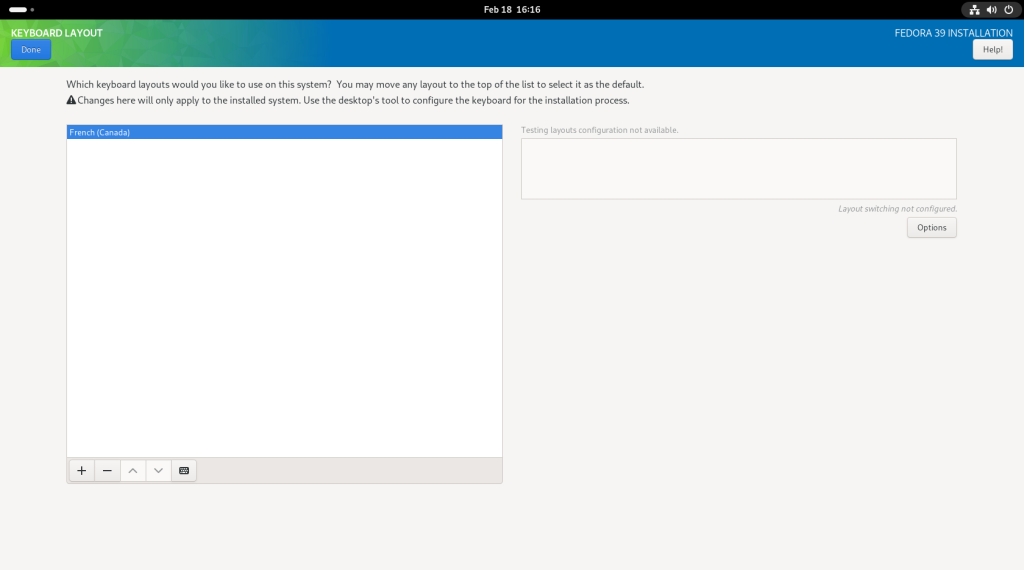
The following screen will be for the choice of the keyboard layout. The plus “+” button at the lower left corner of the left box was clicked, and a window popped up. In this case, I have chosen a French Canadian keyboard layout for reasons beyond the scope of this post; you should choose the layout that suits you.
Keyboard layout chosen
You may continue to add keyboard layouts, should you choose to do so or have multiple users of the machine with multiple preferences, by clicking again on the plus “+” sign.
In this case, again for purposes beyond the scope of this post, I removed the “English (US)” keyboard layout by clicking on the minus sign “-” on the lower left corner of the left box, once the “English (US)” option was highlighted:
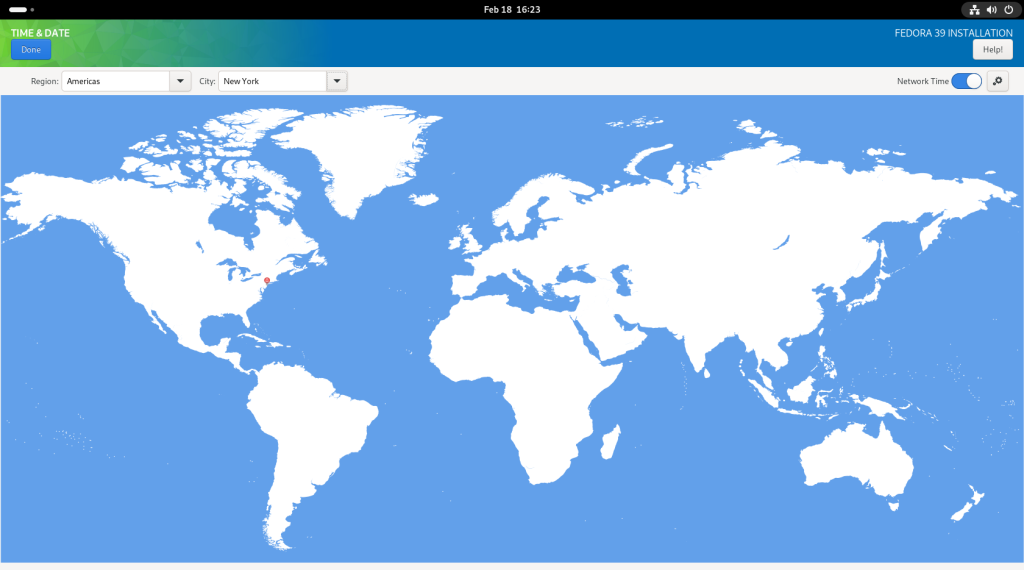
Next, the timezone was chosen, in this case, that for New York City, which is the same as for where I live:
Timezone chosen
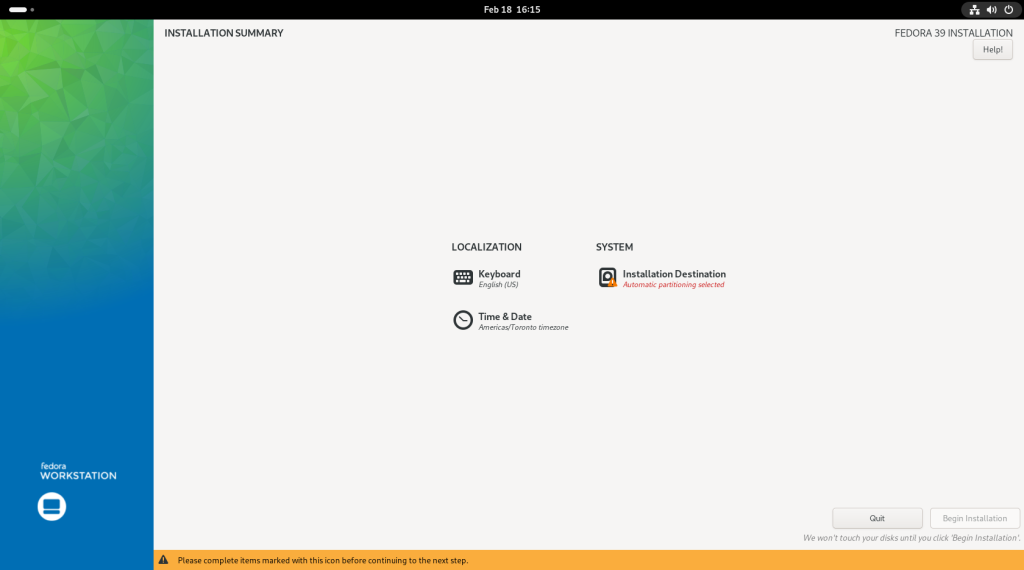
The next thing to arrange is where to install on the hard drive, by clicking on “Installation Destination”:
Choose “Installation Destination”
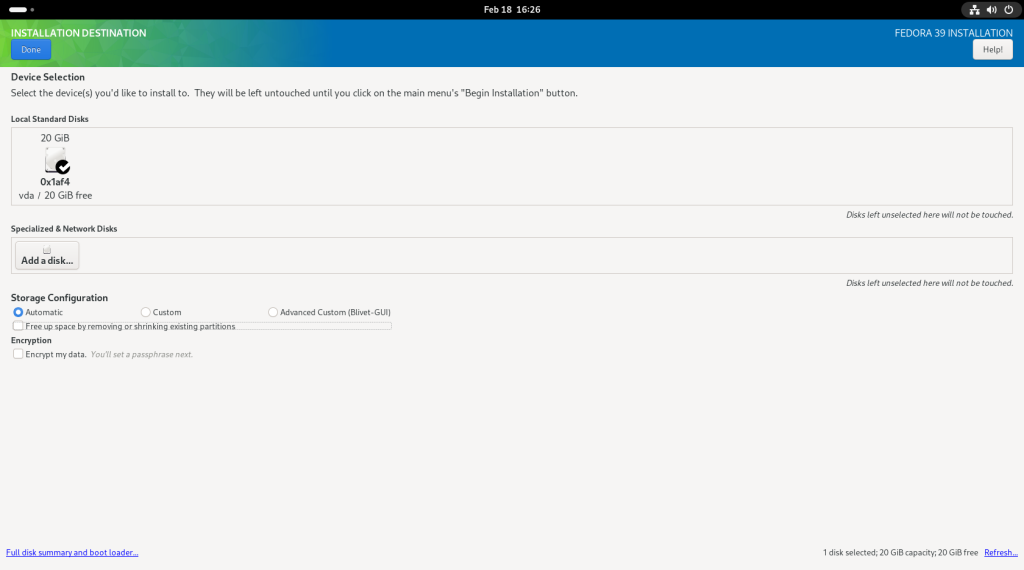
This screen will show details about your hard drive. Note that despite having previously recommended a minimum of 40GB, a 20GB only drive is in place since my screenshots are using a virtual machine, whose setup started with 20GB drives:
Hard drive details
Be certain to reclaim all space by clicking on “Full disk settings and boot loader …”
Click on “Full disk settings and boot loader …”
… Which should confirm that you will be using the whole disk:
Use of all disk space
After closing that screen, back at the main screen, click on “Begin Installation”:
Click on “Begin Installation”
At this point, the installation will begin:
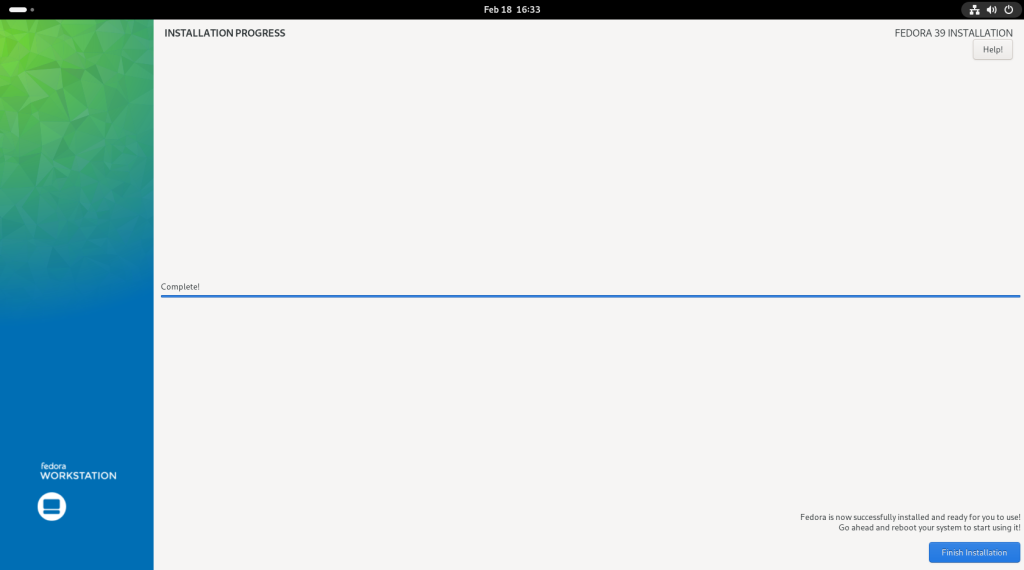
Installation beginning
Basic installation complete
Boot Loader installation
Generating initramfs
Scripts being run
Click on “Finish Installation”
At this point, the installation is complete, and you should click on “Finish Installation”:
Anaconda will close and return to the main screen:
Return to main screen
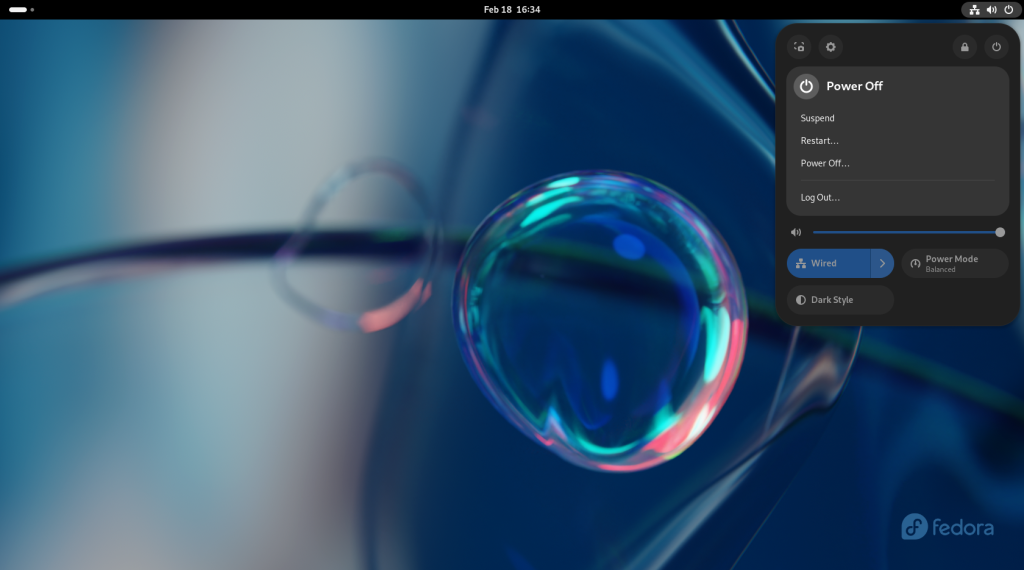
Click on the power button in the upper right hand corner, which will open a little window:
Settings options opened
Choose the power options by clicking on the second power button to the right to the right of the lock symbol, opening up power options:
Power options opened
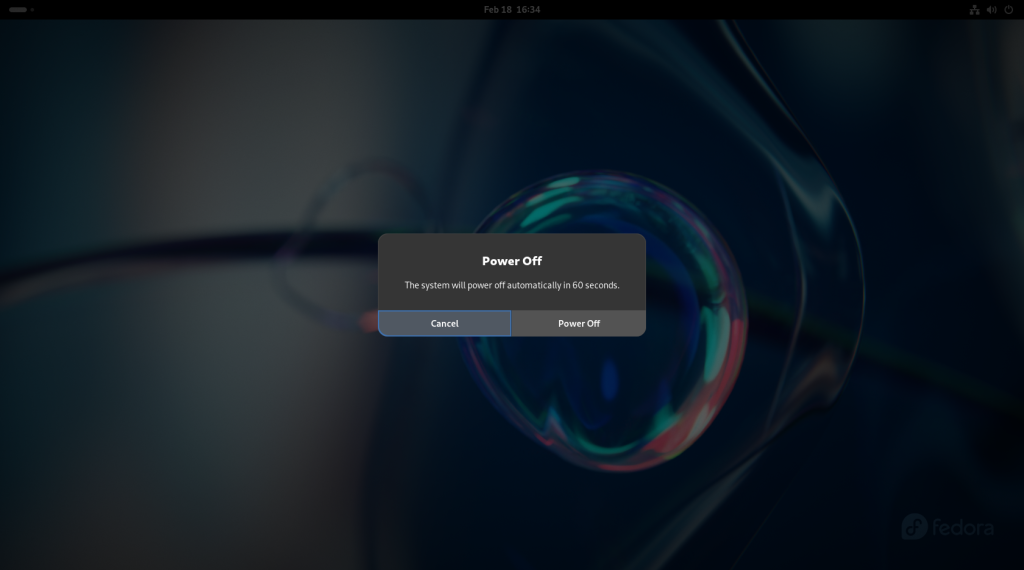
You will be asked whether to power off the machine; click on “Power Off”.
Click on “Power Off”
Your computer will shut down:
Computer shutting down
… and reboot:
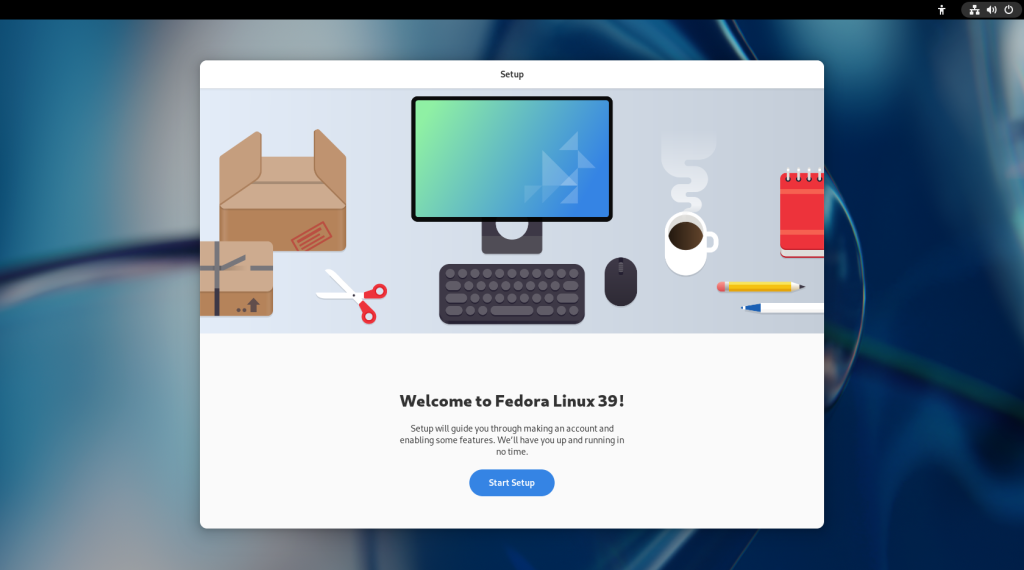
Computer rebooting
Which will bring you to a “first time” welcome screen, where you should click on “Start Setup”:
Initial welcome screen
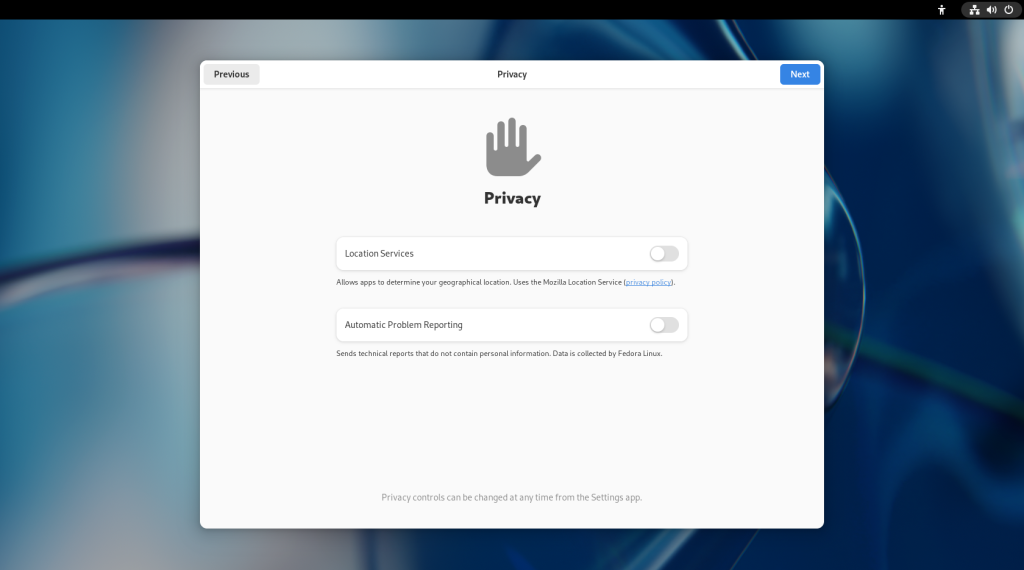
Choose whether to allow Location Services, and Automatic Problem Reporting:
Privacy settings
Settings turned off
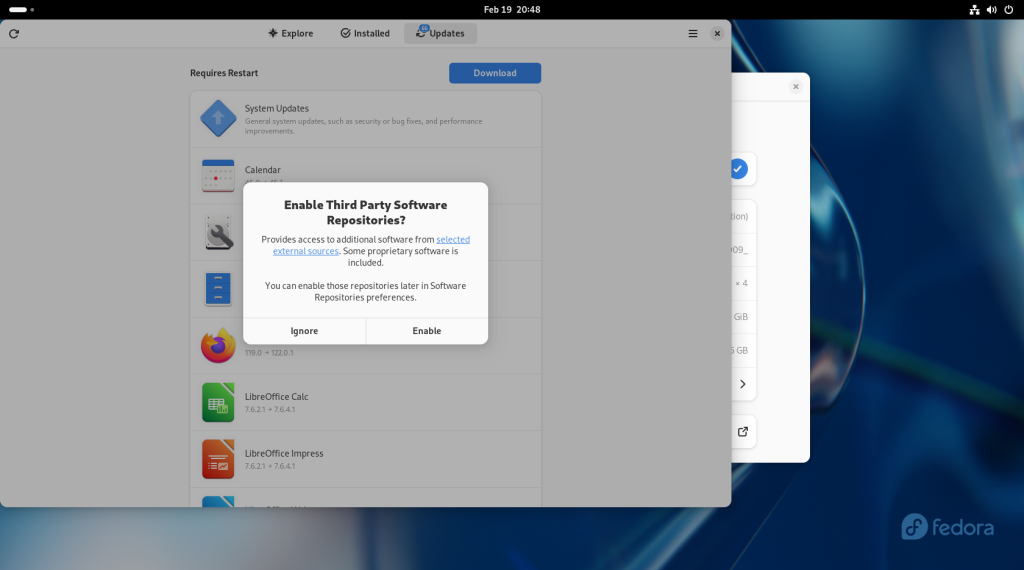
The following screen will allow you to enable Third-Party Repositories — extra “software stores” — beyond those of Fedora itself, which I recommend be enabled:
Enabling Third Party Repositories
The following screen will allow you to Connect to Your Online Accounts:
Connecting to online accounts
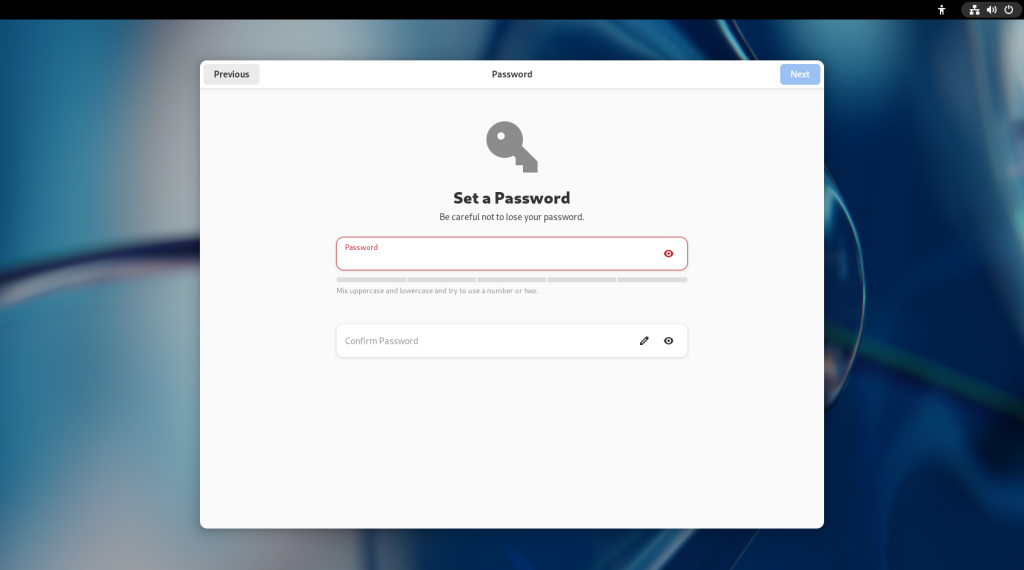
The following screen will ask you to set a password, which should be long enough to be secure (there will be an indicator line), and which will be important to remember:
Setting a password
… and enter the password again to confirm you haven’t made a typo:
Setting a password
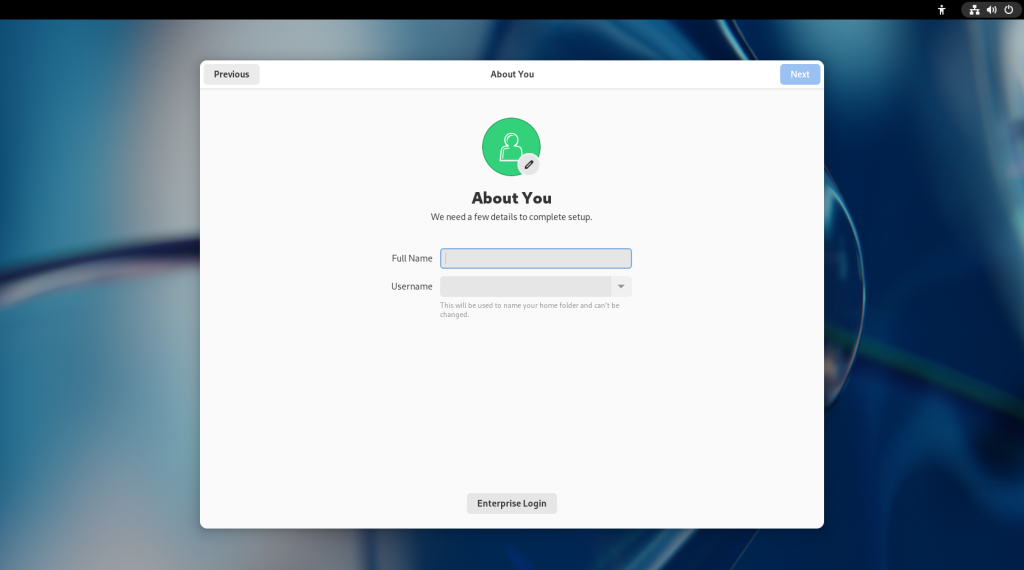
The following screen will ask you to enter your name and a username:
Entering a name and username
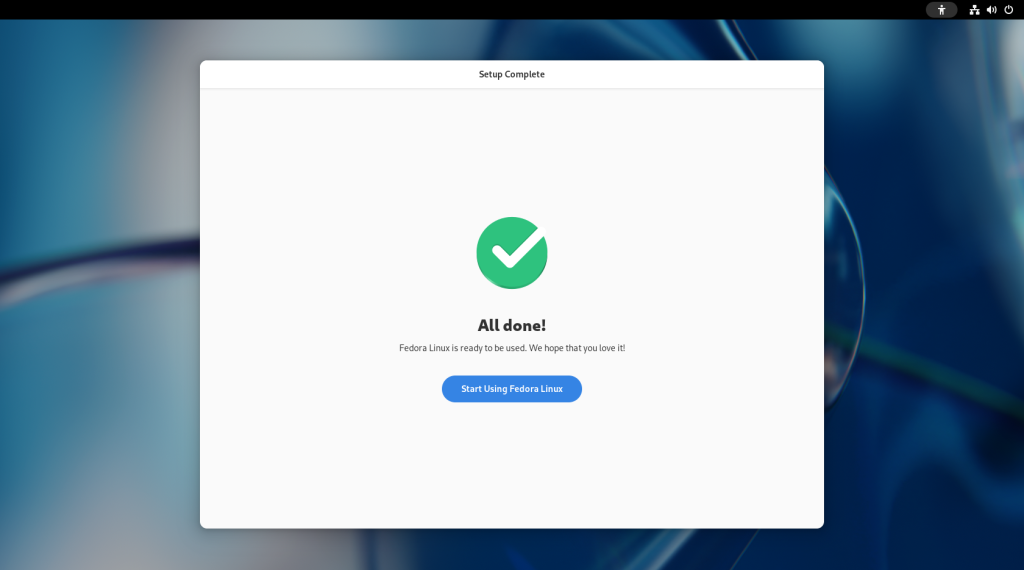
Once you have entered a name and username, the basic setup will be complete:
Basic setup complete
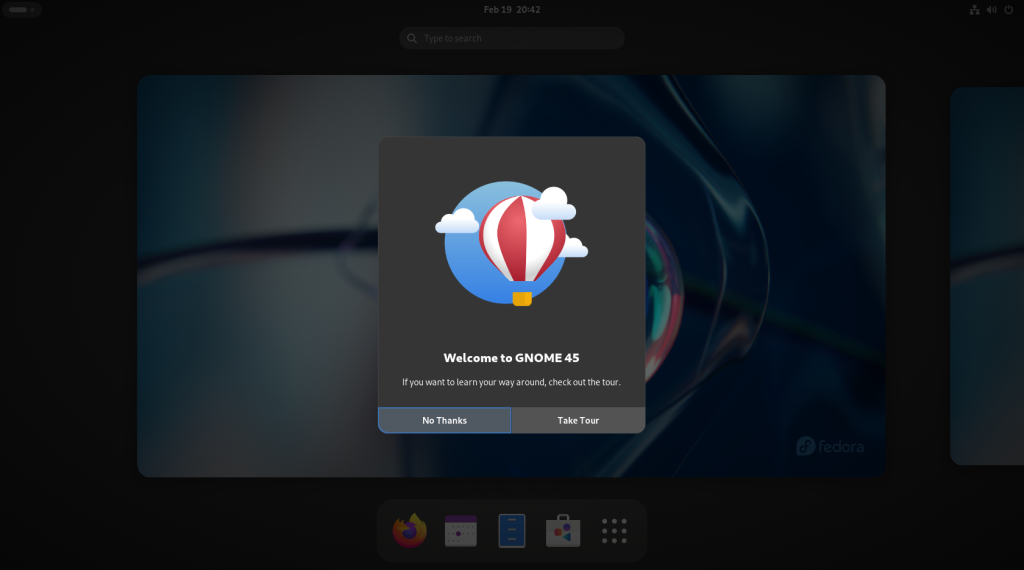
After clicking on “Start Using Fedora Linux”, the computer will offer a guded tour of the Gnome Desktop, which you may do if you wish, otherwise click on “No Thanks”:
Guided tour offered
The activities screen will come up at this point, offering you a dock at the bottom of the screen, as well as a search bar for other installed software:
Activities screen
But wait folks … there’s still plenty more to do! 😃
Click on the upper right hand corner to access the settings, and click on the round gear like button second from the left in the little window that will open:
Click on the upper right hand corner then the gear button
Which will open up the Settings menu:
Settings menu
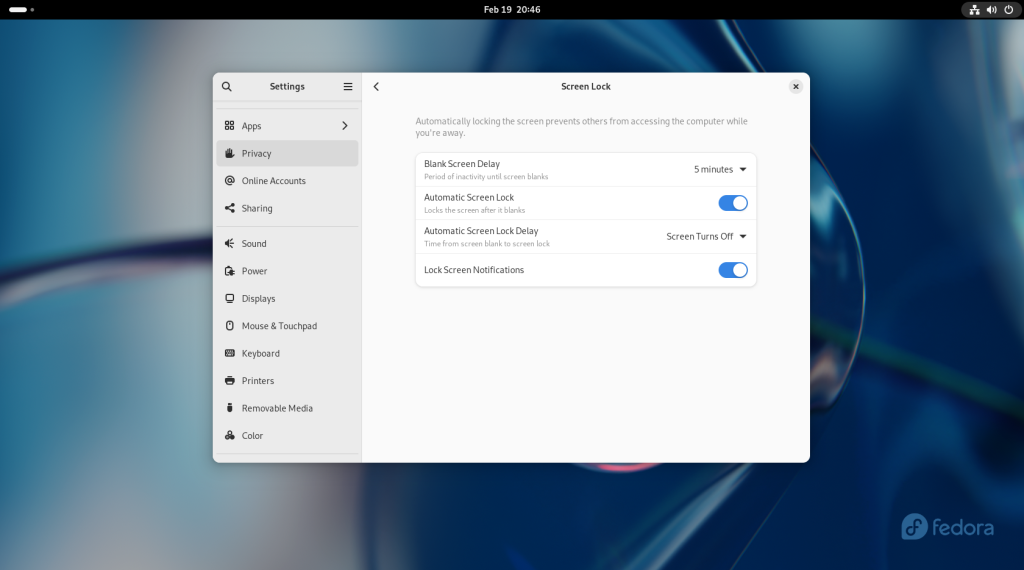
Scroll down to the “Privacy” menu, and adjust the settings to options to your liking, or choose to keep the defaults:
Choose the Privacy menu
Next, scroll down to the bottom to the “About” menu:
Go to the About menu
The first line will be titled “Device Name” and by default will list the word “fedora”; you should choose a name for your computer that will distinguish it from other computers. It can be as simple as “MyComputer” or “LivingRoom”, or be more fanciful, or according to a personalized system. Warning: Do not choose an offensive name or word, since it may show up in odd places that may prove embarrassing, nor should you use a family member’s name or a pet’s name, since in the future you may end up using colloquial terms in reference to your computer paired with said name which may be very confusing or upsetting to those who may not understand the context.
Computer named
Close the settings menu by clicking on the “x” in the window’s upper right hand corner, and return to the activities screen by clicking on the bar in the upper left hand corner:
Return to Activities screen
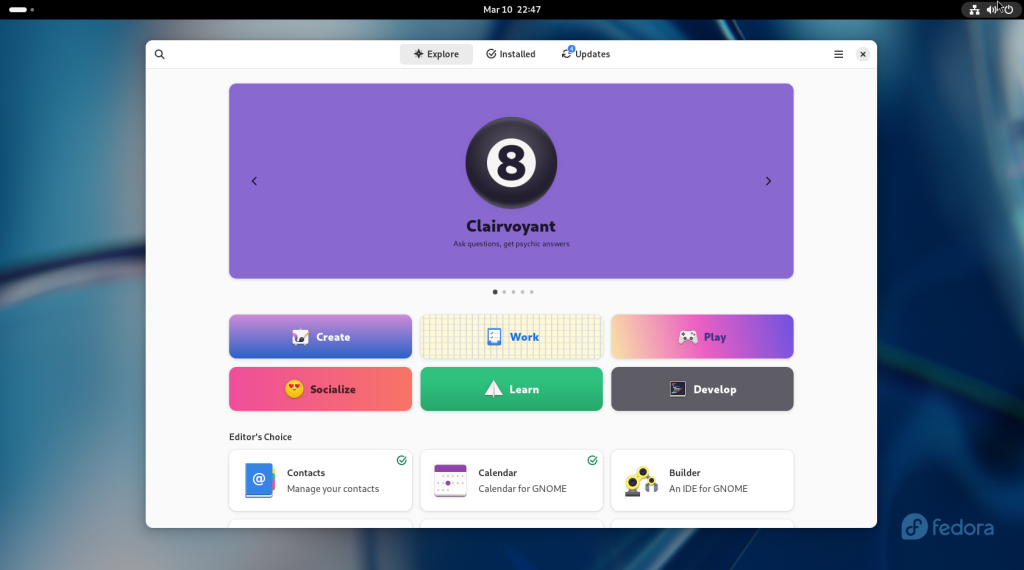
Click on the “bag” on the dock at the bottom, a rectangle with two coloured circles and a triangle, to go to the Software Store (don’t worry, you won’t need any money.)
Software Store opened
Click on the “hamburger” menu (the three lines that look like a hamburger or a stack of pancakes), which will give a little menu:
Click on the hamburger menu
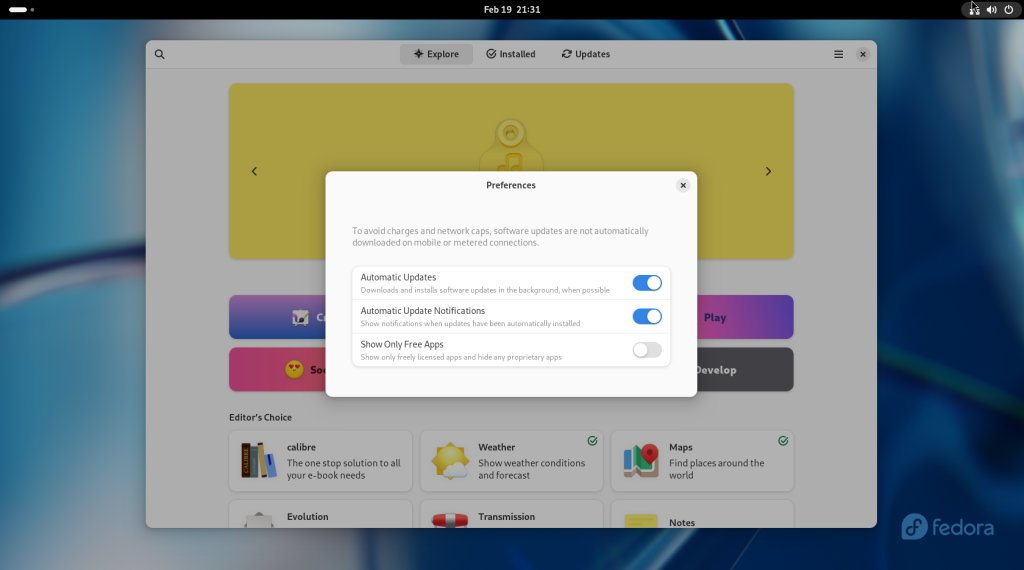
Click on the “Preferences” option:
Preferences menu
I recommend that you activate Automatic Updates, as well as allowing Automatic Update Notifications.
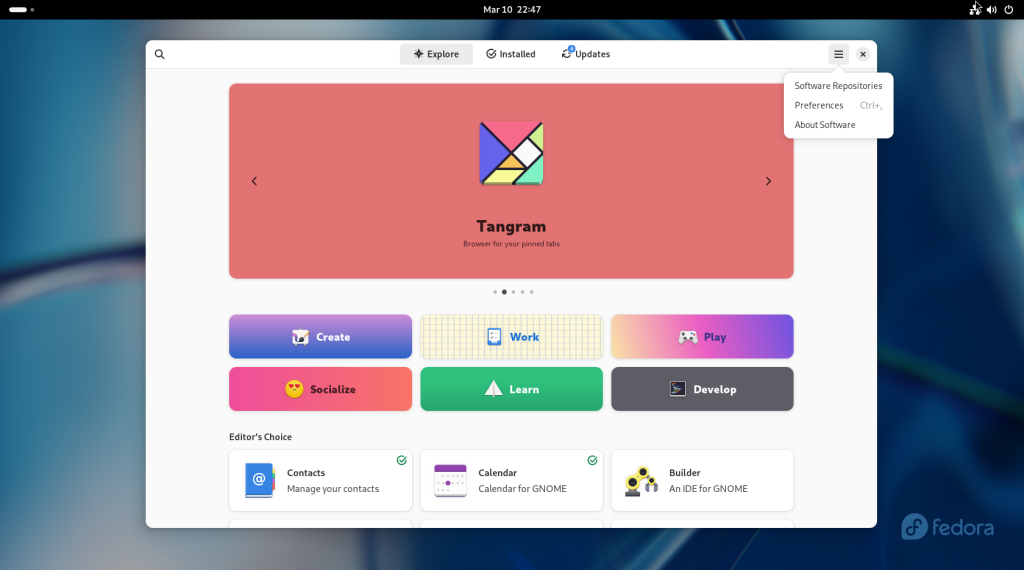
Next, click on the hamburger menu again, and choose the “Software Repositories” option:
Choose the “Software Repositories” option in the hamburger pull down menu
To modify the options in this menu, you will need to enter your password, which you created earlier:
Enter password
You will be asked whether you wish to enable third party software repositories; click on “Enable”.
Enabling third party software repositories
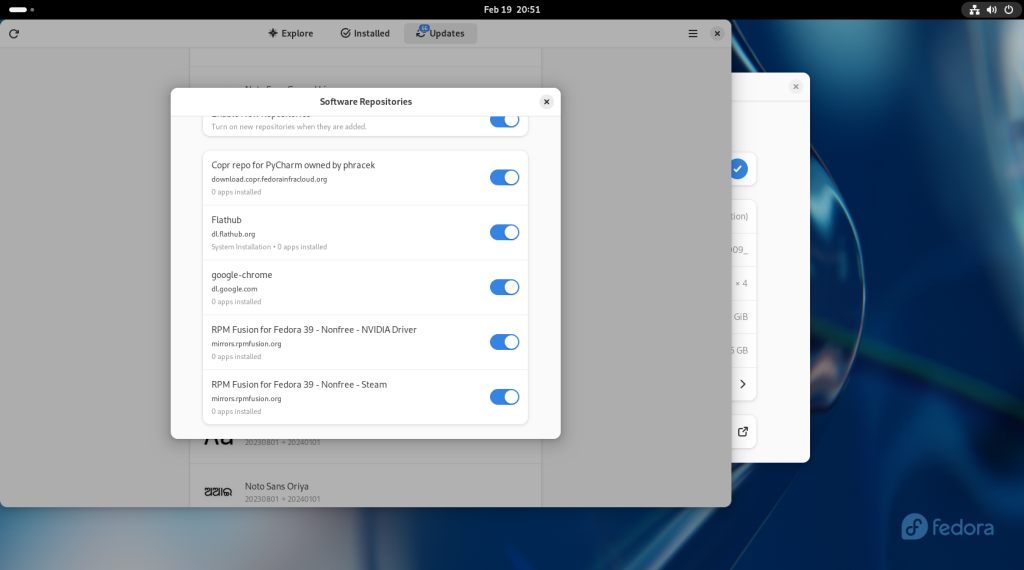
The default repositories will be enabled already; some others will not be. I recommend that the following repositories be enabled: Apps (Flatpak), openh.264, x86_64 …
… Firmware (fwupd) (if you are using UEFI), Enable New Repositories …
… Copr repo for PyCharm, Flathub, google chrome, RPM Fusion for Fedora 39 Non-Free — NVIDIA Driver (even if the computer doesn’t have an NVIDIA card) …
… and RPM Fusion for Fedora 39 Non-Free — Steam.
Click on the “x” button. At this point, click on the “Updates” tab up top, and click on the “Download” button.
The computer will determine which updates will be needed …
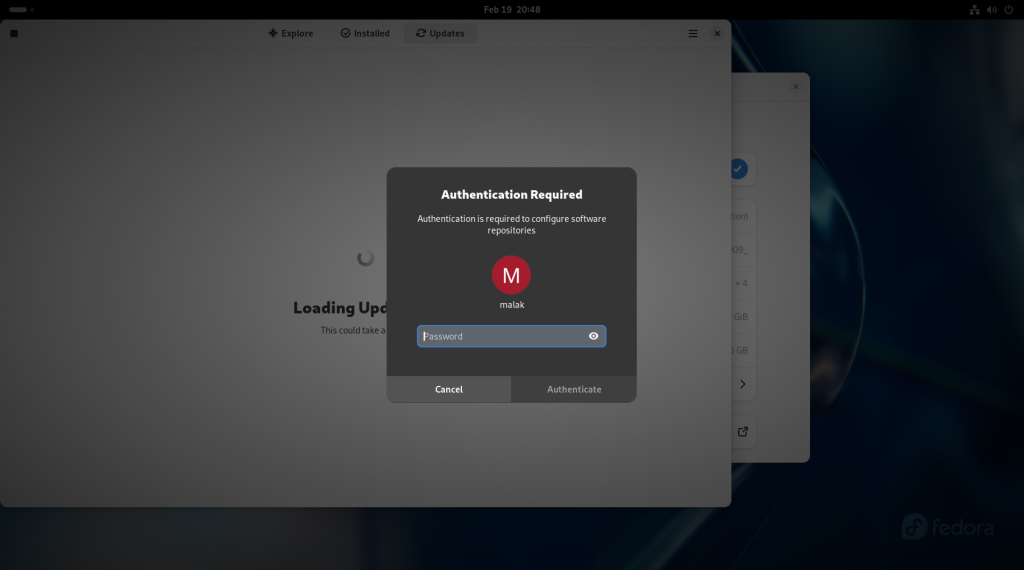
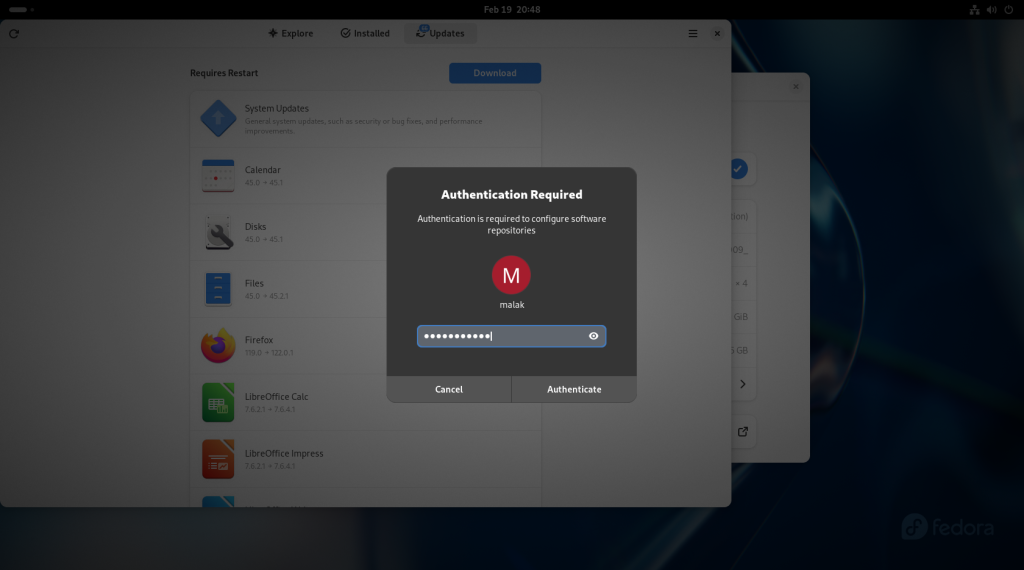
… and the computer will ask you for your password again:
Enter password
Enter password
The updates will be downloaded:
Updates downloading
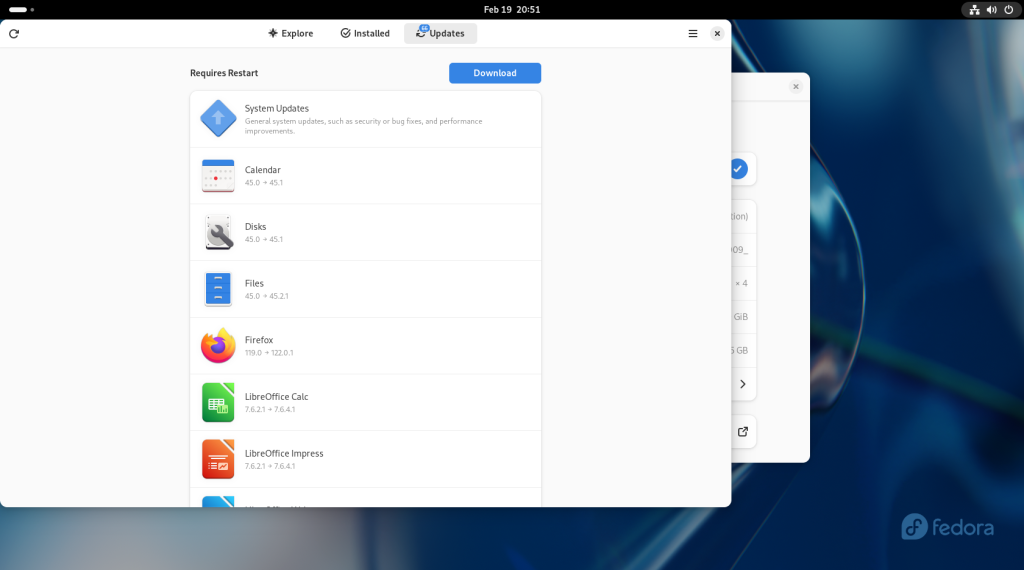
… and then the updates will be listed:
Updates listed
Updates listed
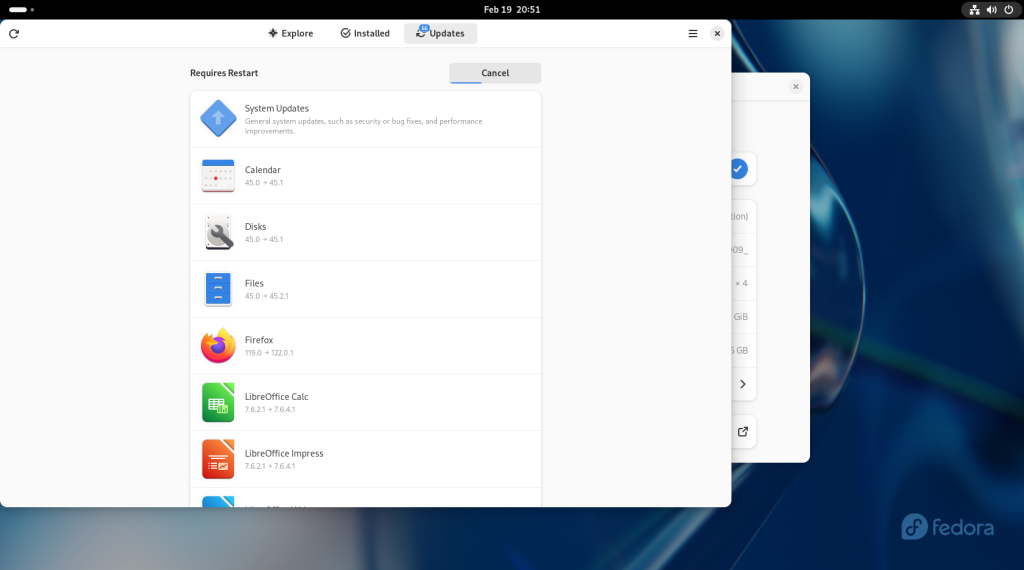
Click on the Restart & Update button:
Click on Restart & Update
Click on “Restart & Install”:
Click on Restart & Install
The computer will shut down:
… and begin to reboot:
The updates will begin installing:
Updates installing
Updates installing
Updates installing
Updates installing
When the updates are complete, the system will reboot automatically:
Computer rebooting
You will now see a sign-in page with your username. You should click on your username.
Sign in page
… At which point, the computer will ask you for your password:
Enter password
… And finally, the Activities page will come up again.
Your computer has now been properly set up for operation.
Next Chapter
Chapter 5 will show some customizations of the Gnome desktop and basic file transfers.
In this post, acquiring a computer on which to install Linux, as well as downloading and writing a Linux distribution on a USB stick, will be shown. Fedora Desktop Edition will be used as an example, although at this point, setting up the installation USB stick can be done with any other distribution — which is most of the common ones — that allows for such an installation.
(Note for future reference, graphical installation with other distributions will be similar, but each may have some nuances and differences between them.)
Hardware — the computer on which Linux is to be installed
First, I recommend that as a newcomer, whichever linux you decide to install, that you decide to do the installation on a separate computer, such as an old computer, on its own. By doing this, you will not reduce space on the hard drive / SSD on which your current OS is installed, especially in taking account the space for data you may to transfer over to the Linux system, nor will you have to deal with the intricacies and occasional perils of dual booting or data loss on your current computer setup, nor will you have deal with the myriad and occasionally confusing issues that may surround virtualisation. Finally, by having a separate computer to “play” with, you will be able to start over again in the event that something goes wrong, or if you decide that you’d like to try a different Linux distribution.
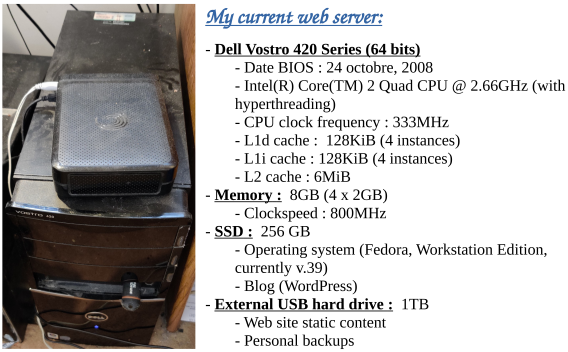
The current (2024) webserver for www.malak.ca
The above photo is taken from a page from a recent (February 2024) presentation the author made about their web server, which hosts https://www.malak.ca (the website hosting this blog), using an old computer with a BIOS creation date of 2008.
Acquiring a computer:
“Old” computers are not unusually difficult to acquire; you may already possess one in storage.
Use an old computer you may be wishing to replace, or already be in the process of replacing, or even a several years-disused computer of which you may not yet have disposed;
Buy, or barter for, a used computer from family or friends;
Buy a used computer from a local computer repair person, who may have a storefront and may sell refurbished computers;
Speak with your employer; depending on their policies, they may be willing to sell you older equipment of which they would like to divest themself(ves);
Check reputable online markets;
Buy a new dedicated computer (only recommended once you become convinced of the cost/benefit regime).
Check the “minimum requirements” page of the distribution you choose; my current bare minimum specs are a Core 2 Duo 64bit processor, 4GB memory, 40GB hard drive (the current, as of late 2023, Fedora Workstation recommendation), and a spare USB 2.0 port (such as after other common USB peripherals you may be using, like a mouse and keyboard), in order to use the installation USB stick (which will be shown lower down in this post). (As desired or required, don’t forget to get a used screen.)
For the purposes of introduction to, and the exploration of, Linux, the old mechanical hard drive with such an old computer is likely adequate; however, SSD cards and extra memory will dramatically increase performance of older equipment. Further, as of posting, SSD cards in the 250GB range are typically very affordable to either add on later, or purchase for immediate use including installation of the system, while memory cards appropriate to the motherboard are usually readily available and inexpensively as per the above list regarding sourcing an old computer.
Downloading and creating a USB installation stick:
A USB stick is required for this step; Fedora’s installation image as of version 39 in late 2023 is approximately 2GB; hence a 4GB USB stick would be recommended going forward.
I am recommending the use of Fedora Media Writer to create the installation media, which can be run on Windows or Mac (as well as Linux, of course!) Should you choose another distribution, you can use a downloaded image from another distribution’s download page (see Desktop Linux: Unveiled Chapter 2: Common Linux Distributions for a few suggestions of other distributions; see below regarding choosing other Fedora desktops, or creating installation media of another distribution).
(Note that the following screenshots may have been created out of order, however are presented in the order required for the narrative.)
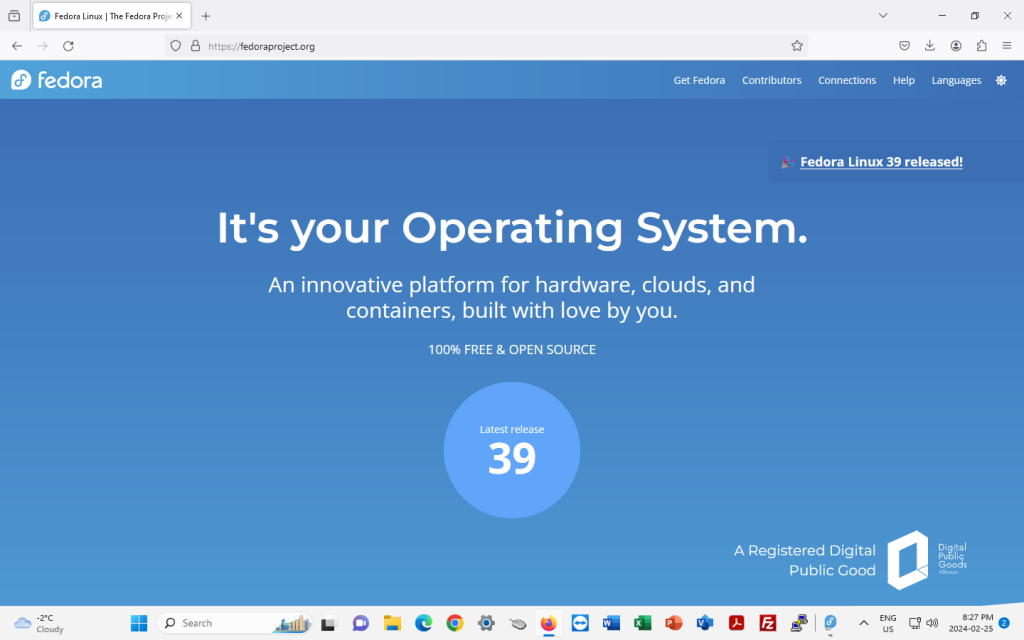
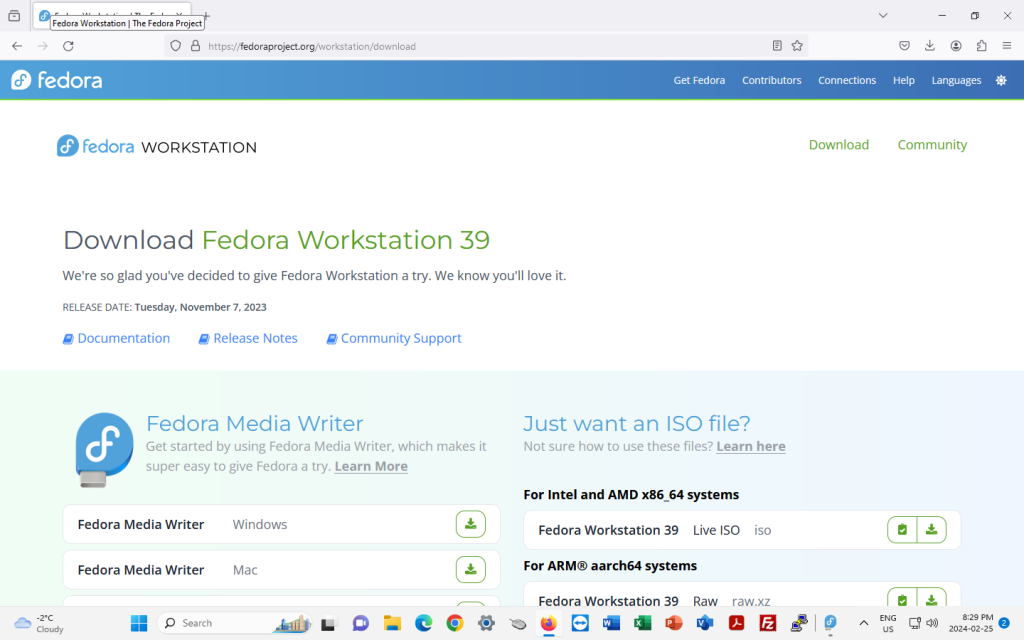
To get the Fedora Media Writer, visit https://getfedora.org (I start off using screenshots from Windows):
Click on the circle indicating the latest release (in the shot above, 39), which will bring you to the following screen.
On this screen, click on “Download Now”; don’t worry, you aren’t committing yet.
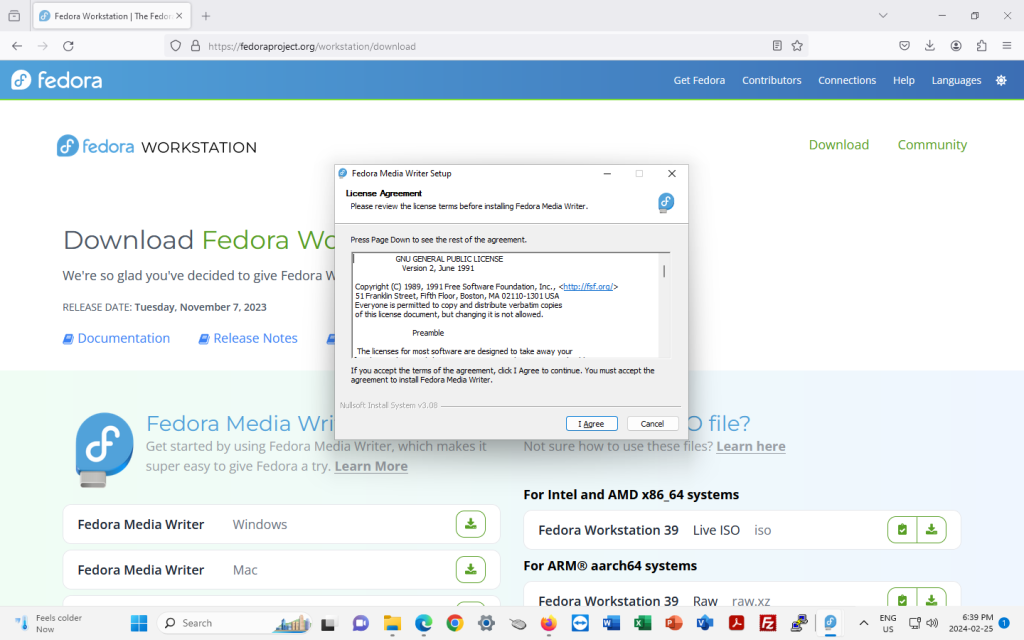
On the following page, click on the green download button for Fedora Media Writer, either for Windows or for Mac:
A licence agreement window will pop up. This is for the Gnu Public Licence version 2, the licence under which the Fedora Media Writer is licensed. Click on “I agree”.
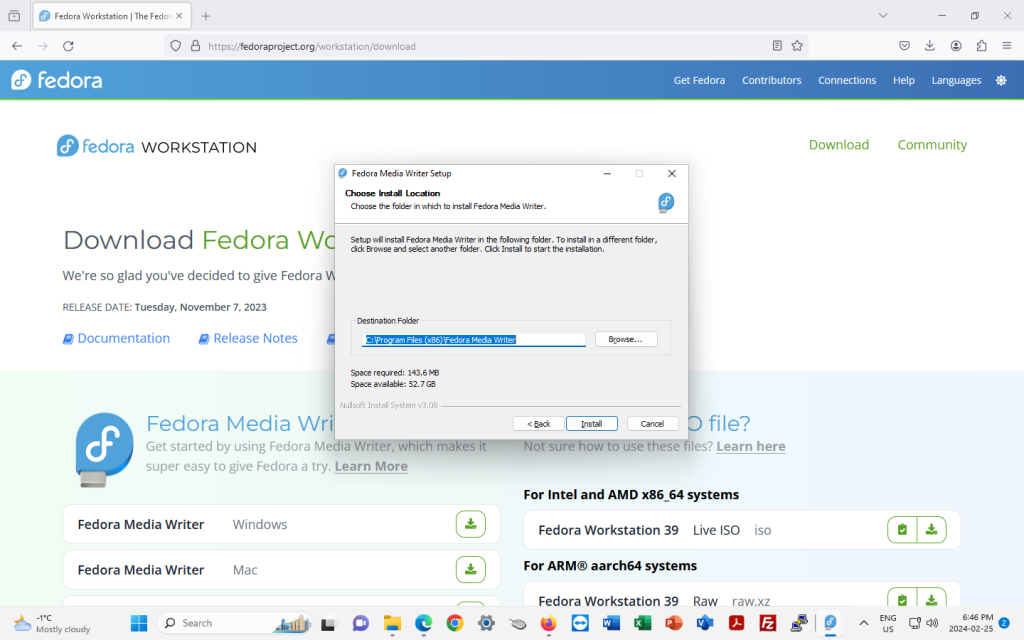
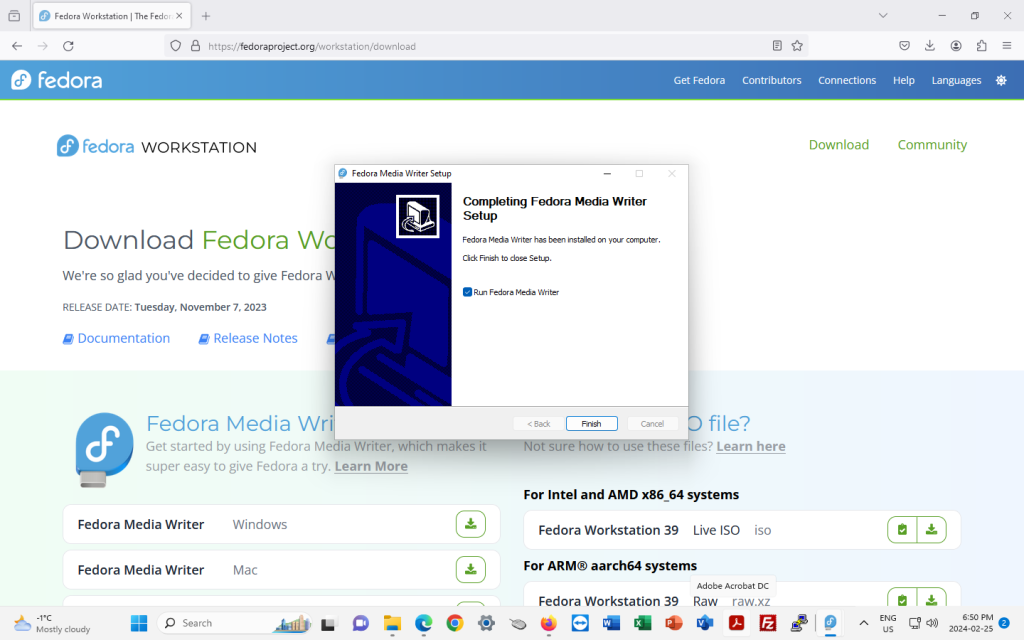
The next screen will ask where to install Fedora Media Writer on your computer, and it will suggest a location to install it on your hard drive. Click “Install”:
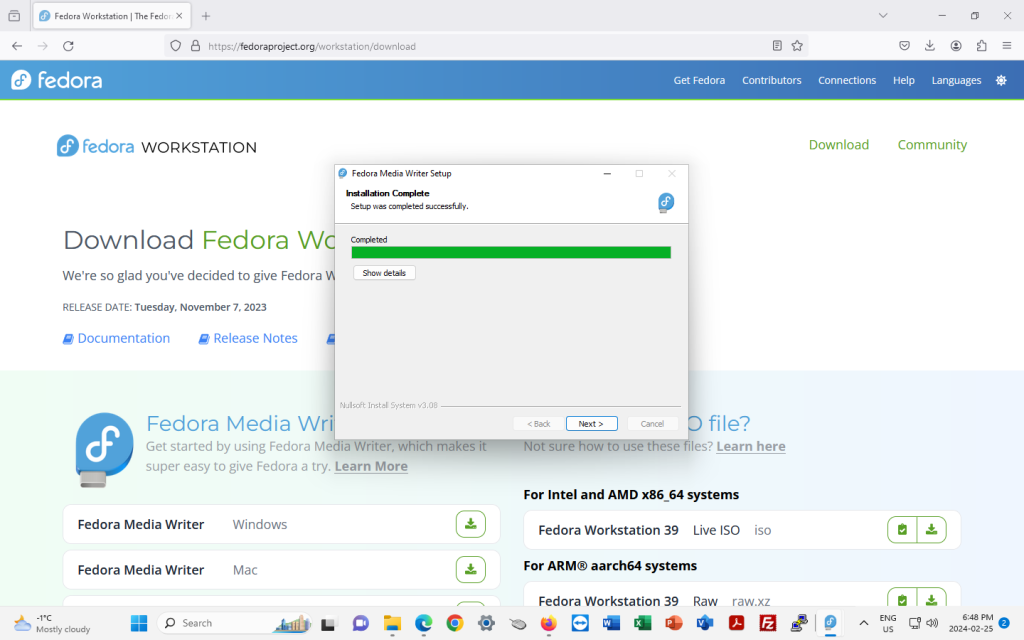
Once Fedora Media Writer is installed, click on “Next”:
… and click on “Finish”:
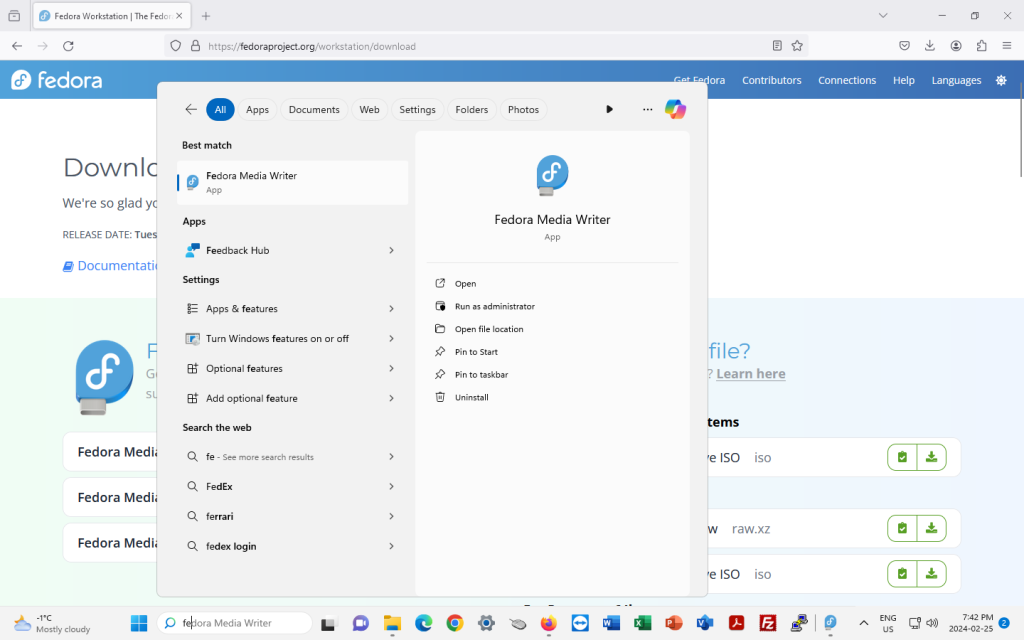
Launch Fedora Media Writer:
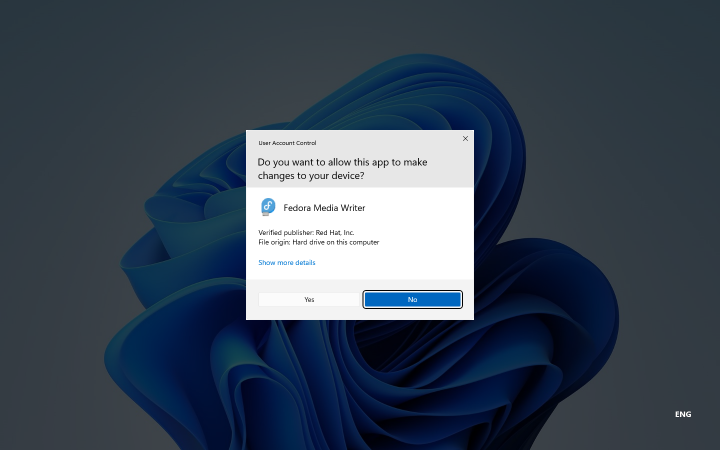
You may be asked to allow the app to make changes to your device. Click “Yes”.
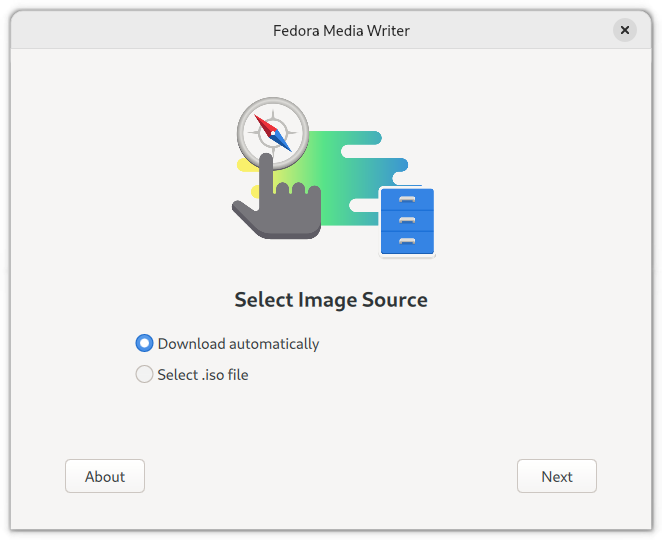
At this point, you can either choose to have the Fedora Media Writer download Fedora automatically, or, you can download a distribution of your choice, and ask Fedora Media Writer to use that distribution instead (the “Select .iso file” option):
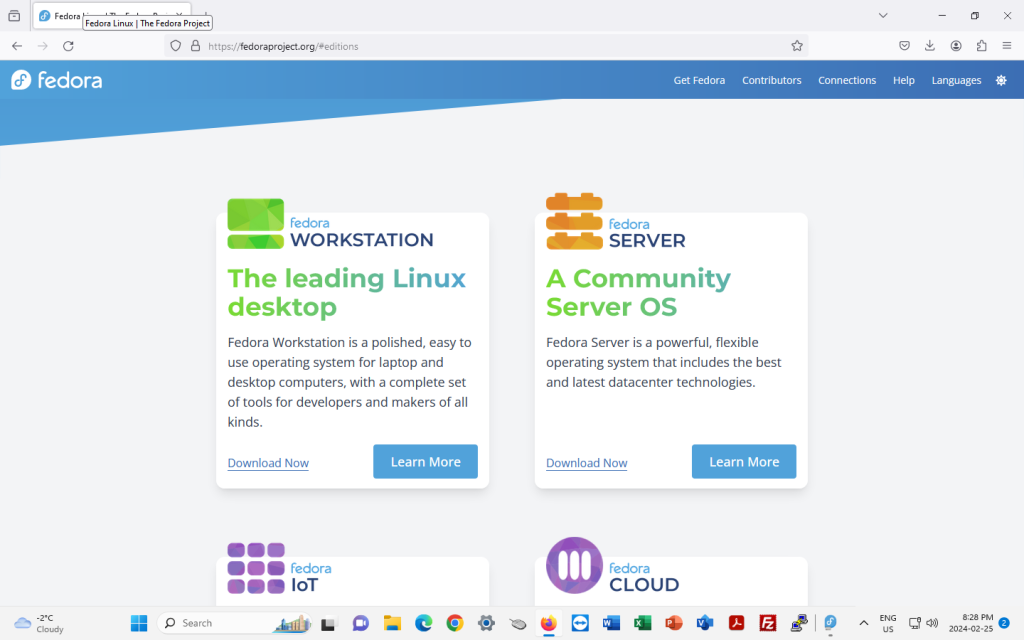
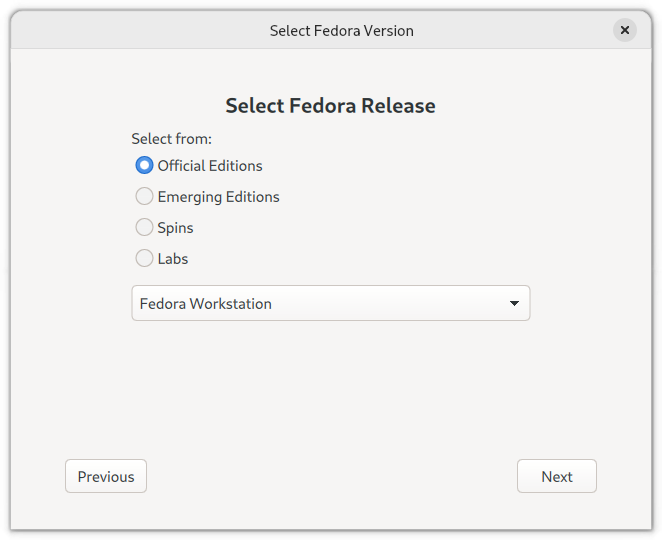
Going with the “Download automatically” option above, which by default chooses a Fedora distribution, on the next page (below), choose “Official Editions”:
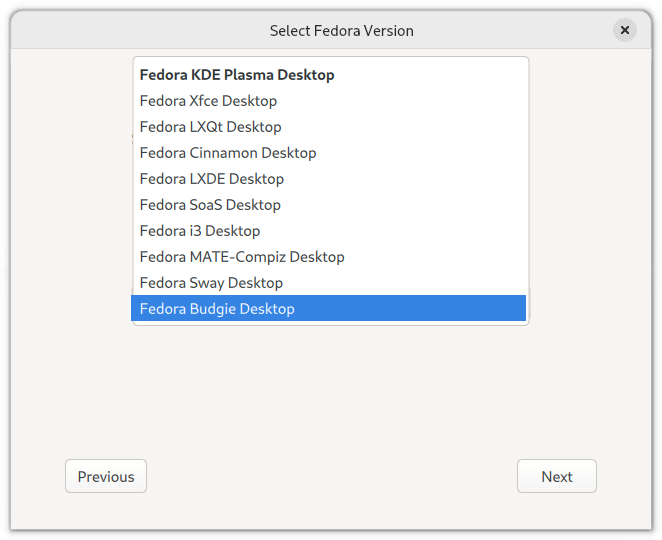
Should you wish to try another desktop instead of the standard Gnome Desktop in Fedora Workstation Edition, you can choose the “Spins” option above, which will list the following drop-down menu:
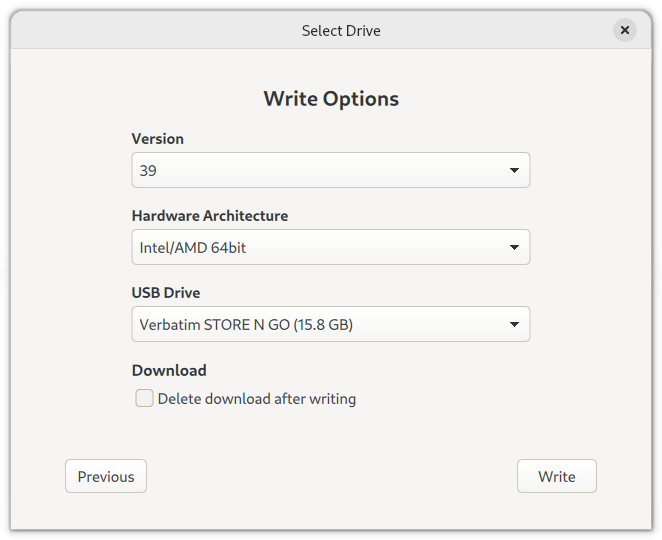
Under the choice taken, the next screen is the “Write Options” for the USB stick, which at this point should be inserted in a USB port. Choose the latest version of Fedora (in this case, 39), the hardware architecture, and the USB stick to which you wish to write the installation media:
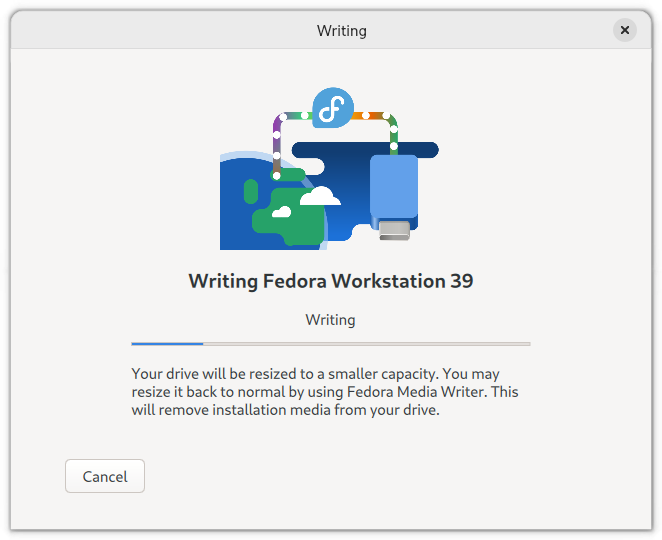
Click “Write” in the above screen, and Fedora Media Writer will begin writing to the USB stick:
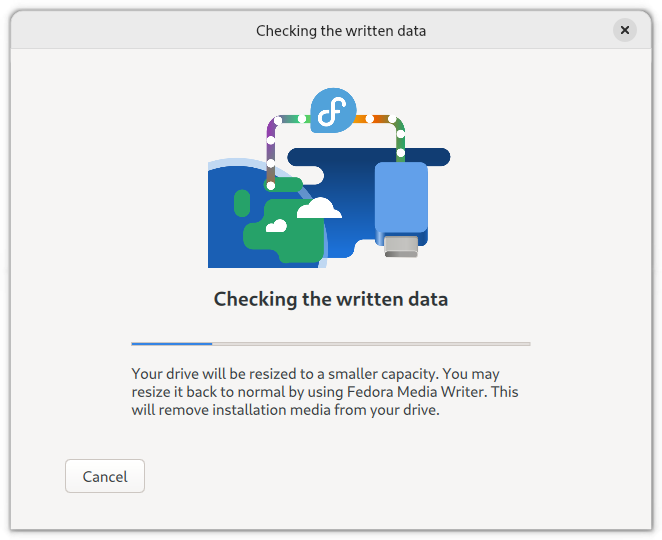
The screen will automatically change to indicate that the written data is being checked:
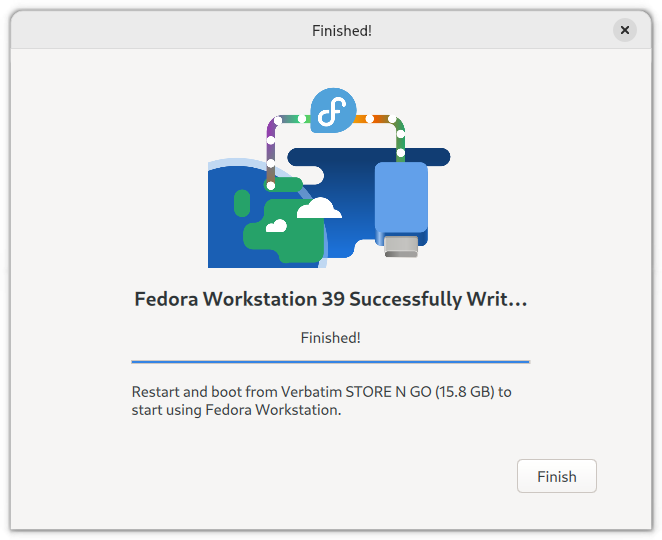
Once finished, you can click on “Finish”.
Should you wish to try out Fedora without installing it on your computer first, you can follow the instructions on the screen to restart the computer and try a live, temporary version of Fedora. This will not affect your hard drive in the least, unless you choose to install … which I am not recommending, since I am recommending that you install on a completely separate computer (see beginning section).
Next Chapter
Chapter 4 will show the installation of Fedora Workstation.
In this post, a few of the more well known linux distributions and desktop environments will be showcased.
Note: Clicking on the various desktops will show larger versions.
Fedora
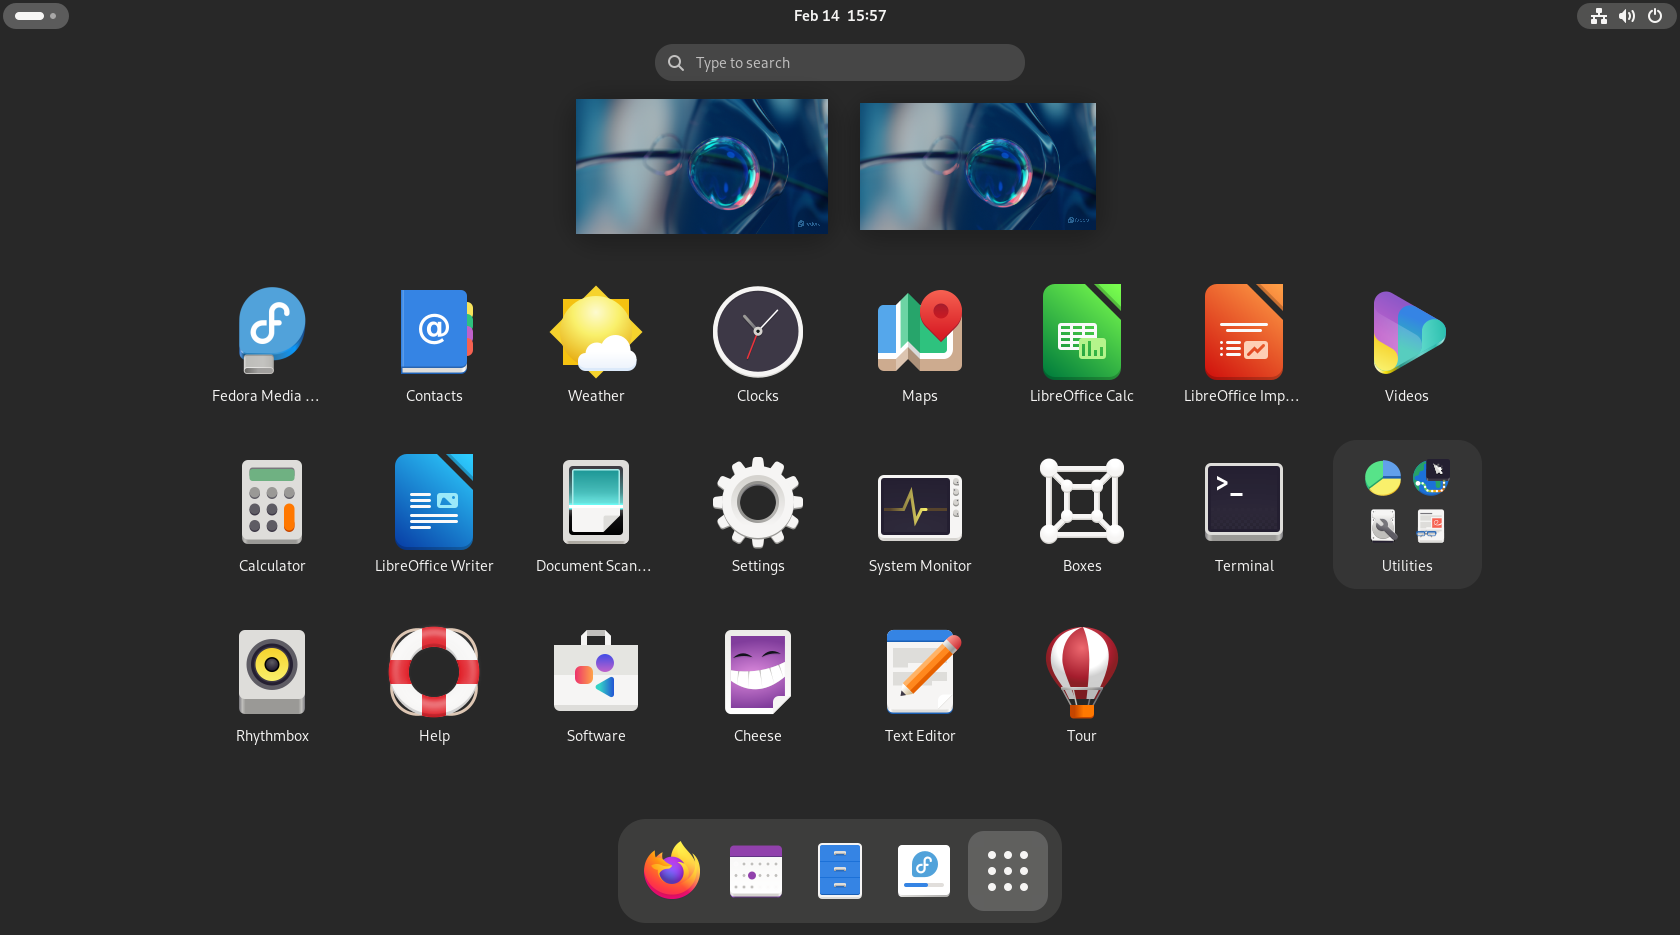
Fedora Linux is a general-purpose linux distribution focusing on free software (ie. not containing any proprietary software) and on being on the leading edge of free software development. It can be used by all desktop users. While having many tools that developers find useful, it is can also be used as a general purpose computer desktop.
Fedora using the Gnome desktop, with the activities screen opened up
Fedora provides a variety of desktop environments; the Gnome desktop environment is the default desktop environment, although other desktop environments are available in Fedora’s various spins, which cater to varying visual aesthetics, technical requirements, and useability.
Fedora Linux can be downloaded from https://getfedora.org(note: do not add “www”, it will lead to an error page)
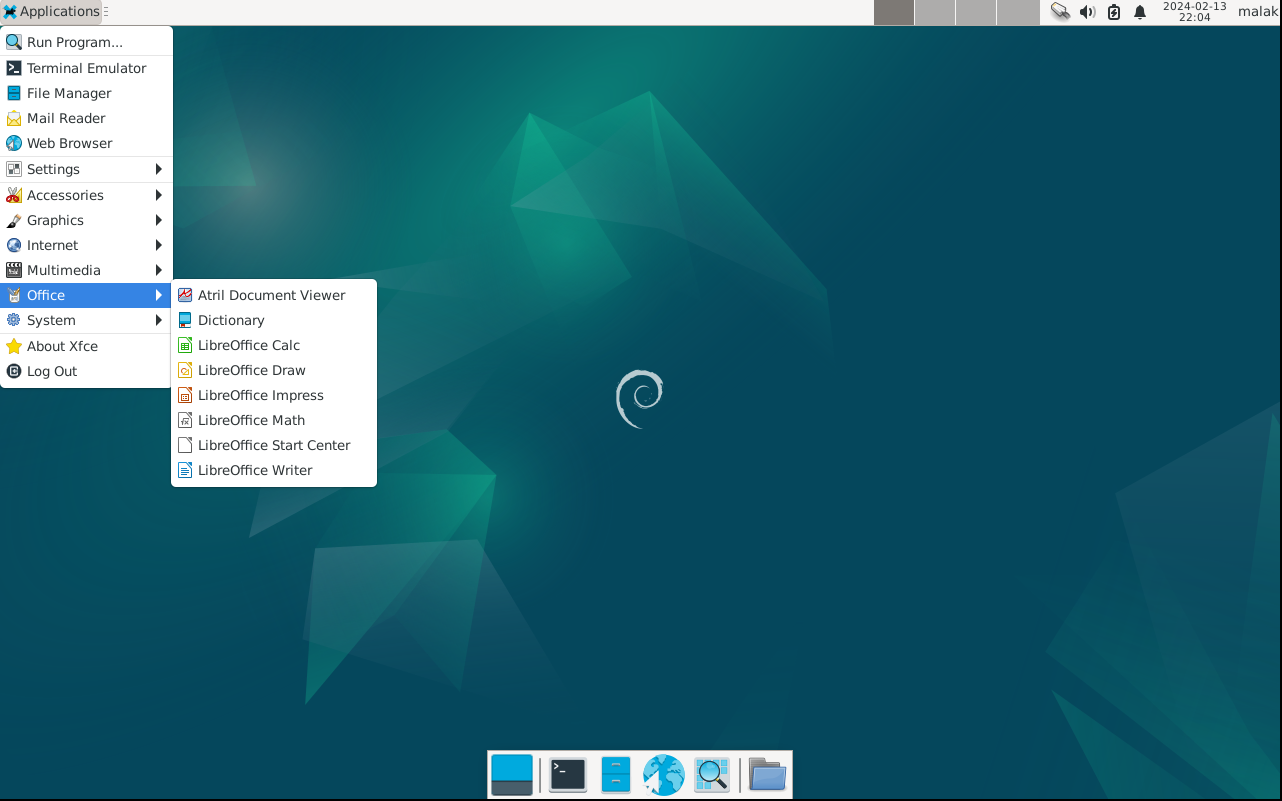
Debian
Debian GNU/Linux is a general purpose Linux distribution aiming to be available on a large variety of computer architectures, built on free software, and is known for its stability. The large number of software packages available under Debian and its stability are often highlighted as some of its strengths. Debian is used for a wide variety of purposes including desktops and servers, and is equally capable in both functions. Debian is often used as a base for other Linux Distributions.
Ubuntu is a popular Linux distribution based on Debian. It releases “Long Term Support versions every two years which typically are supported for at least five years, as well as intermediary releases usually every nine months. Ubuntu is often found not to be too difficult to learn to use.
Linux Mint is based on Ubuntu, and is known for its desktop named “Cinnamon”, which was originally based on the Gnome Desktop, but was branched off into its own desktop environment which focuses on a more traditional computer desktop appearance and functionality.
openSUSE is the community version of SUSE Linux, a business and server oriented version of Linux. openSUSE is known for its use of the KDE desktop, but also uses the Gnome desktop.
openSUSE Tumbleweed is a version which updates continuously and does not require reinstallation after a certain period of time; however, it may prove more challenging to newer users, who might find openSUSE Leap more stable.
It is titled “Deux frères, deux serveurs” (yes, it’s in French, and means “Two Brothers, Two Servers”), and the presentation represents my part of a double presentation with my brother.
I have five active computers, all which were ready to update to Fedora 39 in November, 2023: Three were running on Fedora 37, and two were running Fedora 38. Normally, I try to keep to the same version of Fedora on my fleet of computers — although I will format with the current version of Fedora mid-stream when I format a new or a new to me computer, or a new hard drive or ssd, and try to use a version (that of the majority of computers) until end-of-life, usually roughly 12 to 13 months. I settled on odd numbered versions several years ago, on Fedora 15, by happenstance, and a desire not to be reformatting different computers every six months depending on when their end of life fell.
As such, I proceeded to upgrade my computers.
Since the recommended method of update for Fedora is by the command line DNF upgrade command (here’s my archive), or to use the graphical method in the “Software” “App Store”, I proceeded to upgrade my machines on the command line.
(Note: Some of the screenshots and photos used in this post were created during the various upgrades, while some were re-created ex post facto for the sake of mounting this narrative.)
Note that the upgrade plugin was already present on the server, hence my having omitted the step of installing the plugin. Important note, minor in my head although critical to my experience, is that my webserver uses the Workstation Edition, not the Server edition.
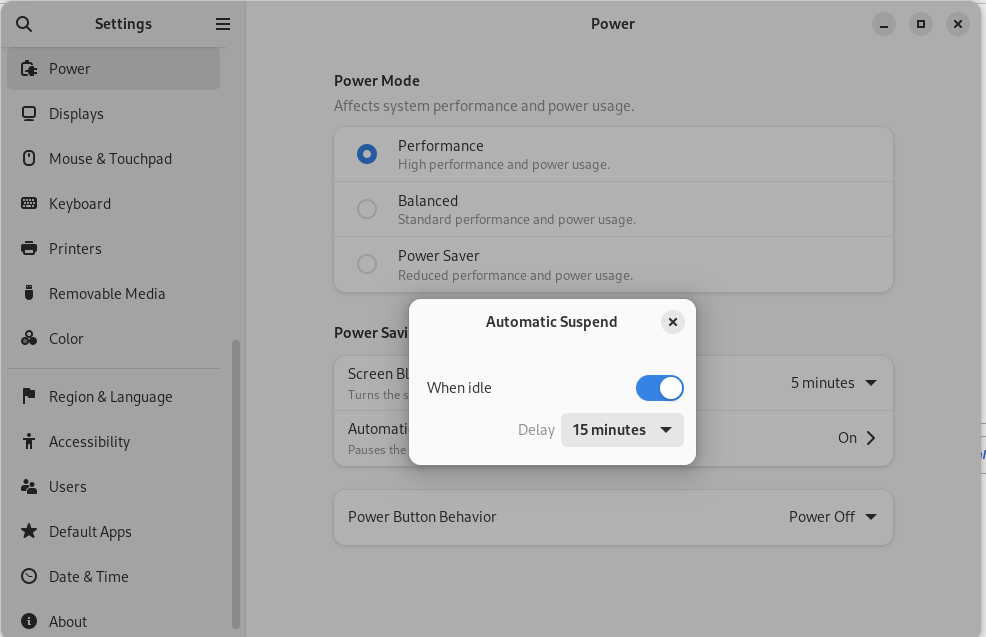
All went smoothly, with one small quirk: After the upgrade and later that evening while at a restaurant, I wanted to check my website for something, and it was down. I thought little of it beyond the frustration in the moment. When I got home, I let my brother know in the hopes he might help … but in the process, I saw that the machine’s light in the power button was amber, and I had an idea that there was a software power management issue. I pressed the button, and the machine popped to life; I then went into the power management part of the settings in the gnome settings, and found the “automatic suspend” setting had been turned on to “when idle”.
VPN Server: Fedora 38, Server Edition, Legacy BIOS (HP Compaq dc7700 Small Form Factor)
My next upgrade was also fairly simple and straightforward. It was on a machine I found in a building slated for demolition in about 2016, and is a P4-3.4GHz single core machine, which I had been using as a world community grid node for years, but which had been inactive for months, after there having been little work for it for months when WCG moved from IBM to the University of Toronto. (I also suspect that the UofT may have decided to shift most of its tasks to GPUs, which I don’t think the machine possesses, and in any case I did not properly research let alone confirm this, beyond the apparent lack of work units being sent to it.)
A problem I’d been having for years with this machine was that it would not reboot without manual intervention, apparently due to a time error; this suggested a dead bios battery. I tolerated this for years, but this summer I finally installed a new battery in the machine, resolving the issue.
I reformatted the machine with Fedora 38 Server Edition given its age and lack of memory, and I renamed the machine, having some misgivings about its former name. I offered its use to my brother, who uses it as a VPN server for the household here, particularly to simplify assisting our mother in her computer use. I generally leave the machine alone: VPNs are a nebulous thing I don’t understand very much at all; I understand SSH filesystem tunnelling, and the parts between that and VPNs are too nebulous for me to understand.
But to wit: Up to this point I was neglecting the machine, letting my brother deal with it, but as a result the machine would often go unupdated for weeks at a time. In mentioning that I’d embarked upon the process of upgrading my computers all to Fedora 39, I mentioned that I liked to keep my fleet of computers all aligned on the same version of Fedora; I mentioned that at that time, due to new installs, I had two out of five computers on Fedora 38, while the rest were still on Fedora 37. With the comment that I wanted to keep my fleet on the same version, my brother encouraged me to maintain responsibilities for updates and yes indeed to upgrade this machine in particular, to keep it in line with the rest of my computers.
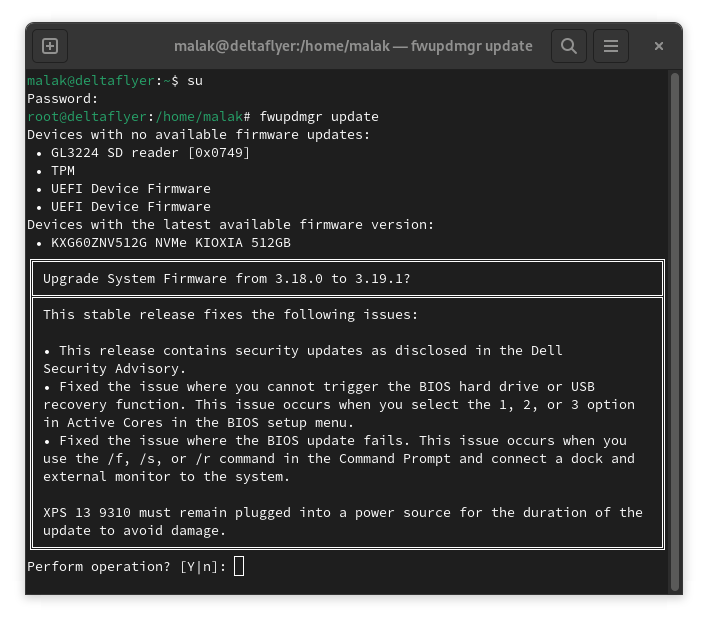
Which, of course, I did. (There were indeed some firmware updates to be installed.)
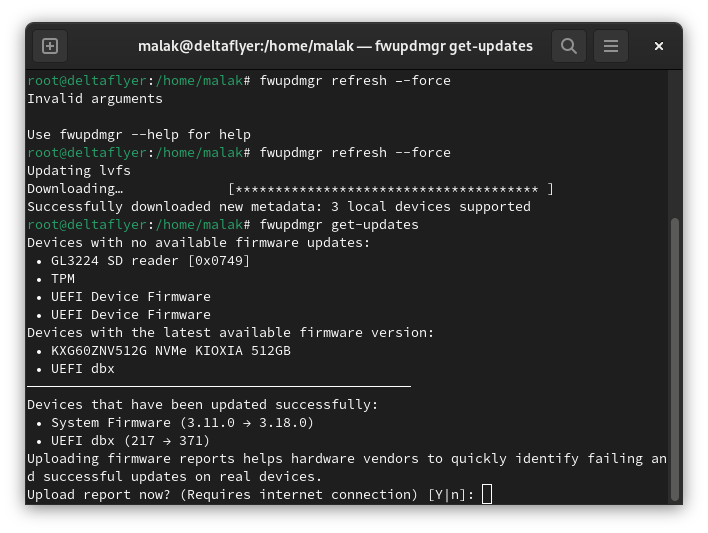
Here’s what the process looks like on my XPS13 (Screenshots and photos taken after the fact, on a subsequent series of firmware updates):
Firmware updates a few weeks after upgradeFirmware updates a few weeks after upgradeFirmware updates a few weeks after upgrade
At this point, I was invigorated by being able to perform firmware updates on my XPS 13 laptop (which admittedly had not been the first time I had done so under linux, but no matter.)
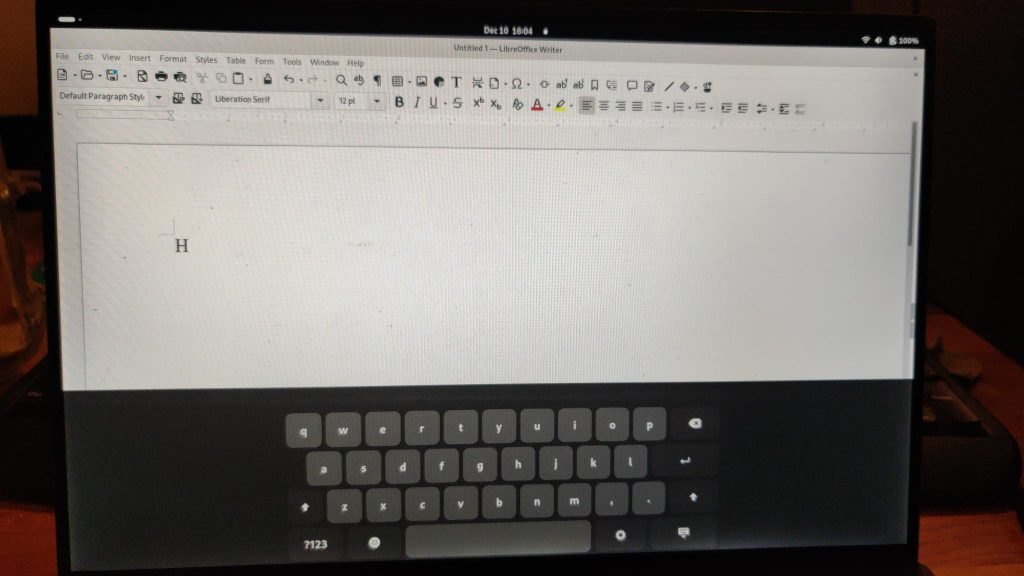
However, a couple of weeks later, I noticed that an extension wasn’t working: My XP13 has a touchscreen display, and Gnome has an onscreen keyboard that pops up contextually when text is to be entered, occupying a major amount of screen space; I had been using the “disable-touch-osk” extension by sulincix, which stopped working with the upgrade to Fedora 39.
On screen keyboard disabling extension not working
This leads to a gripe I have for the Gnome developers: Stop breaking extensions with each new version of Gnome, or provide *some* kind of stable API or environment or whatever is needed so that the extension developers don’t decide to abandon their extensions because Gnome keeps on shifting so much that they have to work excessively hard every six months just to maintain their extension.
This led to the next two computers I have, which are a 2015 Acer laptop, and a 2014 Dell Inspiron desktop.
Acer Laptop: Fedora 37, Workstation Edition, UEFI — but using Legacy BIOS
I have been having problems using UEFI in my Acer laptop since I received it new in 2015; the Fedora live media would boot up, and I could install Fedora under UEFI; however, it would never boot up afterwards. My only solution seemed to be to use legacy bios. Nonetheless, hope springs eternal, this was the time to try again to install under UEFI.
I should note at this point, as mentioned above, that my home server (2008) and my VPN server (2007) are both rather old computers and pre-date UEFI and use legacy BIOS, while my XPS 13, Acer laptop, and Dell Inspiron desktop, are all UEFI machines. I make these distinctions because of conversations I had in which on the one hand, it was suggested that I perform a baremetal reformat of the Acer laptop in order to sidestep a problem I had been experiencing when I’d allowed the battery to drain completely, forcing a reset to defaults in the BIOS and hence to UEFI boot, making my setup with legacy-BIOS unbootable; on the other hand, I concluded “It’s 2023; it’s absurd not to be using UEFI on UEFI machines.” (Of course, the use of older, legacy machines predating UEFI are a different issue altogether, and for them, said point is moot.)
In addition to this comment about using UEFI, and the potential to have any UEFI firmware upgrades as discussed above, I decided that my Acer laptop needed to receive a baremetal format, given the accumulation of a lot of software on the system that I didn’t use (many though hardly all installed because of a presentation I gave in 2021); I decided that instead of package hunting and manually uninstalling them all — including dependencies that decide not to uninstall — it seemed more efficient and effective to do a clean install.
Fast forward to this round of upgrades, I upgraded the installation using a downloaded Fedora 39 image, and I went through various upgrades and setups, such as Gnome extensions, and some software installations. Suddenly I remembered that I had not changed the boot sequence from legacy bios to UEFI, so … I started over.
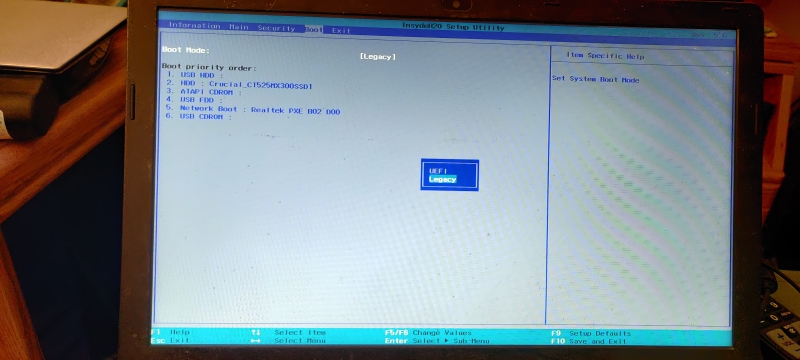
Several installation attempts later, including trying Fedora 36 (with an intention of upgrading through to version 39) based on some advice playing around with the various BIOS settings trying to get just “the right” settings, none worked, and I finally resigned to reinstalling yet again under, and continuing to use, legacy BIOS. Sigh.
Setting the Boot sequence to Legacy BIOS
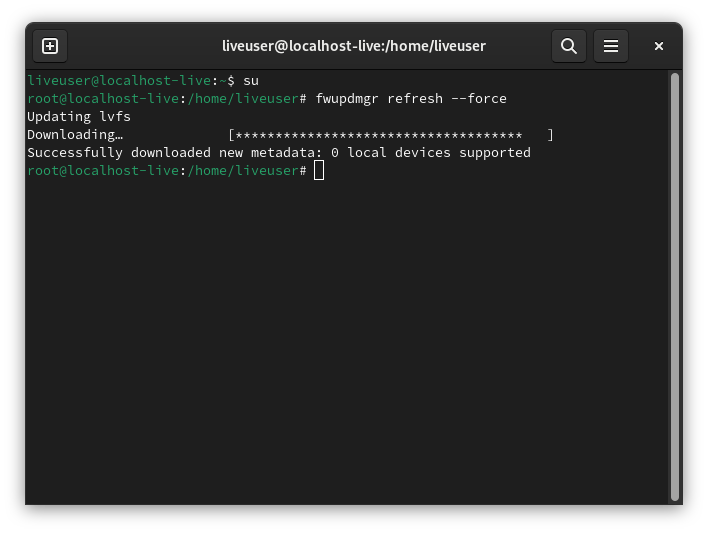
Before setting up in legacy mode, I had a flash of inspiration: Since I was nonetheless able to boot the live media under UEFI (which I knew wouldn’t otherwise be used afterwards), I attempted a firmware update as per the above. To my mild disappointment, there weren’t any firmware updates for my Acer Laptop:
I continued with the installation under Legacy BIOS mode, and set up the desktop with the various Gnome Extensions, installing software not in the base installation, and customizing settings and the like.
I once again faced a few pet peeves I have about how Fedora is set up (incidentally through Anaconda, but by itself not Anaconda issues, best I can tell):
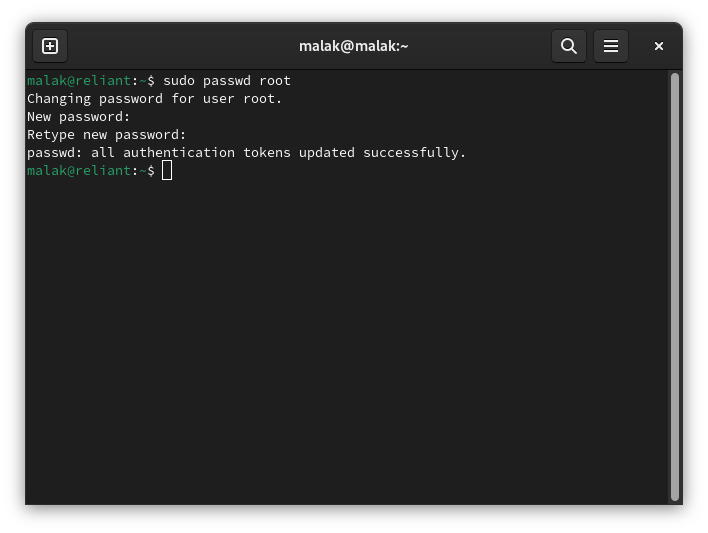
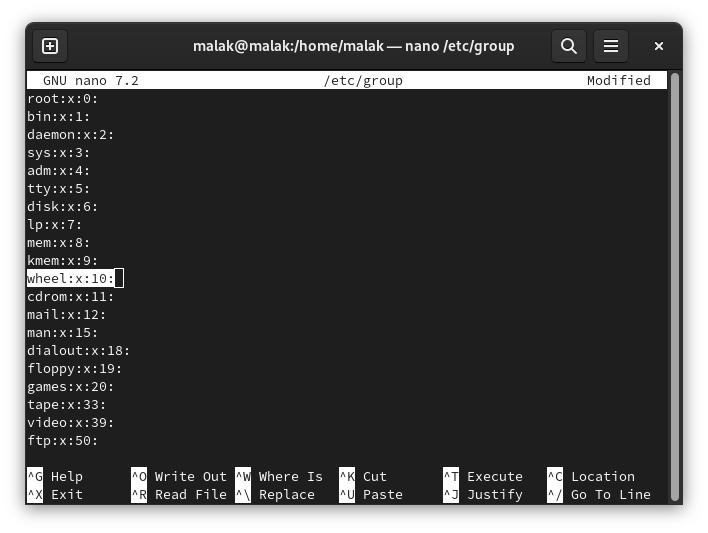
Fedora uses sudo by default, which I don’t like: I go by the notion of “Don’t be afraid of root; respect it, but don’t be afraid of it” — when you have to do root-y stuff, log into root, do what you have to do as root, and then sign out of root. (Yes, I am aware of the advantages of sudo, even beyond its convenience and short term elevations of privileges, such as logging of *who* elevated their privileges to do *what*; I just wasn’t taught that way, and on a single user system, I don’t see much value to it; hey maybe that’s just me.) As such, with each new install I perform, I have to, ironically using sudo under my default user account, assign a password to the root account, and then, remove my default account from the wheel group.
… by removing my user account from the wheel group (highlighted):
The next thing that irked me was that in Fedora Workstation Edition, it seems that Anaconda no longer has an option (read, without the qualifier “it seems”) to set the hostname during the installation. While I understand that it is a trivial enough thing to set as per the following, under the default régime of the default primary user having sudo privileges … it seems to me that this is the kind of thing that should still be in the system installation part. (As in, I wonder how many new users have “fedora” as their machine name for a significant amount of time if not forever, being unaware that it is (only) a default placeholder name, unaware that it can be changed, and unaware of how to change it.)
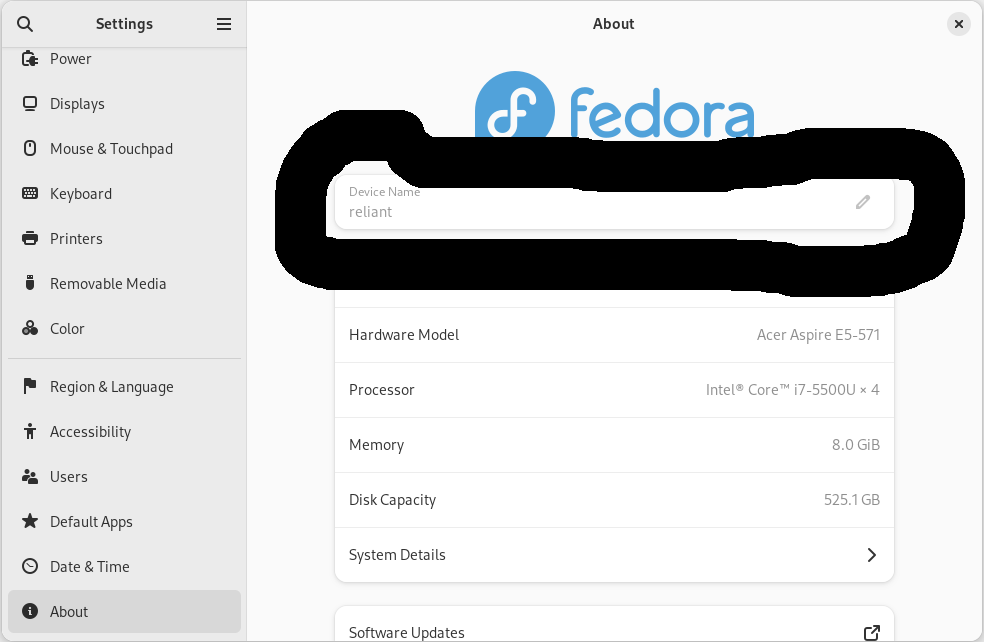
Fortunately, this is easily set in the Settings / About menu, *if* you don’t remove your default user from the wheel group, or at least haven’t yet, and therefore still have sudo privileges:
Note that in the above screenshot, the option appears shaded out because since I had already removed the primary user from the wheel group, effectively disabling sudo, my (default user) account did not possess the requisite permissions to edit the hostname.
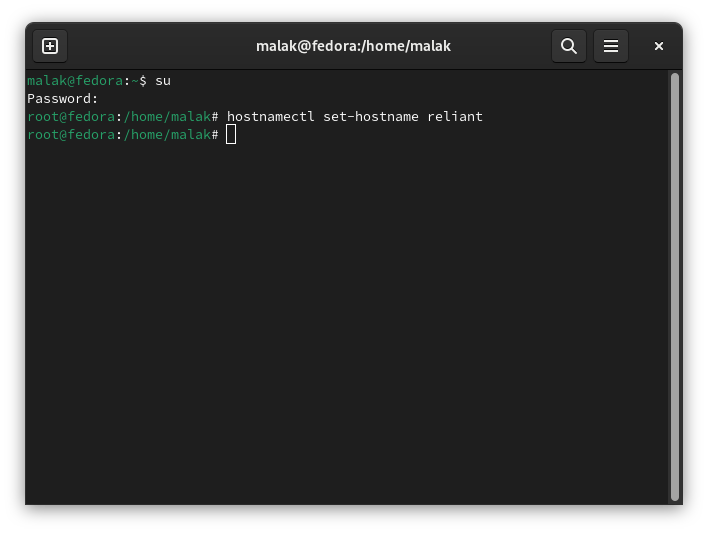
Changing the hostname on the command line is also not particularly difficult, using the command “hostnamectl set-hostname new-name”
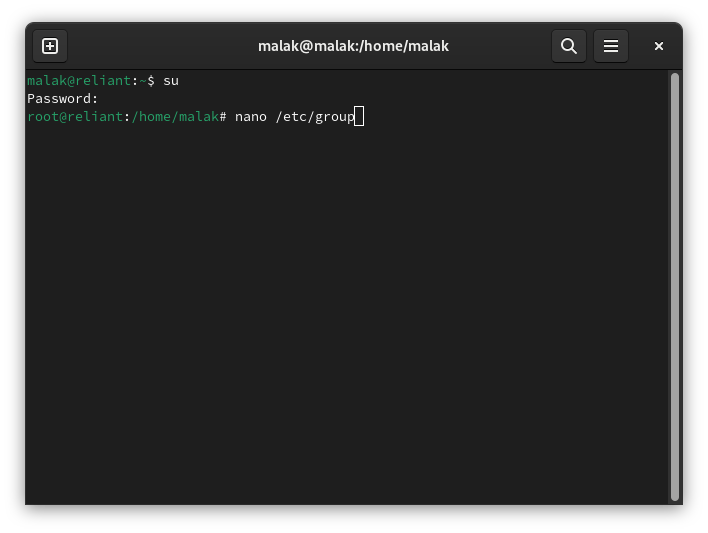
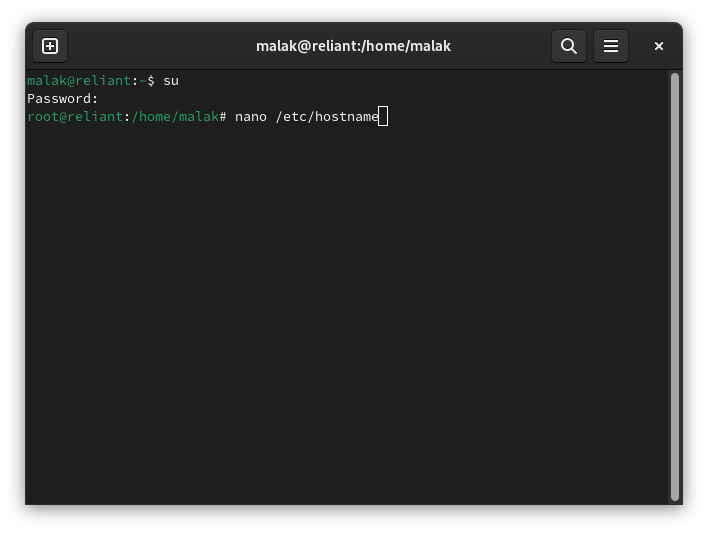
… or, editing the /etc/hostname file, by entering the command “nano /etc/hostname” as the at the command line and as the root user:
Then, once in the /etc/hostname file, enter the host name you want (in the case of my Acer laptop, “reliant”, as in the USS Reliant from Star Trek: The Wrath of Khan movie.)
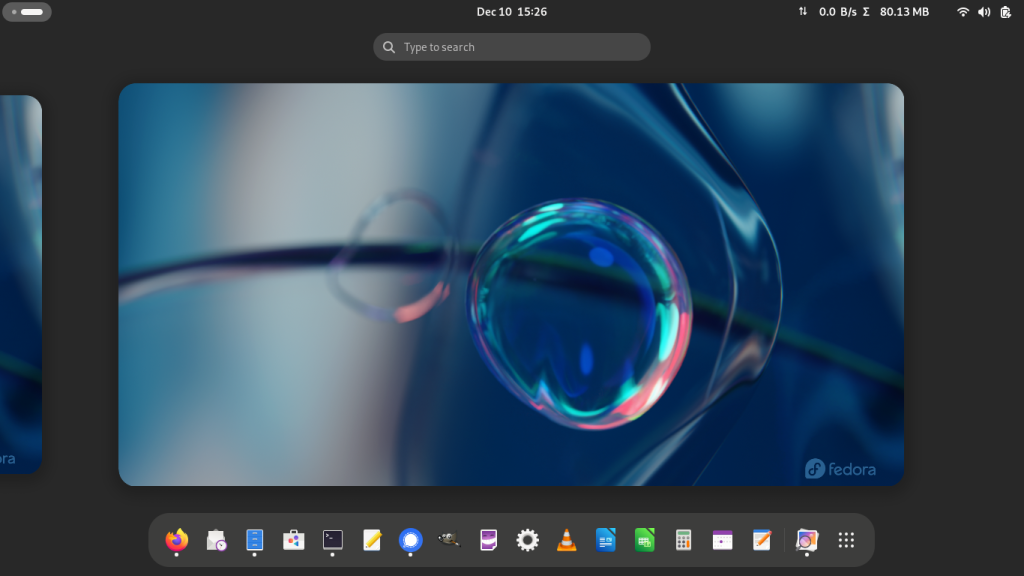
And on this install, I noticed that the extension Vertical Overview by Ralthuis, which among other things, allowed for the dock on the Activities page to remain vertical and on the left edge of the screen, instead of on the bottom of the screen, was broken, something I hadn’t noticed when upgrading my XPS13. Note: Check lower down in the section for my desktop.
Dock moved to the bottom of the activities screen due to a broken extension (note screenshot recreated after the fact)
On this point, I installed a number of Gnome extensions that I like, unfortunately not the one mentioned above, as well as adding apps to the dock, and other optimizations I commonly perform.
After these items, I installed Gnome Evolution, modified the installation’s setup such as pinning apps to the dock, and checked the power management issue listed above. During the install process, I was able to specify that third party repositories could be enabled; after install, I installed the free and non-free repositories from rpmfusion, as well as Rémi’s RPM repository. I transferred my data from the backup I had created earlier onto my laptop. (See next section on my Desktop).
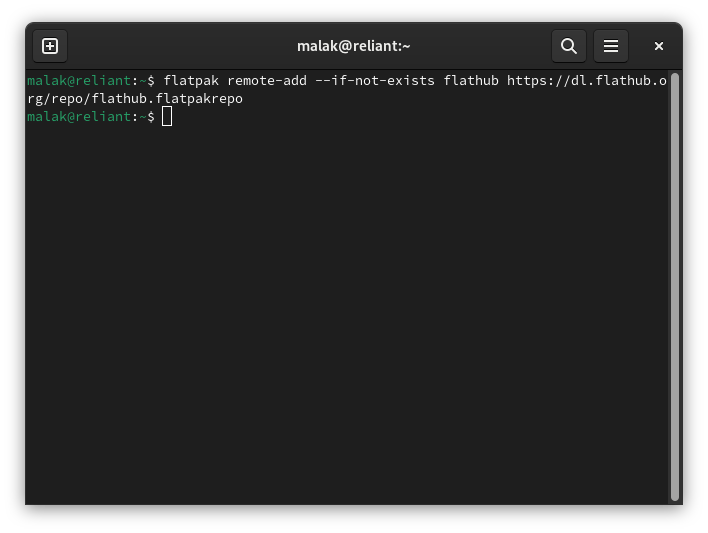
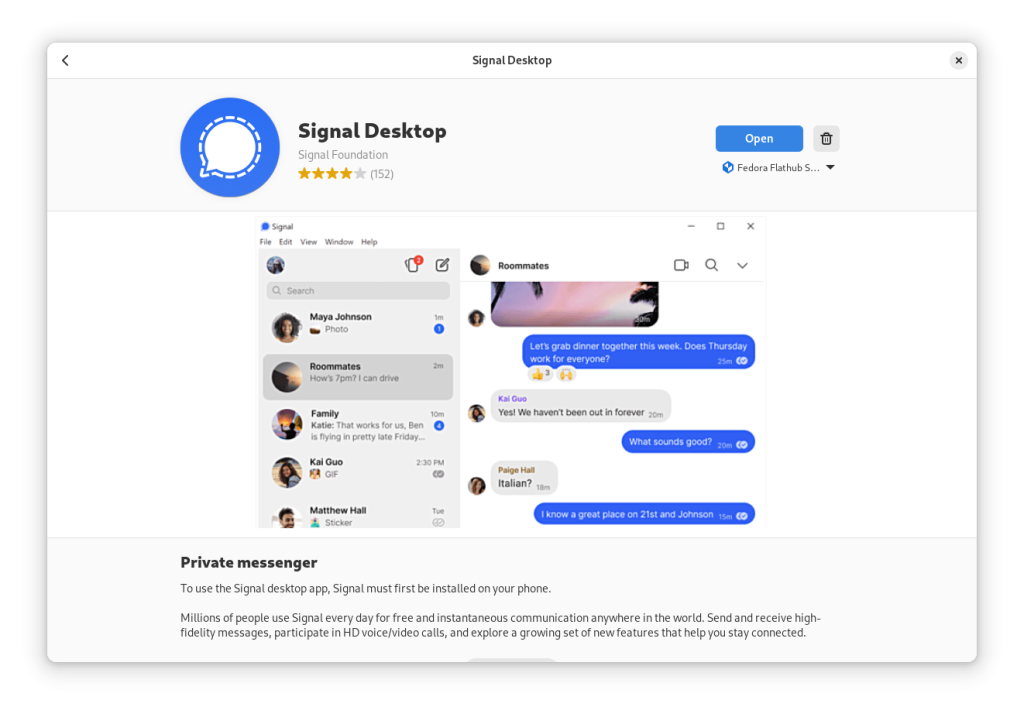
Finally, I had to activate the flathub repository (here’s my archive) in order to be able to install software that I use that is distributed as flatpaks, such as Signal (a secure texting app):
… and then Signal was installed from the Software App:
Minor note: I don’t recall having to enable the flatpak.org repositories before, although I may be wrong.
This leads to my final computer to upgrade, my desktop:
In the summer of 2023, I upgraded the mechanical drive to an SSD, and I had installed Fedora 38 the SSD; the Dell Inspiron had difficulty recognizing Fedora 38 media, so I took an old pre-UEFI computer, inserted the SSD, and installed Fedora on the SSD. I don’t recall if I knew to change to legacy BIOS once I transferred the SSD to the Dell, or after an error or two, I realized the error, and made the change in the setup. The installation worked, although I was slightly irked.
Come time to upgrade to Fedora 39, I performed the command line DNF upgrade covered earlier, dealing with some of the consequences like the power management and idling issue above. Additionnaly, I noticed something else that irked me regarding the power button (changing it from “Suspend” to “Power Off”:
“Power Button Behavior” setting changed from “Suspend” to “Power Off”. Call me old school …
However, in the intervening time I had experienced the UEFI crisis above, so I first performed a backup of my data to my backup folders on my web server, mildly surprised by how much I was behind in my manual backups.
Unfortunately from this point on, my desktop proved to be the most challenging to upgrade properly.
Having downloaded a copy of the install media for Fedora 39 and burned it onto a usb stick, as well as still having the Fedora 38 Server Edition DVD (which I had forgotten was the F38 Server Edition, instead erroneously assuming that I had gone to the trouble of burning the F39 Workstation Edition onto the DVD), and I tried to install Fedora 39 from both media. I tried several settings in the setup menu, to no avail: The motherboard categorically refused to recognize either, simply displaying an error message vaguely communicating a sense that it didn’t like the media. In looking through the internet for pages on the subject, including the Dell website, I was mildly piqued that solutions commonly referenced burning the usb stick using particular software under Windows (to which strictly speaking I have access, but not on the computer in question), and often just assuming that there would be a Windows partition on the computer. Putting aside knee-jerk reactions, I assumed that this would not address the issue since the solutions appeared to assume a conflict with Windows which could not exist on my machine, or that the Fedora media-writing tools were inherently unable to operate correctly.
I gave up for the moment, changed the boot settings back to Legacy BIOS, and used the untouched Legacy BIOS install for roughly a week while dealing with other upgrades and life in general.
After roughly up to a week, I remembered something I’d read a week or two earlier that said that the UEFI shim for Fedora versions 37 and 38 (and I presume, given my experience, Fedora 39 as well), was not working for some motherboards “due to a difficult certification process for this component“, (here’s my archive) and that a workaround was to install Fedora 36, whose shim was known to work, then proceed through the command line upgrades to Fedora 39.
Fedora 36 was downloaded and burned on a usb stick, and the settings in the boot menu were changed back to UEFI. Fedora 36 was installed — successfully! …
… and the updates were performed, after which the command for the version upgrade was performed, to bring it to Fedora 38. However, the system would not reboot on its own; a quick fsck command corrected some “dirty code”, which it corrected, and I changed some boot settings about booting and automatic on at certain dates. Once this was done, the upgrade to Fedora 38 continued:
DNF upgrade command working; yes, my screen is dusty!
I again performed a dnf upgrade to Fedora 39, and had to repeat the fsck command in order for the system to properly reboot.
To correct this rebooting issue, an empty file named “fsck” was created in my home directory.
Backups were restored, and work similar to what I’d performed on my Acer laptop were performed regarding sudo, root, renaming of the box, evolution, extensions, pinning apps to the dock, and the like were performed.
After yet another week or so, I noticed that my backups had not fully been transferred, and began transferring the balance. In the process, my computer indicated that it did not have enough space on the hard drive; I suspected that during the previous install that I had not correctly removed the previous install, so I reformatted yet again.
So I repeated the installation and upgrade process, this time ensuring that all space on the drive was reclaimed, and repeated the above processes, both specific to the computer as well as other things generally required as part of the upgrade.
During the initial setup, I discovered an extension that brings back the vertical view: V-Shell (vertical workspaces) by GdH, and it seems to do what I want, although on the desktop there is a setting that brings up the (vertical) dock, workspaces, and app search space over the workspace; comparison with another setup allowed me to find the setting I wanted.
And, to repeat myself: Gnome, do you hear me? Stop breaking extensions!
Now — so far — the computer seems to be working, but as this whole process over a month has shown, I should give it at least a week to find out if there are any other issues.
Final Thoughts
I don’t read the upcoming changes for new versions, nor do I research in advance problems that people have been having. I discover the problems, changes, and challenges along the way, and as such for me Fedora reveals itself as per my usage and discoveries — no doubt leaving a lot hidden to me — not only over its roughly 13 month lifespan, but also over the first few weeks of using it, and, interestingly, over the installation process itself, especially when it’s over several machines of different eras and manufacturers and technologies.
As this round of upgrades in particular has shown, as well as years of using Fedora Linux, using Fedora Linux is an exercise in bleeding edge.
Now, barring unforeseen changes, additions, and the like, I’m looking forward to roughly a year of Fedora 39 goodness!
This post is a translation of and (somewhat of an) adaptation, as well as slight update, of a presentation I gave in November, 2021, at a meeting of my local Linux Meetup. This adaptation includes some extra limited mockups of demonstrations performed live during the presentation.
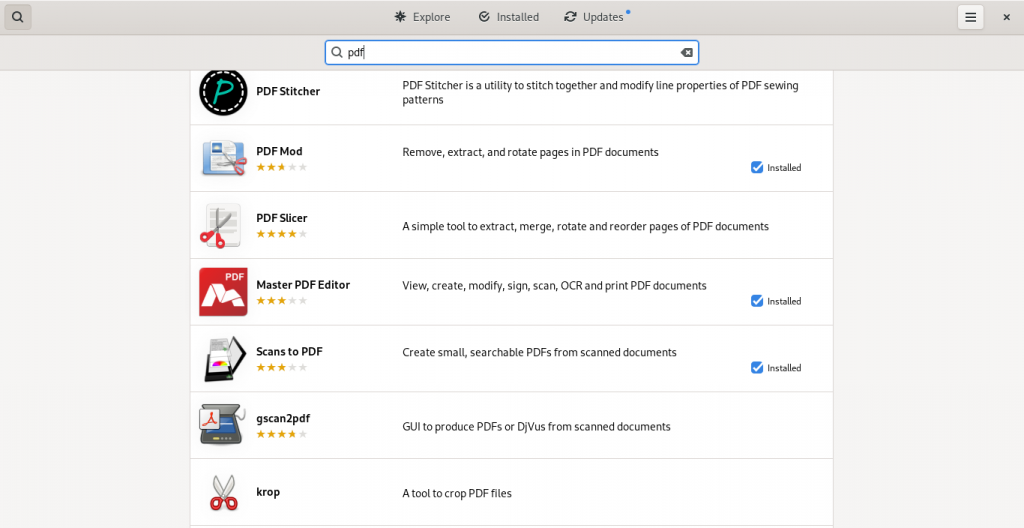
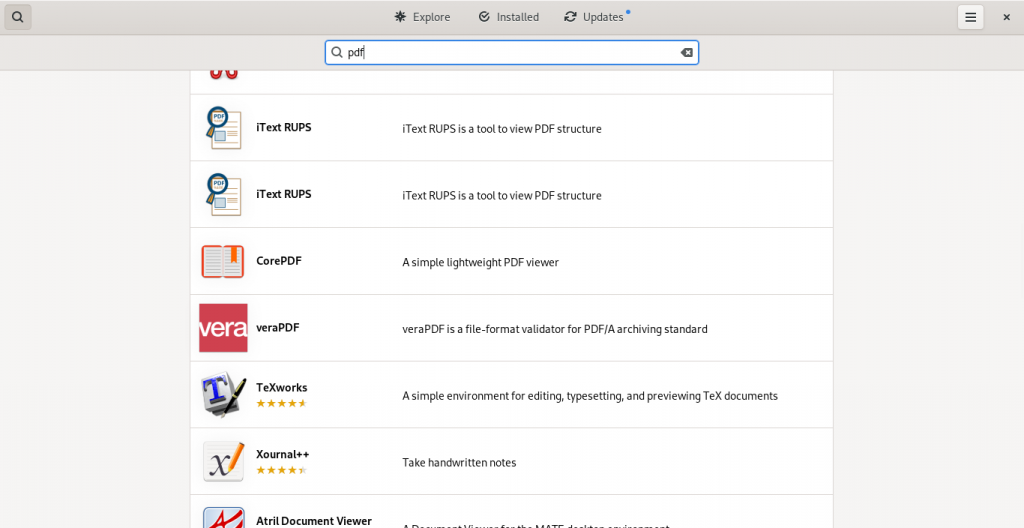
The presentation was put together using Fedora Workstation (a general purpose version of Linux, in this case specializing in being a desktop workstation), highlighting some software either installed by default, or available in the Fedora Linux and rpmfusion software repositories (“App Stores”). It is therefore not intended to be a complete exposé on all available open source / free software options for PDF, even under Fedora Linux, let alone GNU / Linux in general, or other systems.
It should be noted that the presentation’s original target audience was a French-speaking group of Linux enthusiasts, Linux professionals, and other IT enthusiasts and professionals familiar with Linux. Most of the listed software would typically be available in standard or easily accessible Linux software repositories (“App Stores”). Beyond the world of GNU / Linux, free software is generally available for use on other systems, and, barring instances of a specific given package offered with paid warranty support, are usually also free of charge to download, install, and use.
In the case of the software highlighted in this post, all are either free-of-charge, or represent the free-of-charge version.
The Value of a PDF File
Context / Situation:
Take the case of the exchange of a document between two computers — such as between one running Linux, and another running Windows (or vice-versa) — and each computer is endowed with a different office suite, such as LibreOffice (cross-platform) on one, and Microsoft Office (Windows / Mac) on the other. (Of course, other possibilities exist, such as Calligra Suite (cross-platform), Pages / Numbers / Keynote / etc. (Mac), Corel Wordperfect, Google Docs, etc.)
LibreOffice, and in days gone by, OpenOffice.org, have long been touted as being “compatible” with MS Office; this purported compatibility, however, is disappointingly nowhere near as good as I and many others would like to believe.
As such, each user will open the shared document, which will be displayed according to each suite’s interpretation of the file, and may find that the actual displayed content on their screen could be different — sometimes substantially so — from the intended original display of the document. Text lines may be cut off; fonts may not be available on one or more of the systems, causing font substitution; font sizes may be changed, or text size may be different while substituting a different font due to the lack of the specified font; certain symbols may not be available on some systems; table effects may not work, or objects inserted into tables may not function or be displayed as expected, such as the insertion of a spreadsheet.
Unfortunately, I would estimate that said disappointing lack of “complete and perfect” “drop-in replacement” compatibility is a very common experience in comparing many well-known pieces of proprietary software and their open-source counterparts — not just LibreOffice and MS Office. Personally, as a Linux user, I have experienced this lack of complete compatibility a number of times since beginning to use OpenOffice.org in 2005 and Linux in 2006. Since then, I have also seen the incompatibility in action on a number of occasions during varying presentations under completely unrelated circumstances in which the presentation files were produced in one suite, and attempts made to show them in another were met with varying degrees of disappointment, sometimes leading to complete failure.
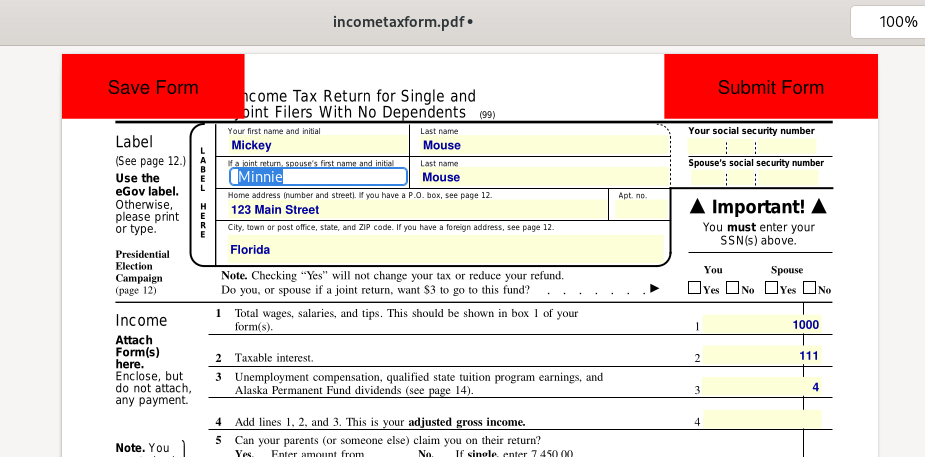
Example PDF
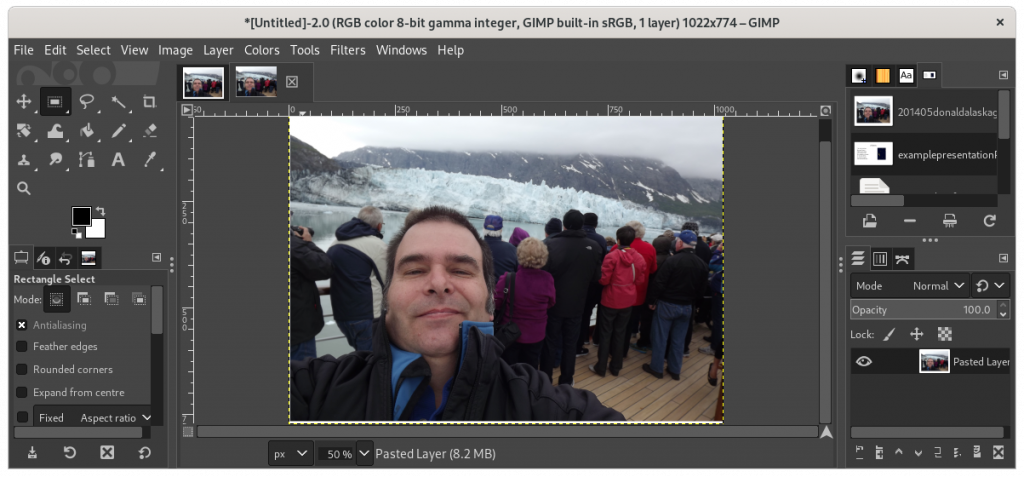
The PDF at this link is a somewhat varied although basic document created for this presentation (you will need a PDF viewer); images of the PDF are shown below. It was developed in order to use throughout the presentation as an example PDF to demonstrate the various given points at hand. It should be noted that the PDF was written in French because the presentation’s original target audience was French-speaking.
The following four images are jpeg images of the pages of the PDF document linked to above, and which I created in LibreOffice Presentation. It should be noted that, for the sake of argument, the pages could have been created in another format, such as a word processor, a spreadsheet program, or a drawing program, for instance.
Page 1 — Song lyrics to be displayed for a Karaoke Night
Page 1, the lyrics to a French song, such as one might want to display during a karaoke event among friends
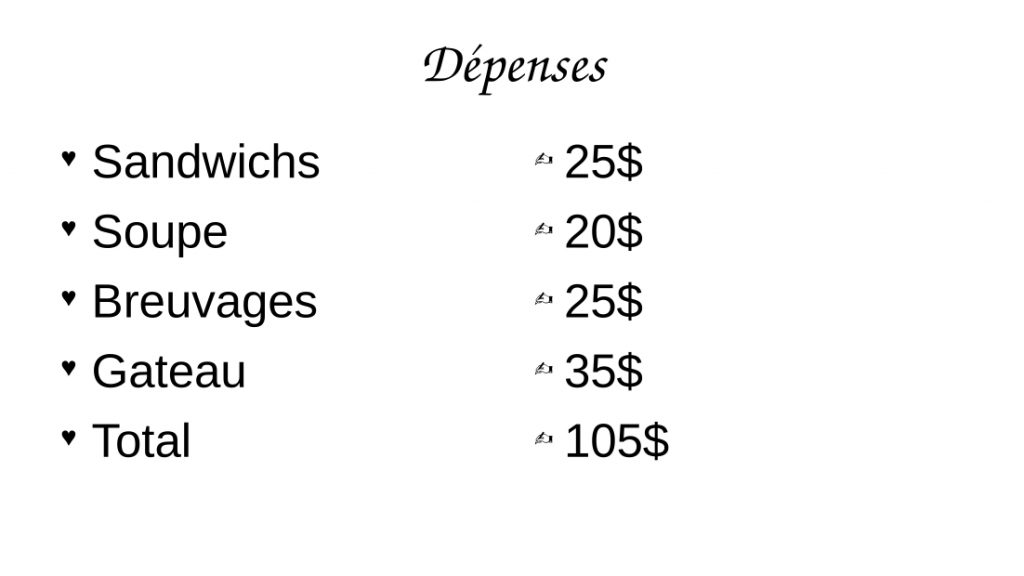
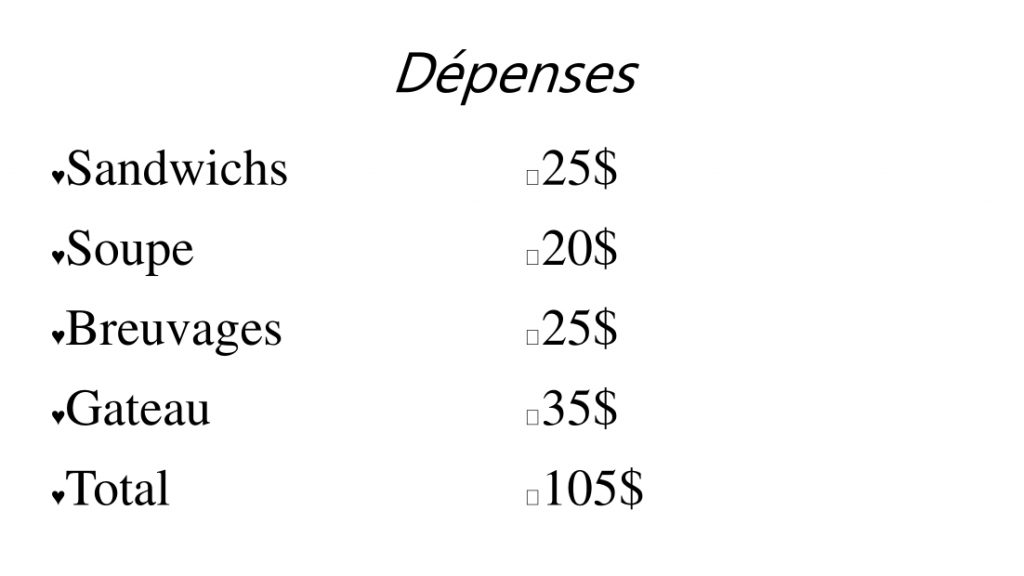
Page 2 — Expenses list for a Luncheon
Page 2, a fictitious list of expenses for a luncheon
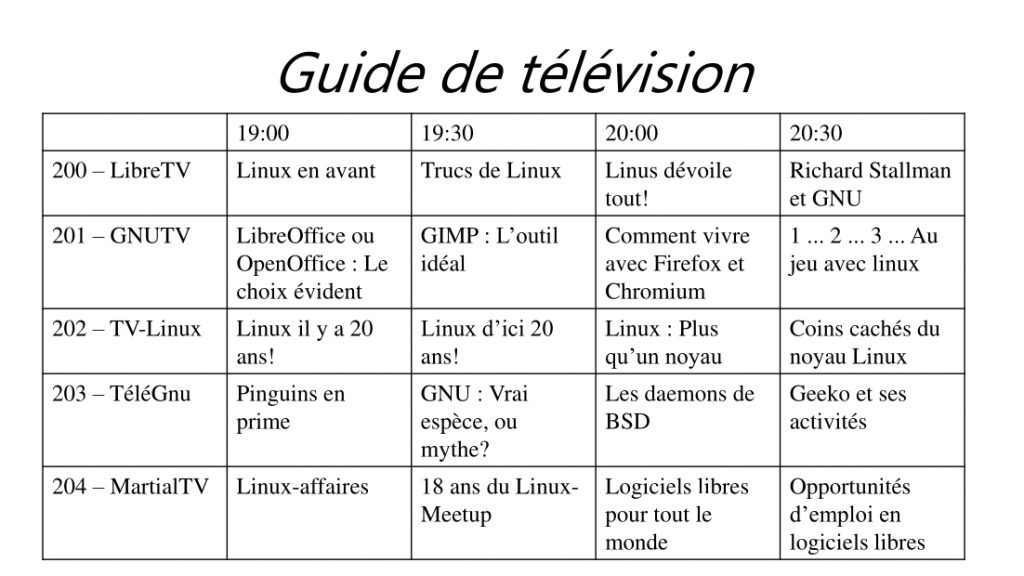
Page 3 — TV Listings
Page 3, a fictitious TV listing for an evening, with some Linux in-jokes and some in-jokes specific to the original audience
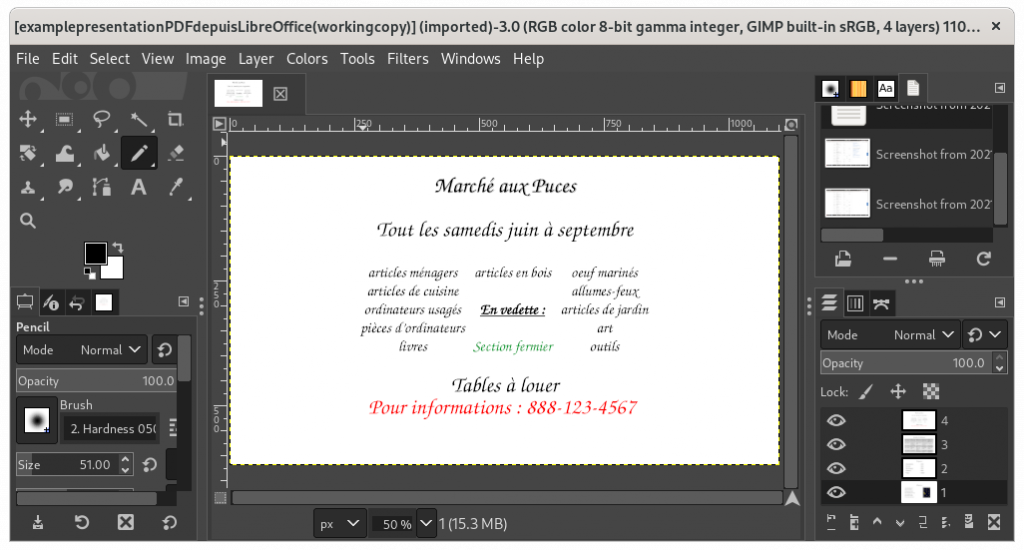
Page 4 — Flea Market Poster
Page 4, a fictitious flyer for a local flea market
The above document — represented here in jpeg format directly produced from a PDF of the document — was originally prepared in LibreOffice Presentation, and therefore correctly represented the original document.
However, the following four images are jpeg images of the pages of the PDF document I created in Microsoft PowerPoint (you will need a PDF viewer) into which I imported the original LibreOffice Presentation, in order to demonstrate the relative lack of compatibility between, at least in this case, LibreOffice Presentation and Microsoft Powerpoint.
Page 1 — Song lyrics to be displayed for a Karaoke Night
Changes: Text fonts and font sizes, causing text to be cut off the page
Page 1, note the changes in fonts and font sizes
Page 2 — Expenses list for a Luncheon
Changes: Text fonts, and improper translation of symbols
Page 2, note the changes in fonts, font sizes, and improper translation of symbols
Page 3 — TV Listings
Changes: text fonts, font sizes, and lack of background colours in the various cells
Page 3, note the changes in fonts, font sizes, and lack of background colours in the various cells
Page 4 — Flea Market Poster
Changes: Text fonts, font sizes, corrupted translation of spreadsheet table in the centre of the flyer
Page 4, note the changes in fonts, font sizes, and the completely corrupted translation of the spreadsheet table in the centre of the flyer
The value of a PDF:
PDF files are generally well supported across multiple platforms and software, generally regardless of platform, and will usually be displayed in a virtually identical fashion on all systems; in the case of discrepancies, they are usually inconsequential.
However:
There exists a certain perception that, short of having Adobe Acrobat Pro (a commercial, closed source piece software), PDF files are difficult to edit and modify, allowing for a certain view that PDF files are more secure. This is a case of “security by obscurity”, since editing and modification may be performed by many pieces of software, besides but of course including Adobe Acrobat Pro.
PDF files may also benefit from a perception of being less susceptible to viruses and malware, such as through macros. Suspicious files, regardless of format, should always be checked when there is reasonable doubt, particularly under certain environments.
Warning:
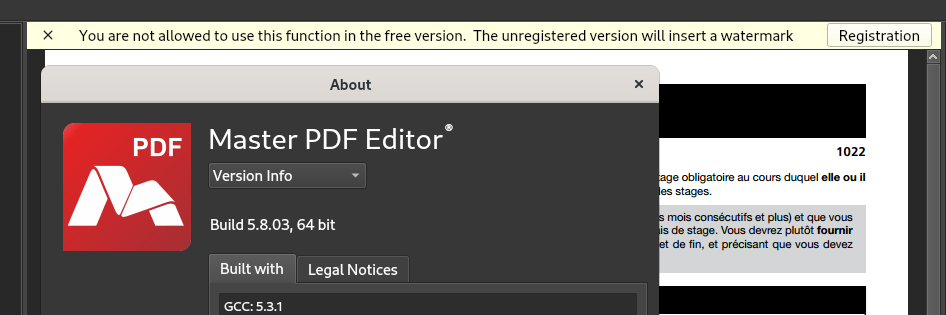
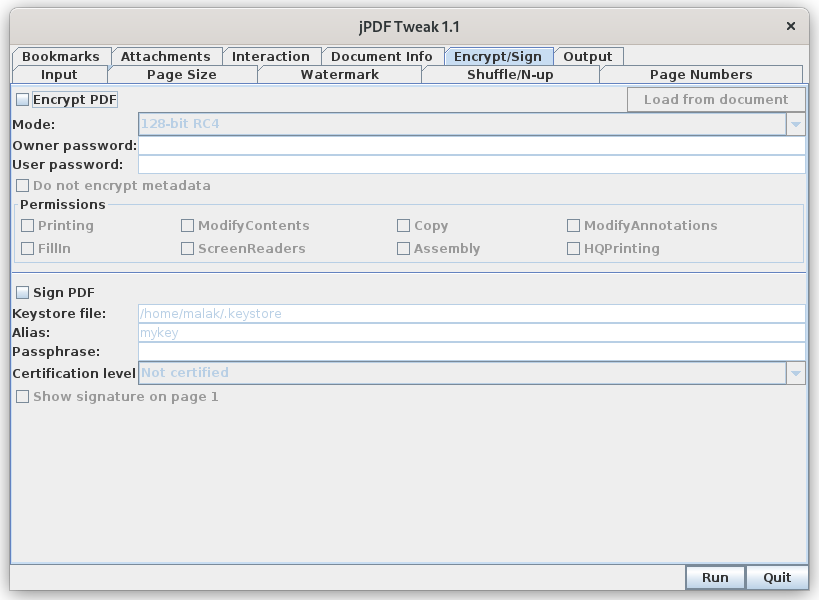
Be careful when using some PDF software downloaded from random websites on the internet, or websites which advertise PDF modification: The may add watermarks to the resulting file — this may be undesirable, and embarrassing, particularly if the software, website, or their output aren’t vetted prior to distributing the resulting file.
PDF Software which adds a watermark to edited watermarks when using an unregistered version
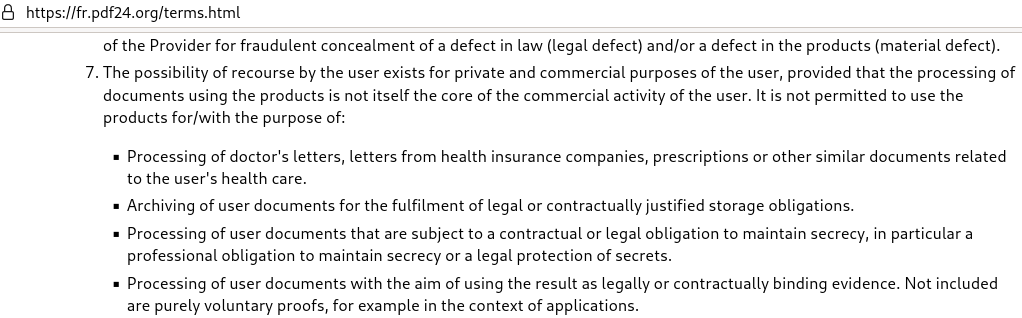
Further, websites providing PDF editing services may have very reasonable terms of service for editing your document, limiting their responsibilities toward you. By submitting a document to an external website, it may may not be able to protect personal privacy, nor be able to guarantee to not divulge commercial or industrial secrets or confidential personal information contained in the submitted document: They may become the victim of a hacking, or become the target of legal proceedings, not to mention potential dubious or unscrupulous intentions operators might have to begin with. Or, they may simply be unwilling to formally engage in such responsibilities in the absence of a paid service contract.
Sample from a website listing their conditions of use
This article’s objectives therefore are:
Firstly, presenting the utility of PDF as a useful format for distributing documents to a wide audience, without having to concern oneself with what software individual audience members may or may not have access to, if at all, and regardless of reason(s);
Secondly, presenting safe, free software and open-source software options for using and editing of PDF files;
Thirdly, beyond the general promotion of free and open-source software and PDF editing, this article is not about promoting nor deriding particular OSes or software packages, or strictly speaking their strengths or weaknesses.
As such, if a particular system or software package suits your needs and / or purposes, you should use it.
However, if a given preferred solution is costly software, perhaps your organization (or your family) may find it to be financially worthwhile to only purchase a minimum number of licences and only install it on a minimum number of designated computers, instead of needlessly on every computer in your organization (or family).
A simple cost / benefit analysis would be worthwhile: You should consider whether you wish to pay $5, $10, $15, or more, on a recurring basis (perhaps monthly), per computer on which such software would be installed. The costs, be they one-time costs or recurring, should be considered against how often the software may be used, perhaps in some cases only once or twice monthly — perhaps overall, let alone for each individual instance, depending on your organization’s size, needs, and other considerations. Further, it should be considered what operations are typically executed, especially if they simple operations such as joining multiple PDFs, or extracting a page or two, which can be easily performed by many, using any of a multitude of software packages you can get without cost, as opposed to perhaps more technical tasks which may justify costly specialized software.
Creating PDFs from an established document
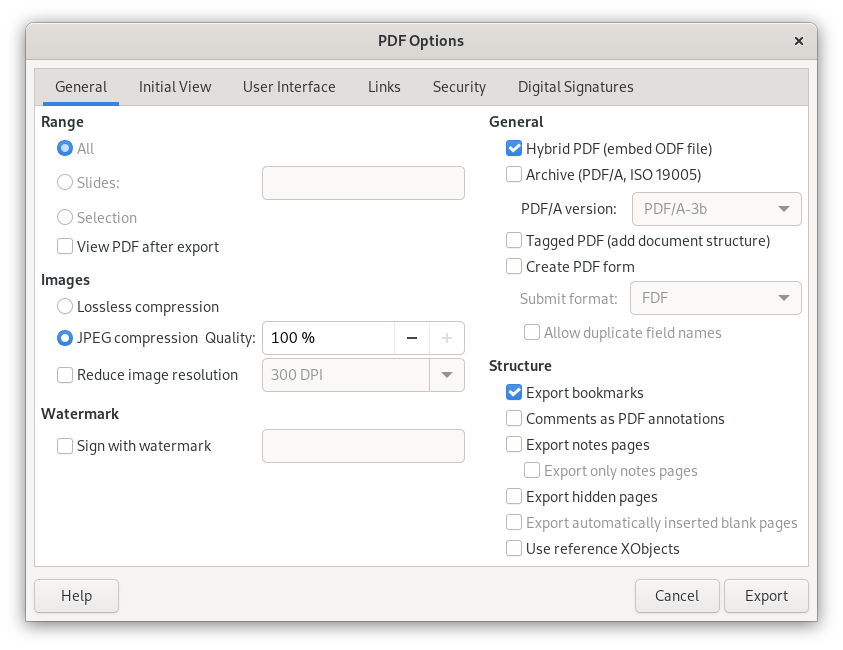
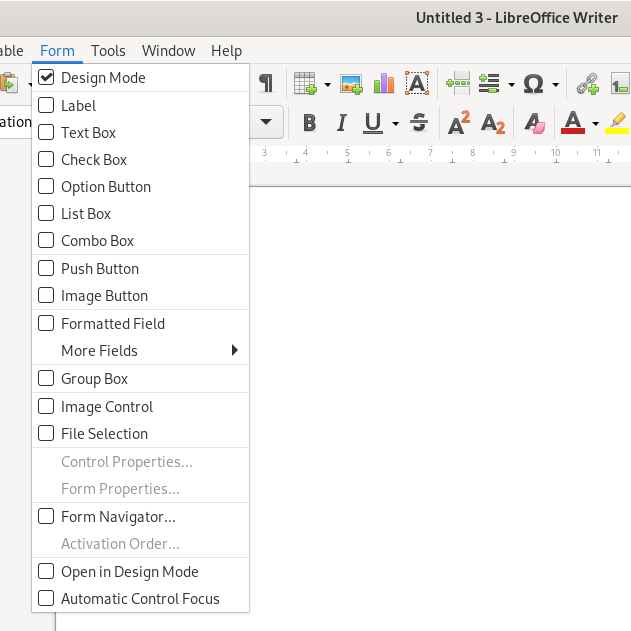
To begin with, most software which create documents will have an option in the File menu or elsewhere to Print, or Print to Document, or an Export function, which will offer PDF as a format:
PDF (creation) Options in the “Export as PDF” option in LibreOffice
At the risk of skipping ahead to the PDF splitting section below, note that it is a common option to be able to selectively output some, instead of all, pages to the resulting PDF, thereby avoiding the question of having to later split the PDF to get only the desired page(s).
Overview of PDF Software
Perhaps (or perhaps not) to the surprise of many, there are many software packages and suites which will:
Display PDF files
Combine, divide, and export PDF files, as well as reorder pages within a PDF;
Edit PDF files, such as the overall files and the file metadata, as well as the PDF file content
Import and display PDF files according to particular strengths (The Gimp, Inkscape, e-readers)
Displaying PDF files:
Here are some examples of software which will display PDF files directly:
Evince Document Viewer (Gnome Project)
Okular (KDE Project)
Firefox and Chromium (Web Browsers)
PDFSam (limited free version; there is also a commercial version with more capabilities); a version for Debian derived Linux systems is available on their website
Here is a very short list of software which will open and display PDF files and allow editing, each according to their strengths, but whose primary function is not PDF display:
LibreOffice (Office Suite)
Calligra (Office Suite)
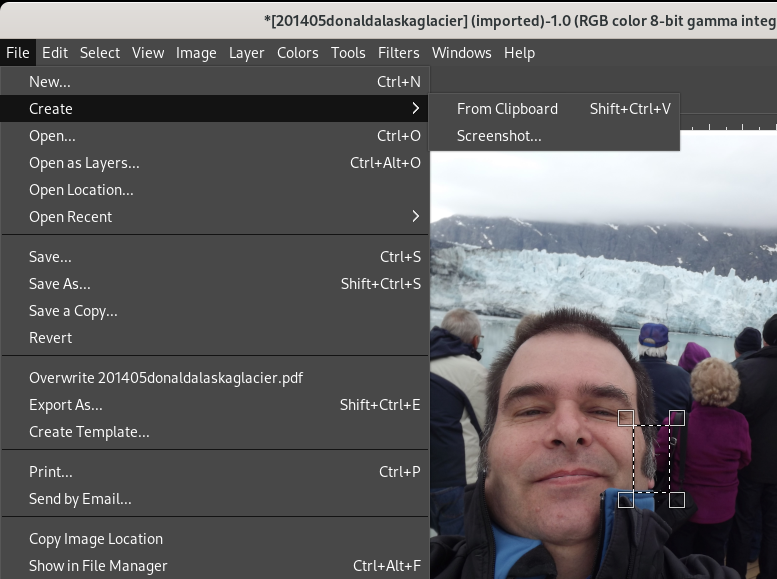
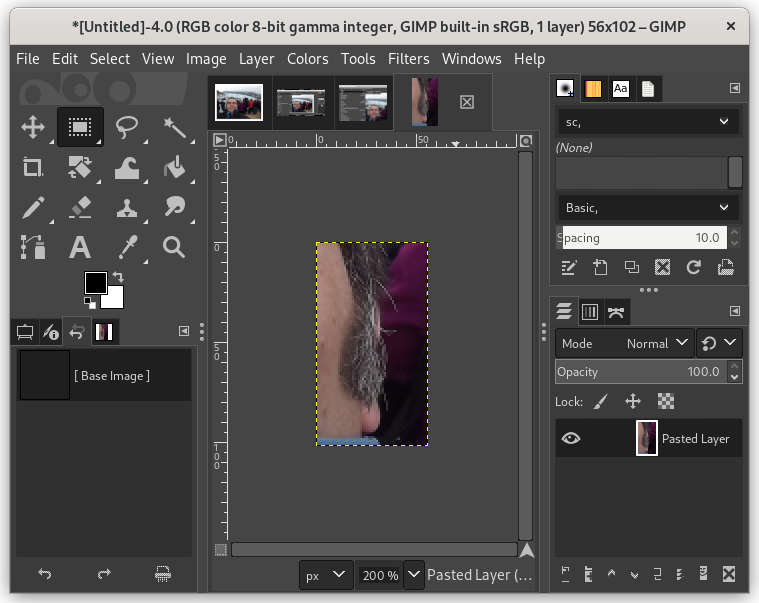
The Gimp (Image Manipulation)
Inkscape (Vector Graphics Editor)
Evince Document Viewer
PDF displayed in Evince Document Viewer
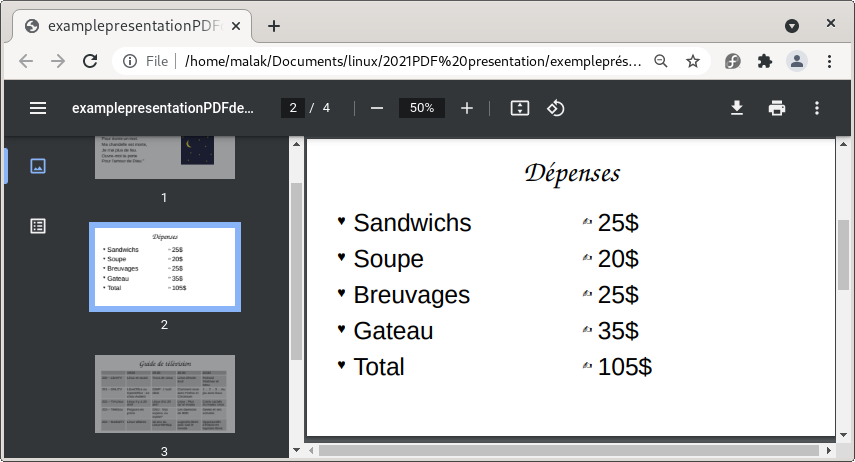
Chromium (web browser)
PDF Displayed in Chromium
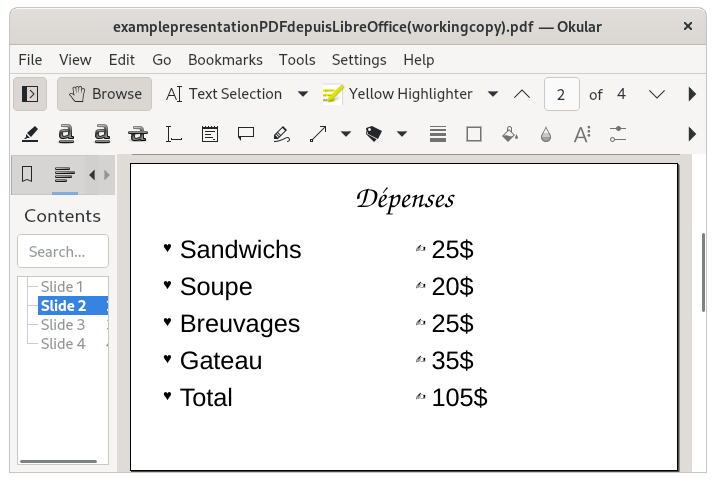
Okular
PDF displayed in LibreOffice
Software to Combine PDF files
A relatively common activity is to combine multiple PDF files into one file — such as, separately scanned pieces of paper, or PDF files produced separately, perhaps by different people.
Here are some examples of software which will combine PDF files:
PDF Mix Tool
PDF Arranger
PDF Mod
PDF Jumbler
PDFedit
PDFTricks
PDFSam
LibreOffice
Calligra Suite
The Gimp
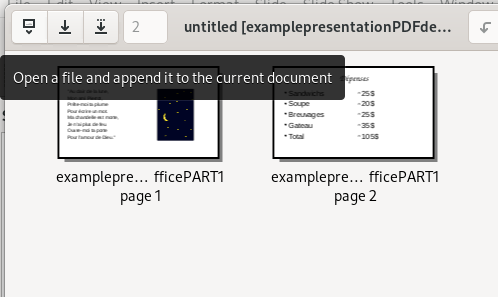
Combining PDF files in PDFArranger
Combining PDF files with PDFArranger
Software to Divide PDF Files / Extract Pages
Another relatively common activity is to divide a PDF File, or extract one or more pages from a PDF file.
Note that if you are the creator of the document, as shown earlier, the software you used to create the document likely allows for you to selectively export individual or multiple pages to PDF in addition to exporting the entire document.
Here are some examples of software which will divide PDF files / extract pages:
PDF Mix Tool
PDF Mod
PDF Jumbler
PDFedit
PDFTricks
PDFSam
LibreOffice — allows to print and / or export one or more pages
Calligra Suite — allows to print and / or export one or more pages
The Gimp — allows to print and / or export one or more pages
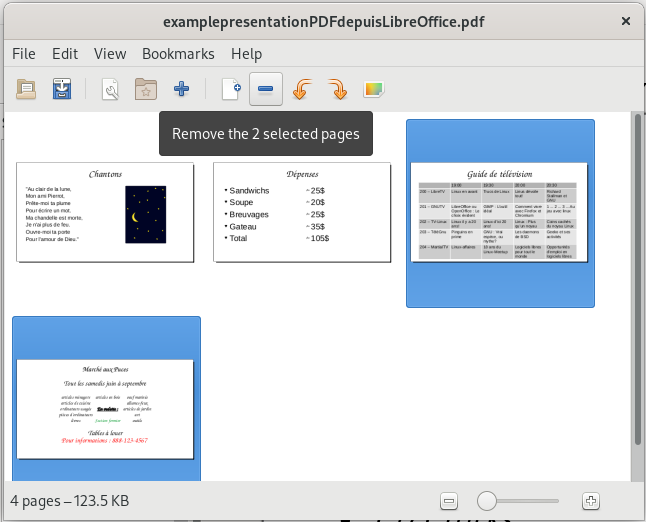
Splitting a PDF File with PDFMod
Removing pages from a PDF file using PDFMod
PDF Editing
Here are some examples of software which will edit PDF files to varying degrees:
LibreOffice permits the possibility of creating a hybrid PDF and .odt / .ods file (word processor or spreadsheet files), which will allow for the PDF to be more easily edited by any suite that is able to edit .odt and .ods files; create a document with LibreOffice, and in creating a PDF, choose Export — General — PDF Hybrid (incorporating .odt / .ods file)
In my personal experience, PDF editing — and ease of doing so — can vary wildly according to what one wishes to do, as well as wildly according to the nature of the source PDF. I have had excellent experiences editing a PDF created from a CAD software drawing (presumably created using commercial CAD software such as AutoCAD), and whose individual elements could be manipulated in LibreOffice Draw. I have also used LibreOffice Draw to insert text zones, arrows, and scanned signatures into PDFs. Conversely, documents composed primarily of scanned images — including text and forms — may require more image manipulation skills to edit, modify, and manipulate individual and specific elements of the document, depending on your objectives.
What you can do will also be dictated by which software package you choose and its strengths and weaknesses.
For instance, it should be noted that the phrase “Editing a PDF” can be a nebulous thing which can mean many and different things to many and different people. For instance, actually editing document text directly in the PDF may be what one understands and expects, while the strengths of a given piece of software may lay elsewhere.
LibreOffice has some PDF import functions, as well as imperfect document layout functions. Depending on the source PDF document, it can be quite effective at editing text directly.
Note from the closed-source world: I once had an excellent experience with a moderately-difficult-to-edit PDF using Microsoft Word, which included being able to edit the text — and presumably save in MS Word’s native file format.
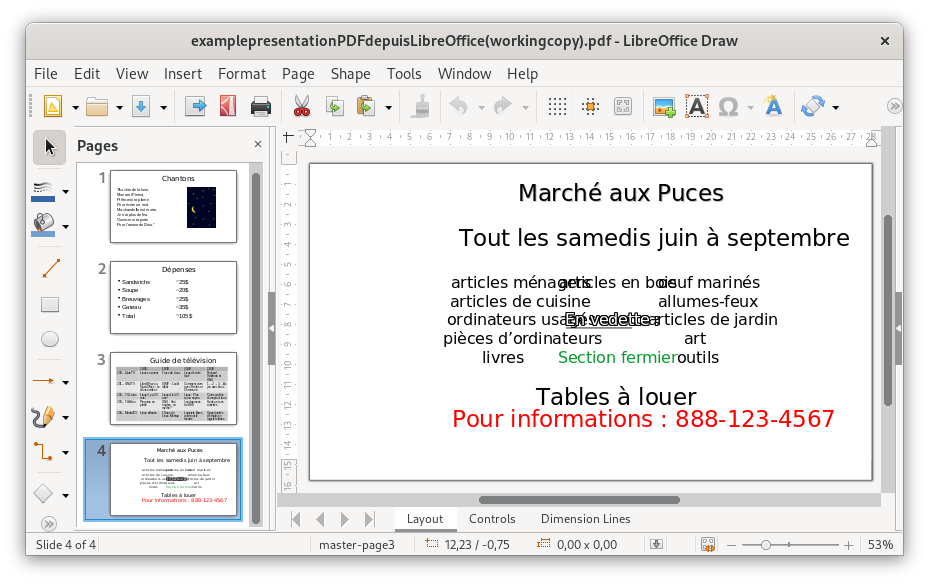
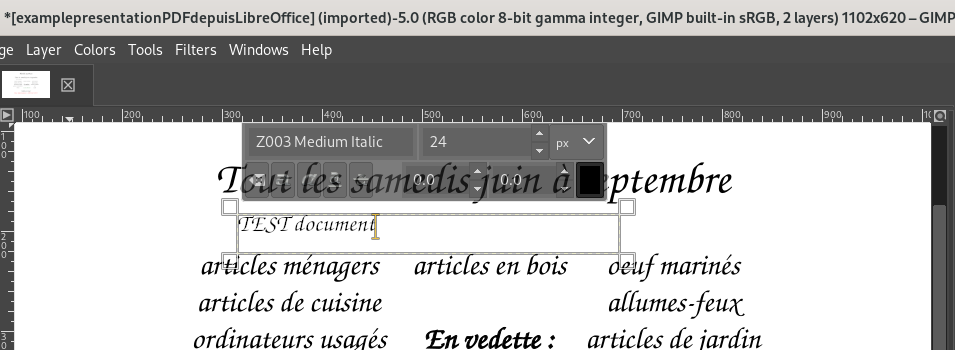
Importing and editing a PDF in LibreOffice Draw (note the imperfect import):
Editing a PDF in LibreOffice Draw
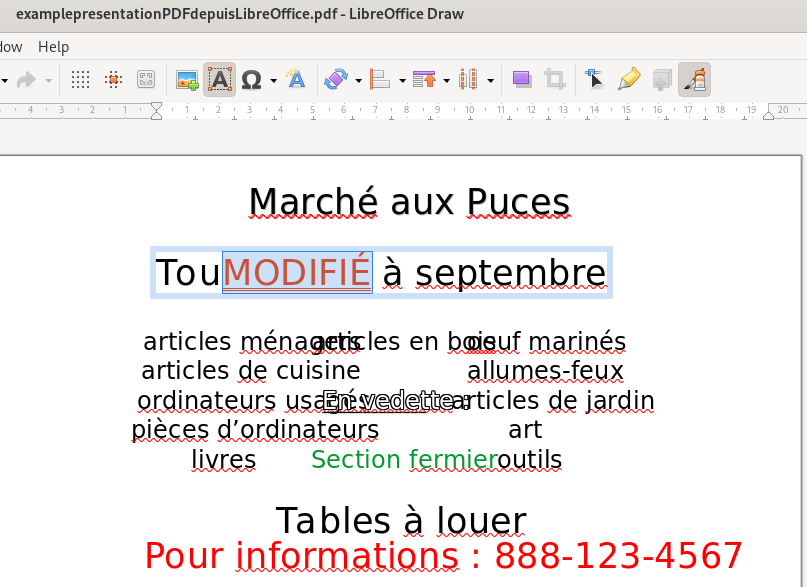
In the case of my example PDF, LibreOffice Draw allows for some direct editing of the text (Notice the word “MODIFIÉ” with a brick-red text colour replacing some of the text):
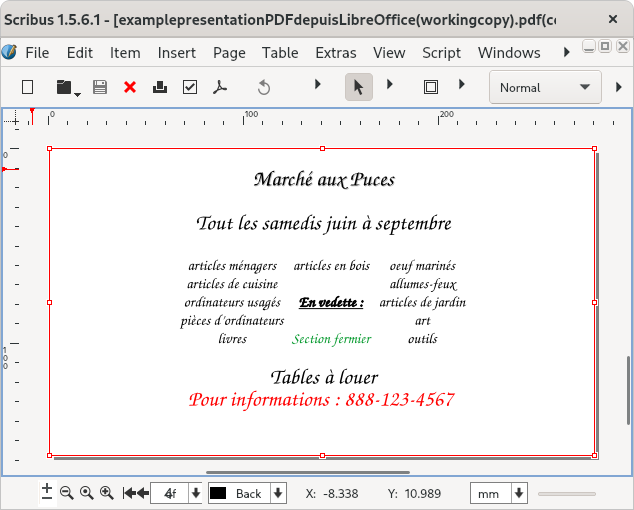
Importing and editing a PDF in Scribus, a desktop publishing programme:
Editing a PDF in Scribus
The Gimp can insert text zones into a PDF, and which text zones themselves may be edited within The Gimp; however, its strengths lie in dealing with a PDF as an image, and editing image characteristics, while editing the text as one might in a word processor might be more challenging.
Importing a PDF file into The Gimp, image manipulation software:
Editing a PDF in The Gimp
Adding a text zone to a PDF in The Gimp:
Note the insertion of a text zone under the first line, saying “TEST document”
Exporting Text, Cut & Paste, and .odt File Creating
Depending on the source PDF and its nature, “cut & paste” may work (as opposed to not working at all), and may even “work well”, although this may be wildly variable according to the source PDF document. However, even in the best case, this method will normally only copy the actual text, and some of the images, from your PDF document; it may not usually be particularly useful in actually replicating the PDF document formatting.
As for other document and content formats, such as drawings, pictures, and text rendered into images, other sections of this post should be consulted (ie. using LibreOffice Draw or The Gimp for drawings; optical character reading (OCR), including OCRFeeder, etc.)
In addition to the mention of LibreOffice above, OCRFeeder is software that acts as a front end to optical character recognition software, and is able to import PDF files, and then export in HTML, plain text, OpenDocument (.odt) format, and of course PDF. Again depending on the source file, results may be variable, although the results are usable.
OCRFeeder in action and ready to export a page of the example PDF to ODT format
… and here is an image of the exported .odt file (word processor file) of the page viewed and created in OCRFeeder, then opened in my word processor (LibreOffice):
Exported word processor file
Ironically, as this case shows, the changes (or lack of adequate recognition and / or translation of the original layout) can be as great or even more as can occur by simply sharing documents between not-fully-compatible-though-similar software suites. However, though far from perfect, it is arguably usable, depending, of course, on how much effort you are willing to devote to replicating the original document layout — and then making your desired changes, and finally creating a new PDF document.
Exporting to other file formats:
As has been (indirectly) demonstrated several times throughout this post, PDF files can be imported into software that isn’t specifically dedicated to PDFs, and then allow for the resulting imported file to be exported into other formats. For example, The Gimp was used to create most of the working images for this post: In the case where PDF files were to be displayed, the PDF files were imported into The Gimp, and then exported in jpeg or png formats. This type of conversion — from PDF to another given format — can often be done by other pieces of software (to varying degrees) according to their strengths or weaknesses.
Photo Editing with PDFs
The Gimp is fully functional image processing software, very similar to — but, unfortunately, not fully compatible with nor a perfect drop-in replacement of — Photoshop. Using The Gimp, you can import a PDF and edit the image(s) directly, or extract photos and other images through a variety of means, such as selecting the area of the photo, copying the selected area, and creating a new document from the clipboard.
Here is a The Gimp having imported a PDF of a photo of myself on a cruise:
PDF of a photo of the author imported into The Gimp
During the live presentation, I gave the hypothetical example — for the sake of levity — of a barber who particularly likes sideburns, and seeing mine in a PDF, decided to clip out one of my sideburns from the photo …
Selecting a region of the photo and creating a new document therefrom
… and then notice on how I was starting to go grey at the time :
The beginnings of some greying in my sideburns
It is taken as an understood that use of The Gimp to manipulate the photo can be continued at this point — such as how my sideburns might look after a colouring, or to compare side-by-side against other people’s sideburns — and then the result exported as a PDF.
PDFTricks allows for resizing of images in PDFs, principally compressing and reducing the file size to the order of “large”, “medium”, “small”, and “extra-small”, as well as image exporting to .jpg / .png / .txt formats, and file merging and splitting.
PDF Tricks menu of options
During the presentation, the PDF document above composed of the photo of myself on a trip was run through the software’s “extreme compression” option. The following is a clip from a screenshot from a file manager, showing the size difference between the the original file, and the newly created compressed file:
File size difference before and after processing file with PDFTricks
LibreOffice Draw allows for some image manipulation.
LibreOffice Draw being used to manipulate an embedded image
In this particular situation, the night sky drawing in the karaoke page of the example PDF I created was selected, and the various options directly available were shown. However, as mentioned earlier, I have imported PDF documents of building plans and modified them to include notes showing were works were performed, or to add signatures to documents.
PDF Forms
PDF Form Creation
LibreOffice Writer and Calligra Suite are fully-featured for the creation of forms. Unfortunately, I am not particularly adept at creating forms.
Filling PDF Forms
Evince — if the PDF form was designed to be interactively filled
Okular — if the PDF form was designed to be interactively filled
The Gimp — allows for text areas to be inserted, as well as photos, drawings, and the like
LibreOffice Draw — allows for text areas to be inserted, as well as photos, drawings, and the like
Fillable form being filled with the names of Mickey and Minnie Mouse
Final Choices:
Viewing / displaying PDF files : User’s choice (usually a system’s default PDF viewer is adequate, or a web browser)
Combining and splitting PDF files : PDFMixTool
Editing PDF files : User’s choice (depends on objectives and source file; The Gimp and LibreOffice Draw are good contenders)
Adjusting PDF file size : PDFTricks
Form creation : User’s choice
Form filling : User’s choice (usually a system’s default PDF viewer is adequate, or a web browser)
Exporting PDF to other formats : OCRFeeder (for .odt); LibreOffice Draw (Photos and images); The Gimp (photos and images)
Note on Linux availability of the above software:
Here are some screen shots from my system’s installed repositories (Fedora Stable; Fedora Updates; rpmfusion.org — free and non-free)
PDF software easily accessible from my computer’s software repositories (“App Stores”):
Gnome Software list of available PDF software from various software repositories on Fedora Linux
Gnome Software list of available PDF software from various software repositories on Fedora Linux
Gnome Software list of available PDF software from various software repositories on Fedora Linux
As this list suggests, there is lot of software available which have varying PDF abilities, ranging from being dedicated PDF software of various kinds, to other pieces of software with other principal functions but with PDF functions ranging to simple importing from and exporting to the format, to being useful within the limits of the software’s main functions to manipulate PDF files in some way(s).
Summary:
This presentation’s goals are to highlight:
how PDF files are well supported most of the time on most systems, while the various pieces of software, between two versions, typically a well-known closed source project and an open-source counterpart, for document production, are not as compatible with each other as we may want;
free software while avoiding the security risks inherent to using unknown and potentially dangerous websites, as well as software which is easily available for routine tasks as well as to reduce costs;
the possibility of editing PDF files with various pieces of free software which are easily available in most Linux distributions’ repositories — as well as often easily available for other platforms — albeit occasionally with variable success.
Questions taken during the presentation:
A question asked midway through the presentation expressed a certain surprise that The Gimp can be used to edit PDFs. As mentioned earlier, The Gimp is able to import PDF files, and perform various functions on the file according to its strengths (image manipulation).
A participant asked at the end during a question period about a recommendation for software to affix signatures to documents. I replied that I was not aware of any open source official signing software with digital traceability, simply because that I had not done any research on that subject; however, an image of a scanned signature can usually be inserted in a document using The Gimp or LibreOffice Draw, or as a document is being created in a word processor.
A final comment recommended the use of LibreOffice Draw, based on the commentor’s frequent use of it to perform a number of the functions listed here, to which I’d commented that I had asked my employer’s IT department to install LibreOffice on my work-issued Windows-based laptop computer in order to be able to perform some drawing-modification functions as part of my employment.
Enjoy sharing and editing PDF files!
UPDATE 20220407:
Signing PDFs can be performed with jPDF Tweak.
JPDF Tweak can also encrypt and add passwords to a PDF.