Although I have already done someposts on my pickled eggs, as per my recent wont of photo posts of me making my various recipes, I took a lot of photos yesterday when I made pickled eggs. Sigh, the stores know how to get me every time when they advertise eggs on sale!
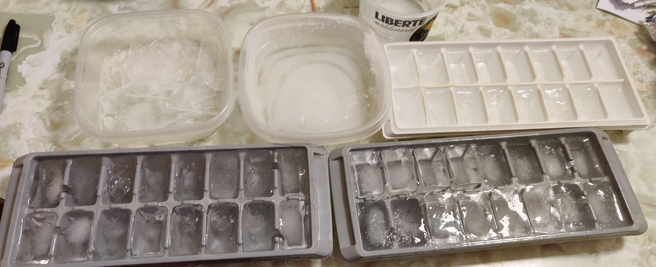
Before I went to buy the eggs, I prepared some extra ice, which would be needed later on once the eggs were boiled:
Ice made before leaving to buy the eggs; photo taken later when the ice was frozen
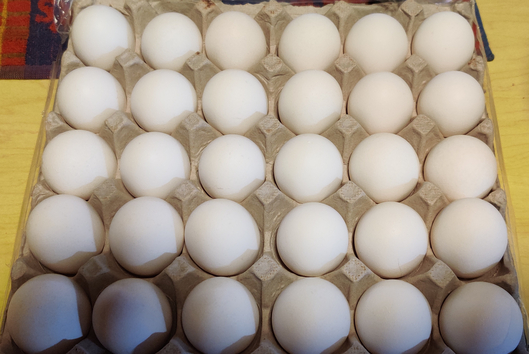
Then I went out to do some shopping and I purchased three flats of 30 eggs each, for a total of 90 eggs, at the advertised price of $4.44 CDN per flat (14.8 cents per egg).
A flat of 30 eggs; I purchased three such flats of eggs.
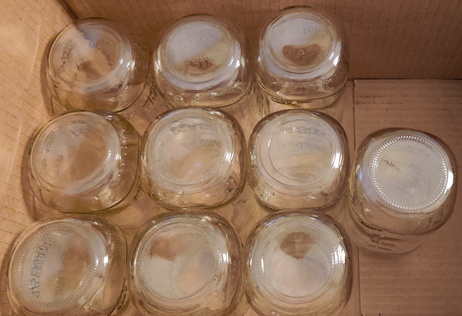
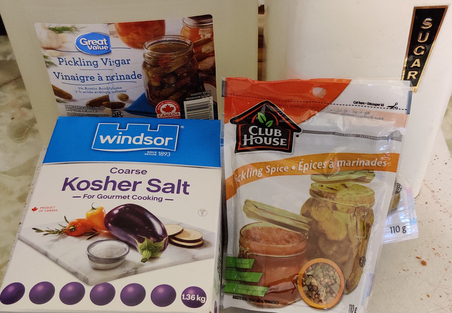
I took out ten jars with mason openings; although the jars shown aren’t strictly speaking mason jars, they have mason jar threading, and I’ve never had trouble with them.
Ten clean jars with mason jar threading
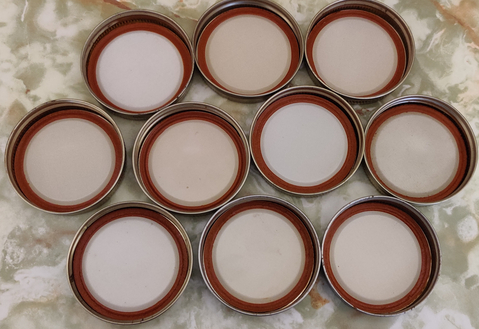
Of course, I also prepared ten rings and lids (in this case, clean reused lids, since I expect that I will be eating the eggs from most of the jars):
Ten rings and lids for mason jars
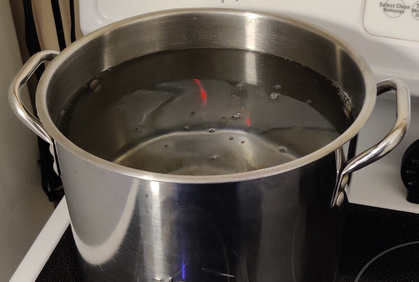
Cold water was put in a pot and heated, for later use when boiling the jars.
Cold water put in a pot and boiled, for later use to boil the jars
I boiled and shelled the eggs over two sessions of 45 eggs each, one after the other.
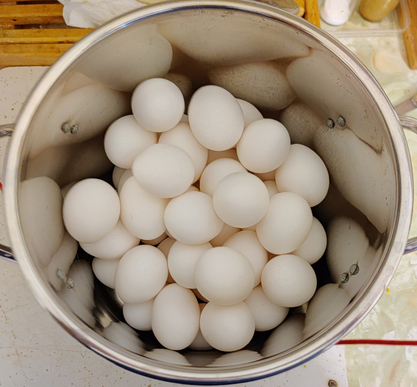
First, eggs were placed in a pot:
45 eggs in a stock pot
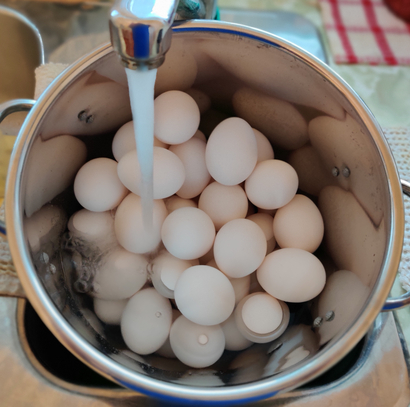
Cold water was added to the pot with the eggs, covering the eggs.
Adding cold water to the pot with the eggs
Pot of eggs with water, covering the eggs and about an inch more of water
The stove was turned on, and I brought the eggs to a boil, and then boiled them for eight minutes.
During the time it took to heat up and boil the eggs, the first thing I did was pour myself a nice beer:
Don de Dieu, a 9% bottle refermented abbey-style triple wheat beer
Yes, that is a double sized, 750mL bottle of beer containing 9% alc/vol; it’s called “Don de Dieu”, and it’s a bottle refermented abbey-style triple wheat beer, from Unibroue, in Chambly, Québec.
Yummy!
Back to work, still while the eggs were heating up and boiling, I prepared some pickling solution:
My pickling solution uses 7% pickling vinegar, sugar, salt, and a commercial blend of pickling spices
Vinegar was measured out into a pot (in this case, 7-1/2 cups; according to my recipe, I knew I would need another 3-3/4 cups, as well as the commensurate amounts of sugar, salt, and spices) :
Pickling vinegar measured out into a pot
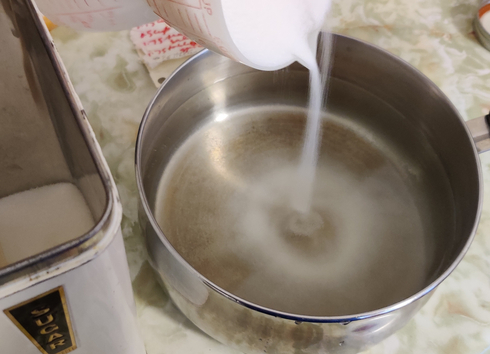
Sugar (in this case, 1 cup) was added:
Sugar was added to the vinegar
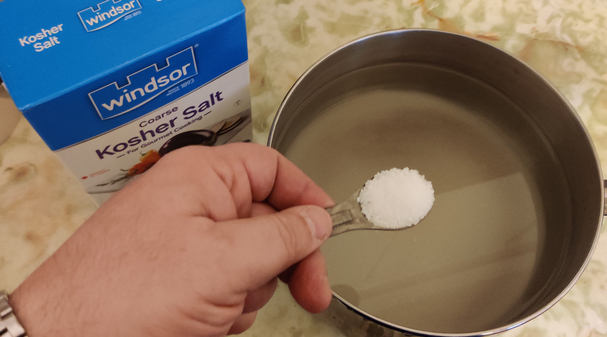
Salt (in this case, 3-1/2 teaspoons) was added to the pickling solution:
Salt was added to the pickling solution
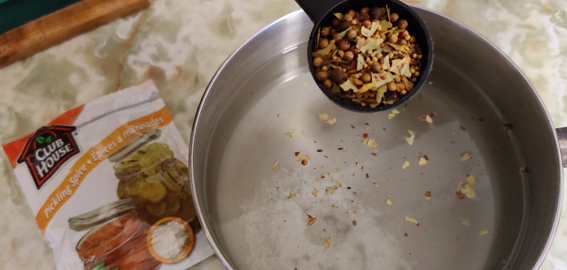
A commercial pickling spice blend (in this case, 3-1/2 tablespoons) was added to the pickling solution:
Pickling spices were added to the pickling solution.
The pickling solution was covered and put aside, to be boiled later.
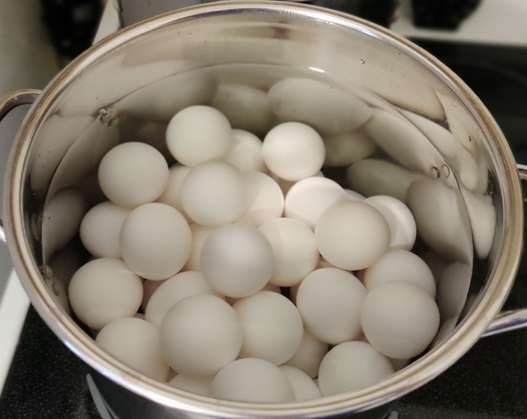
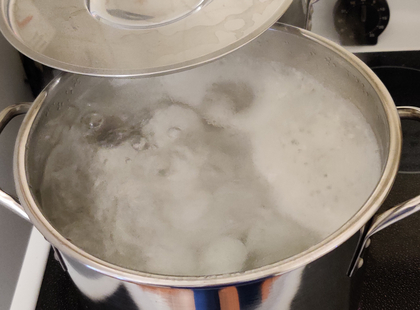
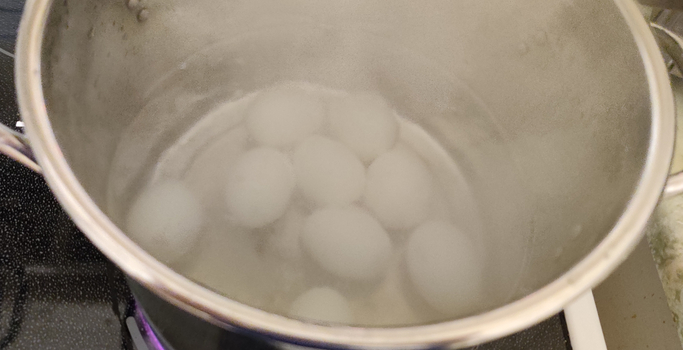
Soon, the eggs had reached the boiling point, and the eggs were boiled for eight minutes:
Eggs boiling for eight minutes
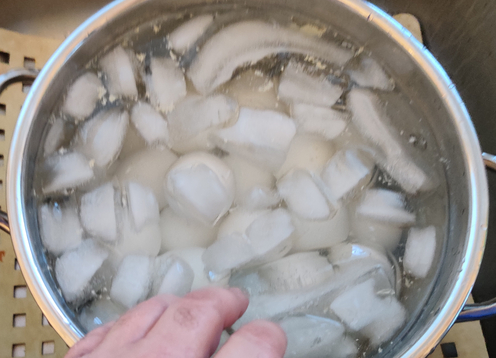
After eight minutes of boiling, the boiling water was immediately drained from the pot of eggs, and cold water was added to the pot of eggs, as well as ice:
The pot of eggs was drained of its boiling water, and cold water and ice were added.
The ice water and eggs were gently mixed by hand, in order to quickly and thoroughly cool the eggs, which takes a few minutes. This is necessary so as to avoid the development of a greenish-blackish ring around the egg yolks (which is harmless, but aesthetically undesirable), as well as to aid in the peeling; the sharp temperature change helps dislodge the membrane just inside the shell, which will then make it easier to remove the shells and minimize tearing.
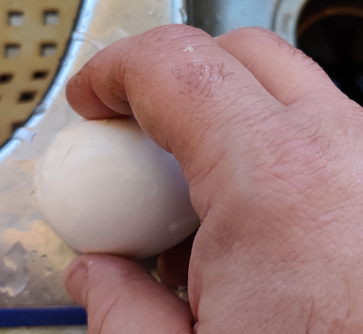
The eggshells were then peeled:
Cracking the shell on an egg against the edge of my sink
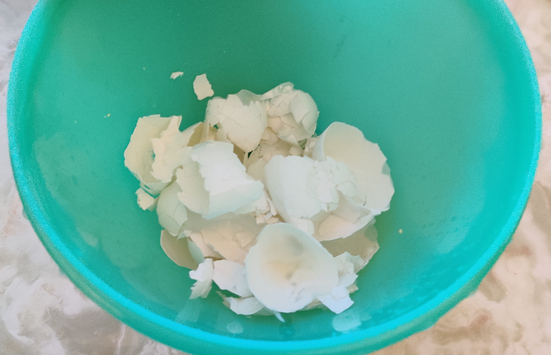
Egg shells collected into a bowl, and eventually sent to the brown box for curbside collection and municipal composting
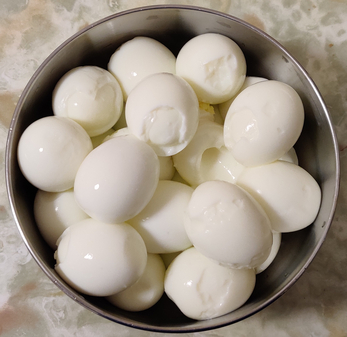
Shelled eggs were rinsed in cool water and placed in a couple of bowls:
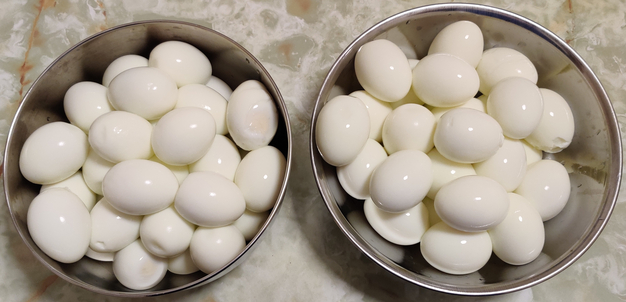
Of the 90 eggs, the shells of 65 peeled nicely
Sometimes, there are tears when shelling eggs. In yesterday’s case, there were 25 eggs with tears; however, tears don’t affect the eggs’ ability to be pickled, they just make the eggs not always look as nice. As such, these eggs were merely placed in a separate bowl so that they could be bottled together for personal consumption, and to distinguish them from the nicely peeled eggs, should I decide to give away a jar of the “nice” eggs (see below).
.Bowl of 25 eggs with some tears
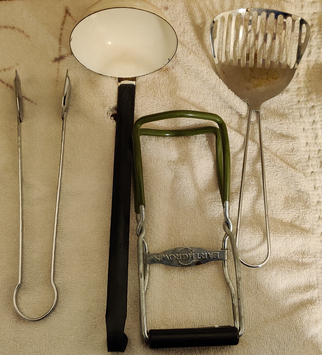
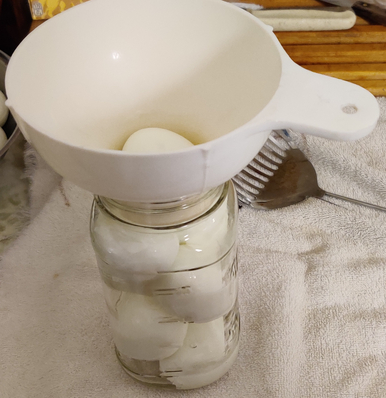
At this point, a few hand tools were needed: Some tongs, a ladle, a jar holder, and a slotted spoon. Not shown: mason jar filler.
Some tongs, a ladle, a jar holder, and a slotted spoon
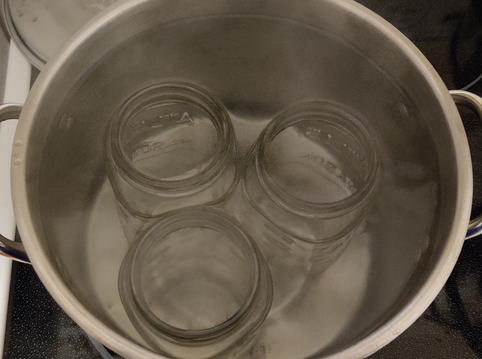
At this point, the water which was heated earlier for the bottles was brought up to boiling again, and jars were put in the water once it was boiling:
Mason jars placed in boiling water
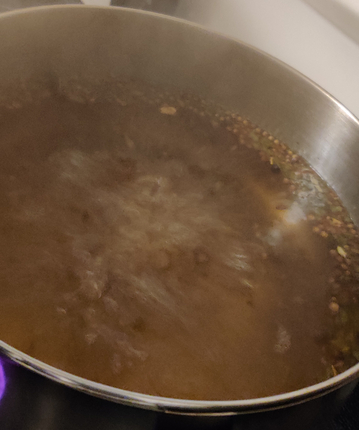
At the same time, the pickling solution was brought to a boil:
Pickling solution brought to a boil
In a third pot — the same one in which the eggs were originally boiled — fresh water was brought to a boil, and eggs (in this case, nine eggs at a time, the number of eggs which fit in the size of jars used) were added, once all three pots were boiling:
Shelled eggs reboiled for a few moments in a boiling water bath
Eggs are only kept in the boiling water long enough to take out a jar from the boiling water bath (just as the jars need only be in the boiling water bath for the time it takes to put the eggs in the boiling water bath.)
A jar is taken out of the boiling water bath, and the eggs in the boiling water bath are transferred to the hot jar:
Reboiled eggs transferred to the hot jar
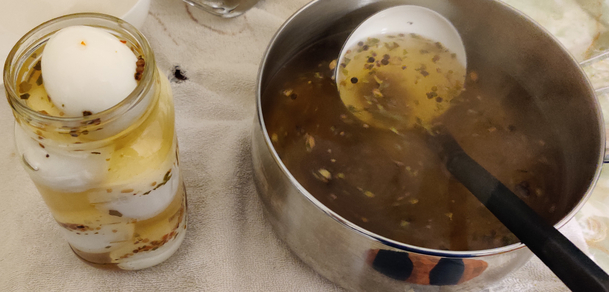
The pot of hot pickling solution — which is kept simmering to boiling on the stove in between filling jars — is brought over, and hot pickling solution is added to the hot jar with the hot eggs:
Pickling solution added to the hot jar filled with hot eggs
The lids and rings were individually placed in the mason jar hot water bath and immediately placed on the filled jars.
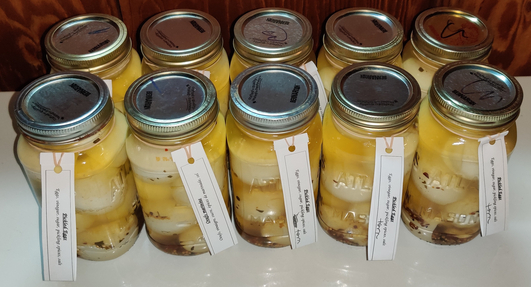
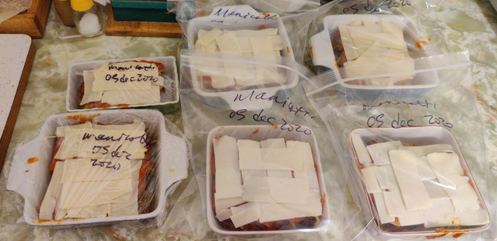
Seven jars were each filled with nine eggs without tears, and three jars were each filled with nine eggs with tears.
Once all the jars were filled, they were placed in a refrigerator overnight to cool the contents relatively quickly, in order to avoid the development of greenish-blackish rings around the egg yolks (which is harmless, but aesthetically undesirable.)
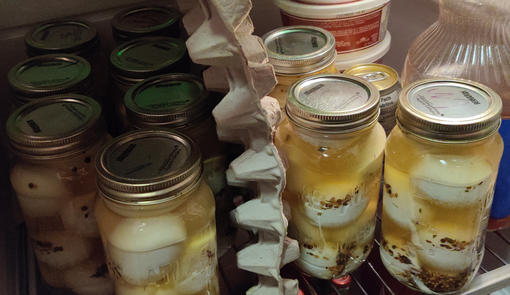
Jars of pickled eggs placed in the fridge, with a divider to help quickly distinguish between jars of eggs with and without tears.
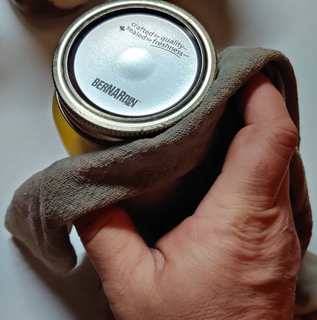
This morning, I took the jars out of the fridge, and wiped down the jars, since when filling the jars and putting on the lids, sometimes the pickling solution spilled a bit.
Wiping down the outside of the jars
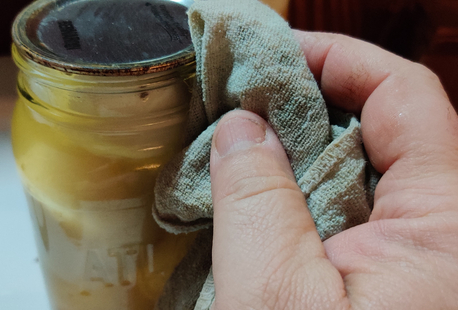
This included taking off the rings to wipe down the necks of the jars, which wasn’t a problem since all the lids on the jars formed a good vacuum seal.
Wiping down the necks of the jars
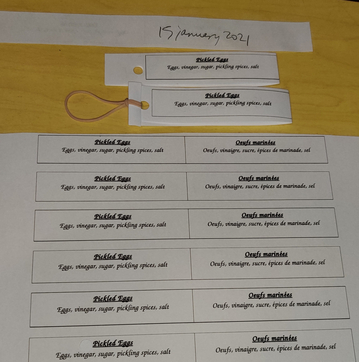
I have a computer file of labels I use for my pickled eggs, which I printed out. I do both English and French parts because I live in a primarily French speaking area, and therefore it’s good to have both languages for when I give away and sell jars. I cut out the individual labels, folded them over lengthwise, wrote the date on the backsides, punched a hole in each, and looped an elastic band in the hole of each label.
Labels for the jars of eggs
I placed the labels around the necks of the jars. In this photo, the three jars of eggs with tears are in the front row and on the right.
The ten jars of pickled eggs I made yesterday.
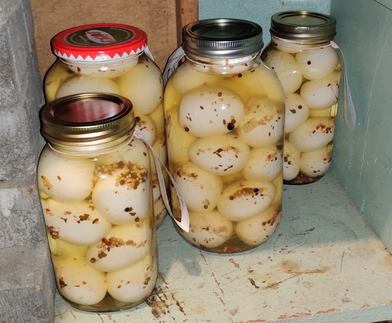
Since I already had some pickled eggs in stock (a total of 91 over seven jars), which I made about a month ago, I moved them around to make space in the storage room:
Four of seven jars of pickled eggs I already had in my store room
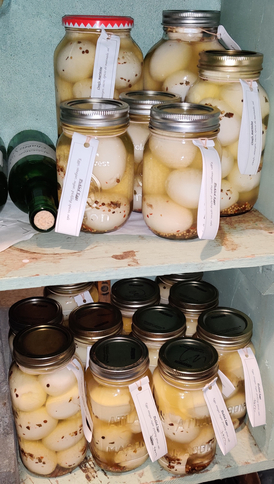
Things were moved around, and yesterday’s jars of pickled eggs are now all put away, on the bottom shelf below the existing jars:
My collection of 181 pickled eggs over 16 jars
As you’ll notice, there are also three extra jars of six pickled eggs in the stock I’d already had, that were not in the above photo; these will likely be given as gifts before I give away any of yesterday’s production since new lids were used when they were made.
And if I don’t give out any jars as gifts? Then I’ll have enough pickled eggs for myself until at least early summer of this year!
ps: And the beer? Of course it was good! It’s a beer I’ve had several times before, it’s from my favourite brewery (Unibroue — no, not the multinational brewery with a slightly different spelling), barring the fact that my favourite beer is from another brewery, and I have a particular taste for Belgian abbey beers and wheat beers.
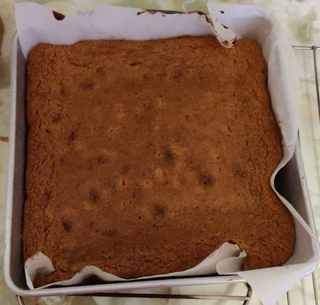
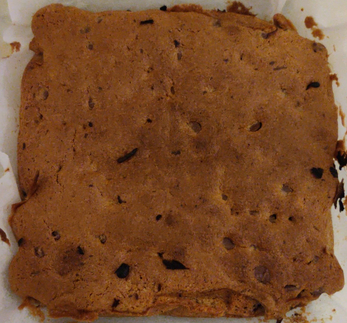
Unfortunately, the two batches I made today did not fully solidify into a fluffy cake consistency during the baking process, and fell a bit, creating a consistency like brownies.
My aunt has been making shortbread cookies for a long time, and used to even send batches of her shortbread cookies through the mail across the country to my grandmother. At one point, I asked my aunt to teach me how make her shortbread cookies so that I could make them somewhat more often and then bring them directly and personally to my grandmother. Alas, my grandmother passed away a few years ago, but I have continued making the shortbread cookies because they are tasty, and my mom has said “why should I bother making my shortbread cookies when you make them (an albeit different recipe) so well?” 🙂
I recently made them for the third time in the past month or so, this time to make as a Christmas gift for my brother who also really likes them; I reminded him that our aunt is the mistress, and I merely the student. 🙂
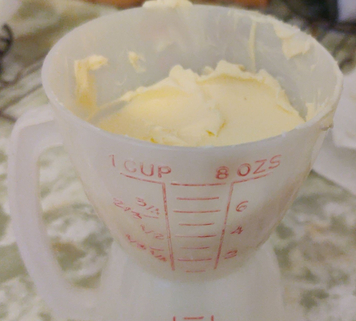
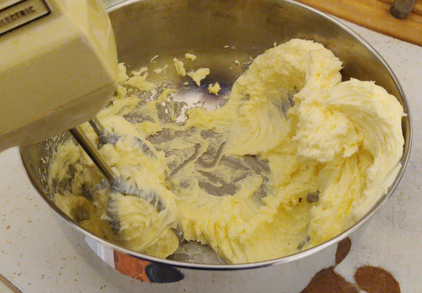
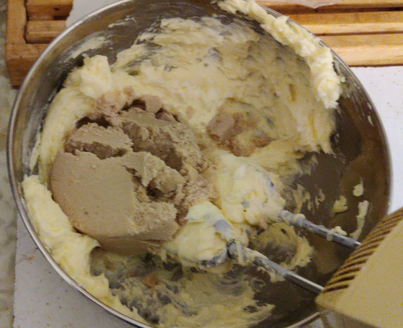
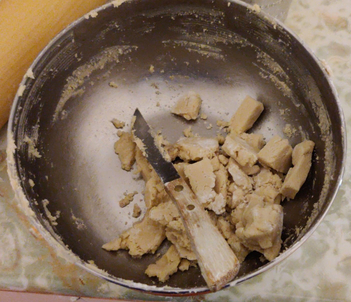
I started off by bringing a pound of butter to room temperature:
A pound of butter brought to room temperature
Then I creamed the butter with an electric beater (dating from the early 1960’s — it’s older than I am!)
Creaming the butter with an electric beater
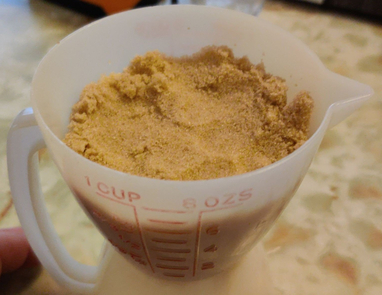
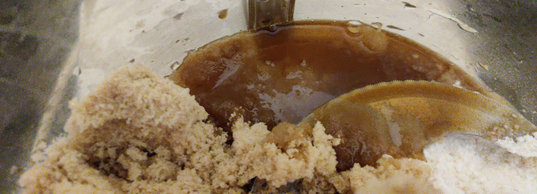
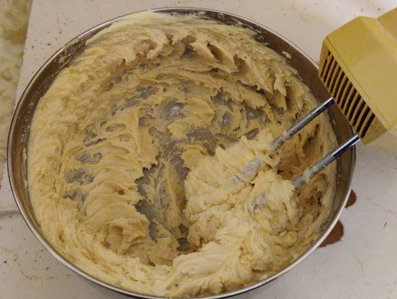
A cup (packed) of brown sugar was added …
A cup (packed) of brown sugar added.
… and then blended with the creamed butter.
1 (packed) cup of brown sugar blended into the creamed butter
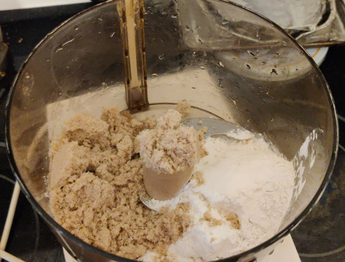
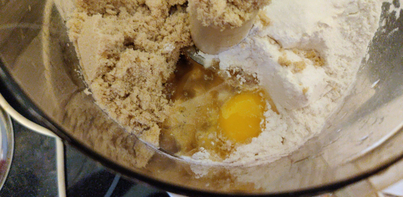
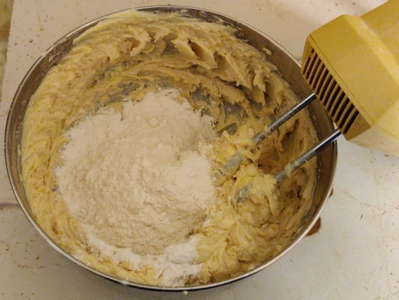
Four cups of regular flour were added, one cup at a time.
The first of four cups of flour added to the butter and brown sugar mix
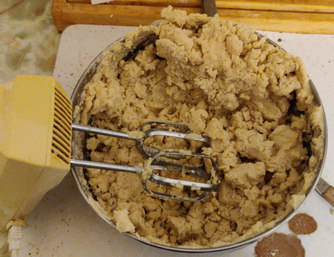
Here is the dough after all four cups of flour have been mixed in:
Dough after all the flour has been added and mixed together
Next, flour was spread on the cutting board to avoid sticking:
Flour on the cutting board
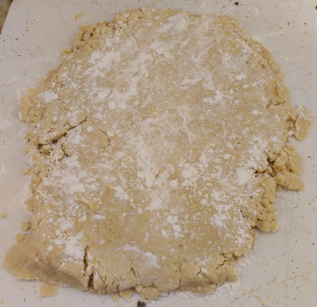
The dough was placed on the cutting board, floured a bit on top to avoid sticking, and flattened with my hands:
Dough on the cutting board, floured and flattened out by hand
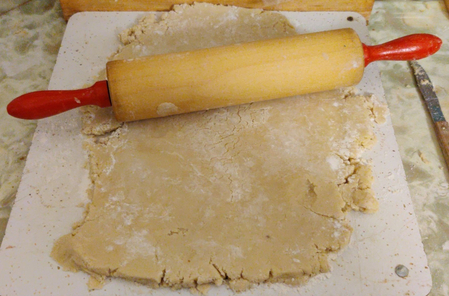
The dough was then further flattened out with a rolling pin.
Using a rolling pin to further flatten out the dough
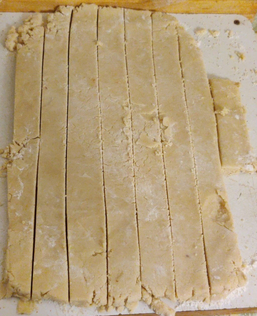
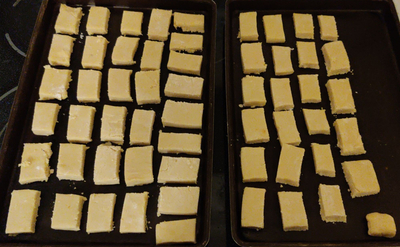
The dough was then cut into strips about an inch wide, and ends were cut off.
Dough cut into roughly 1″ wide strips
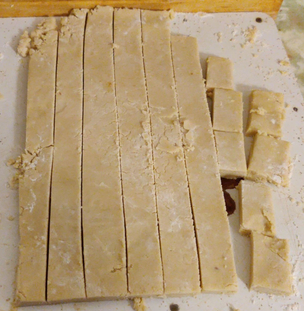
I started to cut the strips into roughly two inch lengths.
2″ lengths of dough were cut
Cuttings from the edges and cookie pieces that broke were put back in the mixing bowl to be formed together again to cut more cookies.
Dough cuttings put back in the mixing bowl
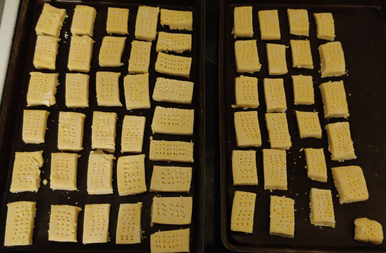
The rectangular cookies were placed on cookie sheets.
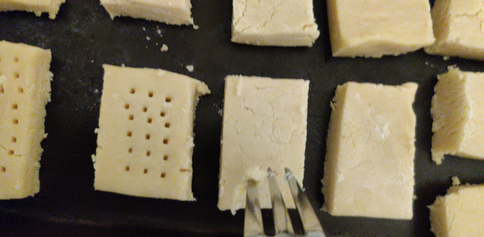
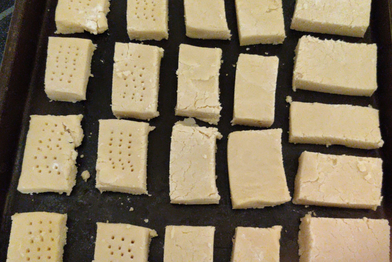
And here are all of my cookies, at the end of the pricking.
All of the cookies, pricked, ready to bake
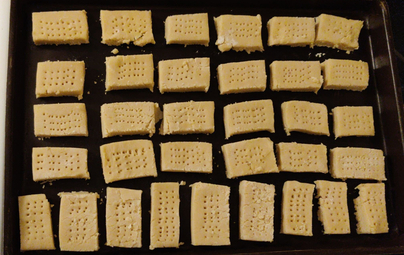
Yet another closeup of the cookies, ready to bake
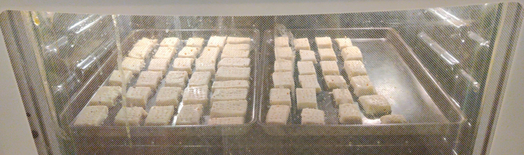
The cookies were placed in an oven preheated to 300F and baked for 22 minutes. This could vary somewhat based on your oven and the electrical load in your neighbourhood at the time you bake, but take them out when the bottoms just start to brown.
Shortbread cookies baking at 300F for 22 minutes
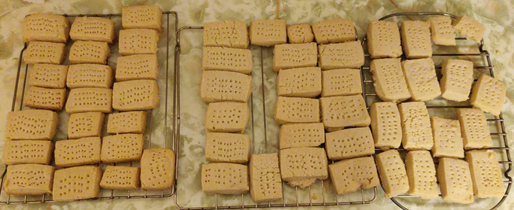
And here are the cookies, cooling on baking racks:
Baked cookies on cooling racks
Yes, there is a broken cookie in the upper right hand corner, it broke when I took it off the baking tray. Anyway, I had to do a quality control test, you must understand … it was yummy!
The cookies are now bagged up carefully and the bags placed in a box, which was placed in the freezer until Christmas Day when they will be given to my brother as one of his gifts.
A relatively long time ago, a neighbour brought over some stuffed pasta rolls au gratin, and they were rather tasty. I liked them so much that I decided to replicate them, and added the recipe to my repertoire of personal recipes.
I recently made a batch of my manicotti, and I took a lot of pictures.
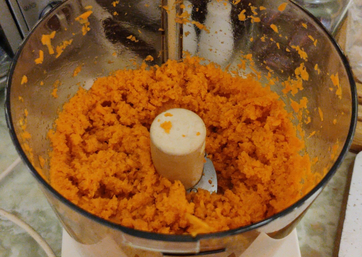
First, I finely ground some carrots in a food processor:
Finely ground carrots
As a side note, I use carrots because I love carrots, and at the time it seemed perfectly natural to me add ground carrots to the filling mix.
I also add ground onions, which to me are also a natural pairing with the beef. The two ingredients extend the beef used in order to stuff more manicotti shells, or conversely, as tasty fillers, reduce the amount of ground beef required.
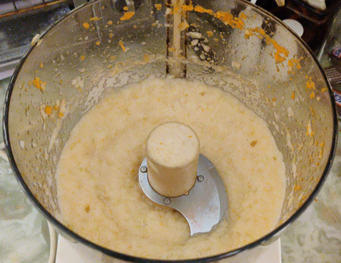
Then I ground some onions, effectively rendering them liquid:
Ground onions, at this point in near-liquid form
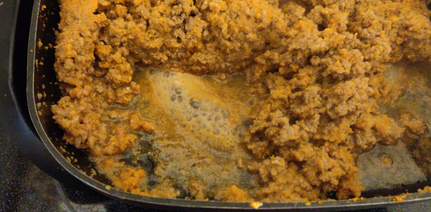
Ground beef was placed in an electric skillet:
Ground beef placed in an electric skillet
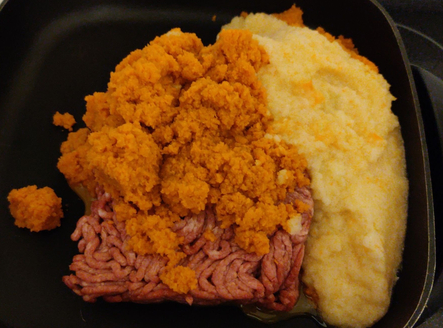
The ground carrots and ground onions were added to the beef in the electric skillet:
The mixture of beef, ground carrots, and ground onion placed in an electric skillet
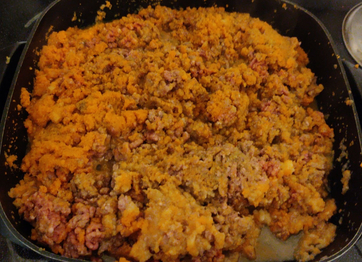
The ground beef was broken up with a spatula, and mixed together with the ground carrots and ground onions.
Ground beef broken up and mixed together with the ground carrots and ground onions
The mixture was fried, while being constantly mixed:
The mixture of beef, ground carrots, and ground onion frying
At this point, I was getting a little thirsty, so I served myself some homebrew (an Irish Stout):
A serving of some of my homebrew, an Irish Stout
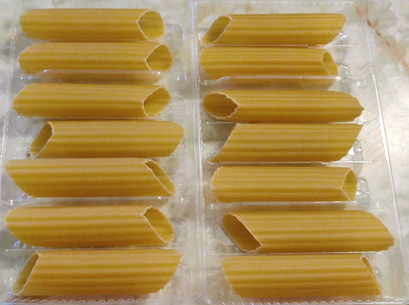
Next, some manicotti shells were taken out of their box:
Manicotti shells in the plastic trays from the box bought at a store.
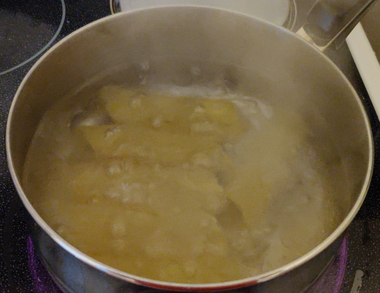
The manicotti shells were then boiled, six at a time, in salted water with olive oil for five minutes:
Six manicotti shells in boiling water
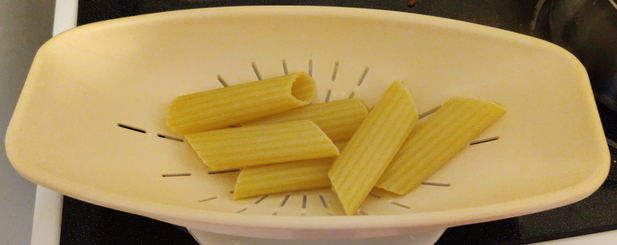
The manicotti shells were then drained:
Manicotti shells in a strainer
At this point, I stuffed the manicotti shells, six at a time, with the cooked meat, carrot, and onion mixture, holding a cooling manicotti shell in one hand, while transferring the meat mixture using a small dessert spoon.
Unfortunately, I didn’t take a picture of me filling the shells — my hands were dirty and greasy, and I didn’t ask for a photographer’s helper. 🙁
At this point, I may have been getting a bit tipsy from my beer, so I drank some iced tea to help deal with the effects of the beer.
I drink lots and lots and lots of iced tea every day!
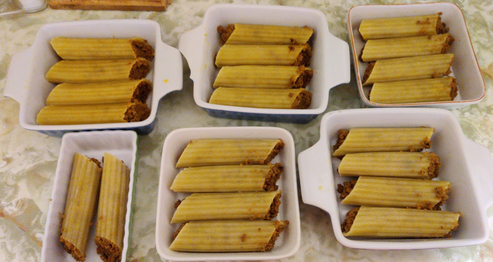
I stuffed a total of 22 manicotti shells. The stuffed manicotti shells were then placed in oven-proof and microwave-safe containers:
22 stuffed manicotti shells
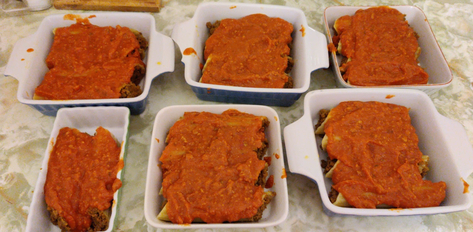
Tomato sauce — in this case, a commercial beef and pork tomato sauce — was spread on top of the stuffed manicotti shells.
Tomato sauce spread on top of the manicotti
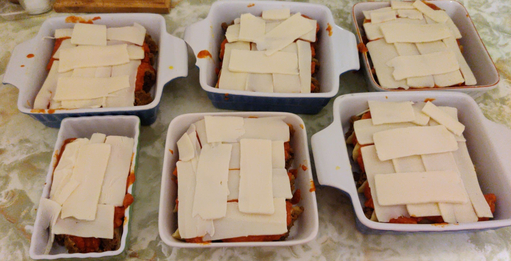
Mozzarella cheese was sliced off the block and laid on top of the manicotti.
Sliced mozzarella cheese laid on top of the manicotti
Freezer bags were identified with the intended contents and the date.
Freezer bags identified with contents and date
The manicotti containers were then placed in the bags, and then frozen.
Beef manicotti in freezer bags, ready to place in the freezer
When cooking, I defrost the manicotti, sometimes add a bit more cheese on top, start to reheat the manicotti in a microwave oven while preheating a countertop oven to 350F, and bake the manicotti until the cheese on the top is a desired level of browned and the sauce is bubbling up on the sides.
I have used Fedora on my desktops since 2008, and on my website server since at least 2018.
I have found CentOS very stable but, through my brother, somewhat limiting as each given version ages. My brother provides invaluable technical support and often does the heavy lifting on my servers and computers when it comes to, well, technical support and setup, for which I am very grateful. He has humoured me over the years in my use of CentOS, but has been frustrated with CentOS for years given its upstream source’s conservative development cycle and the difficulty in maintaining such systems over time.
In the meantime, over the years while using Fedora, I typically use a version for roughly its full lifecycle of 12 to 13 months, and I normally skip a version in the process. Previous to somewhat recent experiences, I would perform a full new install every year from a downloaded image; I was acting on advice from the Fedora website, increasingly old and out of date each time I performed a reinstall, to not use the dnf upgrade function on the grounds that it wasn’t ready yet. This further gave me reason for the occasional use of CentOS and its long term stability on some computers, which I might want to not want to bother reformatting yearly, let alone reinstall software. However, while I was performing another fresh install from Fedora 27 to Fedora 29 in the fall of 2018, I observed a command line upgrade of a Fedora system, and was intrigued. In the fall of 2019, when upgrading from Fedora 29 to Fedora 31, I used the command line upgrade path instead. (Here’s my archive.) This resolved, at least in my mind, my longtime concerns about the short lifespan of Fedora.
Unfortunately, this proved to be a matter of famous last words, since it was merely a convenience for upgrading, something that could be easily done on a weekday evening, instead of setting aside a Saturday afternoon and a (wholly pleasant) visit with my brother.
For me, this isn’t so much an opportunity to complain; as I said, my brother did the real work in performing another iteration of setting up my website in April, 2020, only to do it once more in November, 2020, for which I’m grateful, under a fresh, baremetal install (which I performed.) Instead, the second comment to come to mind — initially, privately, and tongue-in-cheek! — after my gratitude that he would do the job yet again, was that my brother at least got to hone his skills on “the new method”.
After that, a few other things came to mind. As such, risking being a back-seat gratuitous commentator on the process:
It occurs to me that Fedora, while an excellent desktop operating system, arguably has risks associated with it as a medium-term and long-term server, given its mission to showcase and test new technologies as they are introduced while “old” technologies are deprecated;
And, since CentOS (and RHEL) grow old long enough before their 10 year EOL, but Fedora’s approximately 13 month lifespan is too short, how long is ideal?
The actual process itself of upgrading Fedora versions remains smooth, polished, and easy;
Could the upgrade process itself have included:
At least a warning that certain major changes were literally about to occur or were occurring?
An opt-out option for some changes?
Or involve as possible actually upgrading settings and/or other setups such that a neutral net effect on existing functions is effected, ie. change things properly, not just literally changing things without regard to any possible detriment to functions?
Or, make changes, but in separate, neutered files, and a notification that some potential conflicting changes have been made, requiring attention?
With regards to general version upgrading of my server, I should do some research into the new technologies to be installed before upgrading, so as to prepare for any major changes, just as any sysadmin should when upgrading versions to another of any long-term distribution such as CentOS, RHEL, Debian, Ubuntu LTS versions, or any other such system.
20210203 Update: It would seem that another victim of the change toward php-fpm was an inability to use the WordPress upgrade tool when it was time to change to v.5.6. It seems that using some file ownership settings on my machine, which facilitated my administration of the website on a larger scale than just WordPress, was at issue, and how php-fpm handles files and the required permissions, vs. the way mpm-itk and php-cgi would handle similar tasks.
And, at the same time, it seems to me that an additional question is raised, following my musing of “And, since CentOS (and RHEL) grow old long enough before their 10 year EOL, but Fedora’s approximately 13 month lifespan is too short, how long is ideal?”: The literal answer may well lie in “well that depends on individual packages and how they evolve over time, especially regarding the “real world” and other pressures which may shape the project’s evolution”, meaning that things may change more swiftly than Fedora’s 13 month lifespan, and others may outlive RHEL / CentOS’ (at least old) lifespan of ten years.
Which leads to my asking: “How to deal with change management?” and “How to choose a distro, and deal with change in a selected platform which has gone in a different direction from decisions leading to its original choice?”
2020 for Halloween was slightly different, and a lot of the same, for me.
Given “the new normal” brought about contactless and distanced interactions, I had to rethink what I usually do for Halloween.
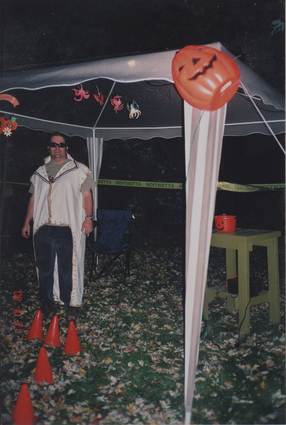
Normally, I set up a marquee on my front lawn, perhaps dress up a bit in (usually) a very simplistic Elvis costume, and give away candies to the ghosties and ghoulies in the usual way, while (badly) belting out a few Elvis tunes, and throwing in a few bellows of “Happy Halloween!”
Me during Halloween 2008, dressed in a simple Elvis suit
Over the years, I added a coffee urn to serve coffee to parents, cookies, juice boxes, and bags of chips, all on a side table, in addition to the candies I would hand out.
This year, there was some uncertainty as to whether Halloween would be allowed at all, but ultimately, where I live, the provincial authorities decided that Halloween was an important holiday for the children to participate in. Halloween activities for adults remained cancelled. This was great for me, since I prefer the street festival vibe of serving the ghosties and ghoulies over costume parties for adults.
However, this also meant that for me, there could be no serving of coffee, cookies, extra snacks, or juice boxes. Of course, contactless and distanced interactions were to be observed, such as placing a table at the end of your driveway, with the candies in individual bags for people to serve themselves. I found this last suggestion to be decidedly unsatisfactory.
I thought about a tube delivery system, the topic of which was being discussed on the radio, while televised newscasts showed people demonstrating compressed air powered delivery systems. I chose something far more simple: A two inch tube, about ten feet long, and set up on an angle off of a step ladder.
This year’s candy delivery system, in the daylight
Operation was very low tech: I would be behind the ladder at the high end, while the ghosties and ghoulies would crouch down and place their bag or bucket at the bottom end of the tube, also on the other side of a cordoned off area. I would push three individually wrapped candies per child down the tube, one candy at a time, with a bit of flourish, calling out “One! Two! THREE!!!!!
And, if the candy didn’t make it down all the way, I would tip the ladder a bit to make sure that the candies would come out the other end.
This year’s candy delivery system, lit up in the dark, with one of this year’s Halloween inflatables
The delivery system seemed popular, and adults thought it was cool enough. A lot, although not all, of the ghosties and ghoulies understood right away what to do, while others needed prompting from either the adults with them, or from me.
Inflatable Lawn Ornaments
I have also been taking a liking to the inflatable lawn ornaments that over the past few years have come out especially around Halloween, as well as around Christmas. While arguably a bit of a luxury item, I am cheap, so whenever I buy a new addition, I only buy the least expensive smallest units, sometimes on sale a day or two AFTER Halloween; I also don’t buy the (somewhat wildly) more expensive units which are licensed designs of movie or TV characters. (I am also somewhat concerned that at some point sufficiently far into the future when I still want to use them, that the premium paid will be lost on an icon whose heyday and easy recognition are long past.)
2020’s Halloween inflatables, with a couple of friends purchased years ago from a dollar store
2020’s Halloween inflatables, lit up in the dark
I purchased the ghost (on the right) a few years ago, and this year I added the green vampire monster, and the pumpkin head skeleton.
Final Count
Given that I wasn’t sure how many children would come, or even whether there would be any at all, I had a decent turnout. My better years have brought out almost 90 children. How many ghosties and ghoulies did I give out candies to this year? At three candies per child most of the time, and 200 candies purchased, with only nine pieces left over at the end, I estimate that I served about 60 children.
Now that Halloween 2020 has come and gone … it’s time for Christmas!
Christmas themed inflatables (squirrel, snowman, and fox)
Now that Christmas is on its way, today I felt that it was time to set up my Christmas-themed inflatables. In fact, while it’s only now the beginning of the fourth week of November and Christmas is still a month away, I’m actually a bit tardy — off the top of my head, I can think of at least five other houses on my block who have already set up Christmas lights and inflatables!
I say “relatively easy” since a good number (though hardly all) of my recipes are geared toward making large batches in advance meant to be frozen, and the making of which I treat as all afternoon affairs, often with a large bottle of very premium beer. The above cooking jobs, however, are individually of the smaller amounts variety, each being able to be made easily and quickly.
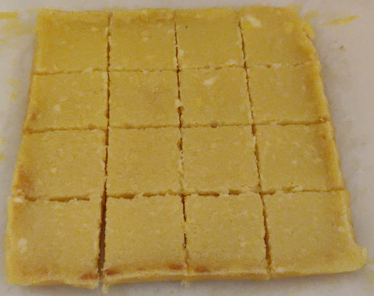
Today, I put my cooking plans into a bit of overdrive, and, by mid afternoon, my main cooking plans for the day were complete, with a few extras beyond the list to boot. The whole list was somewhat more ambitious than the lemon squares which I’d made at the beginning of the week during a spare afternoon I’d had.
An 8″ x 8″ pan’s worth of lemon squares made earlier in the week. They were delicious!
I started all this process somewhere around 09:30 in the morning.
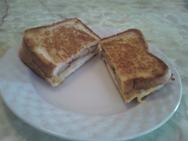
Breakfast was first, consisting of my breakfast sandwiches, which are essentially a grilled cheese sandwich with a fried egg and, in my sandwich, sliced breakfast sausages, while in my mom’s, bacon.
My breakfast sandwhich with sausage (this is an old picture taken several years ago, not this morning). The photos following this one were all taken today, of the foods I made today.
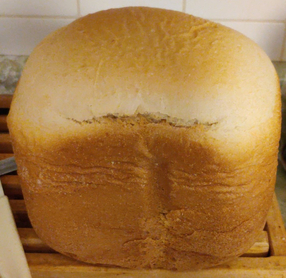
At the same time, I started by setting the bread machine to replenish my supply of bread slices in the freezer for sandwiches and the like. Three hours later, the bread came out of the machine, and was later sliced and frozen.
The bread sliced and on a tray between sheets of food grade plastic, for freezing
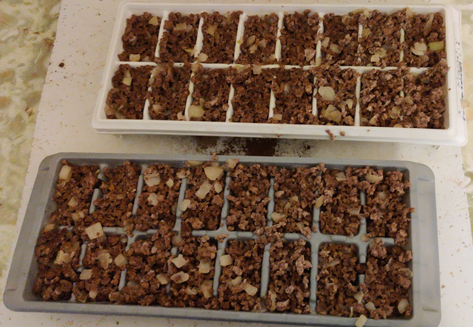
One of the things I now normally keep in the freezer is a cooked mixture of ground beef and chopped onions, cooked in advance and frozen in ice cube trays. The cubes are used for putting into the likes of tomato sauces for spaghetti and other recipes calling for cooked ground beef, or instead of chopped bacon in my pizza recipe. Cooked, two pounds of ground beef with onions will fill two ice cube trays:
Cooked ground beef and chopped onions in a couple of ice cube trays, for freezing
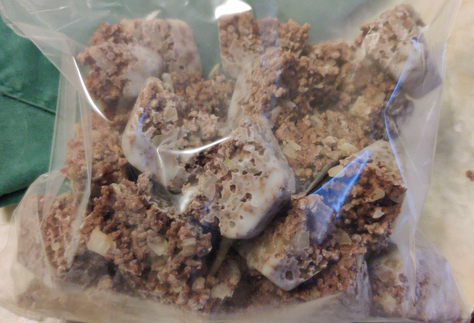
Frozen cubes of cooked ground beef and chopped onions in a freezer bag, ready for use in future meals
Next, I cooked a single 375g package of bacon (“mild sugar cured bacon”, each slice cut in half lengthwise), for the freezer, for my mom (I prefer cooked breakfast sausages for myself):
Some of the package of bacon cooking
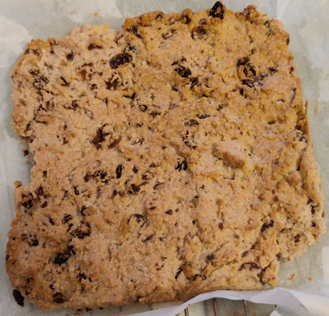
My next cooking job was oatmeal raisin squares, which I learned from one of Jamie Oliver’s TV shows. They’re nice enough, but I make them for my mom.
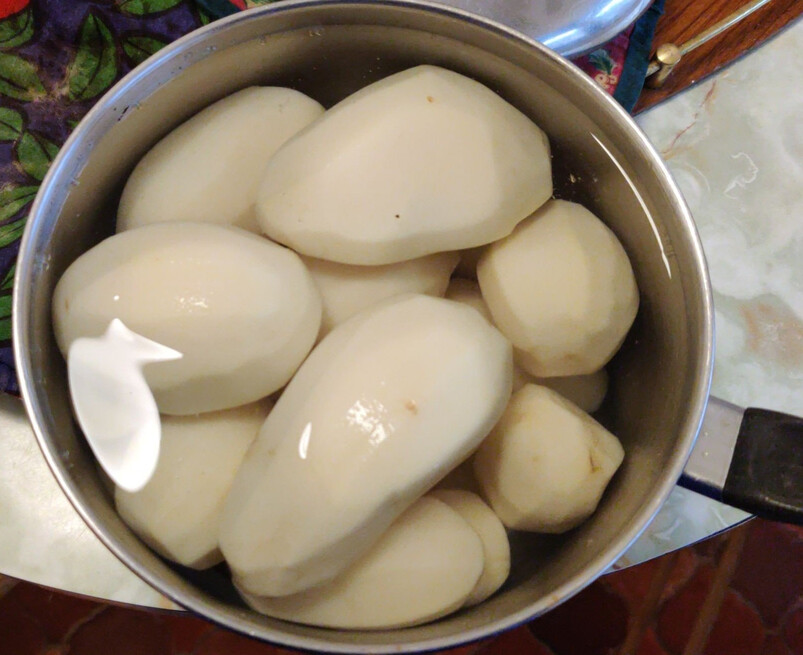
While the oatmeal raisin squares were baking, I peeled a few pounds of potatoes for roast potatoes for tomorrow’s Sunday Lunch.
A few pounds of peeled potatoes for tomorrow’s Sunday Lunch
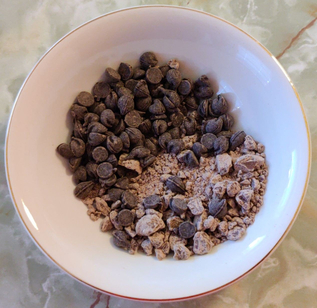
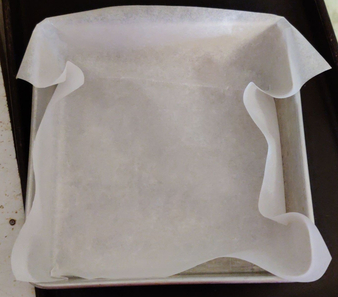
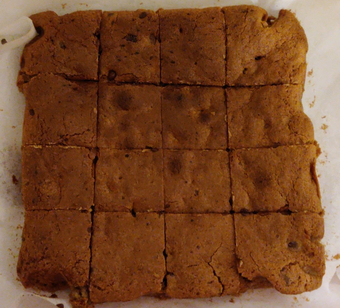
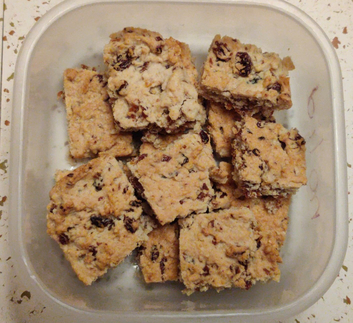
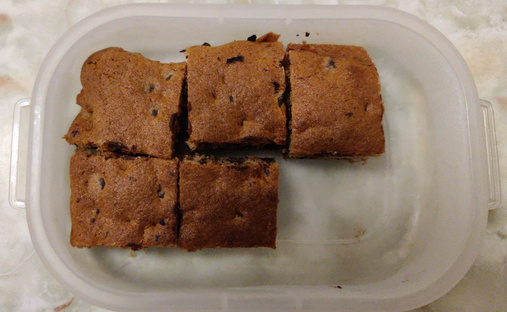
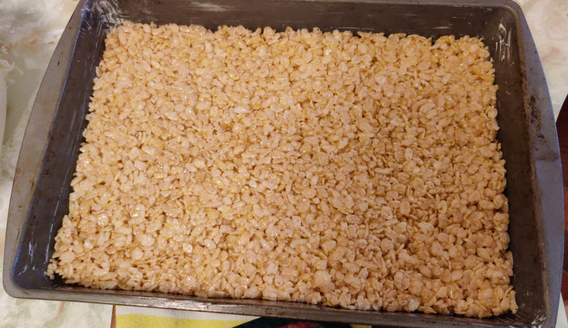
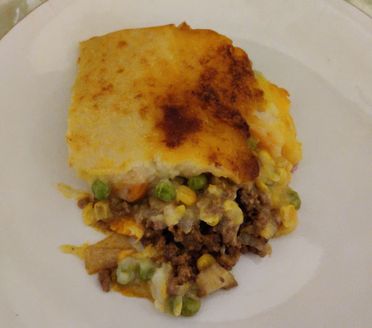
After that, I made blondies for myself. They’re supposed to be similar to brownies, but I add baking powder, giving them more of a cake consistency and height; they are of a tan or caramel colour, and with chocolate chips in it; I cut them into small bite-sized squares.
An 8″ x 8″ pan’s worth of blondies, before being cut into squares
Before beginning to makepickled eggs, I had never cared much for pickles of just about any sort all my life, although over time I have come to realize that I wasn’t as averse to pickled items as much as I thought, demonstrated by having begun making pickled eggs and continuing to love them for many years now.
My mom, on the other hand, has enjoyed several kinds of pickles as long as I remember. While I was growing up, every summer into the fall, she would be part of a group of ladies at our church who would be making various jams, jellies, and pickled vegetables to sell later each autumn at the church’s fund-raising bazaar. This in fact was an indirect inspiration for me, a couple of decades later, to make my pickled eggs to contribute to the same church bazaar table. To this day, every year my mom makes an English-style chutney containing rhubarb (which she grows in her garden), raisins, and onions, using the recipe the church group assigned to her to make in the early 1980’s.
Over the years, one of the things that I have been keeping my eyes out for at roadside farmers’ stands on my way up to the cottage are artisanal jars of pickles from the local farmers to keep my mom supplied with pickles, usually of the bread and butter pickles, and pickled beets, varieties. For several years, one stand in particular sold bread and butter pickles that my mom really liked; however, the stand has since closed. I won’t be trying to find out whether the lady who made them distributes them elsewhere; conversations over the years indicated that she found that making at least her bread and butter pickles was becoming too much trouble for the price she was able to charge.
A growing nagging feeling that I should at least experiment making bread and butter pickles for my mom has been developing over the past couple of years.
This year, after having found a different road side stand distributing various pickled vegetables from a local cabane à sucre (maple sugar shack) (here’s my archive), I bought some jars of the bread and butter pickles for my mom. She tried them, and found them to be representative of the style but not as good as those from the closed farmer’s stand, and further, that the jars appeared not as fully packed as the other jars.
This proved to be one of two imps pushing me over the edge to experiment, the other imp being having found a three litre basket of pickling cucumbers at my local grocery store shortly thereafter, which I decided to purchase.
Already having a supply of onions, sugar, and vinegar, I proceeded to wash then slice the cucumbers in my food processor using the slicing tool. The recipe was based on cups of sliced cucumbers, so given the number of cups of sliced cucumbers I actually produced from what I’d purchased in the three litre basket (14 cups, as compared to the base recipe’s 20 cups), I adjusted the amounts of each of the rest of the ingredients accordingly.
I deviated from the original recipe in the following ways:
– The original recipe called for thinly slicing the onions, while I coarsely chopped the onions;
– In addition to the pickling spice blend in the bag, the original recipe called for mustard seeds, turmeric, and celery seeds, which I did not have, and which I simply omitted;
– The original recipe called for packing sterilized jars with the cucumber slices, onions, and pickling solution immediately once bringing the mix to a rolling boil, and then boiling the sealed mason jars in a water bath for 10 minutes, while I instead boiled the cucumbers and pickling solution for ten minutes, then packed them in sterilized mason jars, and finally proceeded directly to cooling the jars, over concerns that, not having used the water bath method before, I would suffer jar breakage.
Tasting a leftover pickle that didn’t get bottled, I could tell that it tasted roughly like what I knew bread and butter pickles should taste like.
The whole process, including cleaning up, took about two and a half hours, and produced five jars of about 450mL each. I was pleasantly surprised at how relatively easy it was.
My mom was thrilled to learn that I’d conducted my experiment, and anxiously awaited my next visit so that she could try the results.
In the meantime, I had a nagging guilt about not following the instructions and not treating the filled jars in a water bath. The following week, when I happened to be back at the grocery store, I happened upon another display with more pickling cucumbers, and yet another imp convinced me to buy a three-litre basket of cucumbers.
This time, I decided to follow the recipe a bit more closely, given that I already had what I considered to be an otherwise successful batch of pickles in sealed jars already in storage: While I decided to continue omitting the turmeric, mustard seeds, and celery seeds, I sliced the onions thinly and into coins; I brought the cucumber slices, sliced onions, and pickling solution to a boil; then I immediately packed the sterilized mason jars with the mix; and then boiled the sealed jars in a water bath for ten minutes. I did not have any jar breakage. The second basket I’d purchased seemed to have more cucumbers than the first basket (16 cups of sliced cucumbers), and I produced seven 500mL mason jars, as well as one 250mL mason jar.
In the meantime, my mom had made some pickles using some instructions she’d received from a friend, involving the use of pickling solution saved from a number of previously consumed jars of pickles, and some English cucumbers she’d purchased.
The following week, I visited my mom, bearing a jar from each batch, and we set up a taste-test. Fortunately, I am not outright averse to bread and butter pickles; they just aren’t something for which I’ve acquired a taste – yet. 🙂
We had four jars of pickles to compare, which we rated as follows by preference (1 – liked the most, 4 – liked the least):
1: My batch #2 – perfect, and crunchy (refrigerated)
2: My batch #1 – almost as good as “my batch #2”, but not crunchy, at least not enough, and otherwise very good (not refrigerated)
3: Current roadside stand pickles – okay, but not as good (refrigerated)
4: My mom’s recycled pickling solution experiment with English cucumber (refrigerated) – fourth place, and okay but decidedly unremarkable.
We came up with a suspicion afterwards: Since “my batch #1” wasn’t refrigerated while the others were, we wondered if that could have made a difference in the crunchiness.
I received a phone call a couple of days later about “my batch #1”: After refrigeration, they were declared a complete success, since they developed a certain crunch in the fridge.
So my experiments seem to have been successful, at least until and unless I find some spoilage in the jars of “my batch #1” after a few months, if they last that long, and of course which I am not expecting to occur anyway.
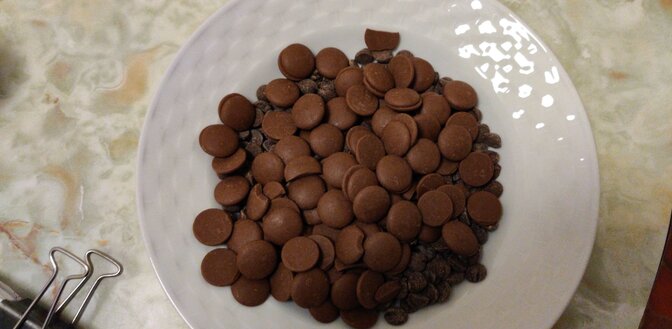
For several years, I have had an on and off exposure to what within the family we have been calling “crunch” after my brother started patronizing a local candy shop not far from his home. The favourite treat he bought from the store was chocolate buttercrunch. My mother and I loved it, and of course my brother did as well.
Said “crunch” was difficult to resist; it got to the point that my brother would simply place orders with his “candy lady” to purchase the “crunch” in bulk, amounting no doubt to several pounds at a time. The boxes in which he received the “crunch” were generic cardboard packing boxes about the size of a couple of large textbooks. Curiously, sometimes his orders took a week or two to fill, “because it will be a week or two before I make it again.”
Over time, I quietly shared my suspicion with my brother that his “candy lady” may have simply been ordering the candy from a well known Canadian brand of high end chocolates, since at a mall location of said brand of chocolates, they were selling the same kind of candy in squares which visually appeared to be identical to those from my brother’s “candy lady”, and they certainly seemed to taste the same. I also recall seeing a clerk replenishing the supply in the display case from a generic cardboard box, which seemed to be very similar to the boxes that my brother had been getting from his “candy lady”. No matter, both were entirely scrumptious.
But alas, several years ago, my brother’s “candy lady” closed her shop and moved away, and I rarely patronize the mall locations of the well known Canadian brand of high end chocolates in order to maintain a supply of the candy.
In June, 2020, I began making the “crunch” at home, rather successfully, for the most part – although it is now, albeit but a few weeks later, beyond my recollection as to why I specifically chose to attempt to make it. To my surprise, it is remarkably easy, albeit still requiring plenty of patience, and at least some basic skill – even when it largely goes according to plan.
I first found a recipe(here’s my archive) and which is the basis for my recipe, although I have modified some of the key steps, such as:
a) although I use butter as the principal fat source as called for in the recipe, I use margarine to grease the heavy pot, simply because I have a lot of margarine on hand given that a number of otherbakingrecipes in my collection of recipes call for margarine (or can use either margarine or butter interchangeably, and we’re generally a margarine family. 🙂 )
b) I use maple syrup instead of corn syrup, since I live in a maple-syrup producing area, and it is commonly available; and,
c) I do not add nuts (a common ingredient in most “crunch” recipes), on the advice of my brother who (after relating a family story offering context) suggested that I “make what *I* like”, since I have not been fond of nuts, certainly in whole form, since I was a very young child.
(see later on for other modifications I brought to the recipe.)
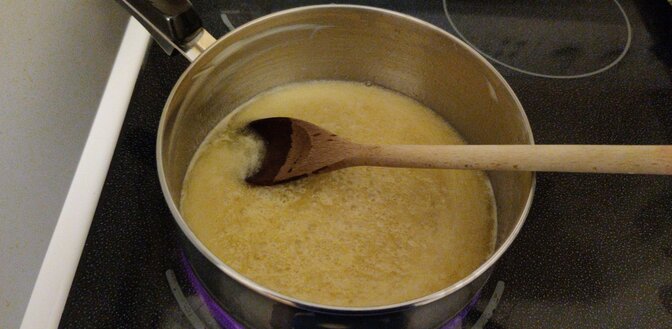
The first time I made the candy, I was surprised at how long it took for the buttercrunch part to rise to the 300F point, reminding me of a school chemistry experiment in which (as I recall) alcohol and water solutions would boil first at the lower boiling temperature of the alcohol, before rising to the boiling point of water.
The buttercrunch during the early stages of the cooking
Once brought to the correct temperature, I poured the (at this point liquid) buttercrunch in my baking pan, which temporarily warped due to temperature differences. This led to parts of the buttercrunch which were thicker than others, to the point of some parts being “too thick”.
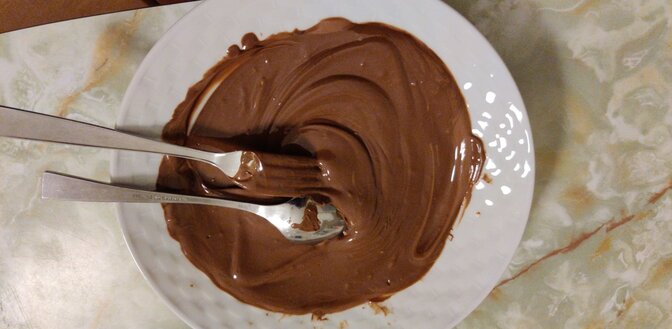
Chocolate was melted in two parts, a portion for each side, with cooling in between each attempt. However, I had difficulty in setting the second layer of chocolate, which easily became detached from the buttercrunch once cooled, and especially when I broke the large flats into pieces.
A separate problem with the chocolate was that I found that the milk chocolate bars I was using were on the one hand ideal for melting and pouring evenly (once melted) over the buttercrunch, yet on the other hand seemed to melt a bit too easily for my liking in the final product.
The melted chocolate, a combination of chocolate chips (traditionally used for making cookies and the like), and milk chocolate buttons
My brother and my mother both tried the “crunch” I’d made, and immediately took a great liking to it. My brother, whom I believe was being mildly gracious beyond otherwise liking what I’d made, asked about how hard it must have been to make the candy as good as the commercial offerings to which we were accustomed.
The time it took to cook the buttercrunch part had taught me to answer that it was principally a matter of patience while cooking the buttecrunch part as it took its time to rise to the correct temperature of 300F, and that beyond that, the success appeared to be largely due to a simple and successful recipe that I had consulted.
My next attempt experimented with separate parts of the recipe:
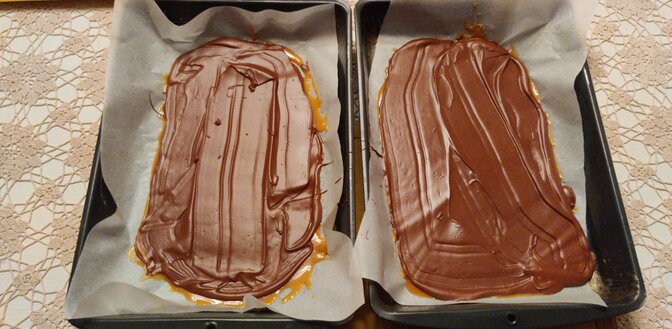
a) spreading the amount of “crunch” called for in the recipe over two baking pans instead of one, in order to make it less thick; and,
The buttercrunch poured and spread over two surfaces, using parchment paper
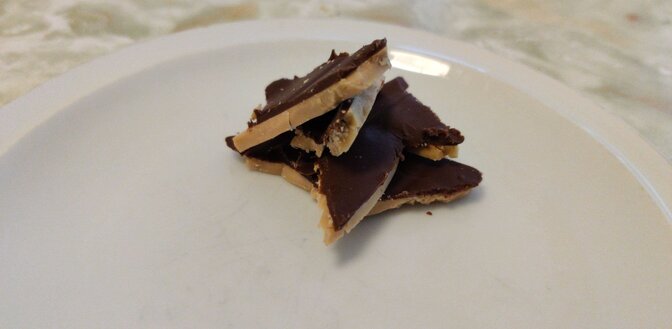
b) only attempting to coat one side of the candy with chocolate, instead of both;
The buttercrunch covered with the melted chocolate
c) using semi-sweet chocolate chips as the chocolate source, principally because its price was more consistently at the lowest price point of bulk chocolate at my local grocery store.
The first two items were largely a matter of technique, while the choice of chocolate to use was initially a matter of cost. This incidentally addressed my concerns with the melting point of the chocolate, since its melting point also appeared to be a little higher than a number of the milk chocolate bars I was buying, as evidenced by the semi-sweet chocolate chips appearing to take longer to melt in my hands while handling.
Reviews from my brother and my mother indicated that using the semi-sweet chocolate chips was as good as the first batch, but that there was a slight preference for the milk chocolate coating, and that I had largely succeeded at making the candy less thick.
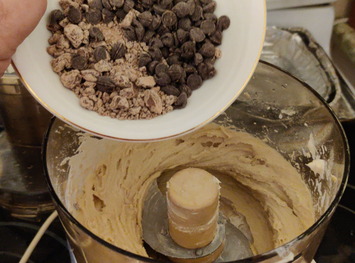
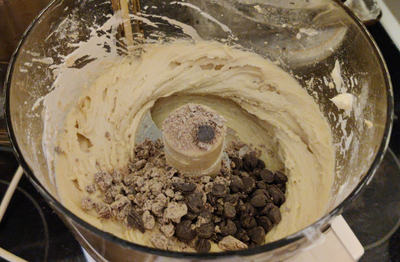
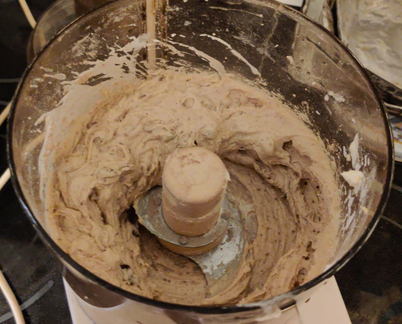
Given the success of the experiment with semi-sweet chocolate chips and the feedback I’d received, I decided to make a 50/50 blend of the semi-sweet chocolate chips and milk chocolate (be they buttons, chocolate bars, or otherwise), hoping to bridge the slight preference for milk chocolate with the apparent slightly higher resistance to melting in one’s hand of the semi-sweet chocolate chips.
This incidentally also lead to an opportunity during my upcoming summer holidays at the cottage to use up various collections of milk chocolate buttons which had been accumulating over a couple of years at the cottage – which is unheated over the winter when I am not there, hence presumably slowing any effect of time on its quality.
Bowl of chocolate chips and milk chocolate buttons, ready to melt (see picture above of melted chocolate)
During my summer holidays at the cottage, I made three batches of the recipe, with uneven results.
The first batch turned out acceptably, however, I noticed that the butter began to separate from the buttercrunch near the end of the cooking phase when I had reached 300F, and, that it seemed to take longer to reach the temperature than at home in the city. I also found that it was harder to manage the cooking of the buttercrunch part, due to the heat from the stove rising against my hand holding the thermometer and the pot, making it very hot and dangerous. The stove at the cottage uses traditional electrical coil elements instead of the radiant heat elements to which I’m accustomed at home in the city; the heavy pot I was using at the cottage was a large heavy aluminum pot with a different handle configuration as compared to the somewhat smaller stainless steel pot I used in the city.
Nonetheless, the results of the first batch were sufficiently satisfactory that I was confident to give samples to a couple of neighbours.
The second batch proved more difficult, and underlined two problems I encountered during the first cottage batch, viz. that it seemed to take longer for the buttercrunch to rise to the desired temperature, and the butter seeming to separate. I assumed that this was possibly because the pot at the cottage had a larger surface area, affecting the heating of the buttercrunch part, due to greater heat losses to the ambient air being somewhat higher than in the pot I used at home. I also remembered at this point that I knew that the main burner on that stove heated unevenly.
During this same second batch, the chocolate mixture melted with a bit of difficulty due to the microwave oven being a model of half the capacity power wise to the unit I use at home in the city, affecting how it melted the chocolate and at what rate. A hot spot formed in the mix that burned, but which ultimately mixed in well to the rest of the chocolate without apparent ill effect.
The result from this second batch was what I consider a failure, since the buttercrunch part did not turn crunchy, but rather retained a firm fudge like consistency. As a candy, it was fine and very tasty; however, as buttercrunch, it was a failure.
A few days later, I decided to repeat my experiment, using a smaller pot, hoping that the relatively smaller surface area of the pot would address the heating issue. Unfortunately, the firm fudge-like consistency was repeated, and I again failed to get the crunchy part I was hoping for. I also had some difficulty in with uneven melting of the chocolate, which only affected the spreading of the chocolate, leaving a particularly bumpy surface in the finished product.
My last experiment at the cottage was to have involved the use of a portable countertop induction stove with the pot I use in the city (having asked that these objects be brought to the cottage by my mother who came to the cottage at the end of my holidays.) Unfortunately, the pot was not of the variety of stainless steel that works with induction stoves, stopping the experiment in its tracks.
I did not attempt to make any more “cruch”at the cottage, having a fair amount of the “failed” results on hand, and being confident that I could not, at least in the short term, resolve the issues at hand.
Back at home in the city after my holidays, I decided to make the “crunch” again with the equipment with which I’m familiar at home, albeit with a bit of trepidation, given my failures at the cottage.
It was, both unsurprisingly and as well as surprisingly, a complete success: The buttercrunch reached proper temperature, butter did not seem to be separating from the buttercrunch part, and I got the desired end product. My mother immediately asked for some samples, and gobbled up the results with great pleasure.
In the process, it seems that my suspicion that the difficulty with the batches made at the cottage laying with the uneven heating of the stove’s main element had been confirmed.
I have also begun to wonder, given that I have had such relative great success from the beginning – barring the difficulties at the cottage – that my brother’s “candy lady” may indeed have learned how to make her own chocolate buttercrunch, and she may indeed have learned to cut consistently-sized squares, which appeared to be similar to those of the well known Canadian brand of high end chocolates. Presumably, packing boxes are readily available similar sizes, and coincidentally, each purchased similar sizes. And, presumably, when she said that she was planning to make the “crunch” only after a certain delay, she was indeed doing so because she had other production priorities at hand when my brother was placing orders of relatively large quantities of her product.
Either way, I seem to have learned how to largely replicate the taste and texture, and dare I say the essence, of the “crunch”, to the pleasure of the family’s various sweet teeth.
A serving of the end product
Update 20200831: I used my portable countertop induction stove and a cast iron pot I own to make the buttercrunch part, and a double boiler to melt the chocolate. No surprise, it worked. So now all I have to do is try making the crunch at the cottage.
Update 20200911: I again brought the countertop induction stove, as well as the cast iron pot, to the cottage in order to replicate the experiment. I also used the double boiler method to melt the chocolate. My brother proclaimed the results as my “best batch yet”. When my brother and I left, our mom greedily kept most of the batch after giving my brother one of four bags of the candy, rationalizing that she was to be at the cottage for a few more weeks, while my brother might benefit from a hypothetical “next batch” that I might make. I kept quiet over my disappointment that to me, the “crunch” part seemed to be somewhere between the desired, crunchy result and the somewhat soft, granular fudge that I had made during my summer vacation. This leads to a new conclusion that had previously been going through my mind, that ambient humidity affects candy making, too. (Here’s my archive) Obviously, home in the city is a bit more climate controlled with central air conditioning, while at the cottage, the humidity is whatever it is, including when it’s stiflingly hot and/or humid.
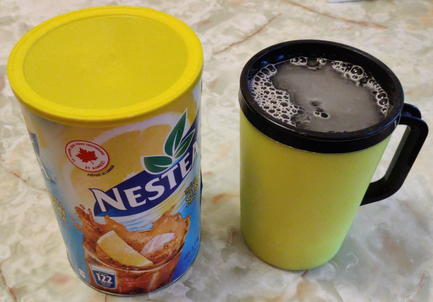
I have a thing about glasses, cups, and containers for drinks of the water and non-alcoholic varieties, specifically for drinking iced tea (Nestea for those who are wondering), of which I drink really large amounts daily, and which itself is a personal trademark.
My obsession with drink containers is to the point that it would also be a bit of a personal trademark in and of itself except that, barring given containers that have been and/or are particularly noticeable or distinctive in their colouring scheme or design, most people would not notice my obsession because most of the containers I use — publicly, anyway — are actually rather mundane containers and cups.
That being said, I’ll start with what I use at home to drink my iced tea:
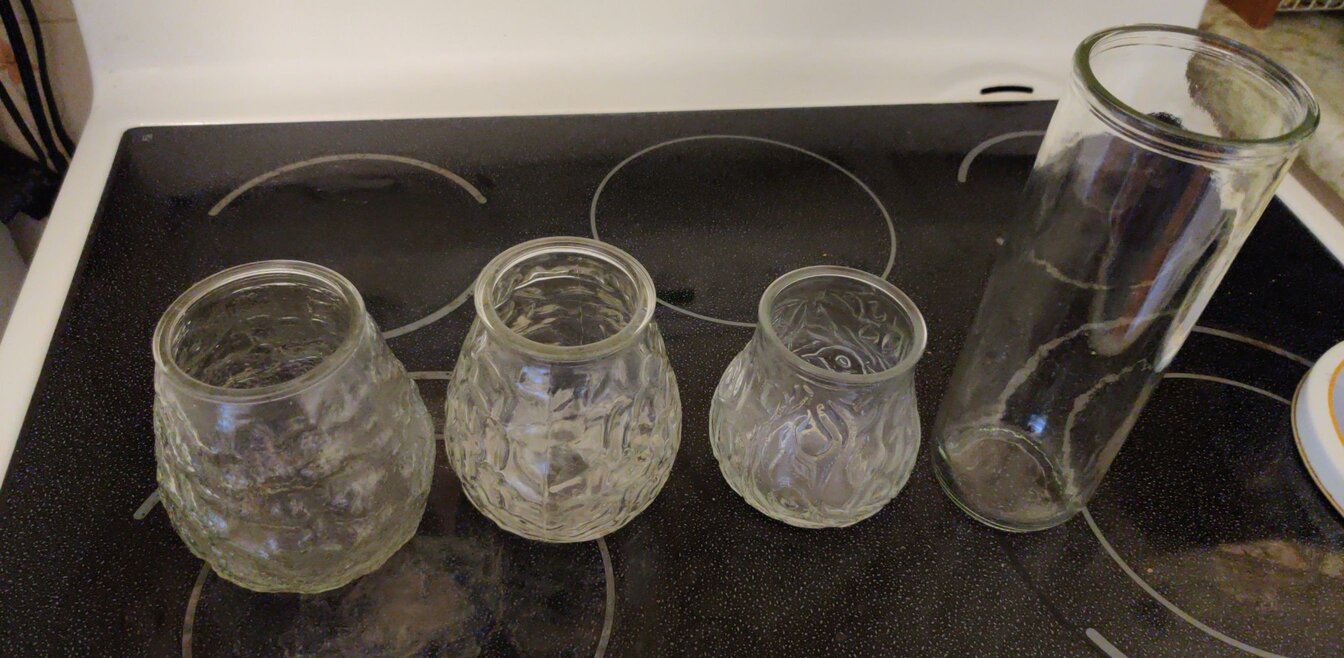
Some of my favourite glasses, which I use at home.
At home, my favourite drinking glasses are old glass candle holders of the variety that some restaurants have been known to have on their tables. I started using the glass candle holders back in the early 1990’s when I found one still with the wax in it; I took it home, reclaimed the wax for a hobby of mine that uses wax, and cleaned up the container. I have since found, cleaned, used, and unfortunately, broken well over a dozen of these containers over the years.
I also have a tall glass container that may have once served as a flower vase, which was found in a garbage bin.
When I go out, whether or not the drink container I use is distinctive enough to be a personal trademark depends on which container I bring with me. Below are three of my more distinctive containers:
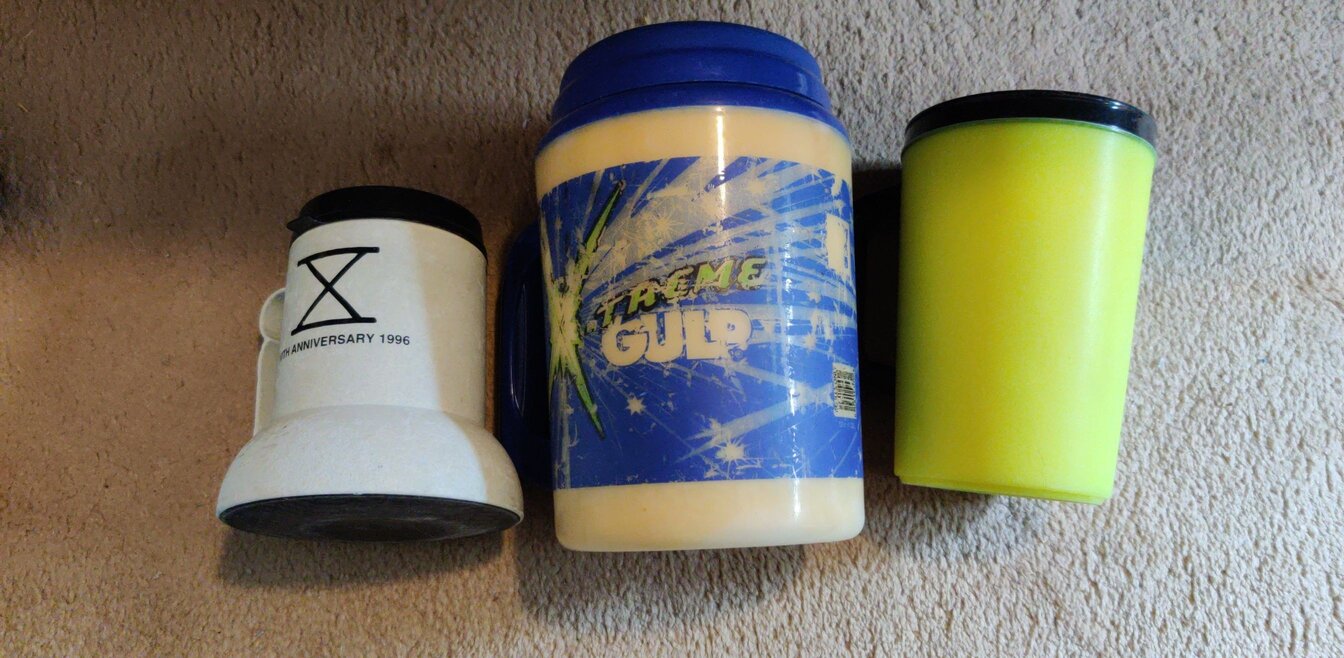
A few of the attention-grabbing travel mugs I have.
The large “X-Treme Gulp” mug – the largest of them in the centre – holds about a litre and a half, and garners attention and incredulous comments to the order of it being “one really big coffee mug”. This was a surprise Christmas gift from my aunt in 2005; I had mentioned my interest in (at least somewhat) unusual drinking containers, and I probably joked about wanting a clownishly large container. That Christmas, a package arrived in the mail, with the mug in it. It is indeed clownishly large, and at the point of being unwieldy to use and drink from.
The yellow mug on the right holds about a litre, and garners similar attention. In 1995, I was driving around for work, and a yellow “something” caught my attention in a snow-filled ditch; I stopped and went to find it, and it was the thermal travel mug pictured above (but without a lid). Obviously, I grabbed it and took it home.
The smallest of them holds about a half litre, and its claim to fame is its wide bulbous base. In 1996, I was part of an organizing group for a party weekend with a wide group of friends, and we’d ordered a bunch of those travel mugs with custom artwork put on it memorializing the event — this one being the tenth edition of the event. We ordered enough for everybody to get one, so as to discourage people from leaving empty bottles of beer, liquor, and soft drinks laying around, which not only of course would have been a nuisance to clean up at the end of the weekend, but which also would have become a safety hazard when many of about a hundred, twenty-somethings became somewhat to very inebriated.
Found Containers
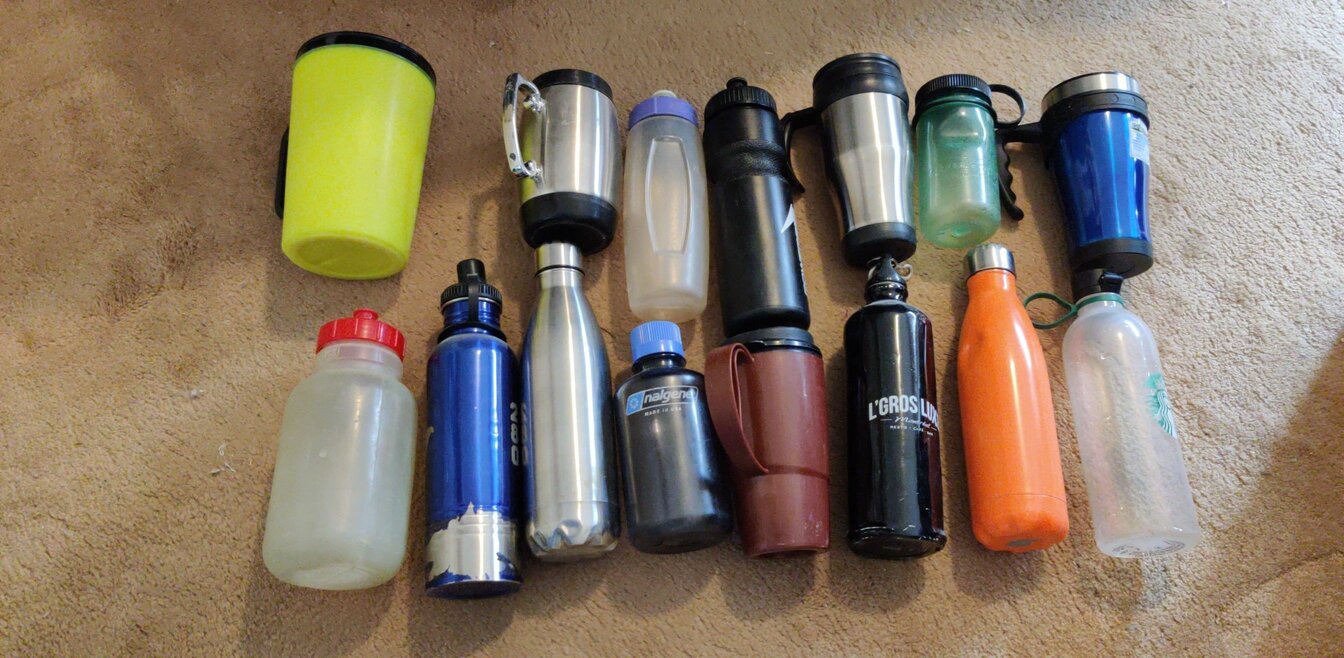
A particular characteristic many of the cups, mugs, and bottles which I have collected over the years is that they have been found on the street, or were found in recycling bins or the garbage.
A number of the mugs, bottles, and water containers I have found on the streets and elsewhere over the years
Most of these containers and mugs shown above have at various times been a favourite container of the moment, and have seen a lot of use over the years. In fact, the opaque container with the red top (second row, first on the left), which I found in the bushes while I was geocaching in 2002 or 2003, came with me on a trip to London, while the small greenish Nalgene container with the black lid (first row, second from right), was found in a lost and found pile in 2017, and went with me on a couple of cruises.
Of course, all containers I find on the street or elsewhere are properly washed in a dishwasher before I ever use them; it’s the same logic as “don’t you wash your dirty dishes before using them again?”
Unfortunately, a number of the bottles and cups I find in the street, including the stainless steel units, that were used for coffee, have a lingering coffee odour to them, and even after an initial cleaning, will impart a coffee taste when filled with a new drink. This is a mild issue for me since I do not drink coffee, nor do I particularly care for it. However, the taste disappears after a few uses and cycles in the dishwasher. Soaking in a mild bleach solution can help in extreme cases.
One virtually new travel coffee cup I found on the street in a snowbank in 2018 was branded with the logo of a well known goodwill organization; I imagine that the organization’s local major location being barely a block away made the chances of finding the mug there coincidental approaching zero. A family member guilted me into not using it, and tried to prevail upon me to return it to the organization. I ultimately gave the travel mug to my aunt when she visited, so that she may have a thermal coffee mug for when she were to go about her visits with friends.
Another travel mug I found in 2016 is a favourite given how well its lid seals (photo above, first row, third from the right); however, it has two little holes in its base, which allow water to enter in between the mug’s interior and exterior when I clean it in the dishwasher, upside-down. Mildly annoyingly — and a perverse reason why I like it all the more — it leaks a lot of water after I take it out of the dishwasher. However, its story lies in the corporate logo and company name which were silk-screened on it side; I was not familiar with the company name, and thought nothing of it, much as I would not think anything of most other common corporate logos on a mug. For months after finding the mug, I innocently used it everywhere, such as at work and other areas my life would bring me. One day, a work colleague saw my mug’s logo; he asked me if I knew what it meant, and suggested – in a suspiciously insistent way – that I should look it up. My immediate reaction was one of horror that it might be connected to a website of a particular type of explicit material (which could lead to unwanted consequences with my employer); I checked on my personal phone’s internet connection — of course not my work computer with the work internet — and found out that the logo was indeed generally connected with explicit websites. I quickly scraped the silk-screened logo off of the stainless steel exterior of the mug, and of course I continue to use the mug to this day.
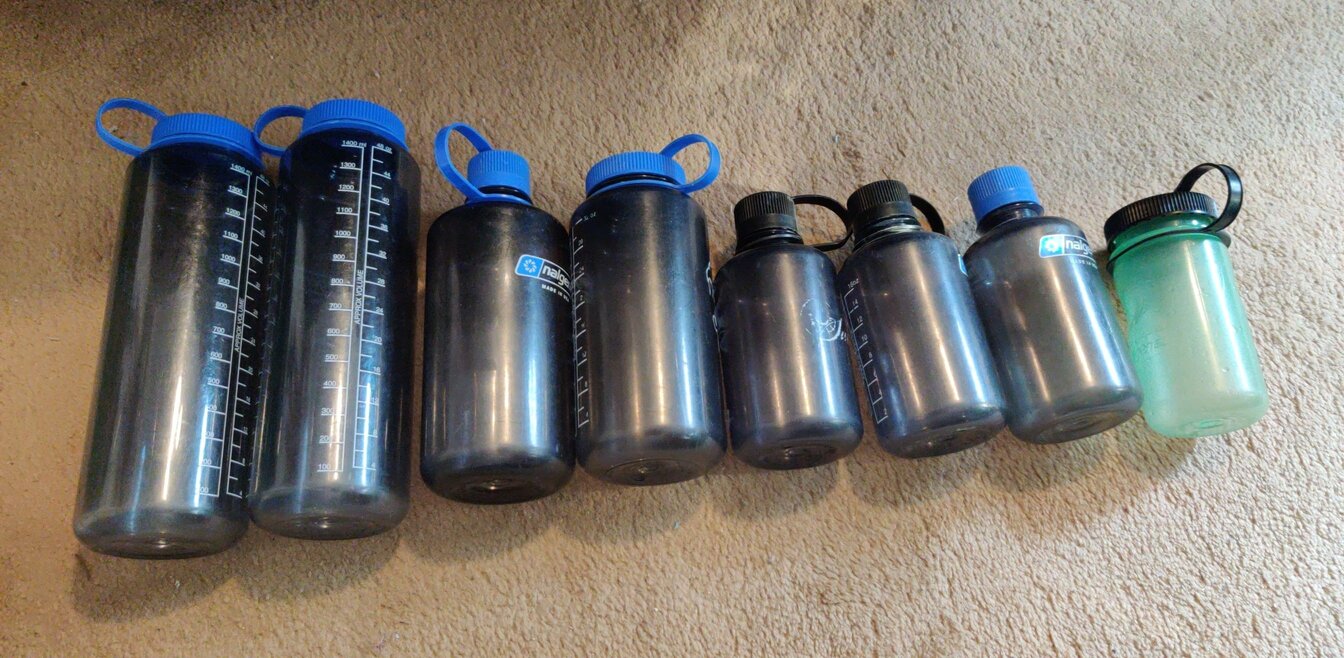
Nalgene Water Bottles
Prior to learning about Nalgene containers for the consumer market in the early 1990s, and that they don’t absorb and retain flavours, then impart them in later contents, I only knew of Nalgene through school lab equipment such as squeeze bottles for lab-grade water and other reagents and solvents such as acetone and hexane.
Generally, I use Nalgene bottles for carrying water around, and I’ll drink my iced tea from another container or mug.
My current collection of Nalgene bottles
My first Nalgene bottle was one I found at a campsite in Vermont in 1994, left behind by previous users of the site. Unfortunately, after several years of service, I inadvertently left it – filled with water – in my car overnight in the middle of a particularly bitterly cold part of winter. The ice expansion caused the plastic in the bottle to split open, and I put it in the recycling bin.
Another early experience with Nalgene bottles was during a sales call with my employer in 1995, who showed a potential client two water samples — one murky, one clear — in clear Nalgene sample bottles in order to demonstrate his filtration device to recondition the process water or glycol in building heating and cooling loops. The sales demonstration was very effective on me, and I asked if I might be able to secure a bottle or two. I used the bottles he gave me for several years; however, the plastic was soft and over time became deformed by the heat in my dishwasher.
Over the years, I have found a Nalgene bottle in a recycling bin (second from the right, 500mL, blue cap), another in a lost and found bin (last on the right, green container, black cap), and others at used goods stores. My most recent acquisitions are two 1.5 litre bottles (first and second on the left), received as a recent Christmas gift (2019).
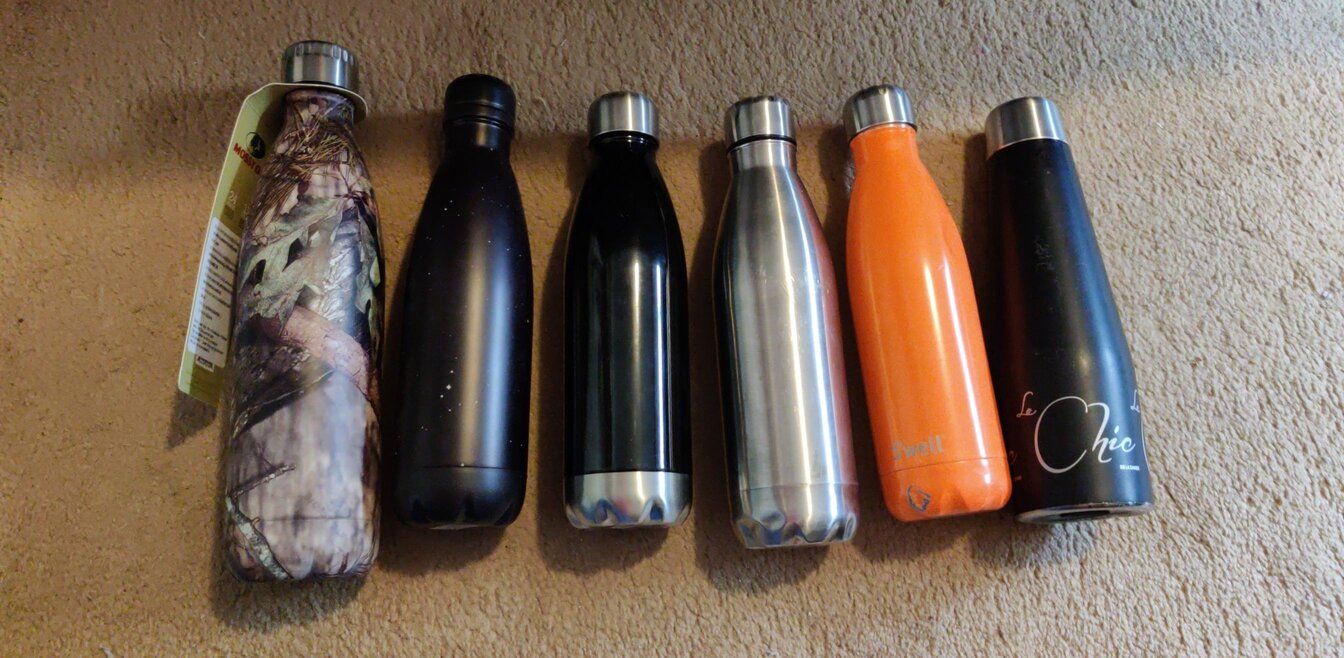
Stylish Insulated Stainless Steel Bottles
The “stylish” insulated stainless steel bottles I have: three new ones on the left, which I have never used, and three used ones I found on the street on the right
There are the relatively new fangled stylish insulated bottles that seem to have taken the water bottle market by storm. Although stainless steel insulated bottles and thermoses have been around for ages, S’Well and similar bottles seem to have started a style revolution in water containers over the past few years, with a lot of copycat competitors, ranging from low end look-alikes to high-end rivals.
I have three new such bottles which I have never used: One received from my employers in 2017, of course with corporate branding (third from the left), and which was the first time I’d seen the style; another received as a Christmas gift in 2018 (first on the left), which was a copycat; and one received as a promotional item during a themed cruise in 2018 (second from the left).
The only such bottles I actually use are the three I found on the street: A cheap discount store, single layer / uninsulated knockoff bottle in 2019 (third from the right); a salmon pinkish orange bottle of the S’Well brand in 2019 (second from the right), and a third, which I call “Le Chic” (because of the branding on it) in 2020 (last bottle on the right). All three show varying degrees of definite signs of wear and tear, and at least two leak very slightly, one a bit more than the other. The “Le Chic” bottle is a very recent addition, and it has the coffee taste issue mentioned earlier; it will probably enter into my regular usage rotation.
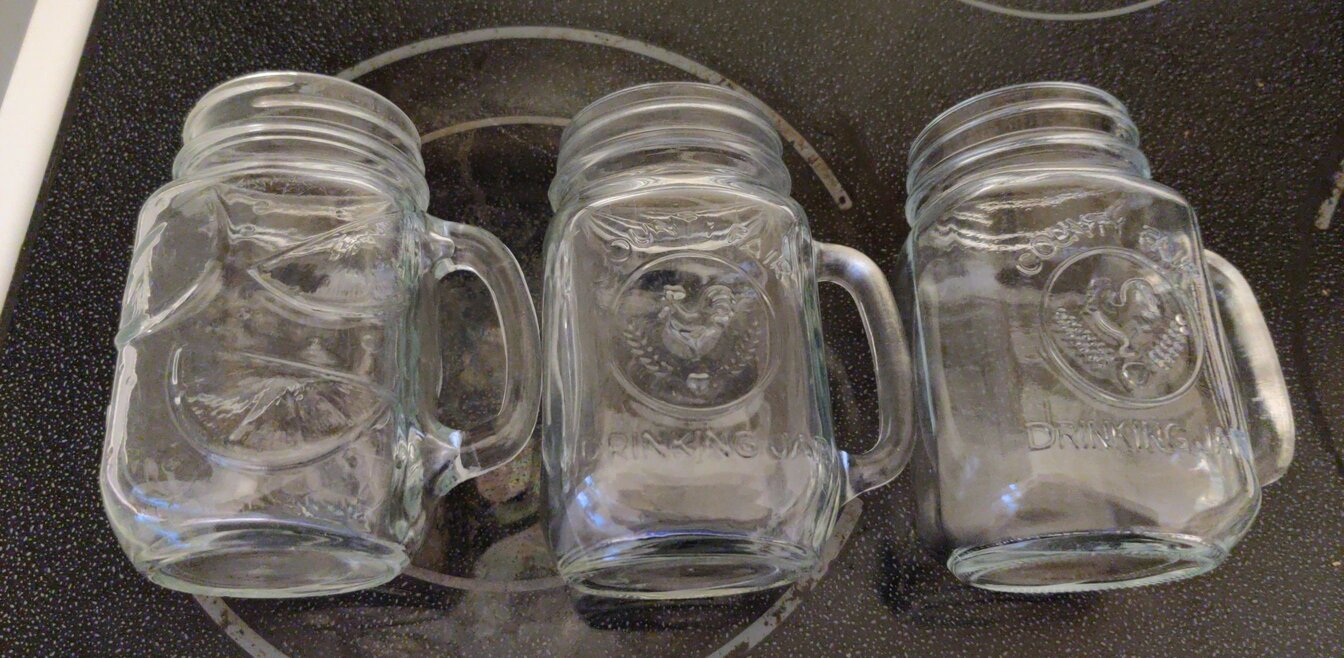
Glass Drinking Jars
I have known about glass drinking jars for a long time, although I only first had one in 2006, when I bought two at the tuck shop at a campsite I was spending a long weekend at; they were relatively expensive, but I purchased them anyway.
Since then, I have found a few at Walmart (the fruit design on the left in the picture above) at a far more reasonable price. Of the other two, one was found on the streets when it caught my eye one morning, while the other was given to me by the recipient of some of my pickled eggs who was returning empty mason jars.
Save for the fact that they are glass and hence susceptible to breakage, these jars are great travel drink containers: In fact, I brought one with me as my main drinking container during a month long business trip out of province in 2009. It served me well, and it amused me when I used it on an airplane. Once I’d finished drinking the water the flight attendant poured into it, I put a lid on the drinking jar. When the airplane landed, I opened it, and was amused by the popping sound caused by the relative vacuum created due to slightly lower cabin pressure.
However, as to the breakage factor, they can be difficult to use on a daily basis in a backpack, since I have accidentally broken a couple of them over the years by simply putting down my backpack on a hard floor in a less than ginger fashion, unfortunately breaking the jar in the bag.
What’s Next on the Horizon?
Of course, I haven’t told the stories to all of the containers I’ve seen come and sometimes go, let alone some that never were. But that is, in a sense, part of the story: There have been so many over the years — including old plastic containers never meant to be used as drinking containers, but rather should have been placed directly in the recycling bin once the original contents were consumed, or finding really good quality travel mugs on the street with excellent seals, that allow me to vigorously shake it to dissolve the iced tea powder I added to the water in it. Oh, and the sort of pear-shaped clear 500mL bottles that a certain type of inexpensive, convenience-store table wine came in … I have fond memories of using those for several years throughout the 1990s.
And while over time I’ve had — and continue to have — favourite containers in the lot, the choice of which container(s) is(are) today’s or this week’s favourite can be ephemeral over time, especially as the overall collection grows with new additions, and contracts due to losses and breakage.
Also, while I actually (somewhat) zealously protect my containers, including very much those found for free, this has also led me have a certain zen when one goes missing, especially if it was one of the “found for free” containers. Just as I found the container because somebody else lost it before me, sometimes I lose containers, leave them behind locked doors to rooms to which I no longer have access, or they get confiscated at a public event such as at a stadium that doesn’t allow participants to bring in items like mugs and bags, both for safety reasons (projectiles), as well as to protect revenue streams from the concession stands.
But this is one of the fun things about what I dare call a hobby: The collection evolves and renews itself, and while I may “mourn” the loss of one of my containers, all I have to do is wait to find another “new to me” container or mug in my various travels, and I’ll end up with a new favourite container.